


The idea of squeezing your phone might have sounded a bit out there when it was new, but it's now a hallmark feature on Pixel devices. As useful as it is for summoning the Google Assistant, however, it certainly would be nice to be able pick and choose what action is triggered by squeezing the phone. Well, now you can.
This feature is available on the Pixel 2, 2 XL, 3, 3 XL, and even the new Pixel 3a and 3a XL. There still isn't a way to change what the "Active Edge" squeeze feature does through the Pixel OS itself, but Google could always change that in a future release. Until then, XDA developer j to the 4n has an excellent app that allows you to customize the squeeze feature entirely.
Requirements
- rooted Android device
- Magisk installed
- Pixel device with Active Edge (2, 2 XL, 3, 3 XL, 3a, 3a XL)
Install Active Edge Module
First, you'll need to grab the Active Edge module for Magisk. This provides you with the ability to override the stock Active Edge feature that comes with your Pixel phone.
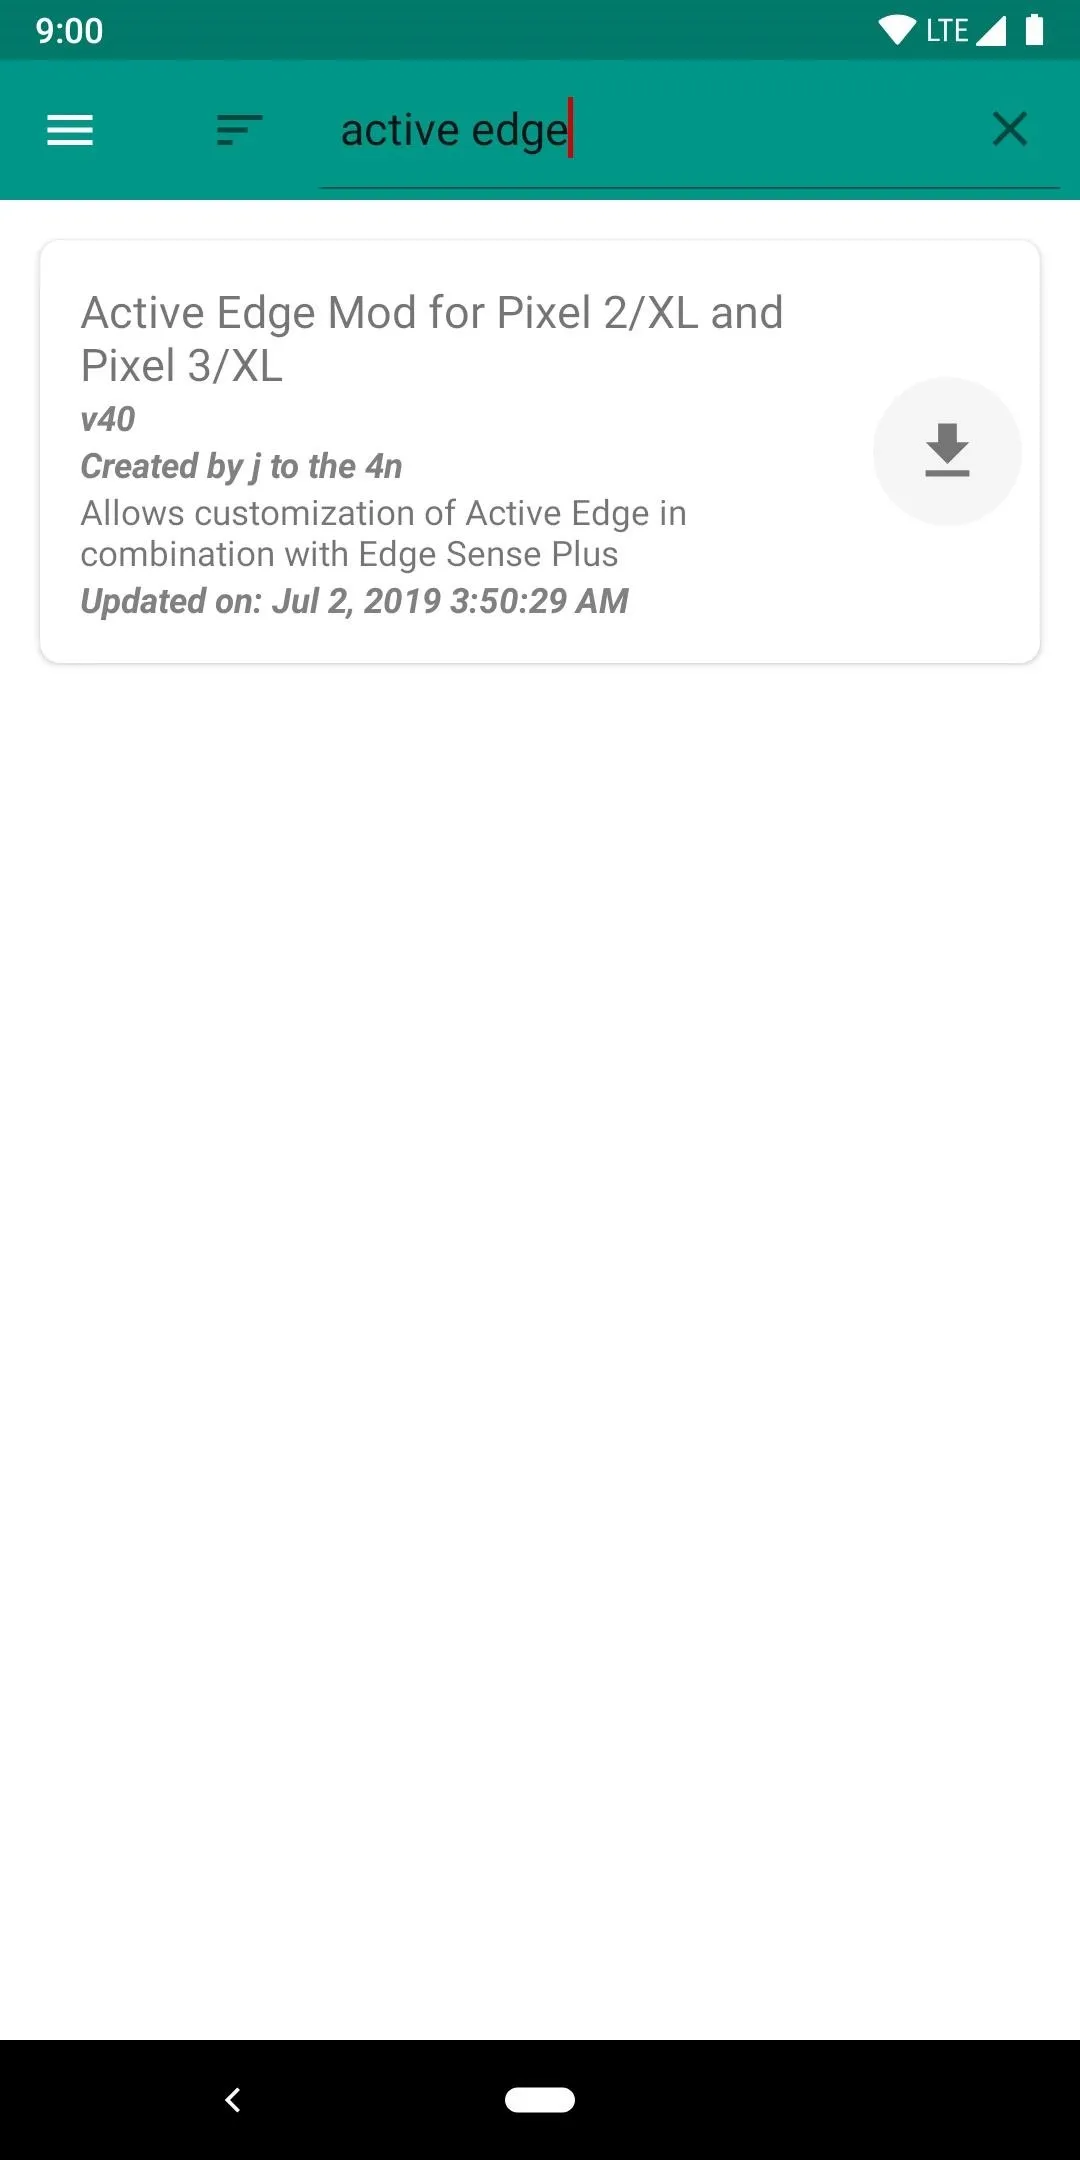
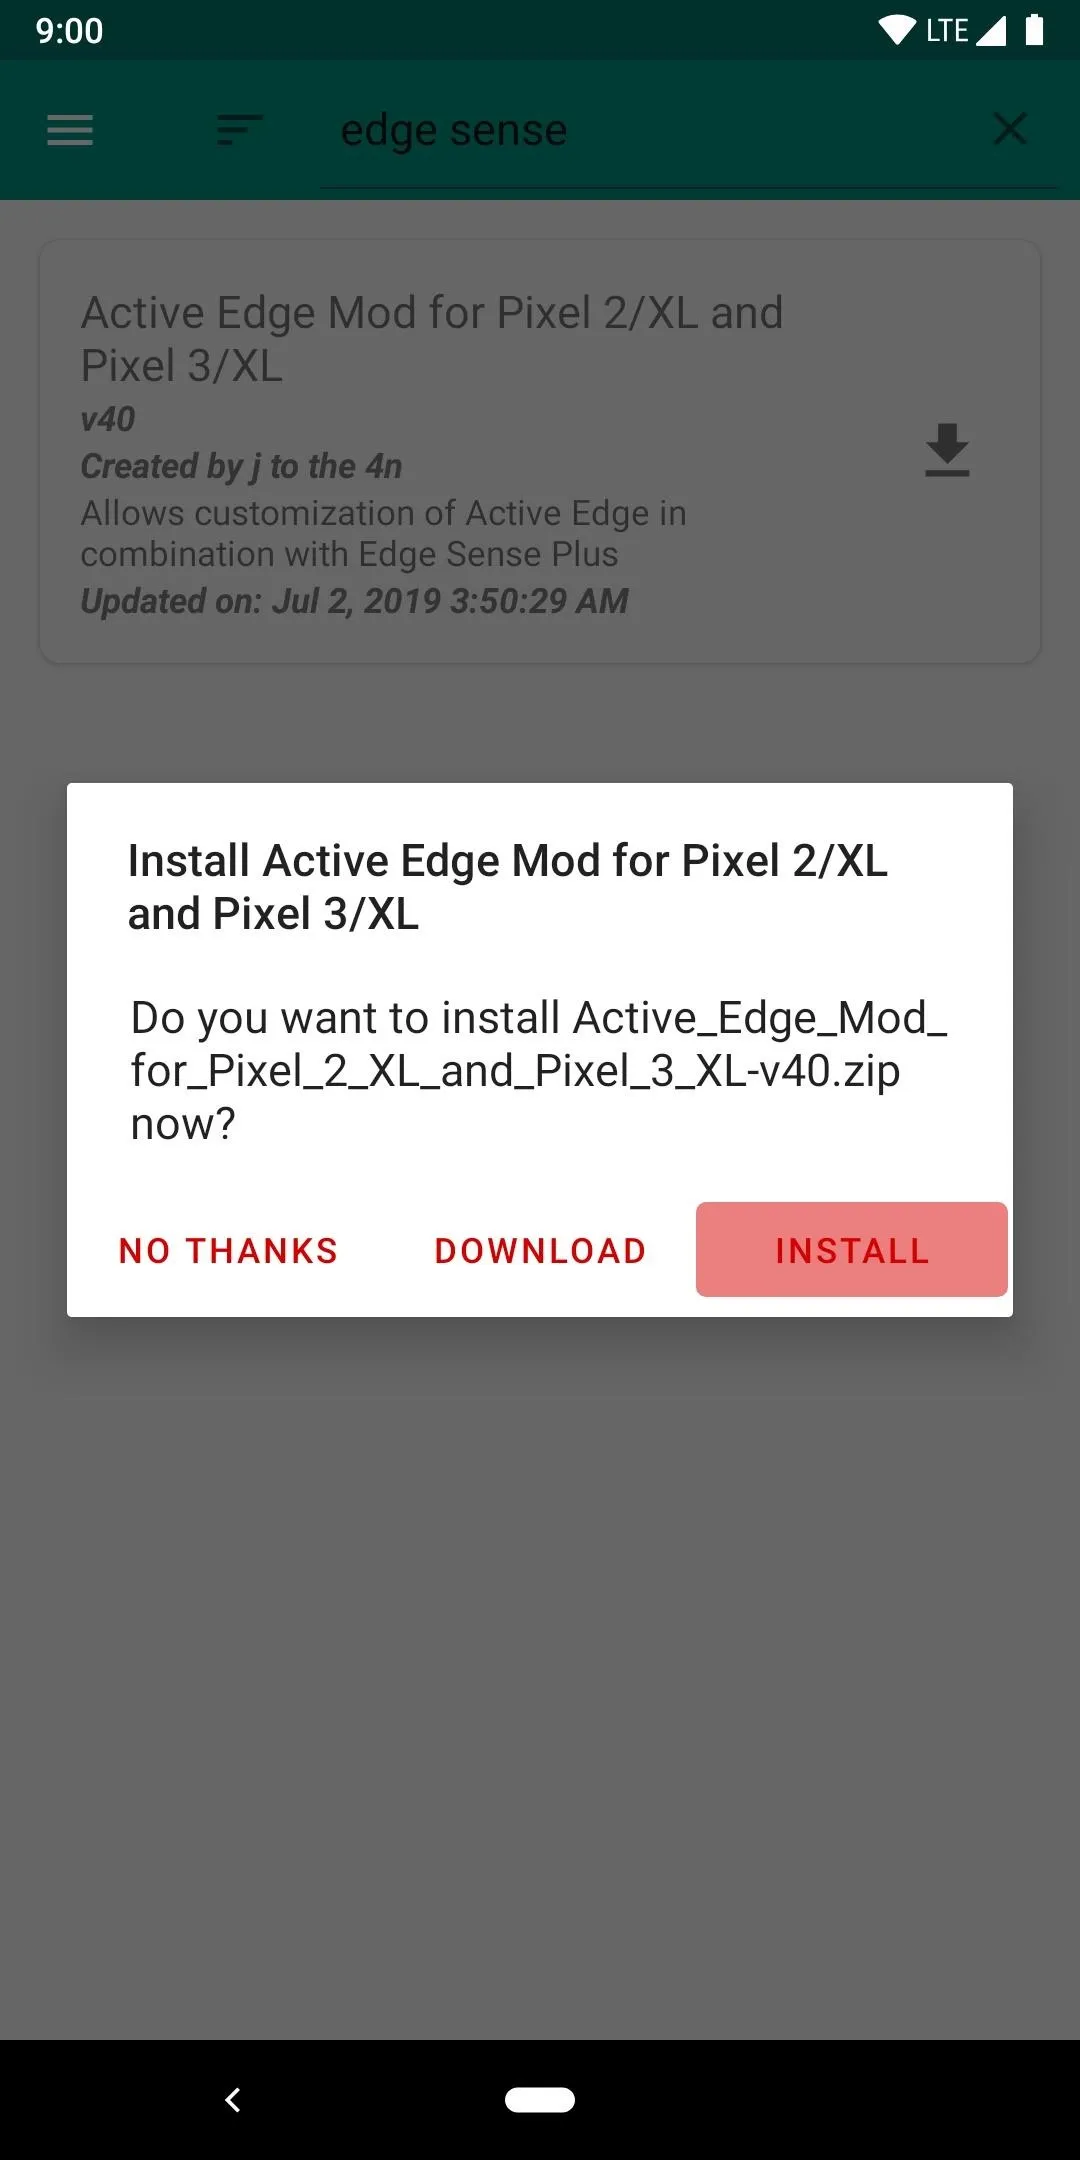
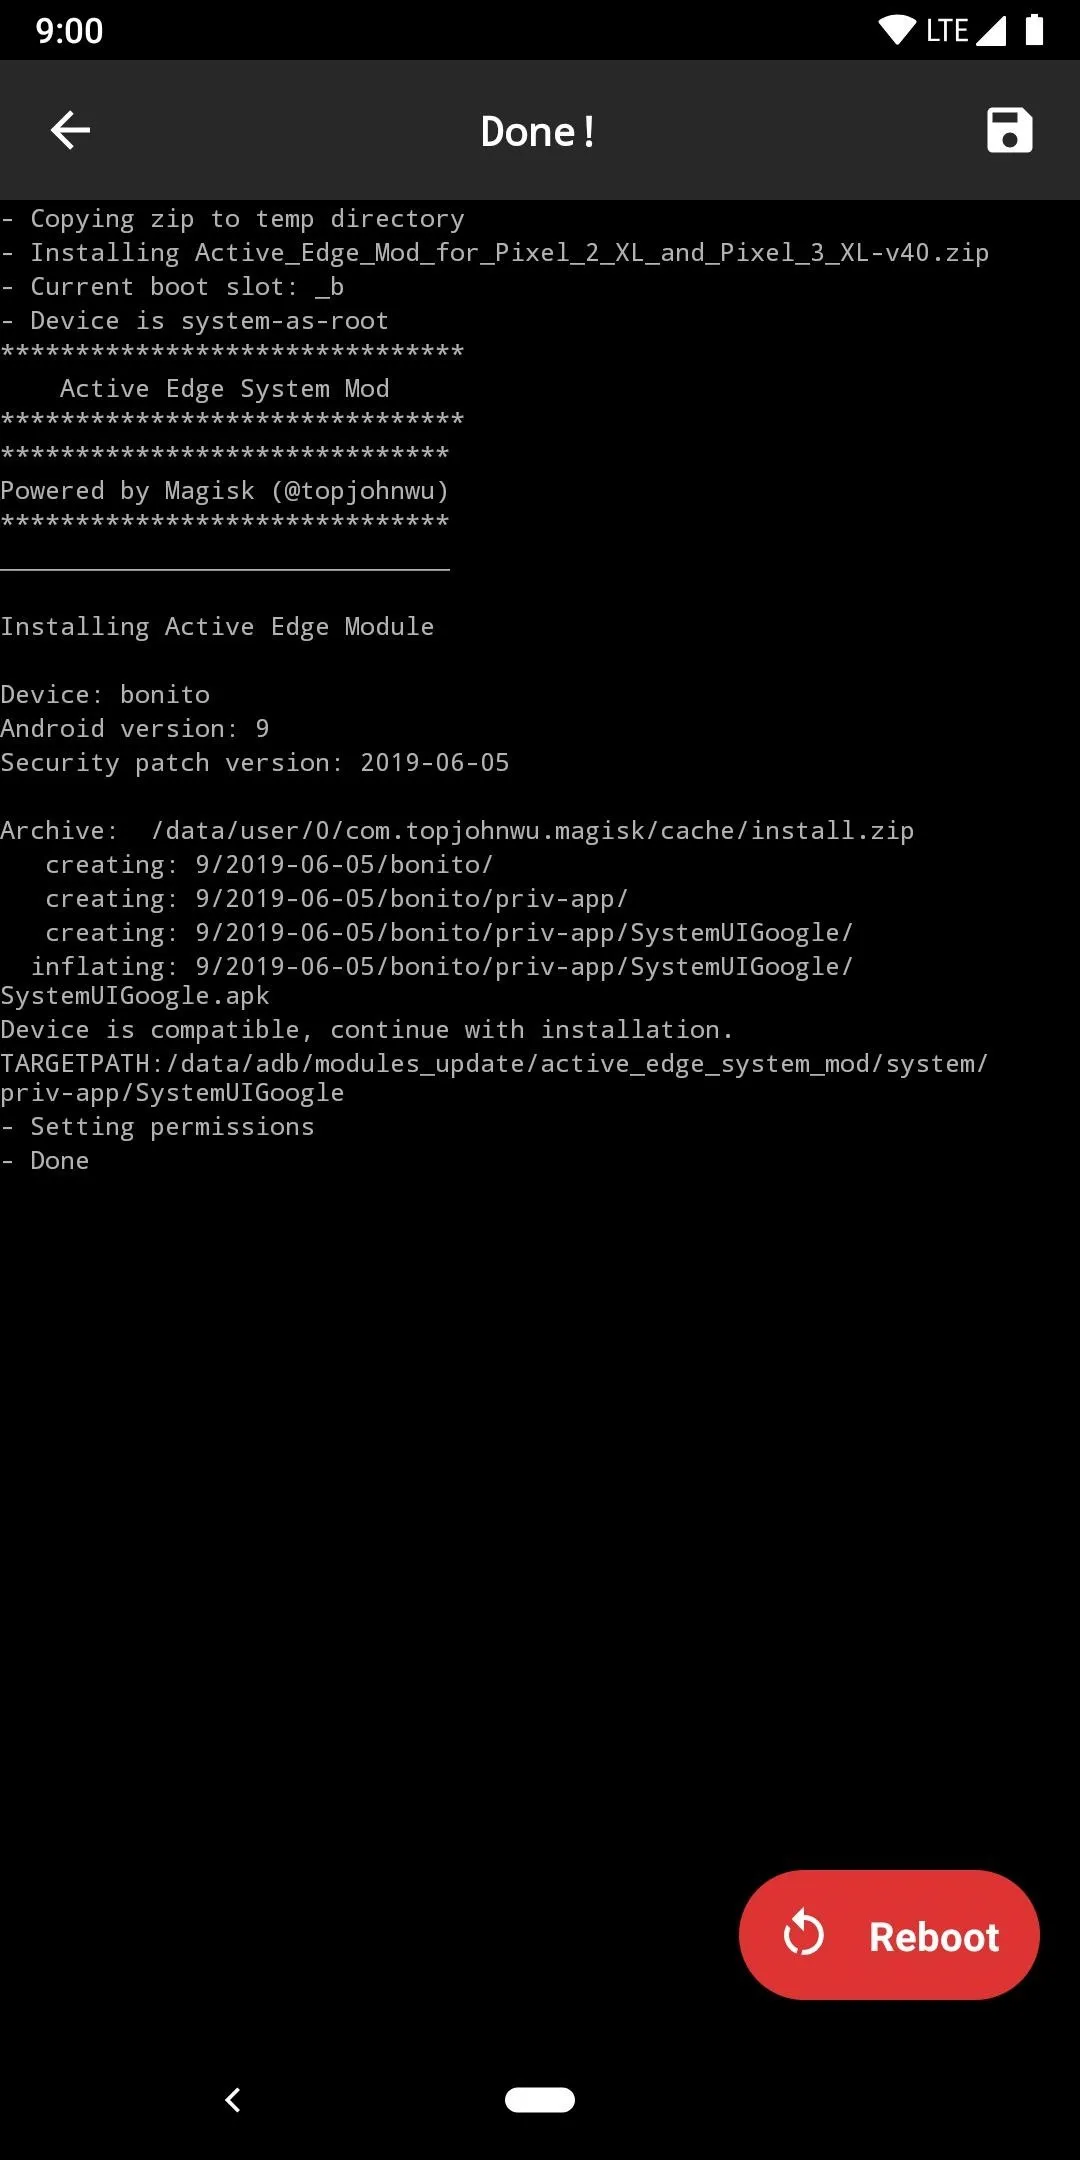
To get started, head into the Magisk Manager app, tap the menu on the left, then choose "Downloads." Tap the search icon and type "active edge" into the text field to locate the module you'll need for this to work. Next, tap the download arrow, then "Install" to begin the installation process. Once successful, hit the "Reboot" button at the bottom-right to restart your device to activate the module.
Install Edge Sense Plus App
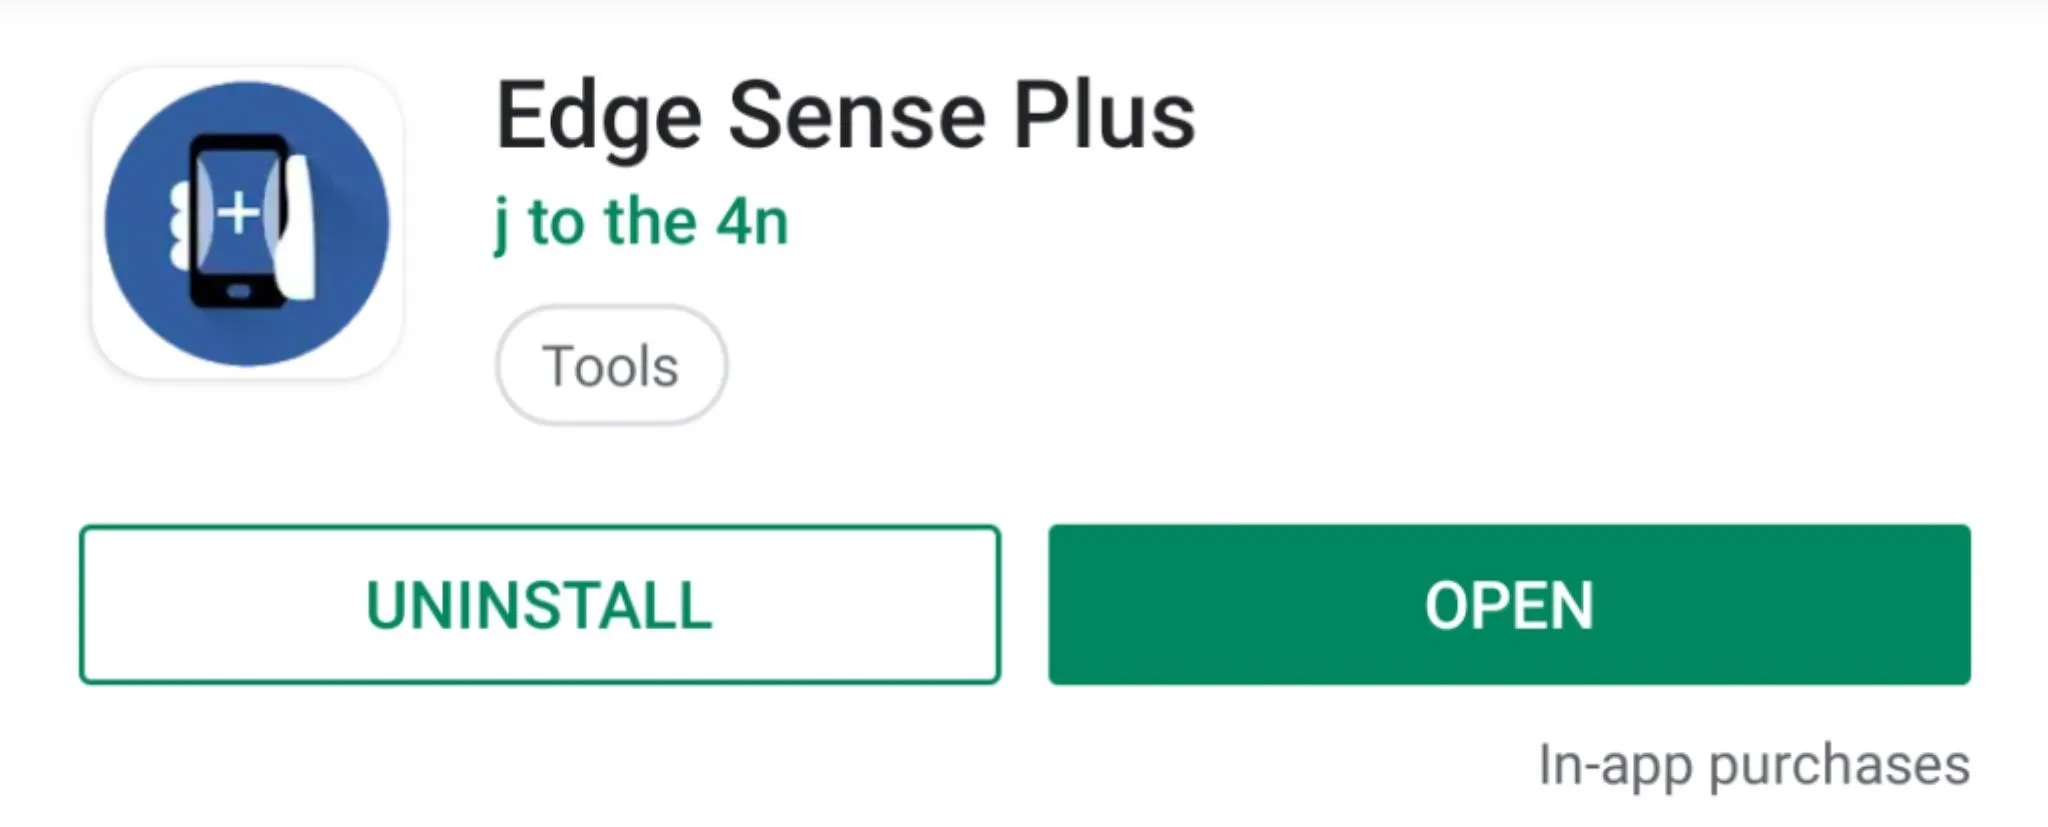
Now that the main module has been installed and your system has been rebooted, you'll need the Edge Sense Plus app from the Play Store to start setting up the new squeeze settings. This app interfaces with the module you just installed to add a ton of customization for the squeeze gesture, which is fantastic for people who enjoy tinkering.
- Play Store Link: Edge Sense Plus (Free)
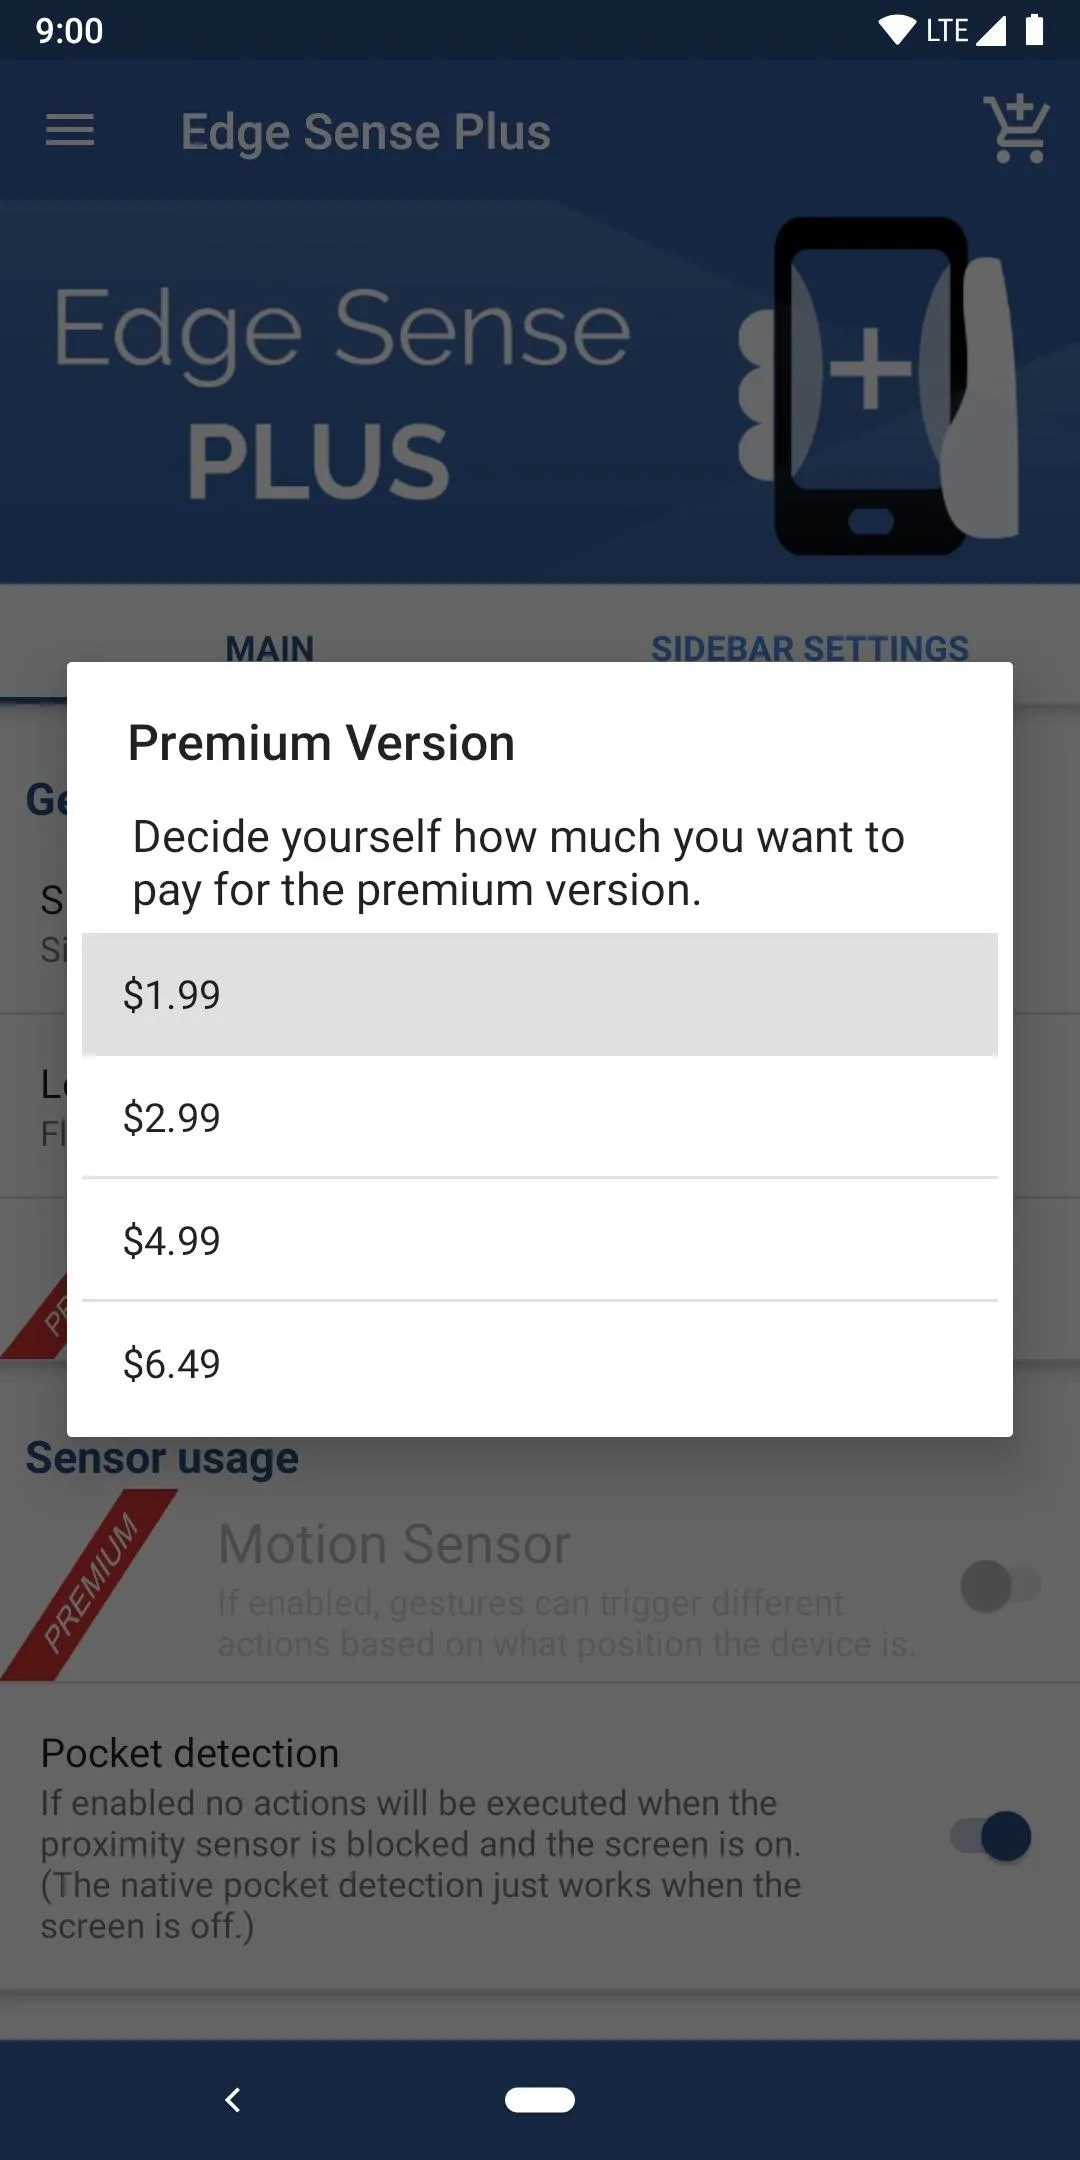
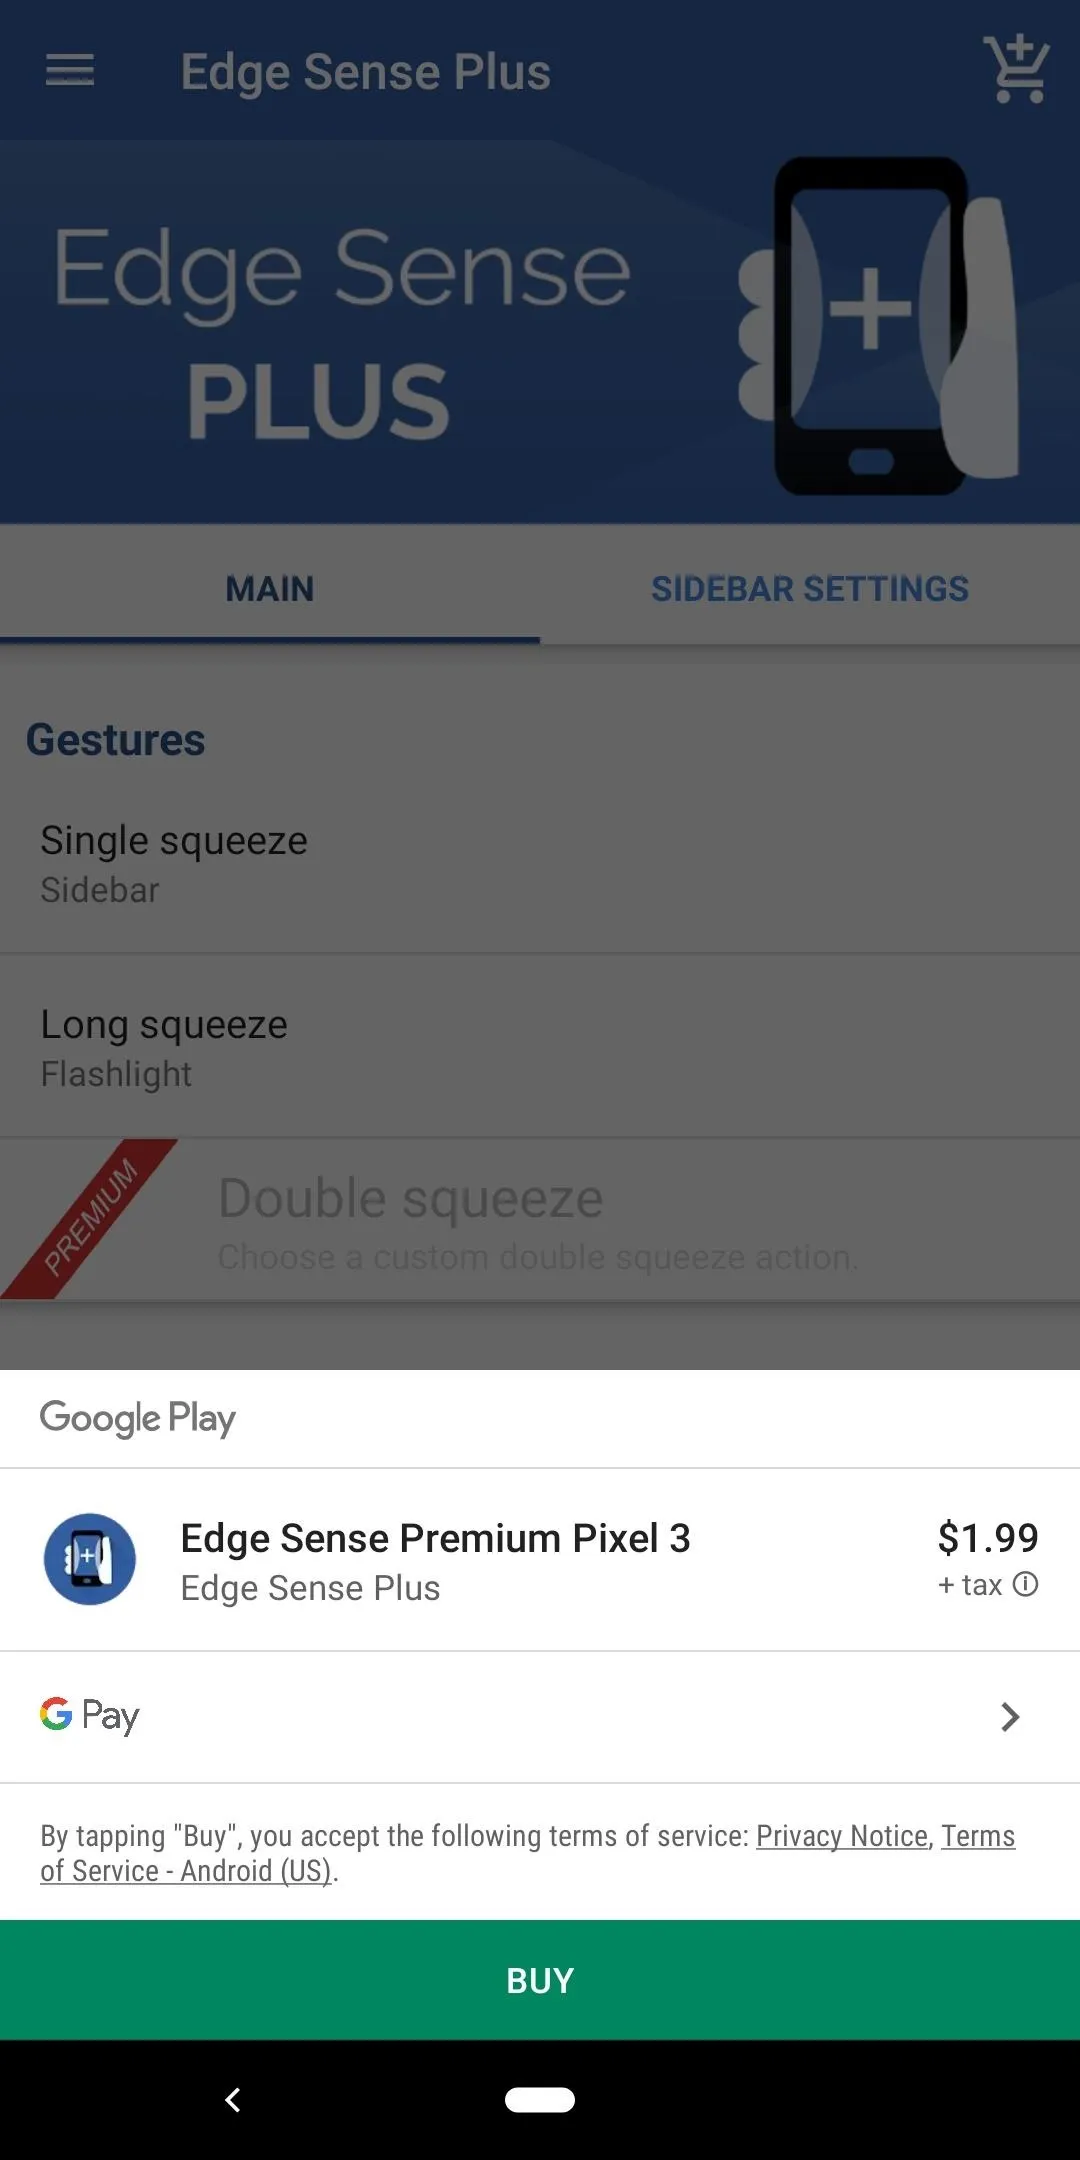
The app is entirely free to use, but it does have a few premium features you might want to consider if you plan on using this module well into the future. I'll dive into that a bit more in the next sections, though. It's also worth noting that you can pick whichever price you want to pay for the premium features, so that's another thing to think about if you're interested in the full experience.
Customize Your Active Edge Experience
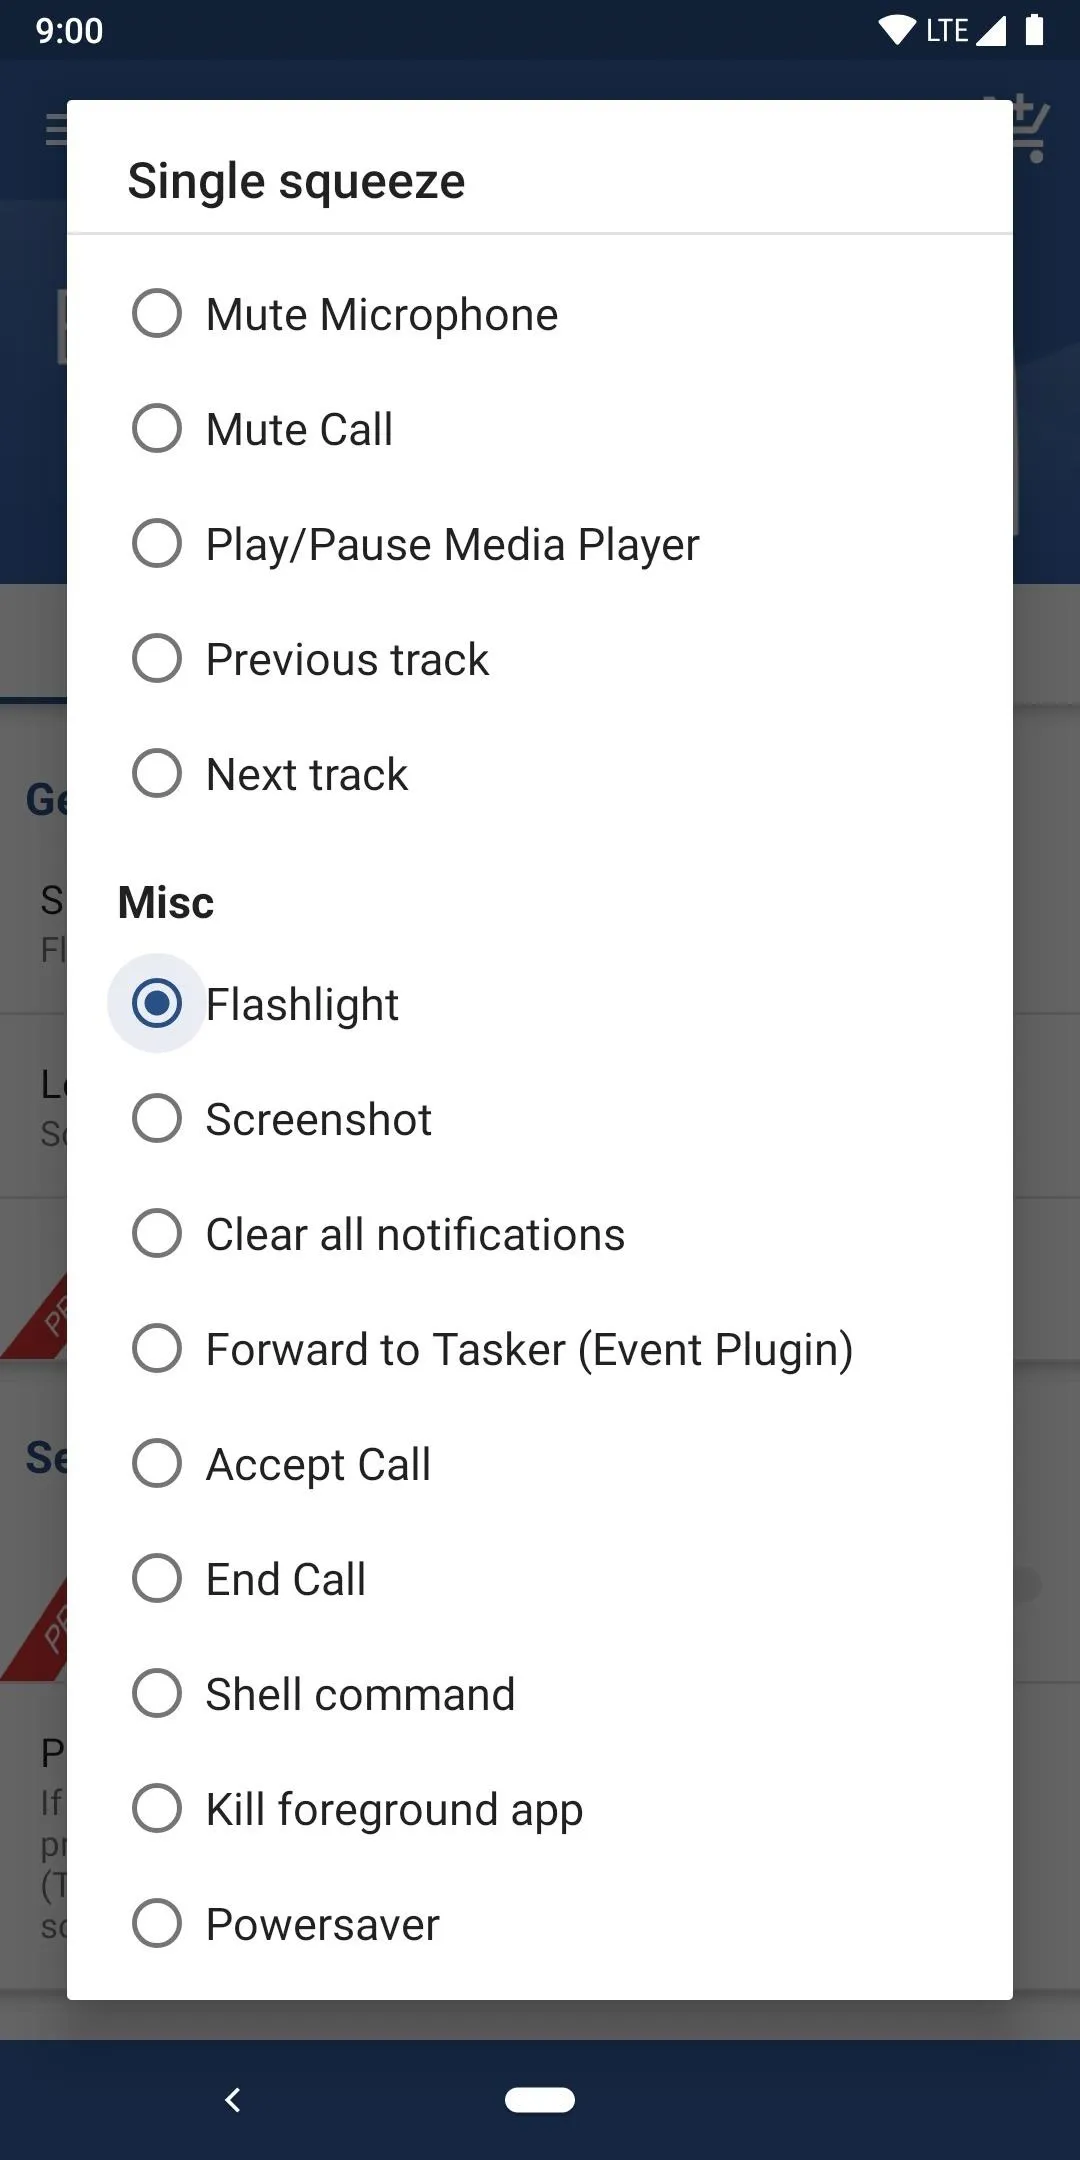
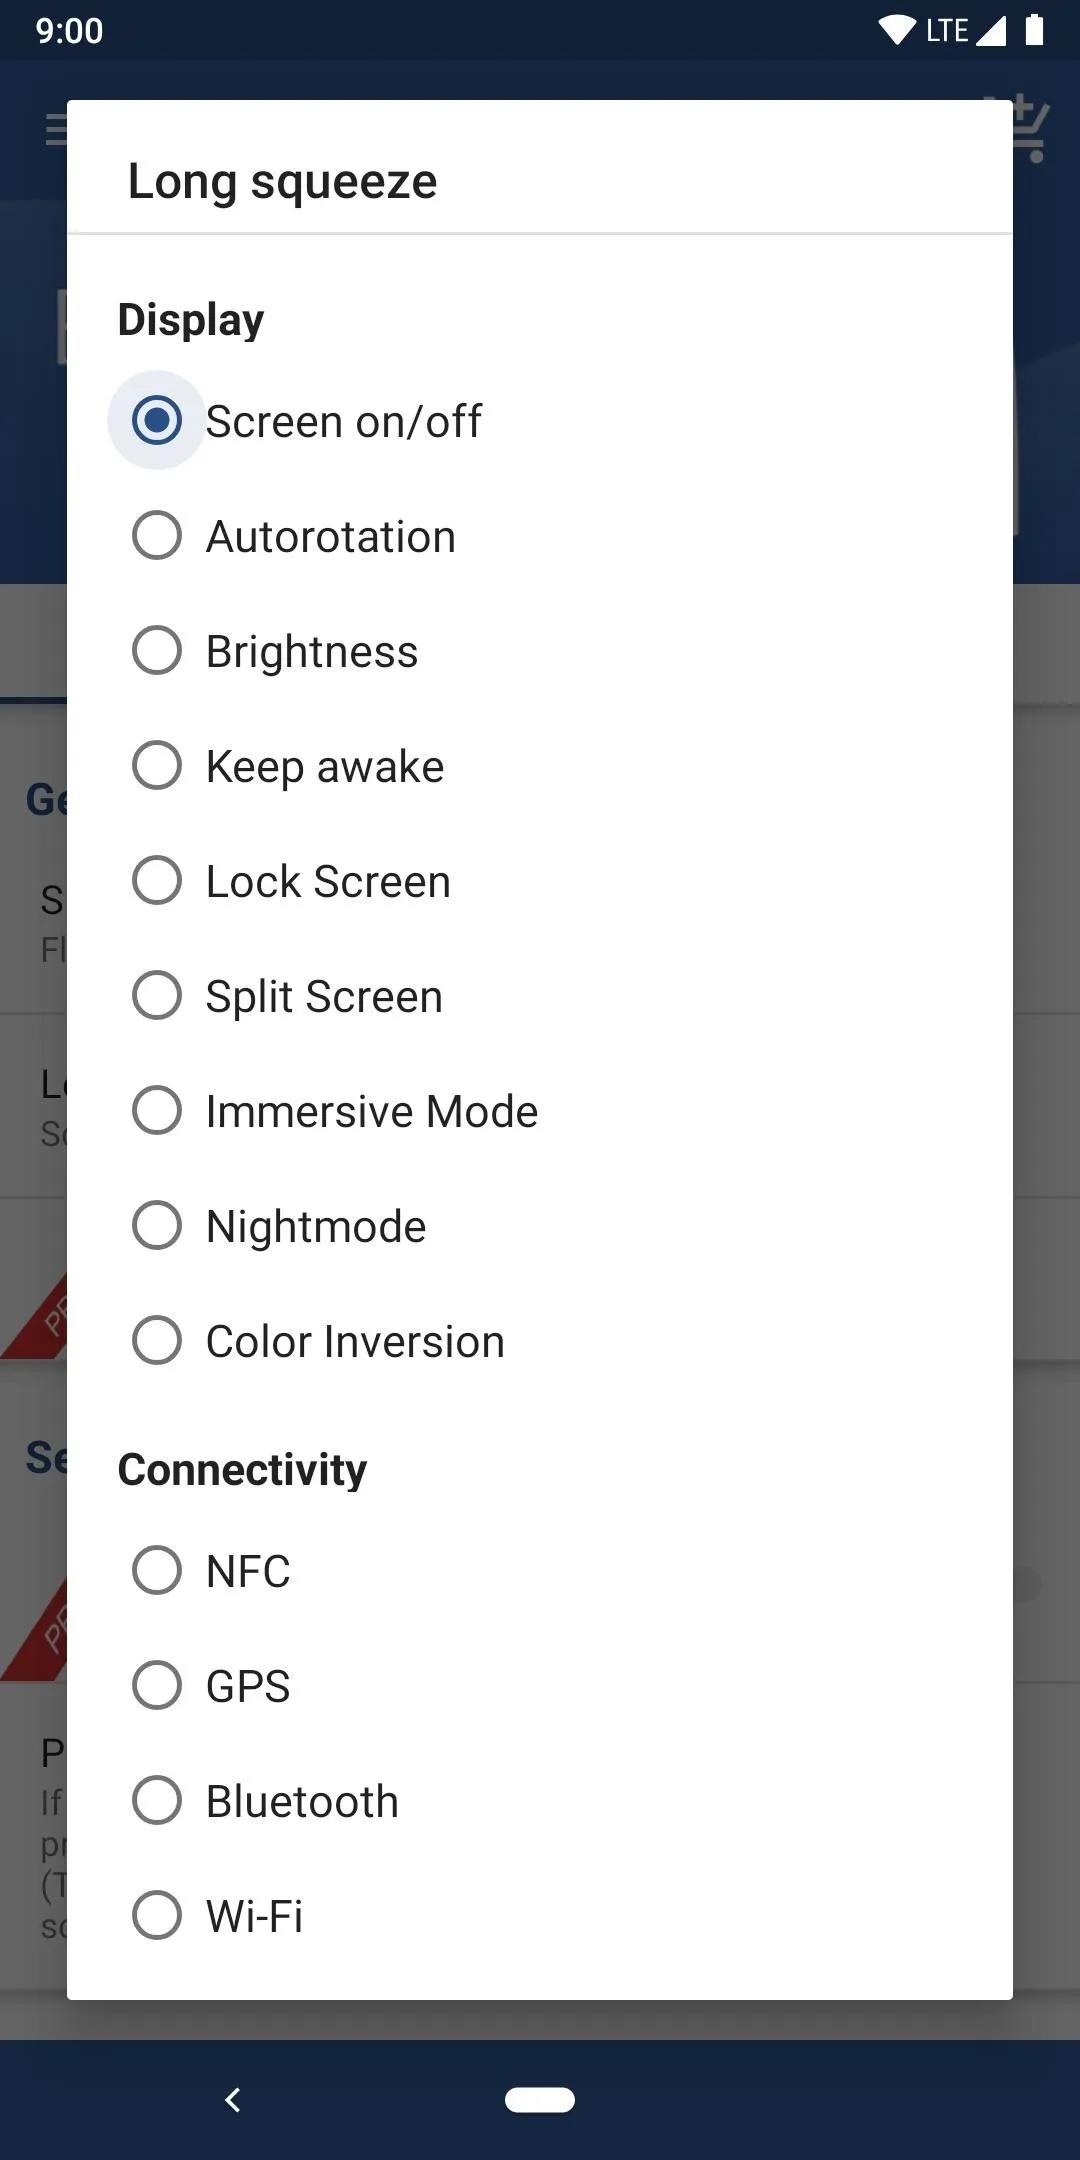
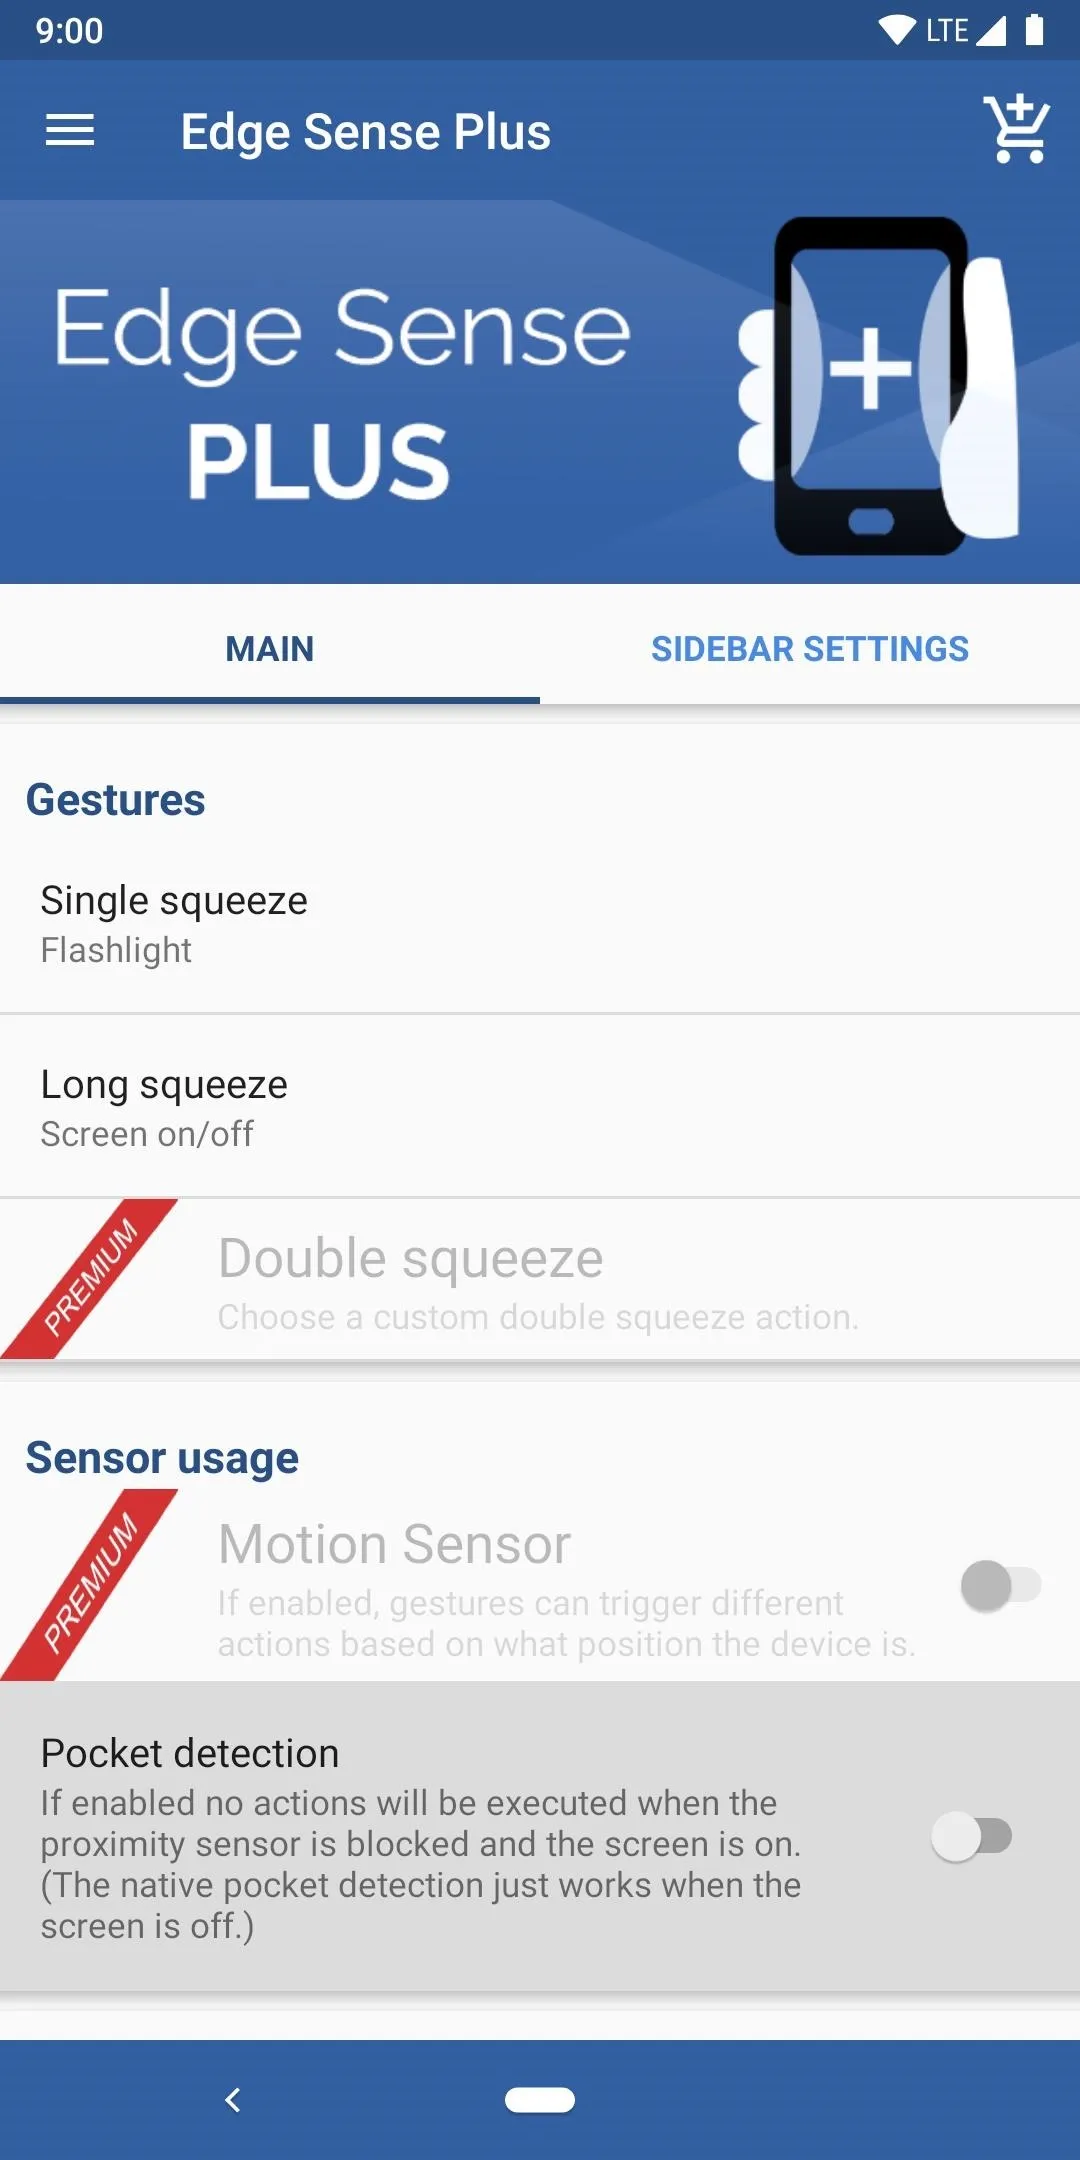
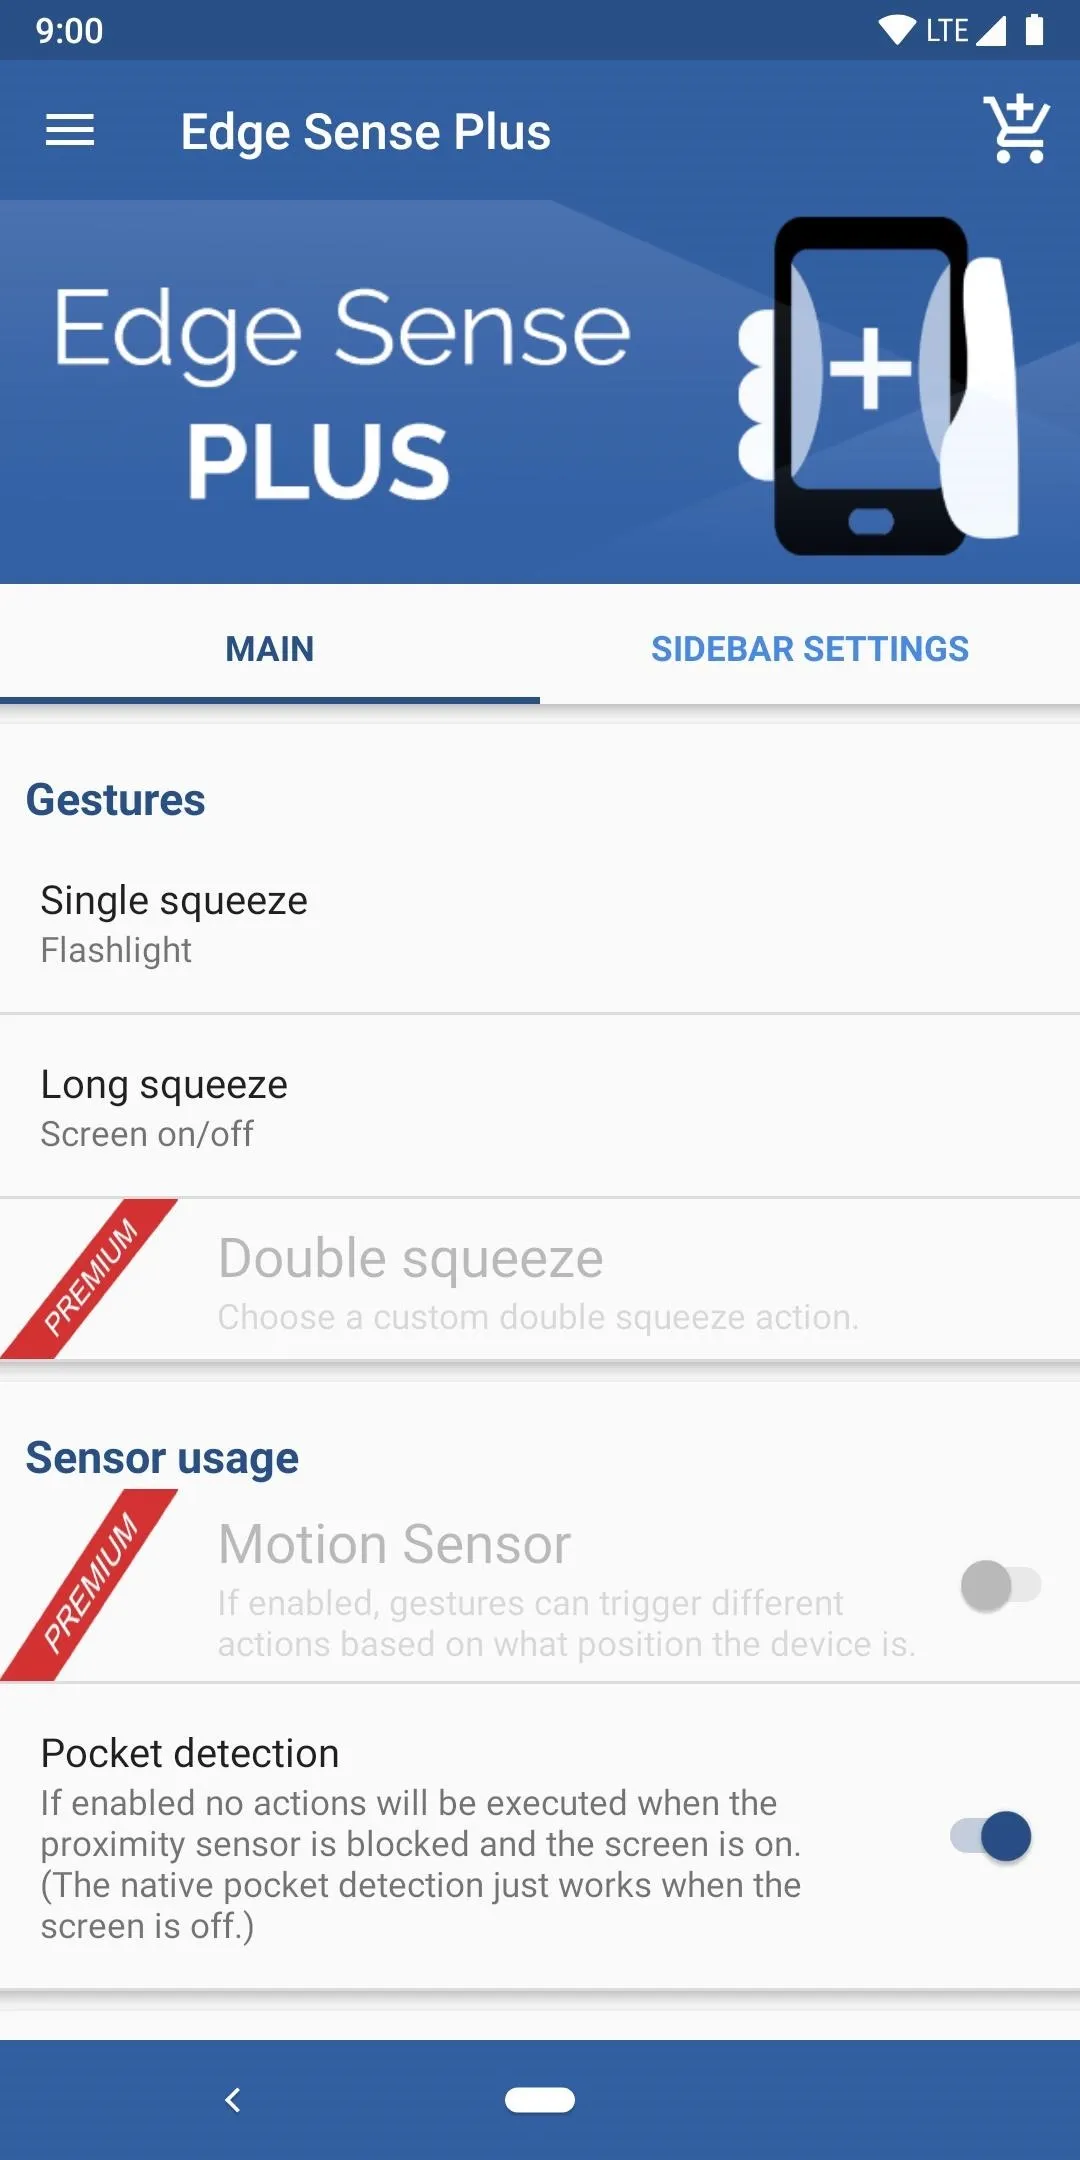
Now it's finally time to start tweaking the squeeze feature to fit your personal habits and lifestyle. Open the Edge Sense Plus app to the main screen and the first things you'll be presented with is the "Single squeeze" and "Long squeeze" options. Tapping each one will list out all the actions you can do with them, so you'll have to decide what'll be most helpful for you.
Personally, I like setting the single squeeze to turn the flashlight on and off, and the long squeeze to turn the screen on and off. That way, you can always have a light at a moment's notice and can turn the screen off without touching the power button. It's a pretty useful combination for the two, but you can pick anything you'd like — this is a good starting point, though.
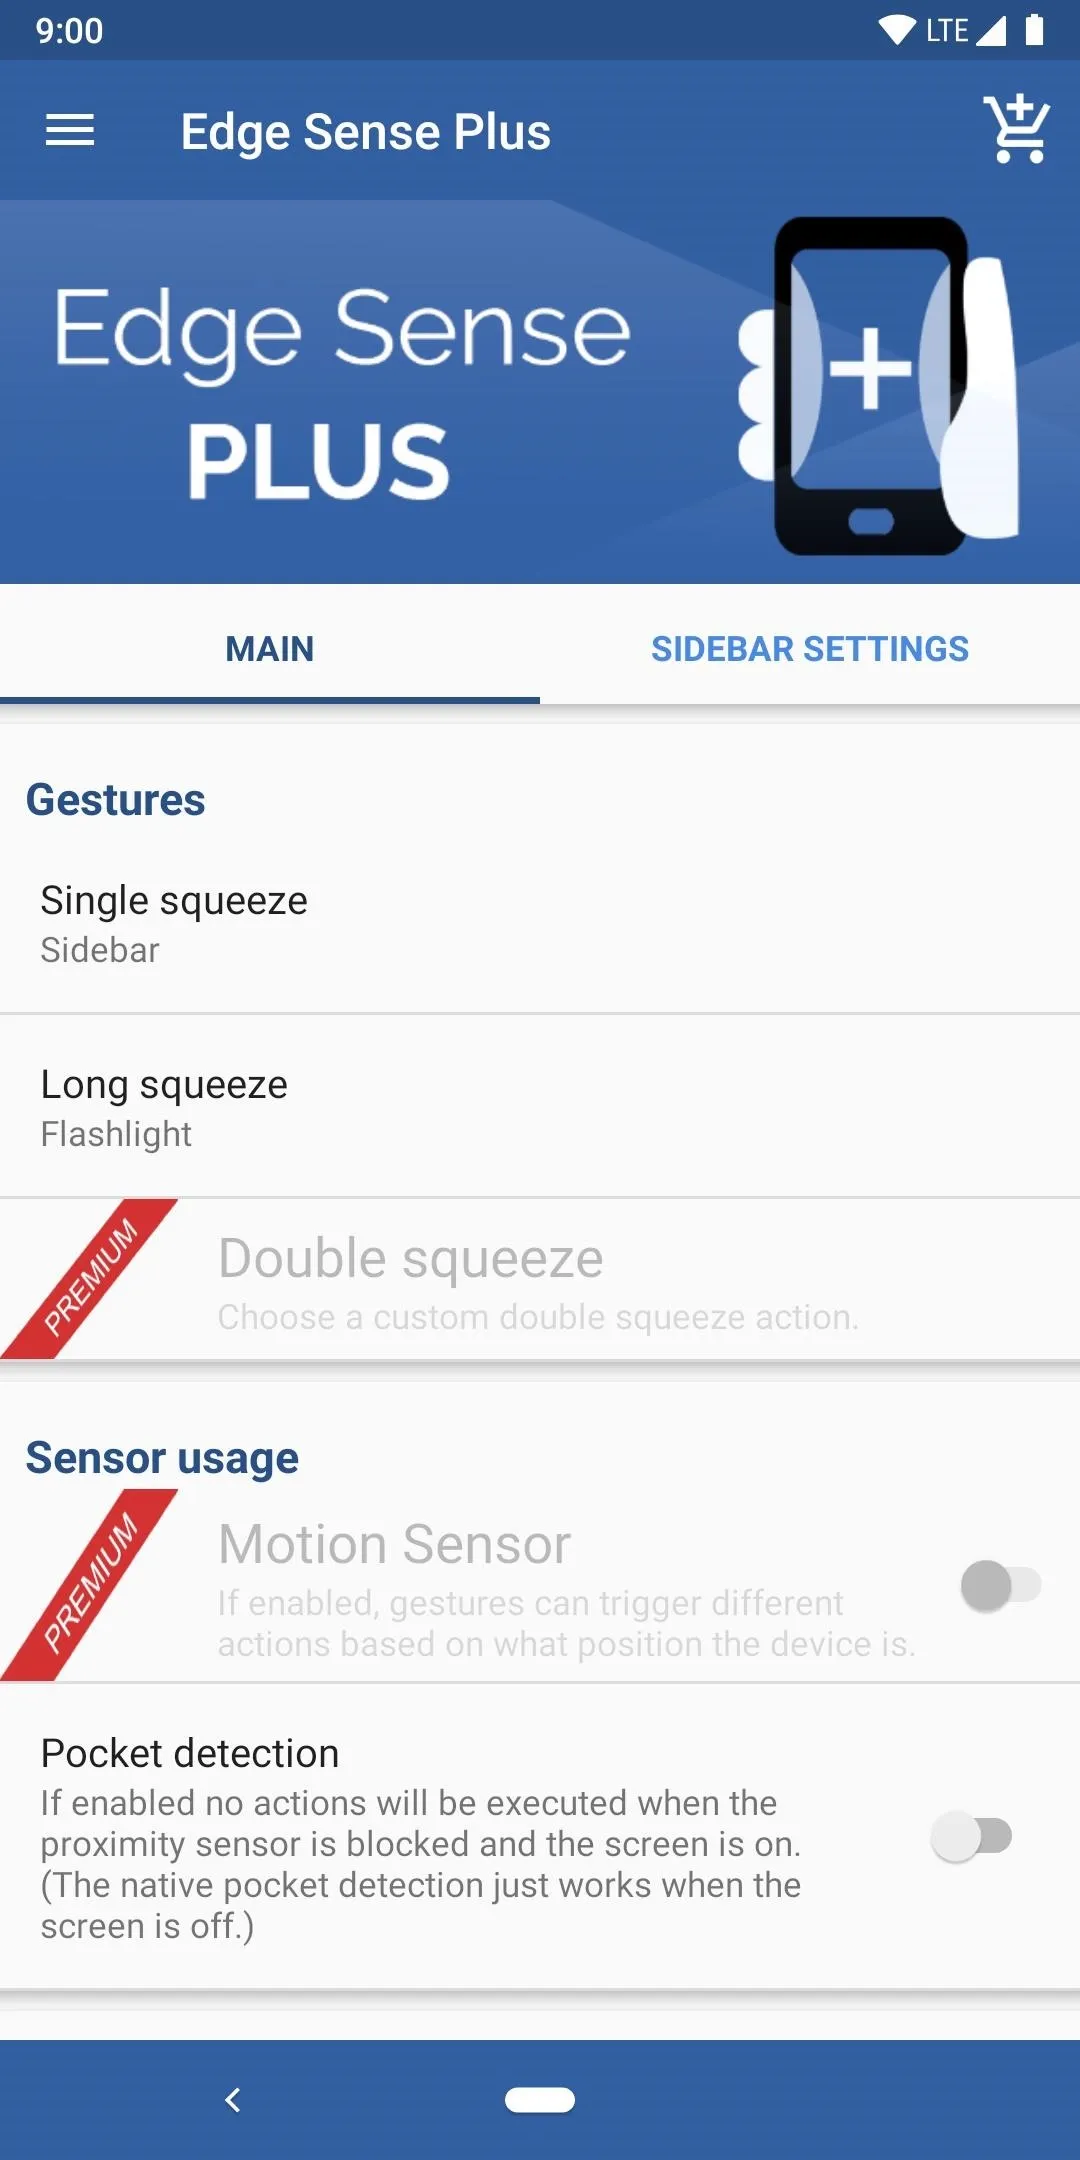
Once you start diving into it, there are actually quite a few settings you can mess around within the main page. For starters, a good thing to do is to enable the "Pocket detection" setting so that the squeeze actions won't trigger accidentally when in your pocket. I'll briefly highlight the other sections below just to give you an idea on what to expect.
Media control: You can change the system behavior for how media is controlled through the squeeze gestures. You'll be able to do such things as changing the volume with a single squeeze and playing the next track with a long squeeze. It gives you a few more options when listening to music with your phone even while the screen is off, so that's pretty useful.
Misc: This is where you can input a sound effect when you activate the squeeze gesture for short or long squeeze functions. You can have fun with this one and set it to something unique, but it does require you to enable the media permission so it can access your internal storage. Nothing major though since most apps need access to your storage to read and write data anyway.
Configuration: This is where the more advanced users will want to start digging around since it has some more exciting and unique options. From creating and managing custom gestures on a per-app basis to changing your immersion mode type, there are some cool extras here to look into.
One setting I suggest everyone immediately check out here is the "Long squeeze interval" by changing the value from the default 700 ms down to 300 ms. That way, you won't have to wait so long for the squeeze gesture to enable, such as the flashlight. This might not work for everyone since it lowers the amount of time needed for the long squeeze, but it's worth noting that the value can be adjusted.
Permissions: Depending on how you set up your Edge Sense experience, this is where you'll enable the permissions required for specific actions. You can leave them disabled for now until you start setting up your squeeze gestures, but I always like to turn on the "Enable root access" option right away. Doing so will grant the app root access, which will allow for the more advanced gestures to be accessed.
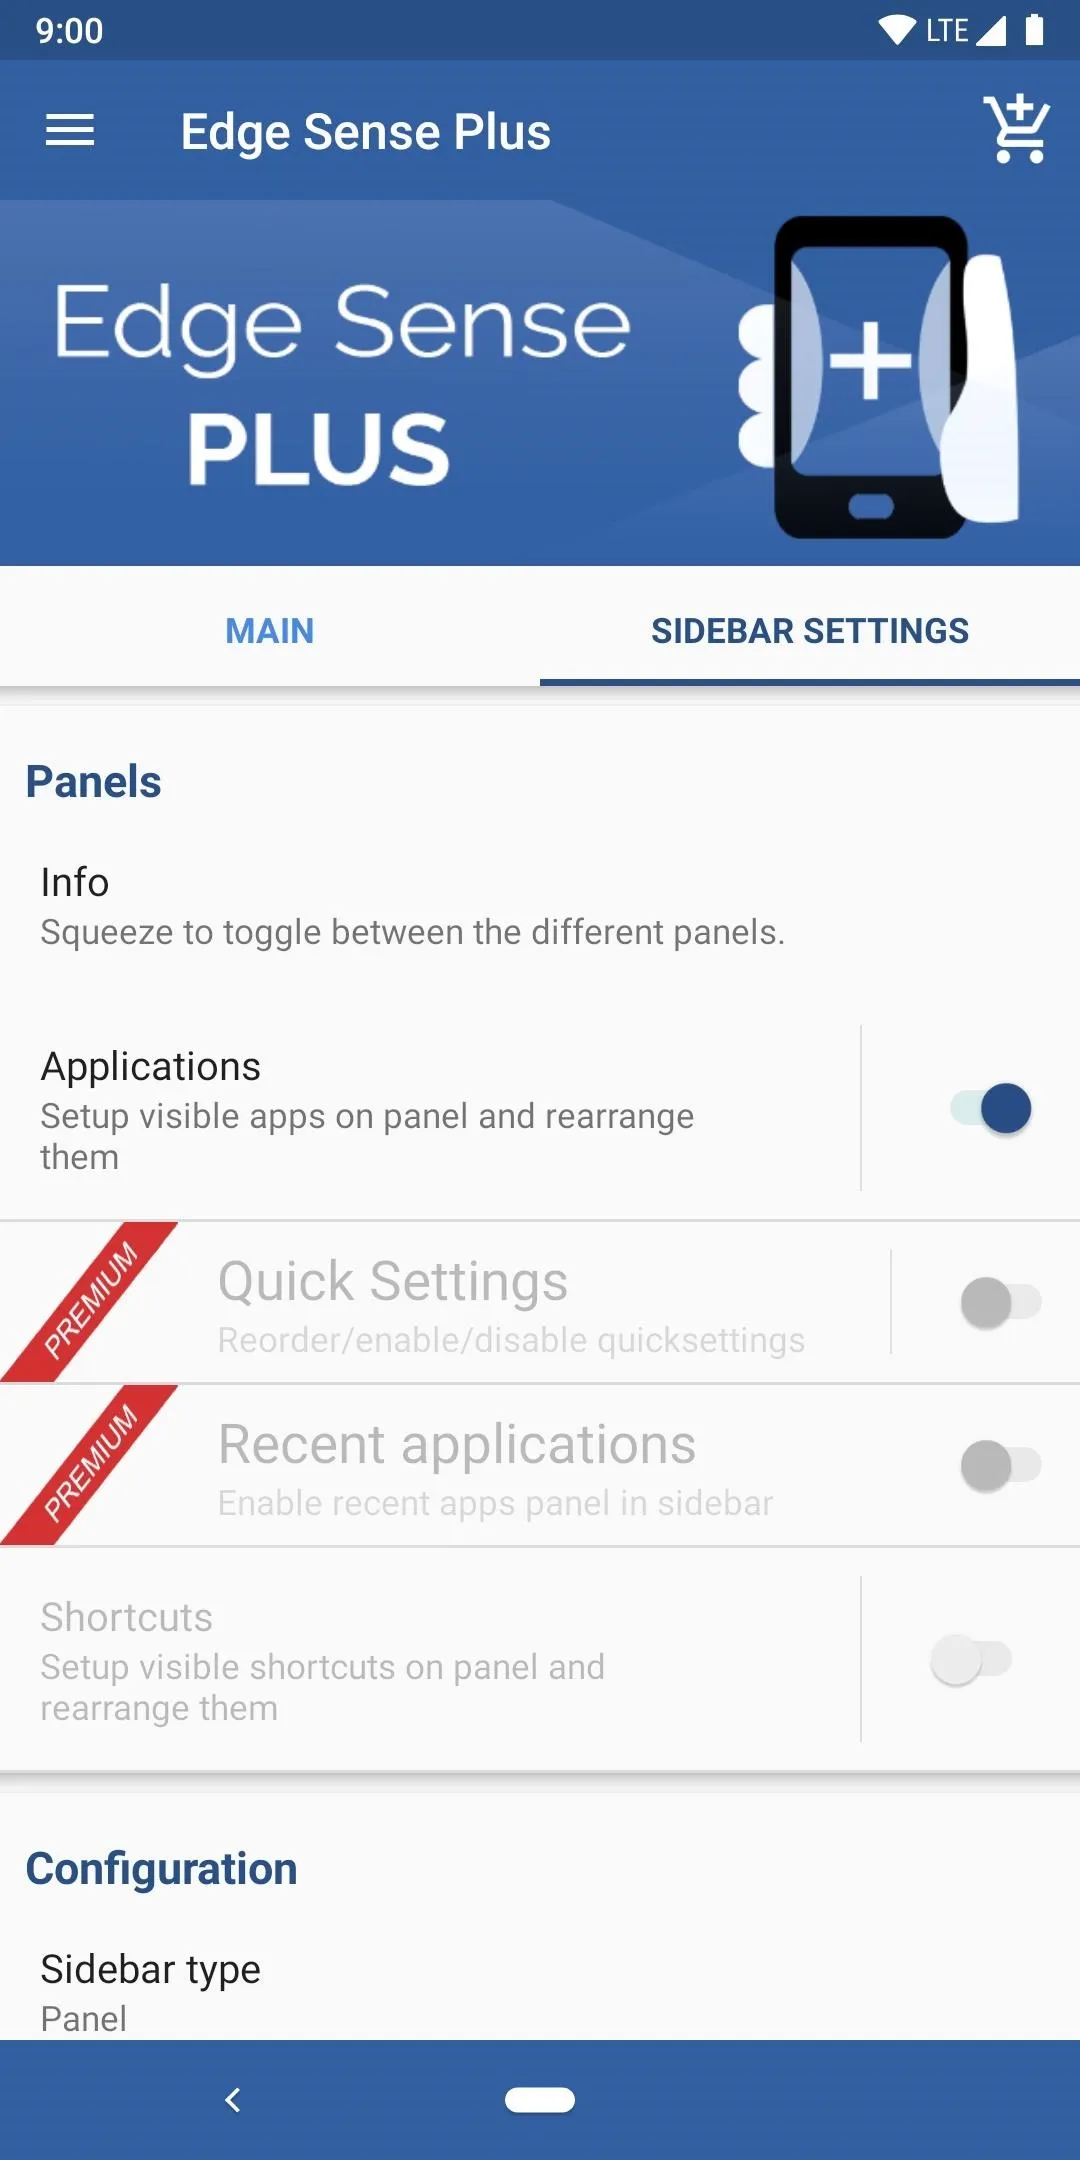
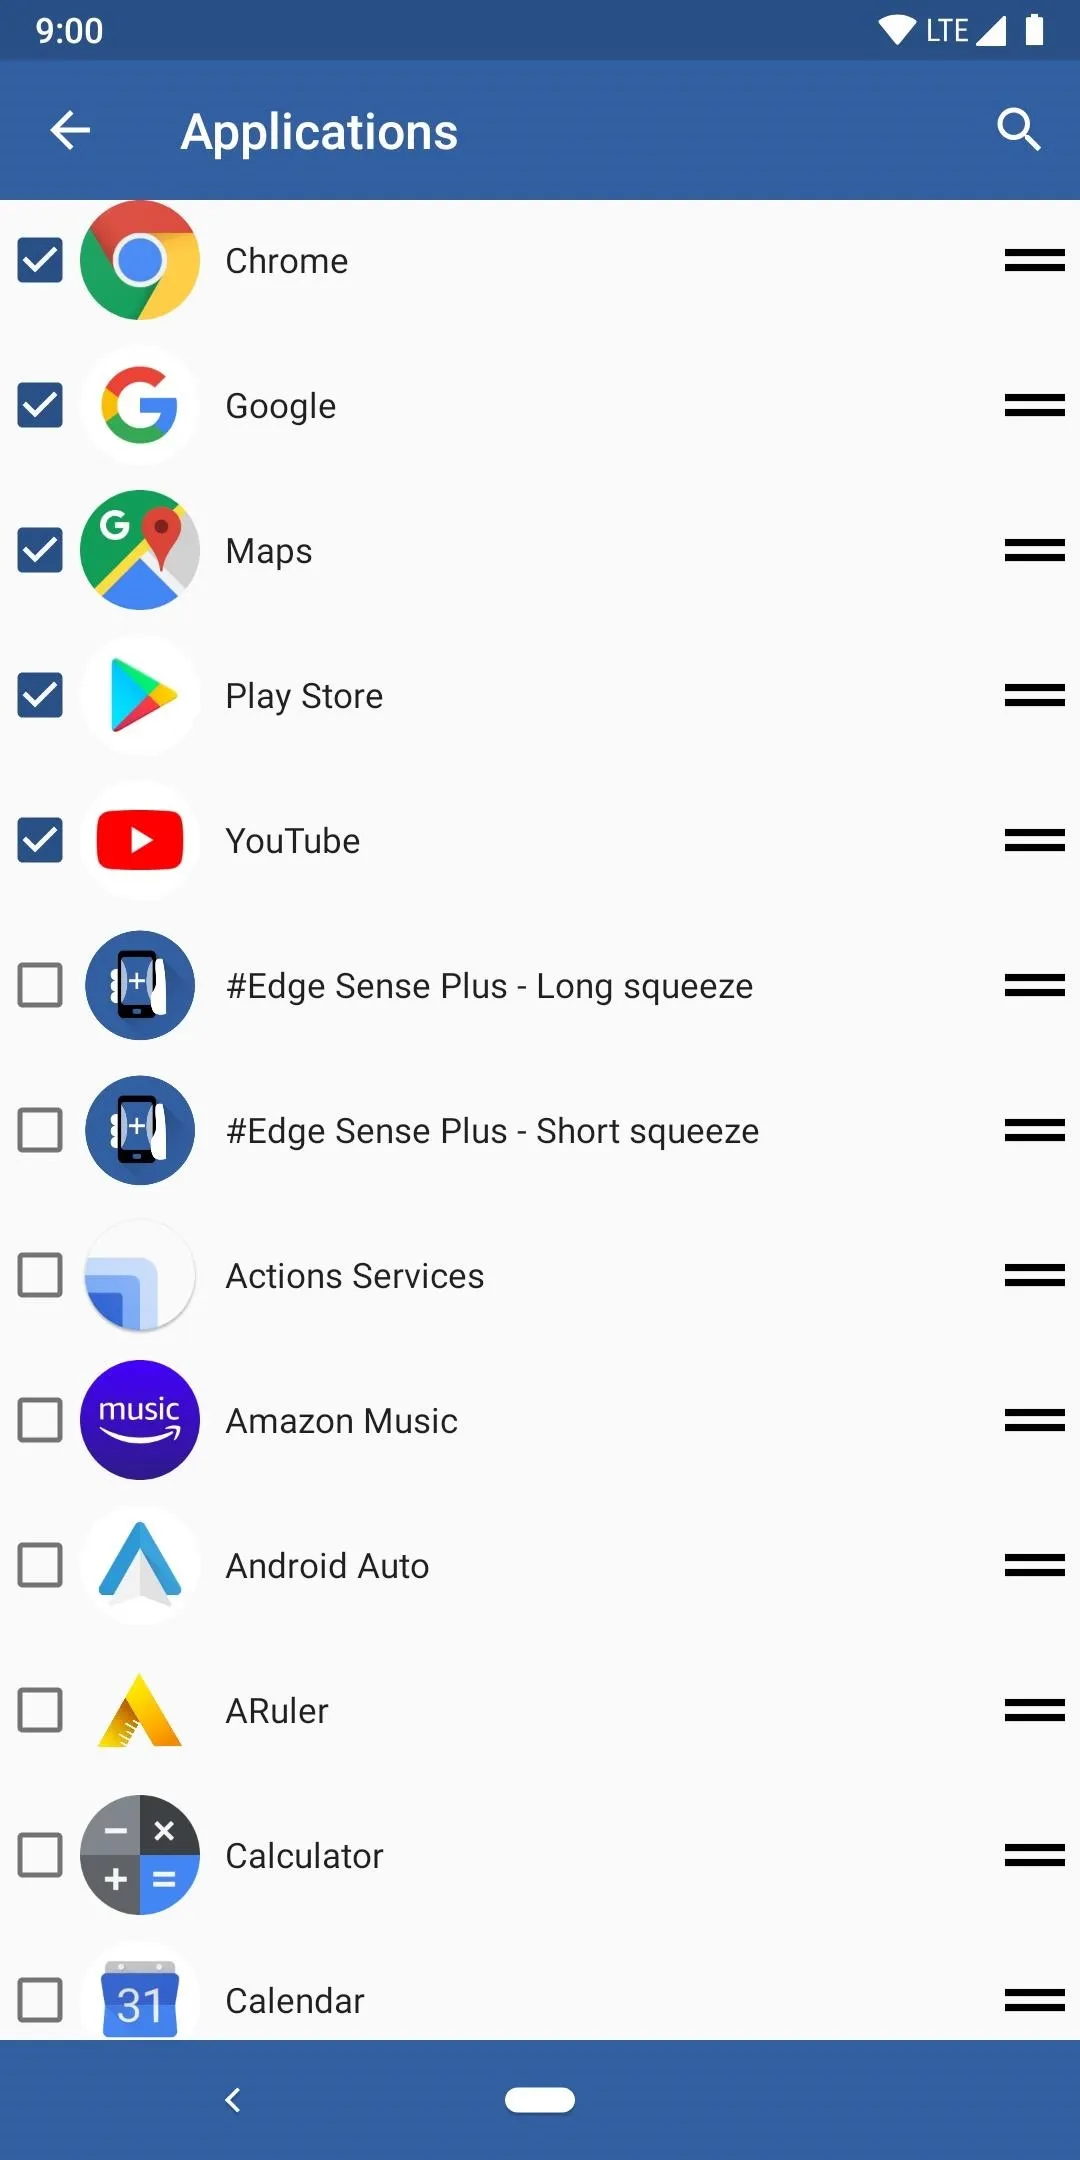
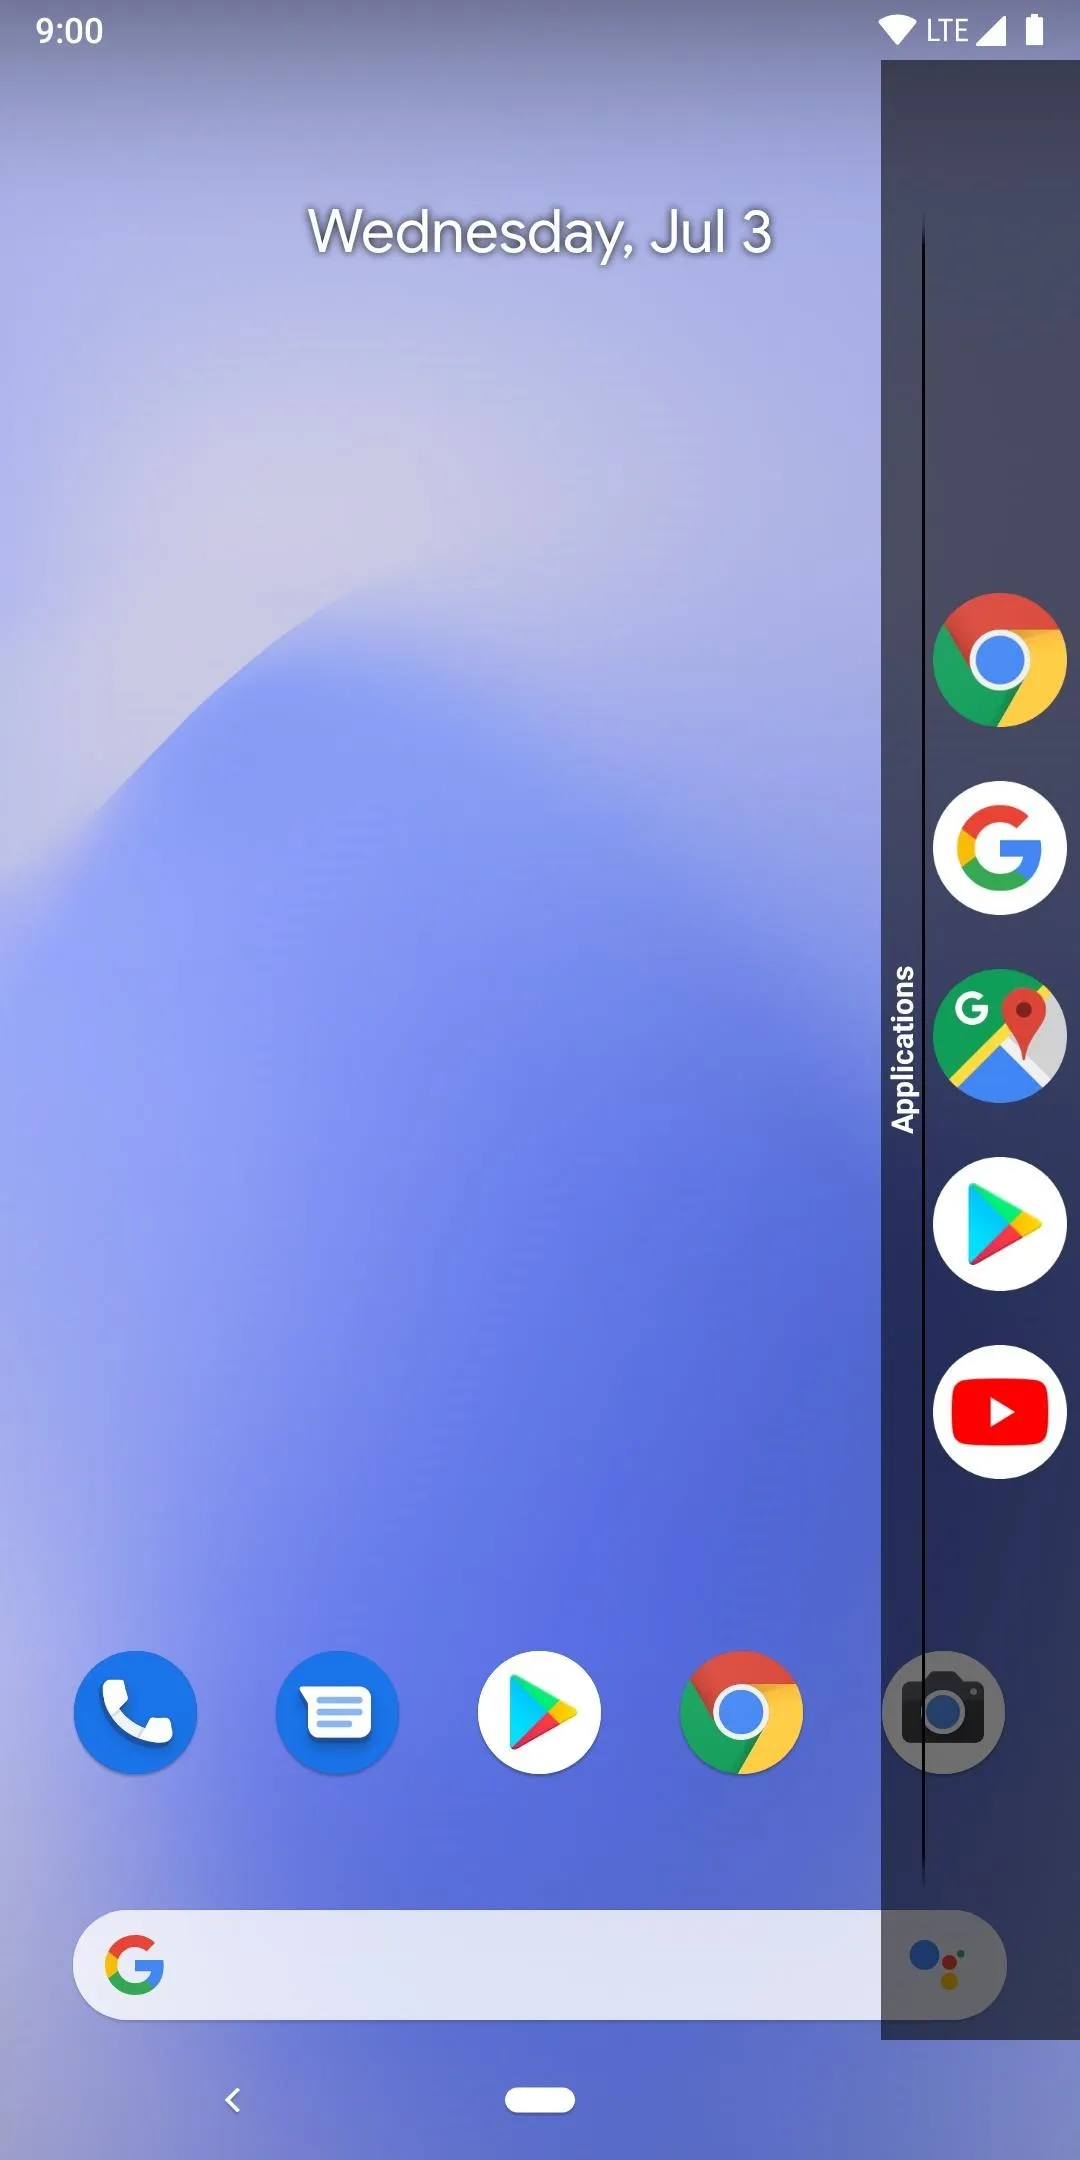
Sidebar Settings Tab: This whole feature has its own dedicated tab for setting it up and tweaking it to however you see fit. You'll only need to look into the Sidebar settings if you plan on using it as one of your squeeze gestures. The Sidebar will bring up a list of apps that you set up, which means you can access any app you want from anywhere. Might be useful for some, but it's worth noting the option is there.
Just as the main tab, you have a ton of options to dig through to your heart's content. You can completely customize the Sidebar in every single way possible, even down to its overall appearance. There are quite a few options here that are only available when you upgrade to the premium version, so that's something to keep in mind as well.
Adjust the Squeeze Sensitivity
Depending on your scenario, the squeeze functions could be hard to enable or might also trigger too easily. If you have a thick case for protection purposes, then it would require you to squeeze extremely hard to trigger the gestures in the first place. There's an easy way to fix that and tweak it to your liking!
Settings -> System -> Gestures -> Active EdgeHeading to the above section in your system settings will land you on the page for adjusting the squeeze sensitivity of your phone. You have a wide range of sensitivity settings to try, but you'll want a lighter squeeze so you won't have to hurt your hand to trigger the gestures. Test out the different slider settings to find the right balance for you that won't also cause accidental presses.
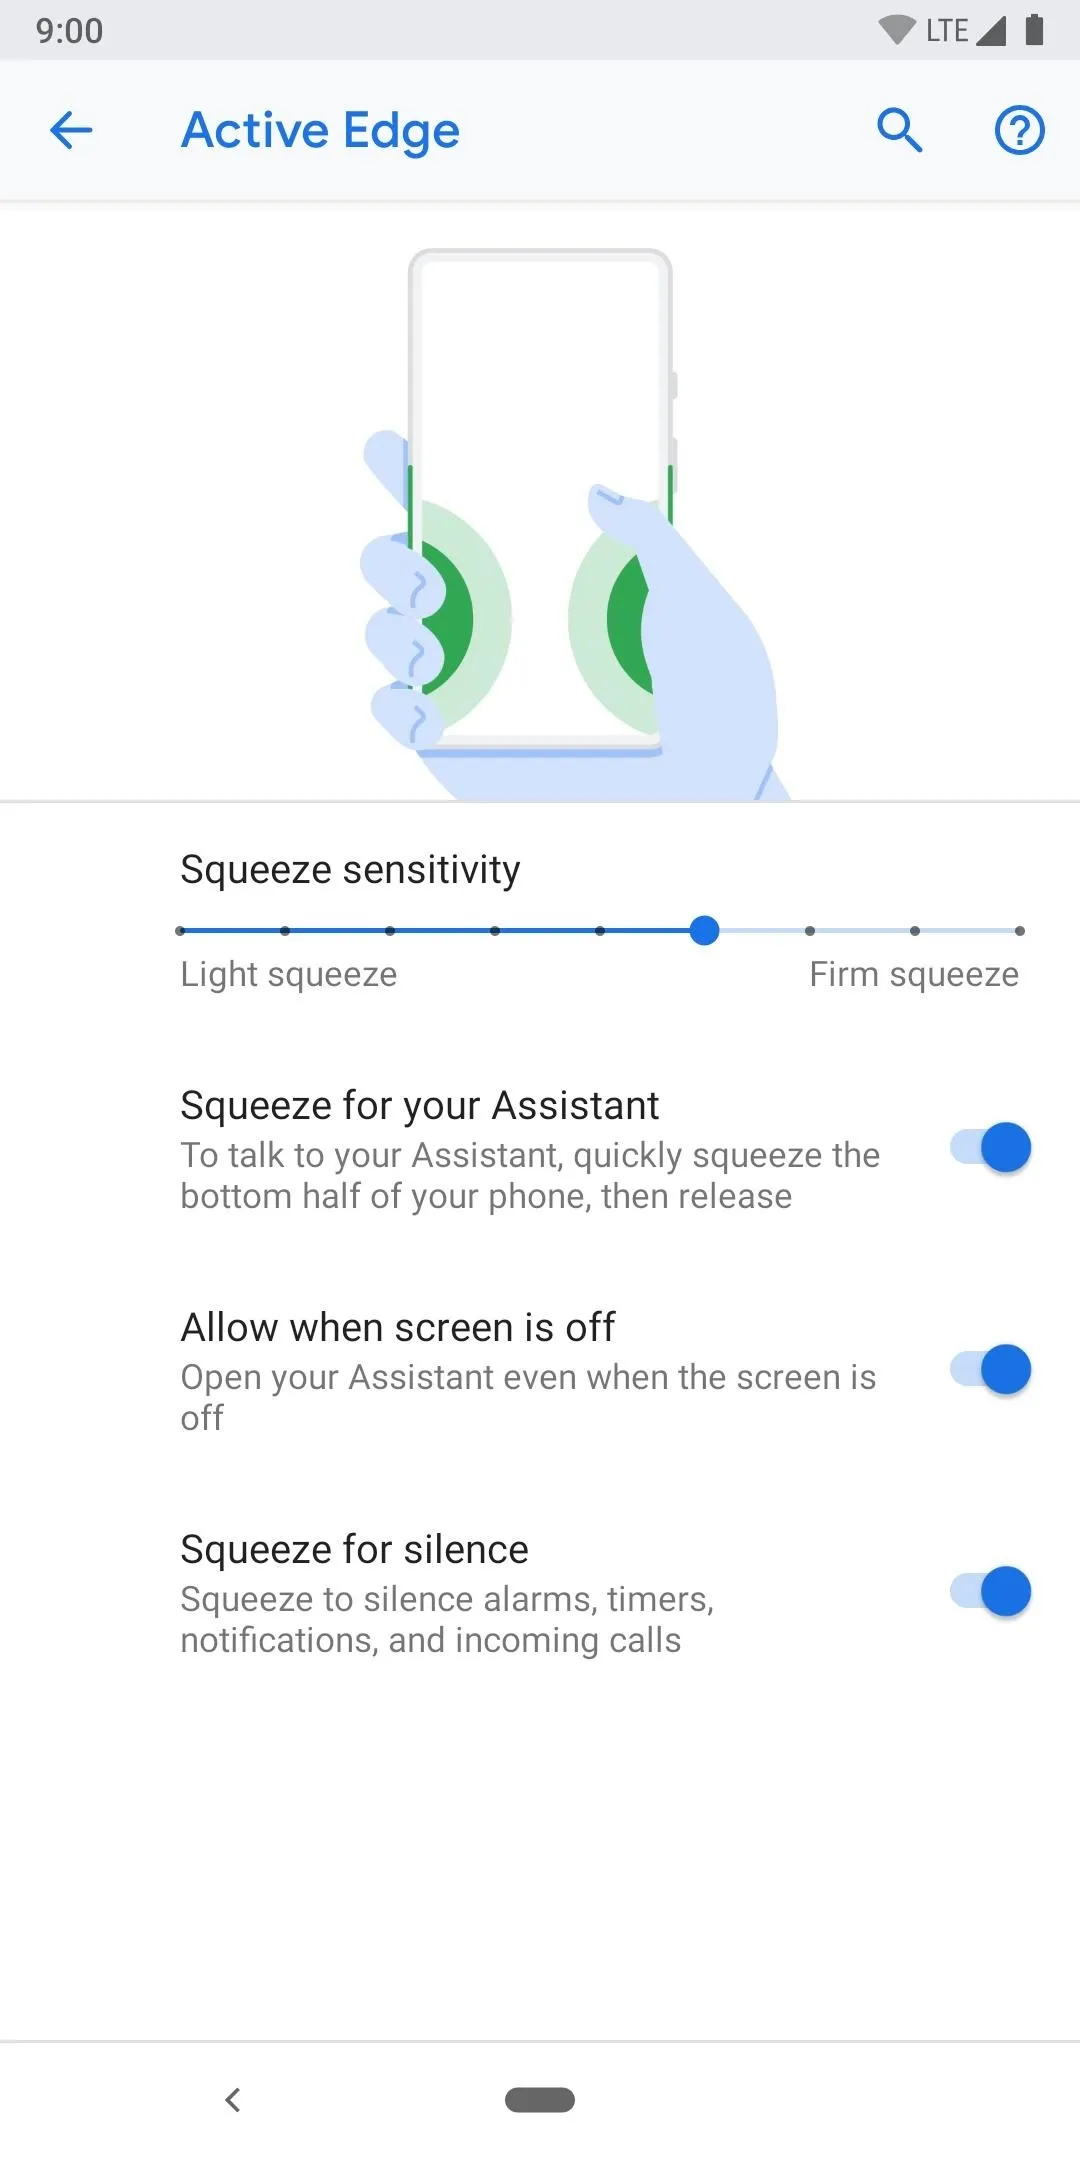
A more firm squeeze will help to prevent accidental triggers.
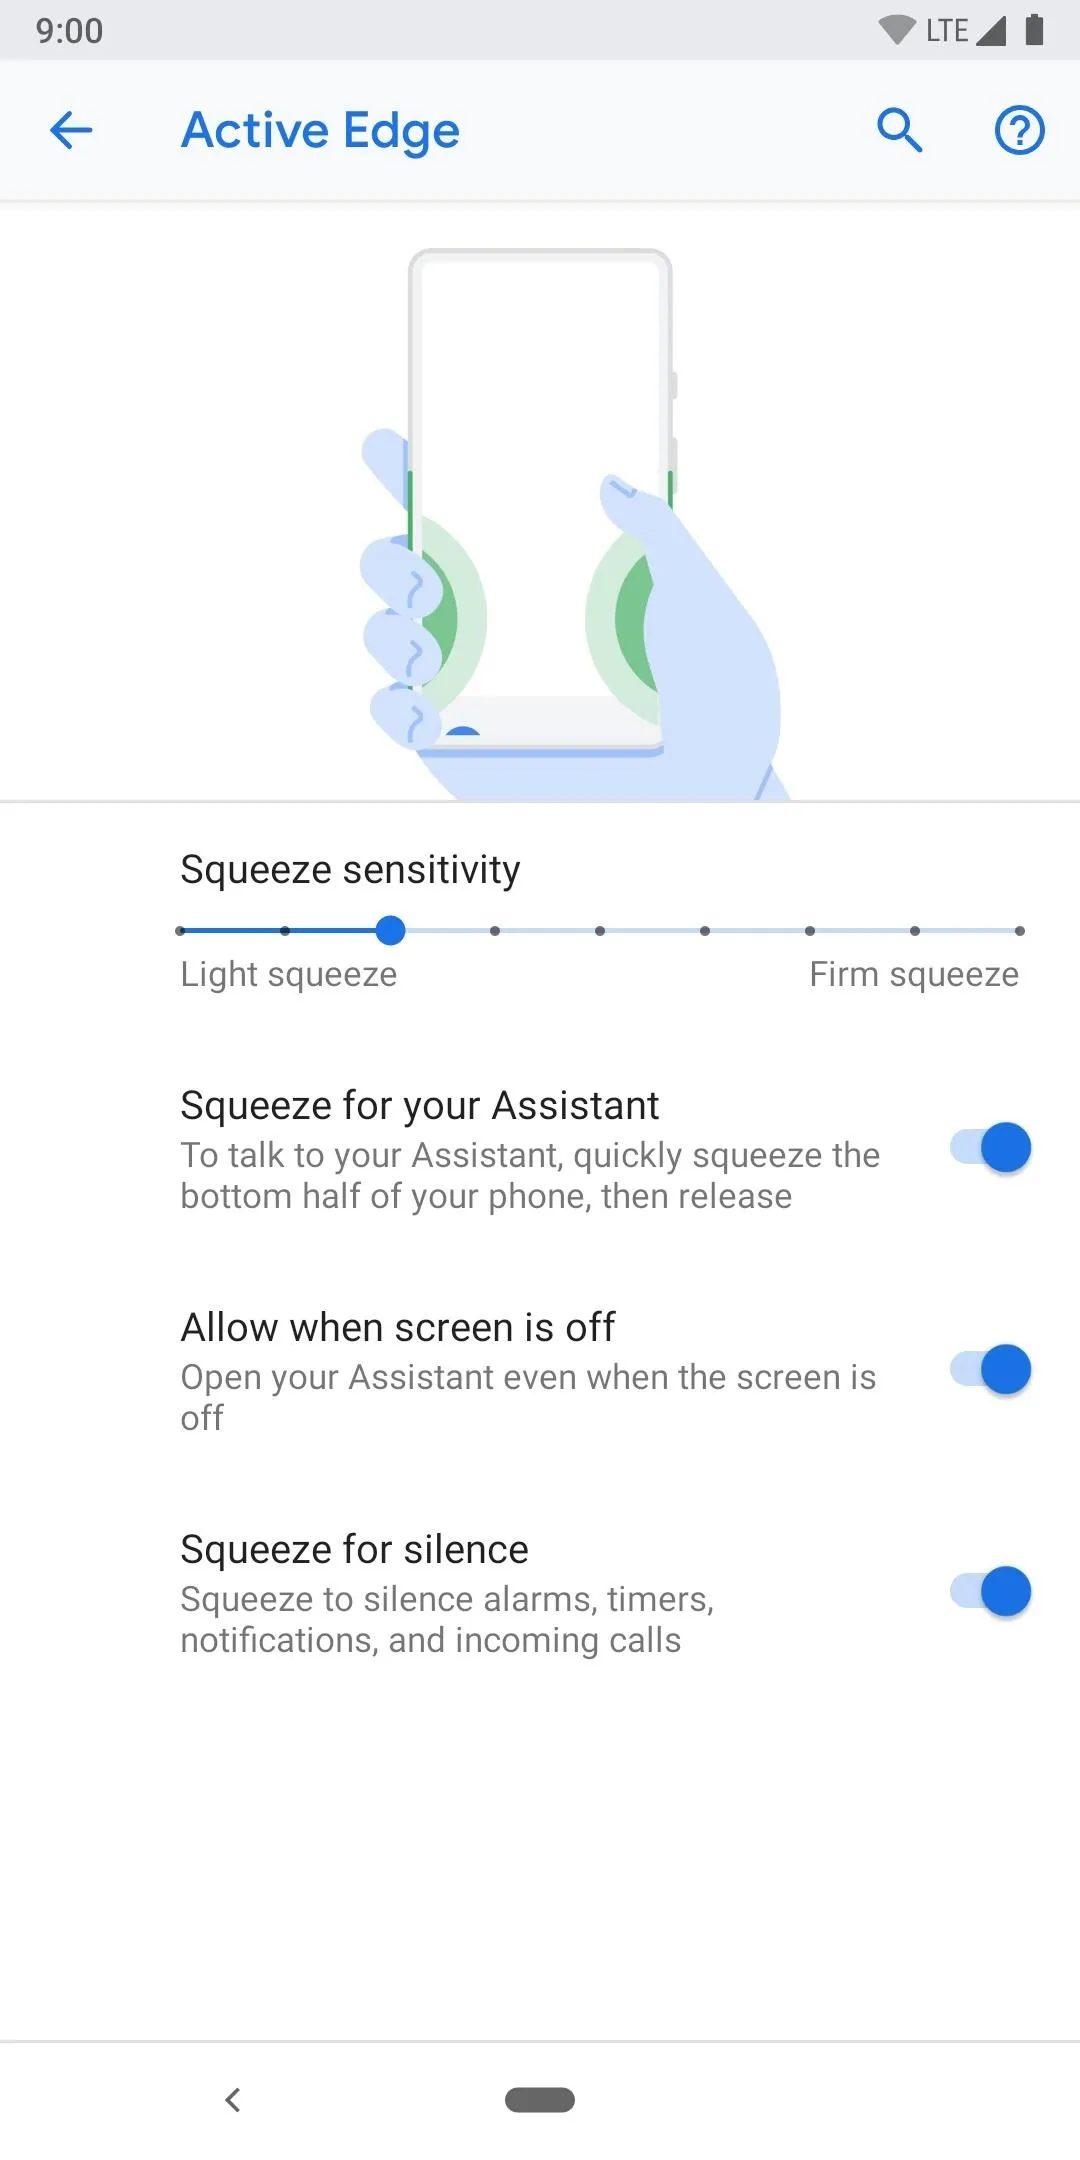
A lighter squeeze will make it easier to trigger through a thick protective phone case.
A more firm squeeze will help to prevent accidental triggers.
A lighter squeeze will make it easier to trigger through a thick protective phone case.
Upgrade to the Premium Version (Optional)
If you like the idea of what you've seen so far and can see yourself using this app a lot, I totally recommend getting the premium version. You can adjust the screen off actions to be different than what happens when you squeeze with the screen on, use a double squeeze gesture for another layer of functionality, and customize the Sidebar even more than before.
Not to mention, you can pick whichever price you want to pay for the upgrade, which is pretty cool too — it's always good to support a developer who creates some cool new things for the community. If you're interested in the added functionality, just tap the shopping cart icon in the upper-right of the screen and pick your price. Enjoy!
Final Note
If you plan on assigning multiple squeeze functions, each one you use will create its own separate "app" using the same icon as the main app. However, they will also be labeled as "#Edge Sense Plus" to help you differentiate between them. You can hide the extra icons from your app drawer if your home launcher allows for that, otherwise, just ignore them since they do no harm.
Cover image and screenshots by Stephen Perkins/Gadget Hacks


Comments
Be the first, drop a comment!