


The main draw for Google's Pixel series is the software. It rocks a clean version of stock Android instead of a heavy OEM skin like TouchWiz, it gets frequent prompt OS updates, the camera software is downright amazing, and it has perhaps the most fluid UI of any phone. But an understated advantage of the software is how dead-simple it is to modify with root-level tweaks.
The first step to modding any phone these days is unlocking the bootloader. This allows you to flash custom images like TWRP or a Magisk-enabled kernel, which, in turn, allows you to root the phone or install a custom ROM. If you plan on rooting, or even if you think you might root in the future, you'll want to unlock your bootloader early to make sure you're ready for all the mods to come.
Before You Begin
You should know that unlocking the bootloader does not void the warranty on your Pixel 3 or 3 XL. You can even undo this process and put your phone back to its original state.
Secondly, the process of unlocking the bootloader will wipe your phone's storage for security reasons. As such, you should back up all important files before you get started (though remember that photos are backed up automatically with Google Photos).
Finally, you'll need two things aside from your phone: a Windows, Mac, or Linux computer and a USB data cable. Make sure your data cable is in good conditions with no visible damage.
Enable Developer Options
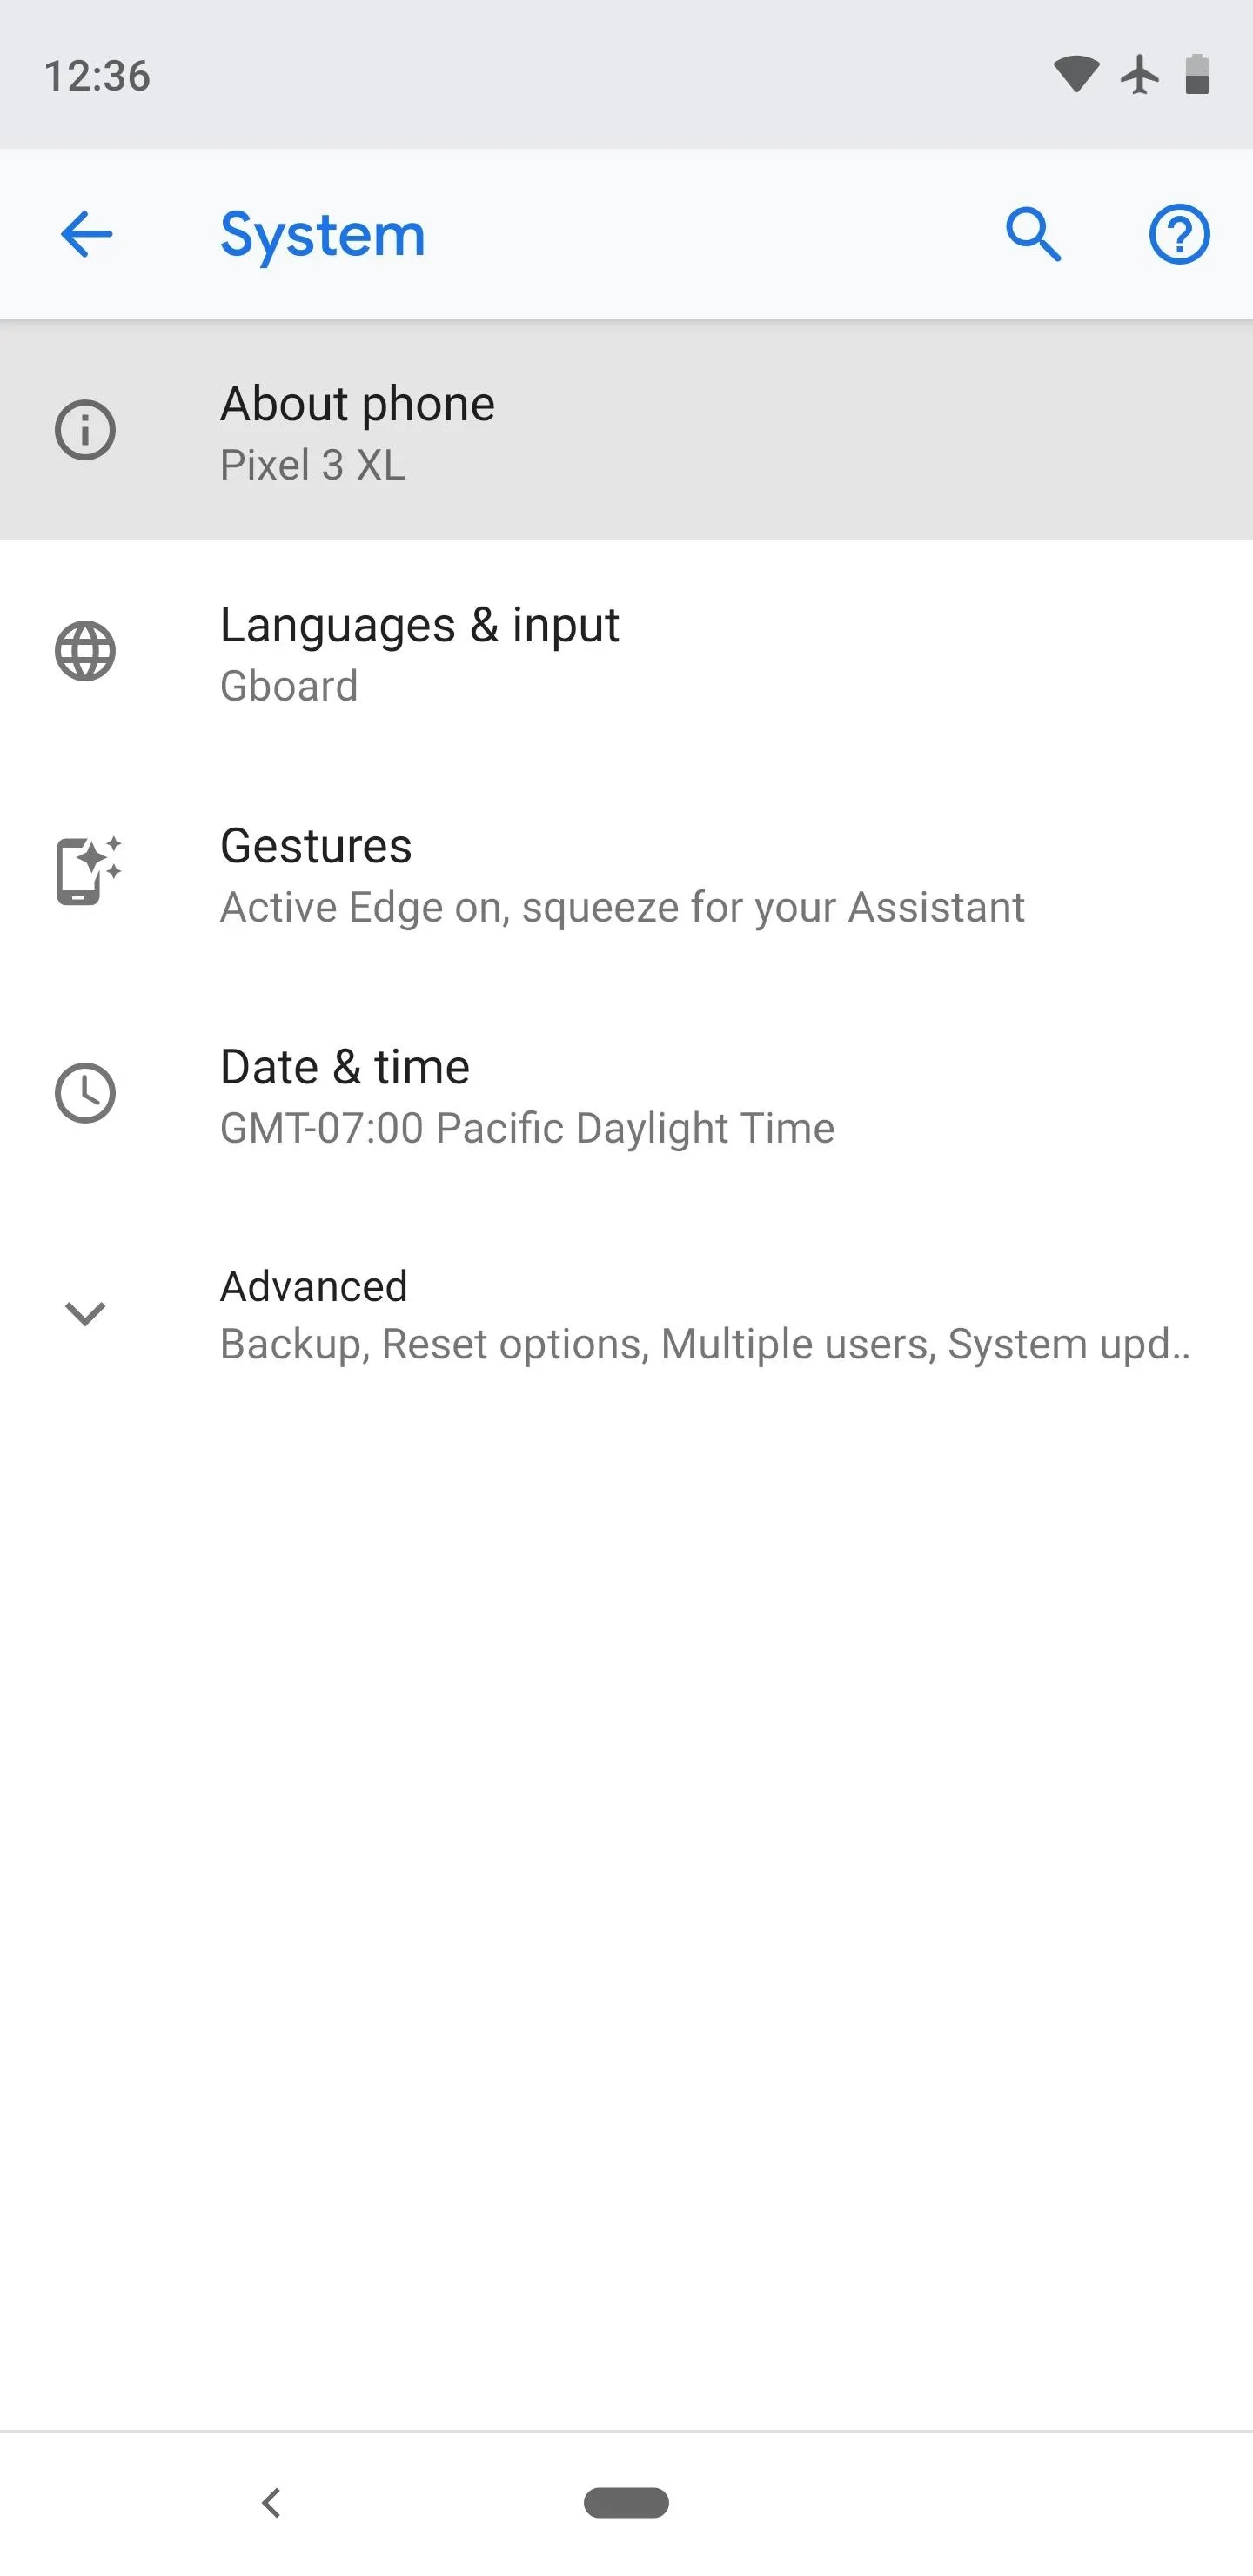
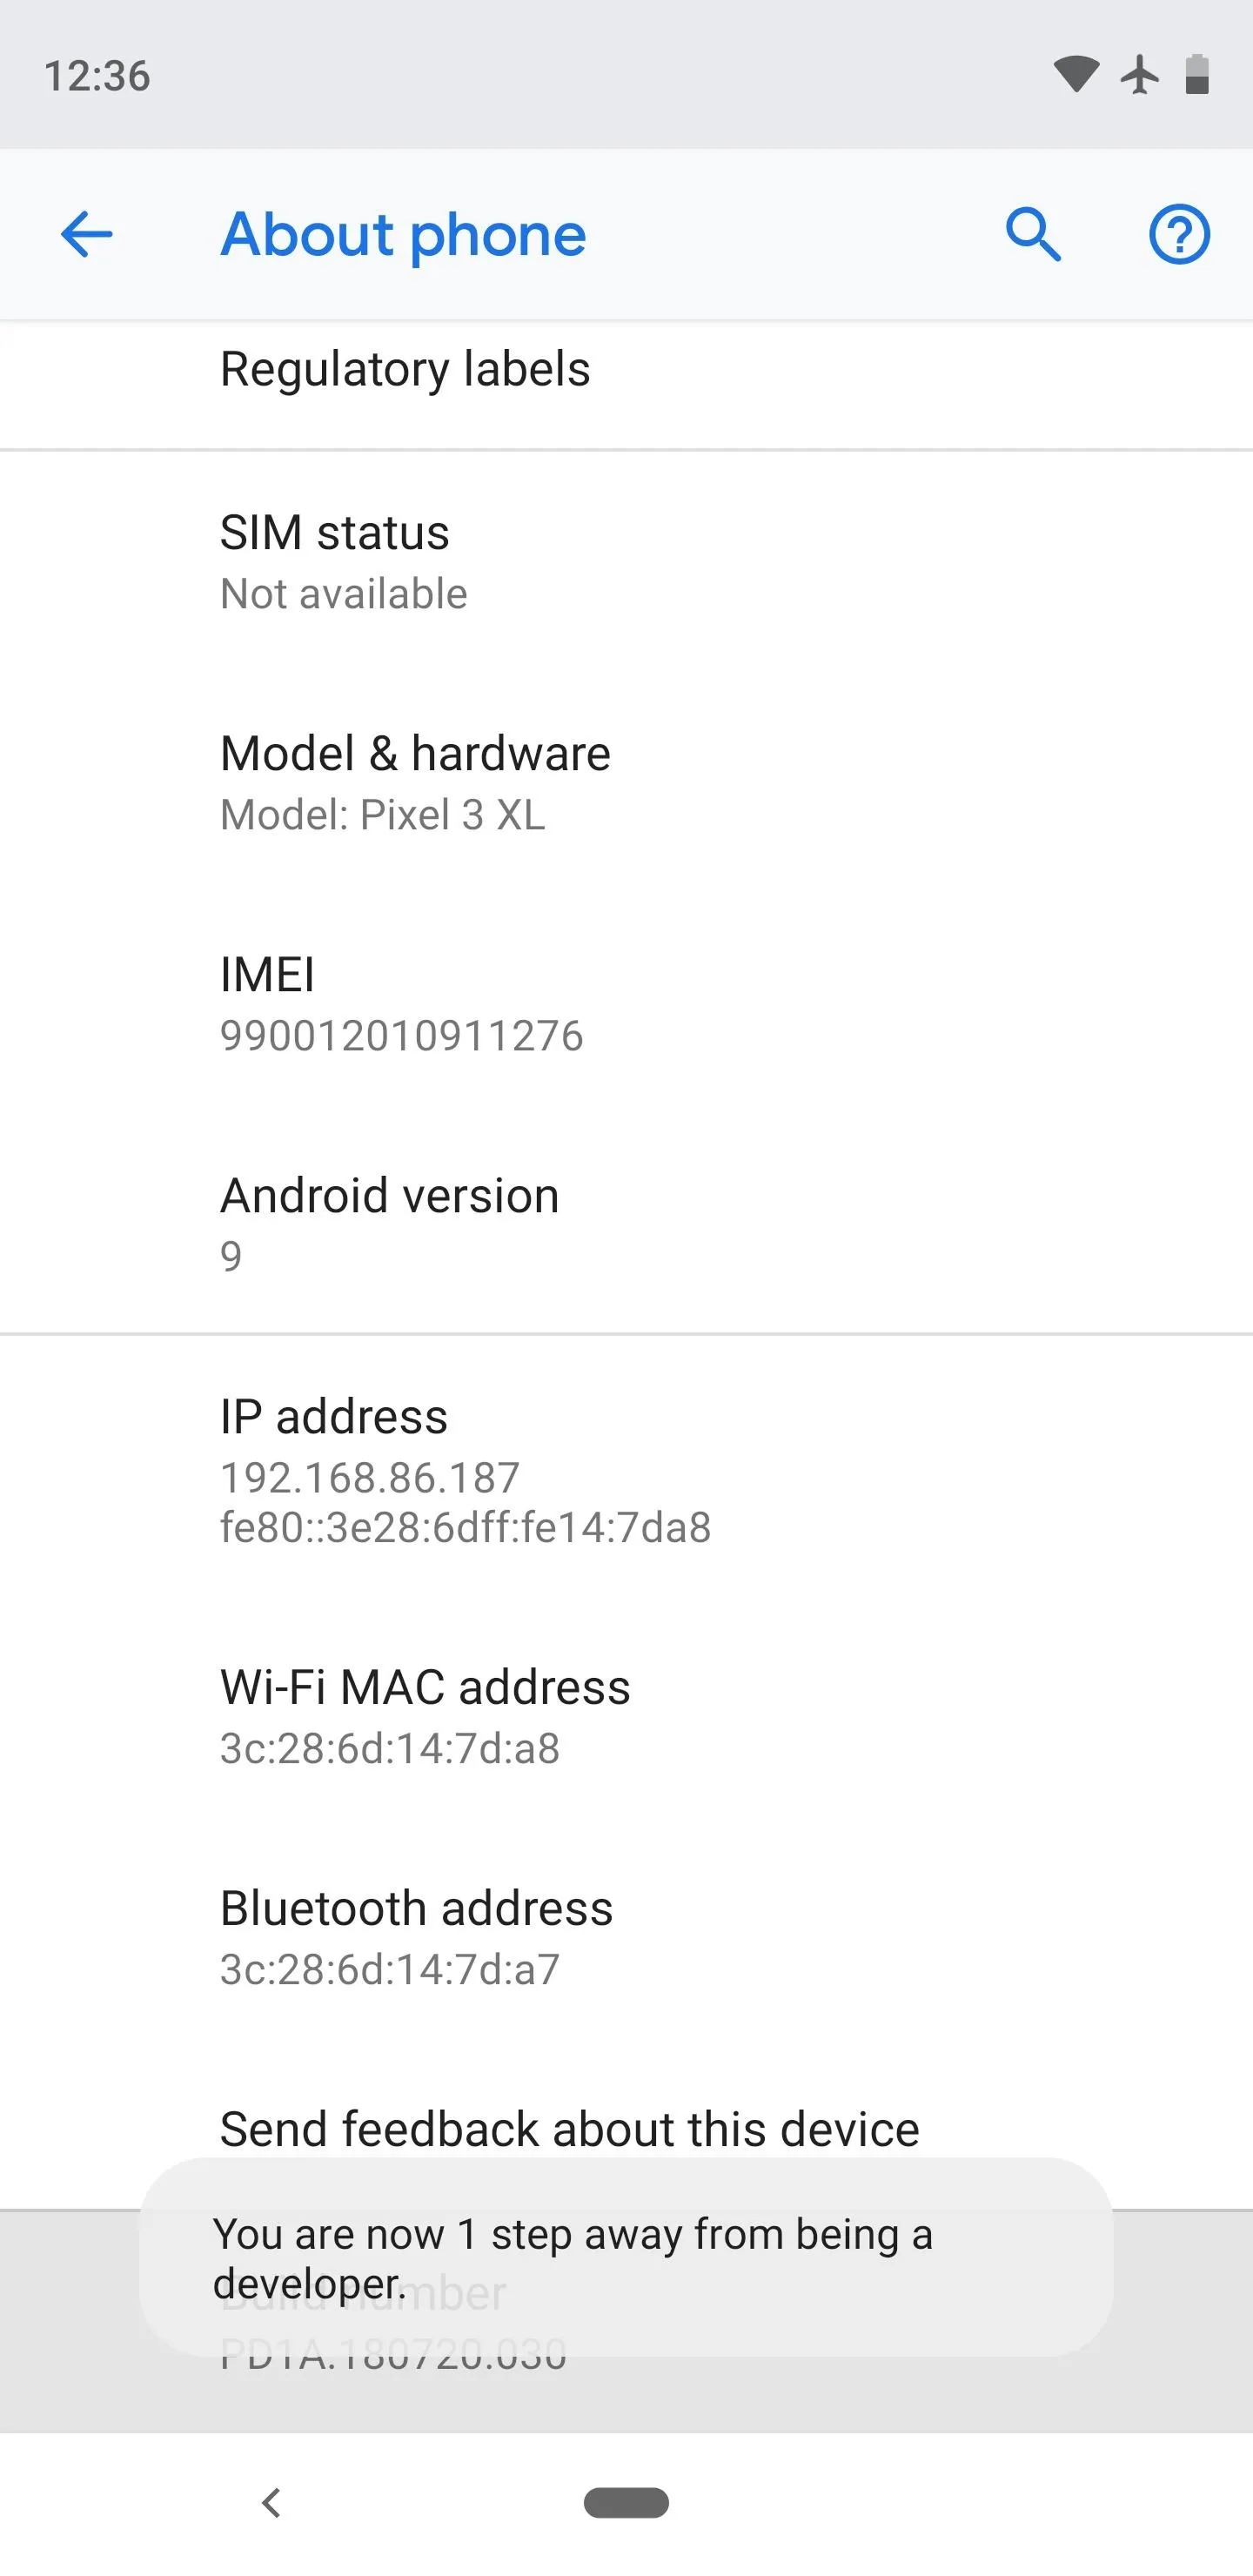
First, open the Settings app, then scroll down and select "System," then tap "About phone" on the following screen. Next, scroll all the way to the bottom of the next screen and find the "Build number" entry. Tap this item seven times in rapid succession, then you'll see a toast message stating "You are now a developer!" This means you've unlocked the hidden Developer Options menu.
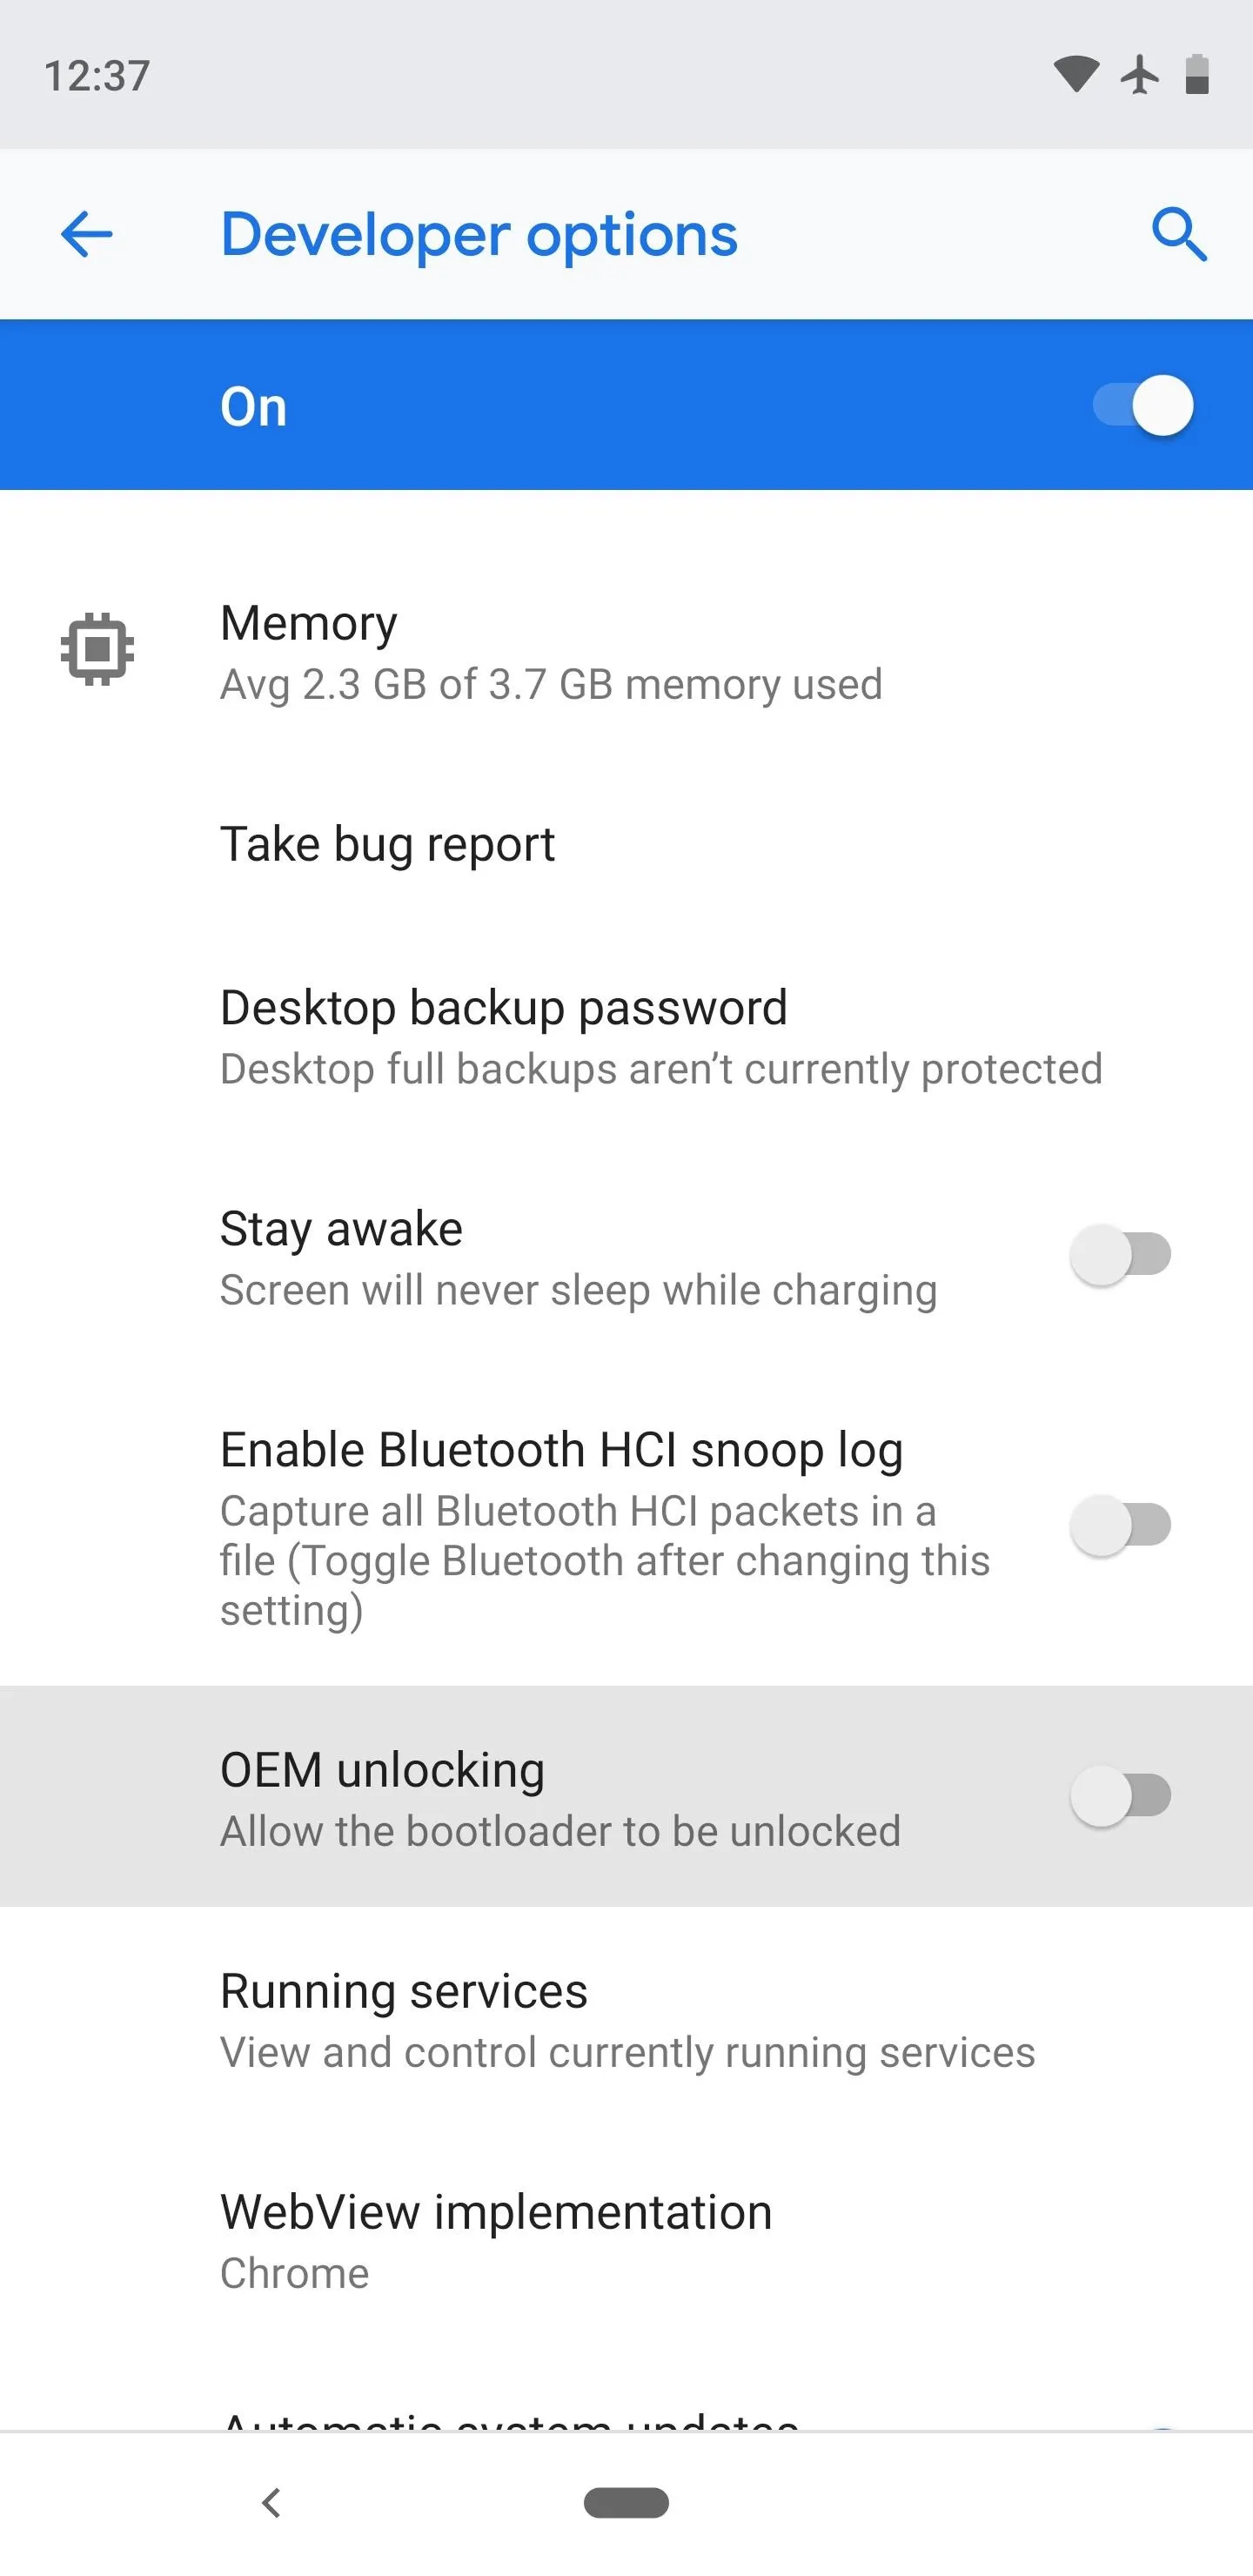
Enable OEM Unlocking
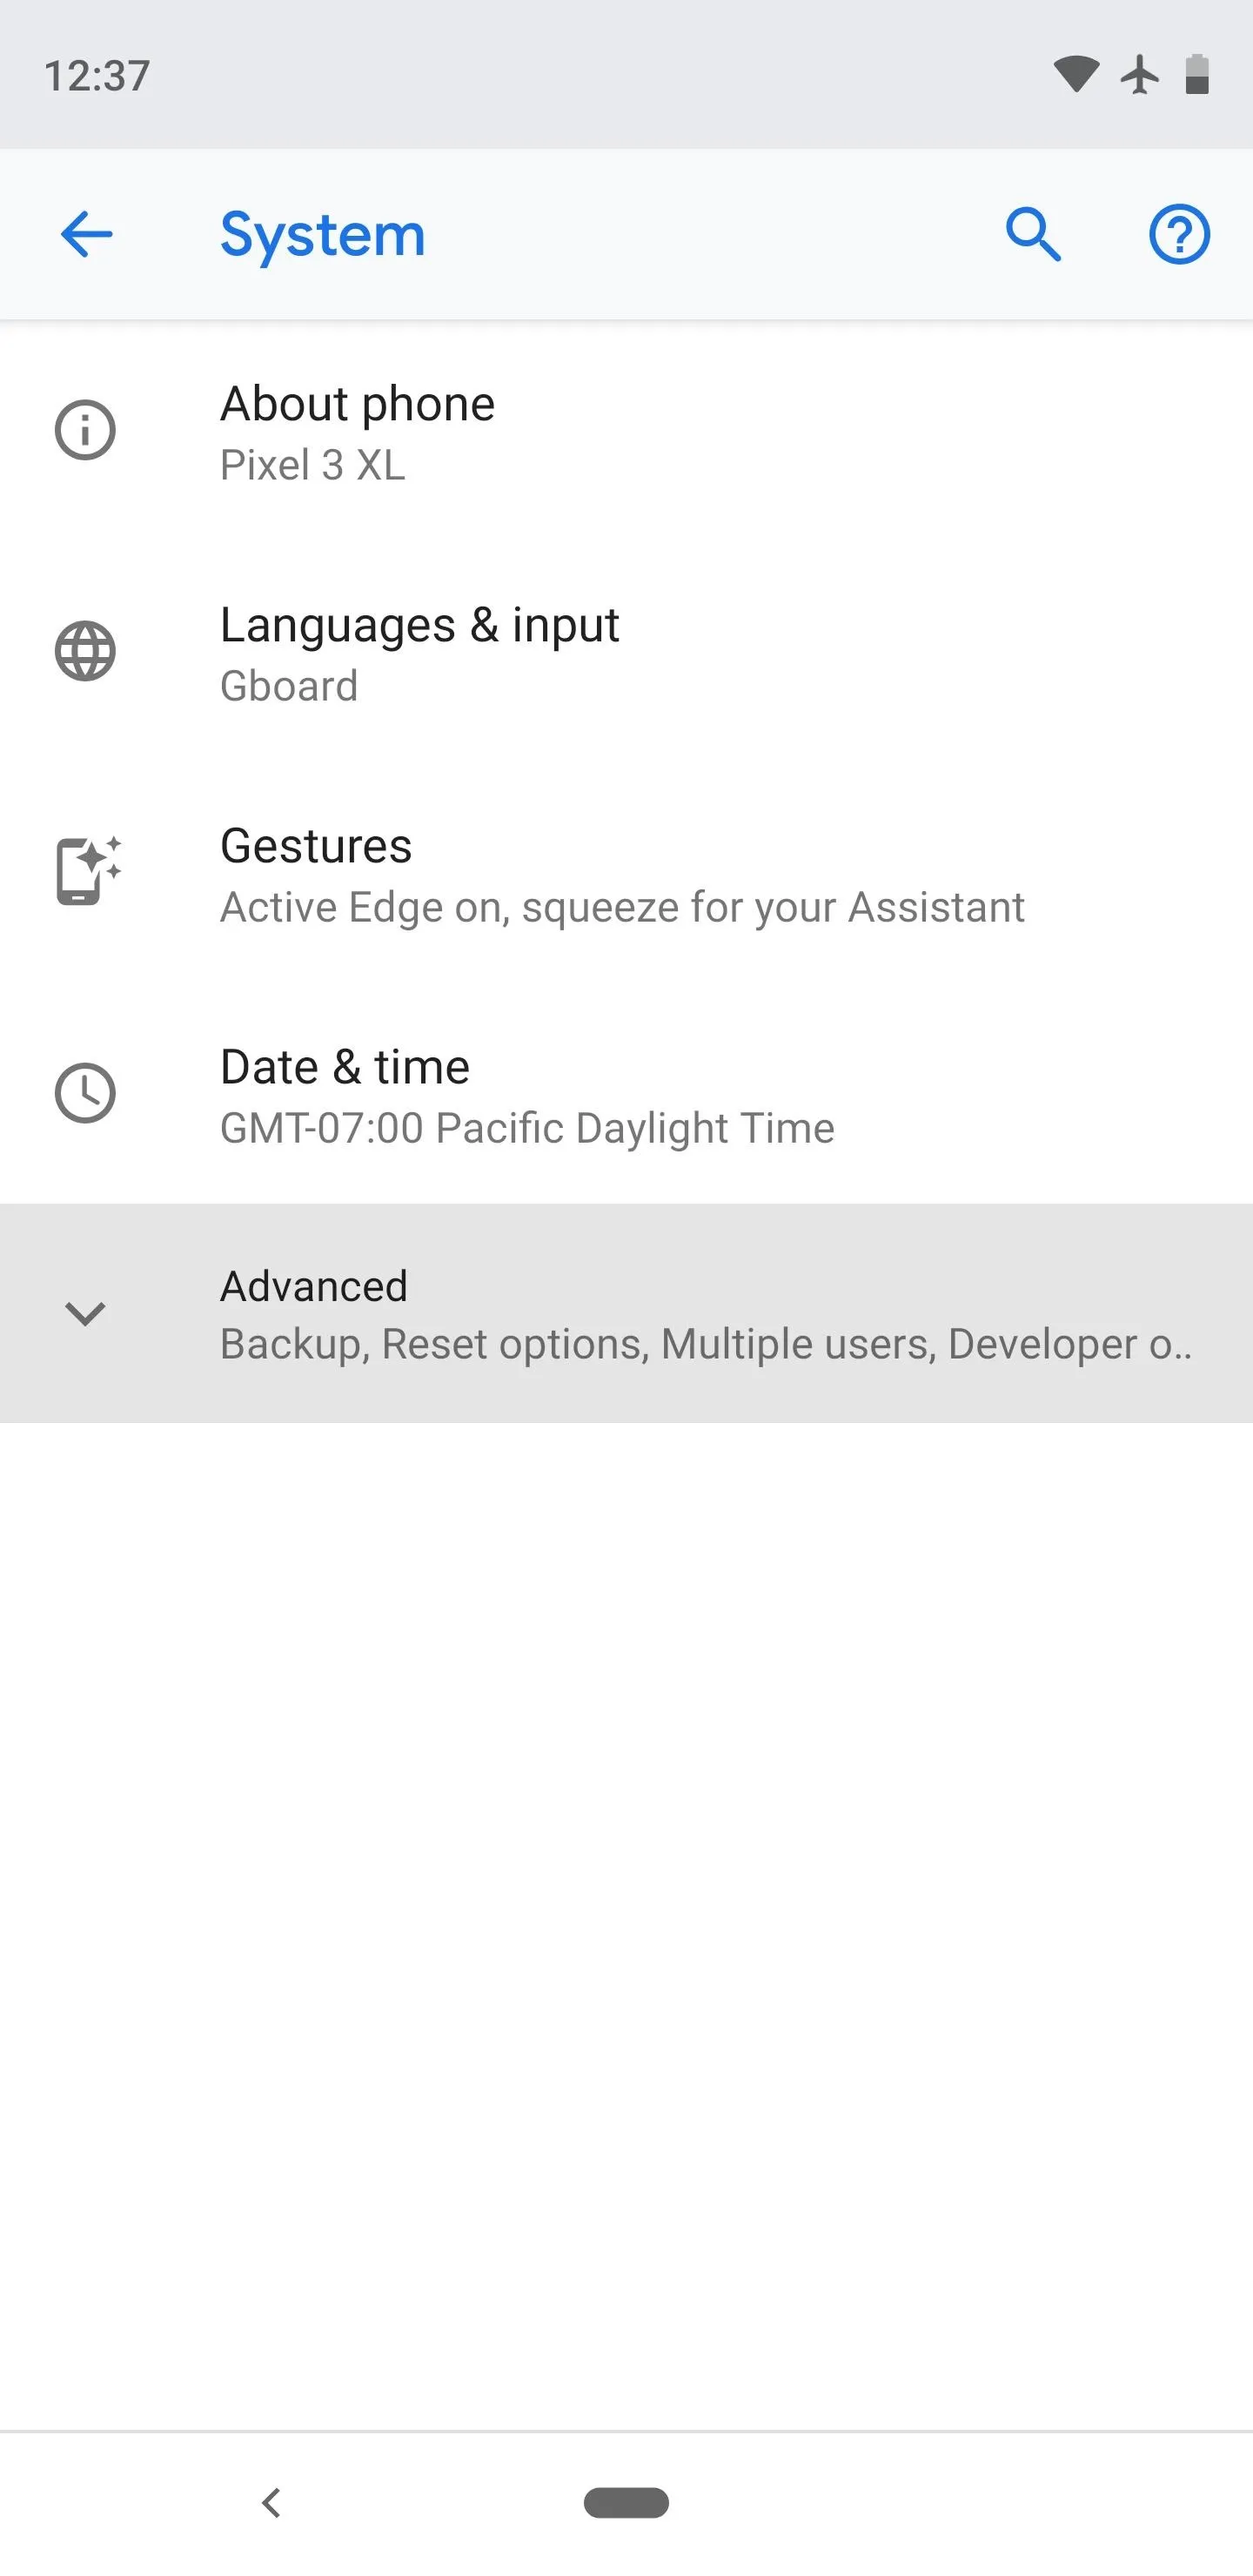
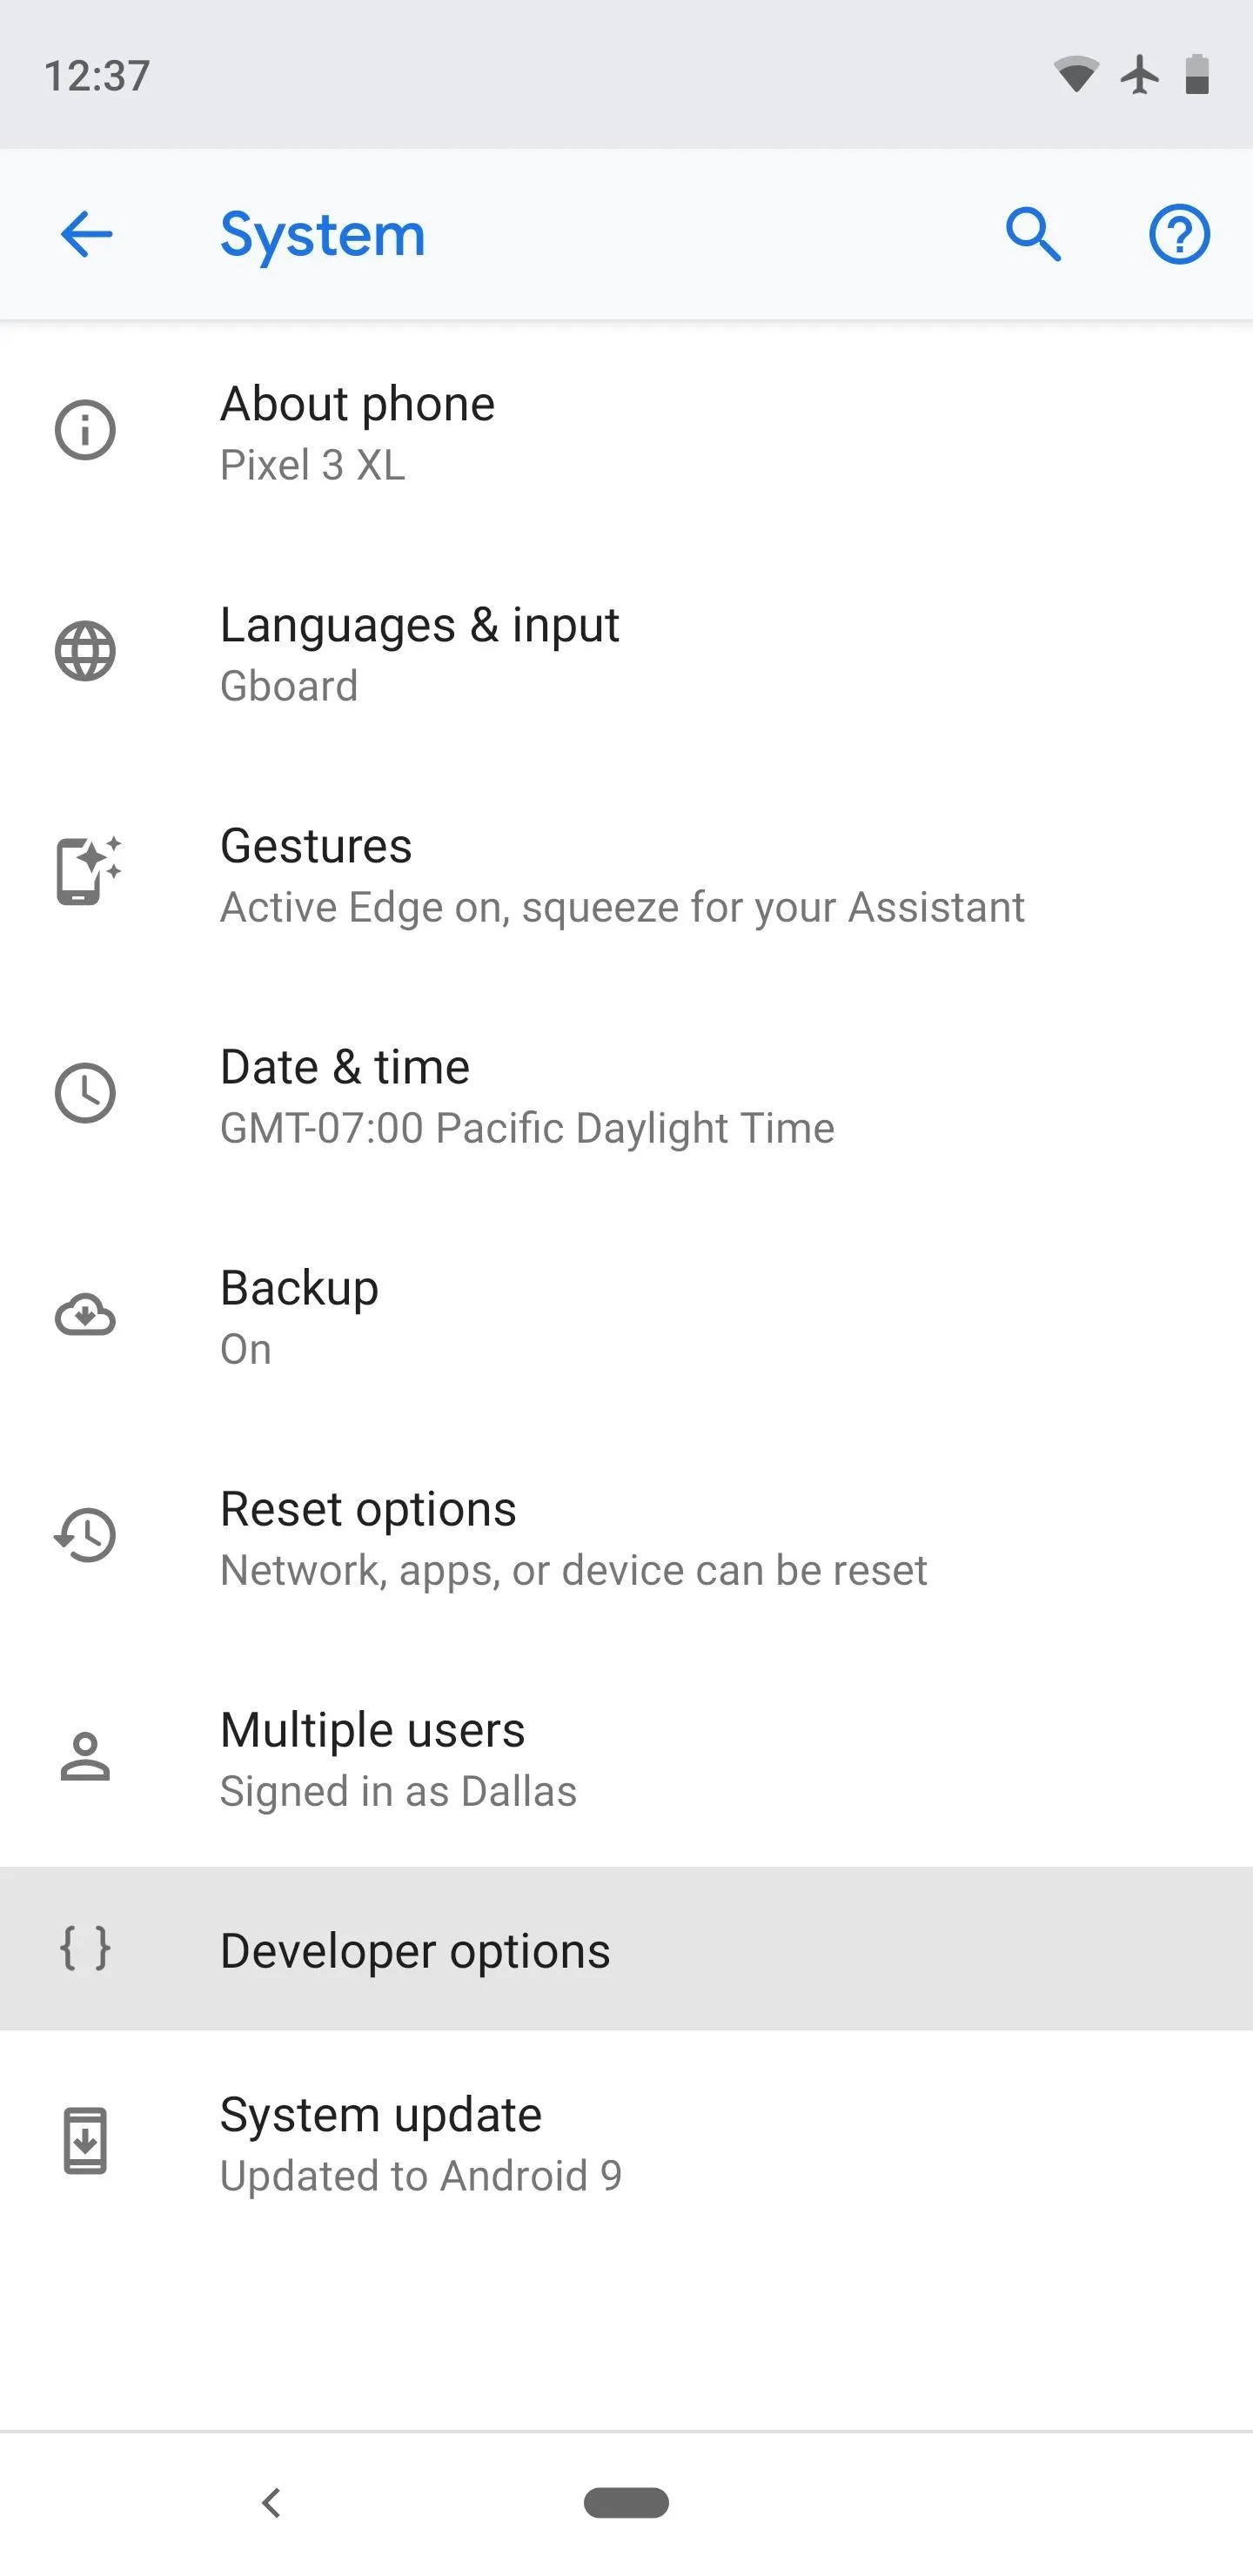
Now, head back to Settings –> System, but this time tap the "Advanced" option. This will expand the menu to reveal more options — scroll to the bottom of this list and select "Developer Options." From there, tap the "OEM unlocking" option to toggle it on, then press "OK" on the popup and enter your lock screen PIN or password.
Boot into Bootloader Mode
From here, the bulk of the remaining work will be done with a computer using Fastboot commands. In order to send Fastboot commands to your phone, you'll need to put it into Bootloader mode.
To do that, long-press the power button to bring up the power menu. Choose "Reboot," then immediately press and hold the volume down button on the side of your phone. Keep holding the button down until you're taken to a screen that looks like the picture below — this is Bootloader mode. Just leave the phone on this screen and connect it to your computer using a USB data cable.
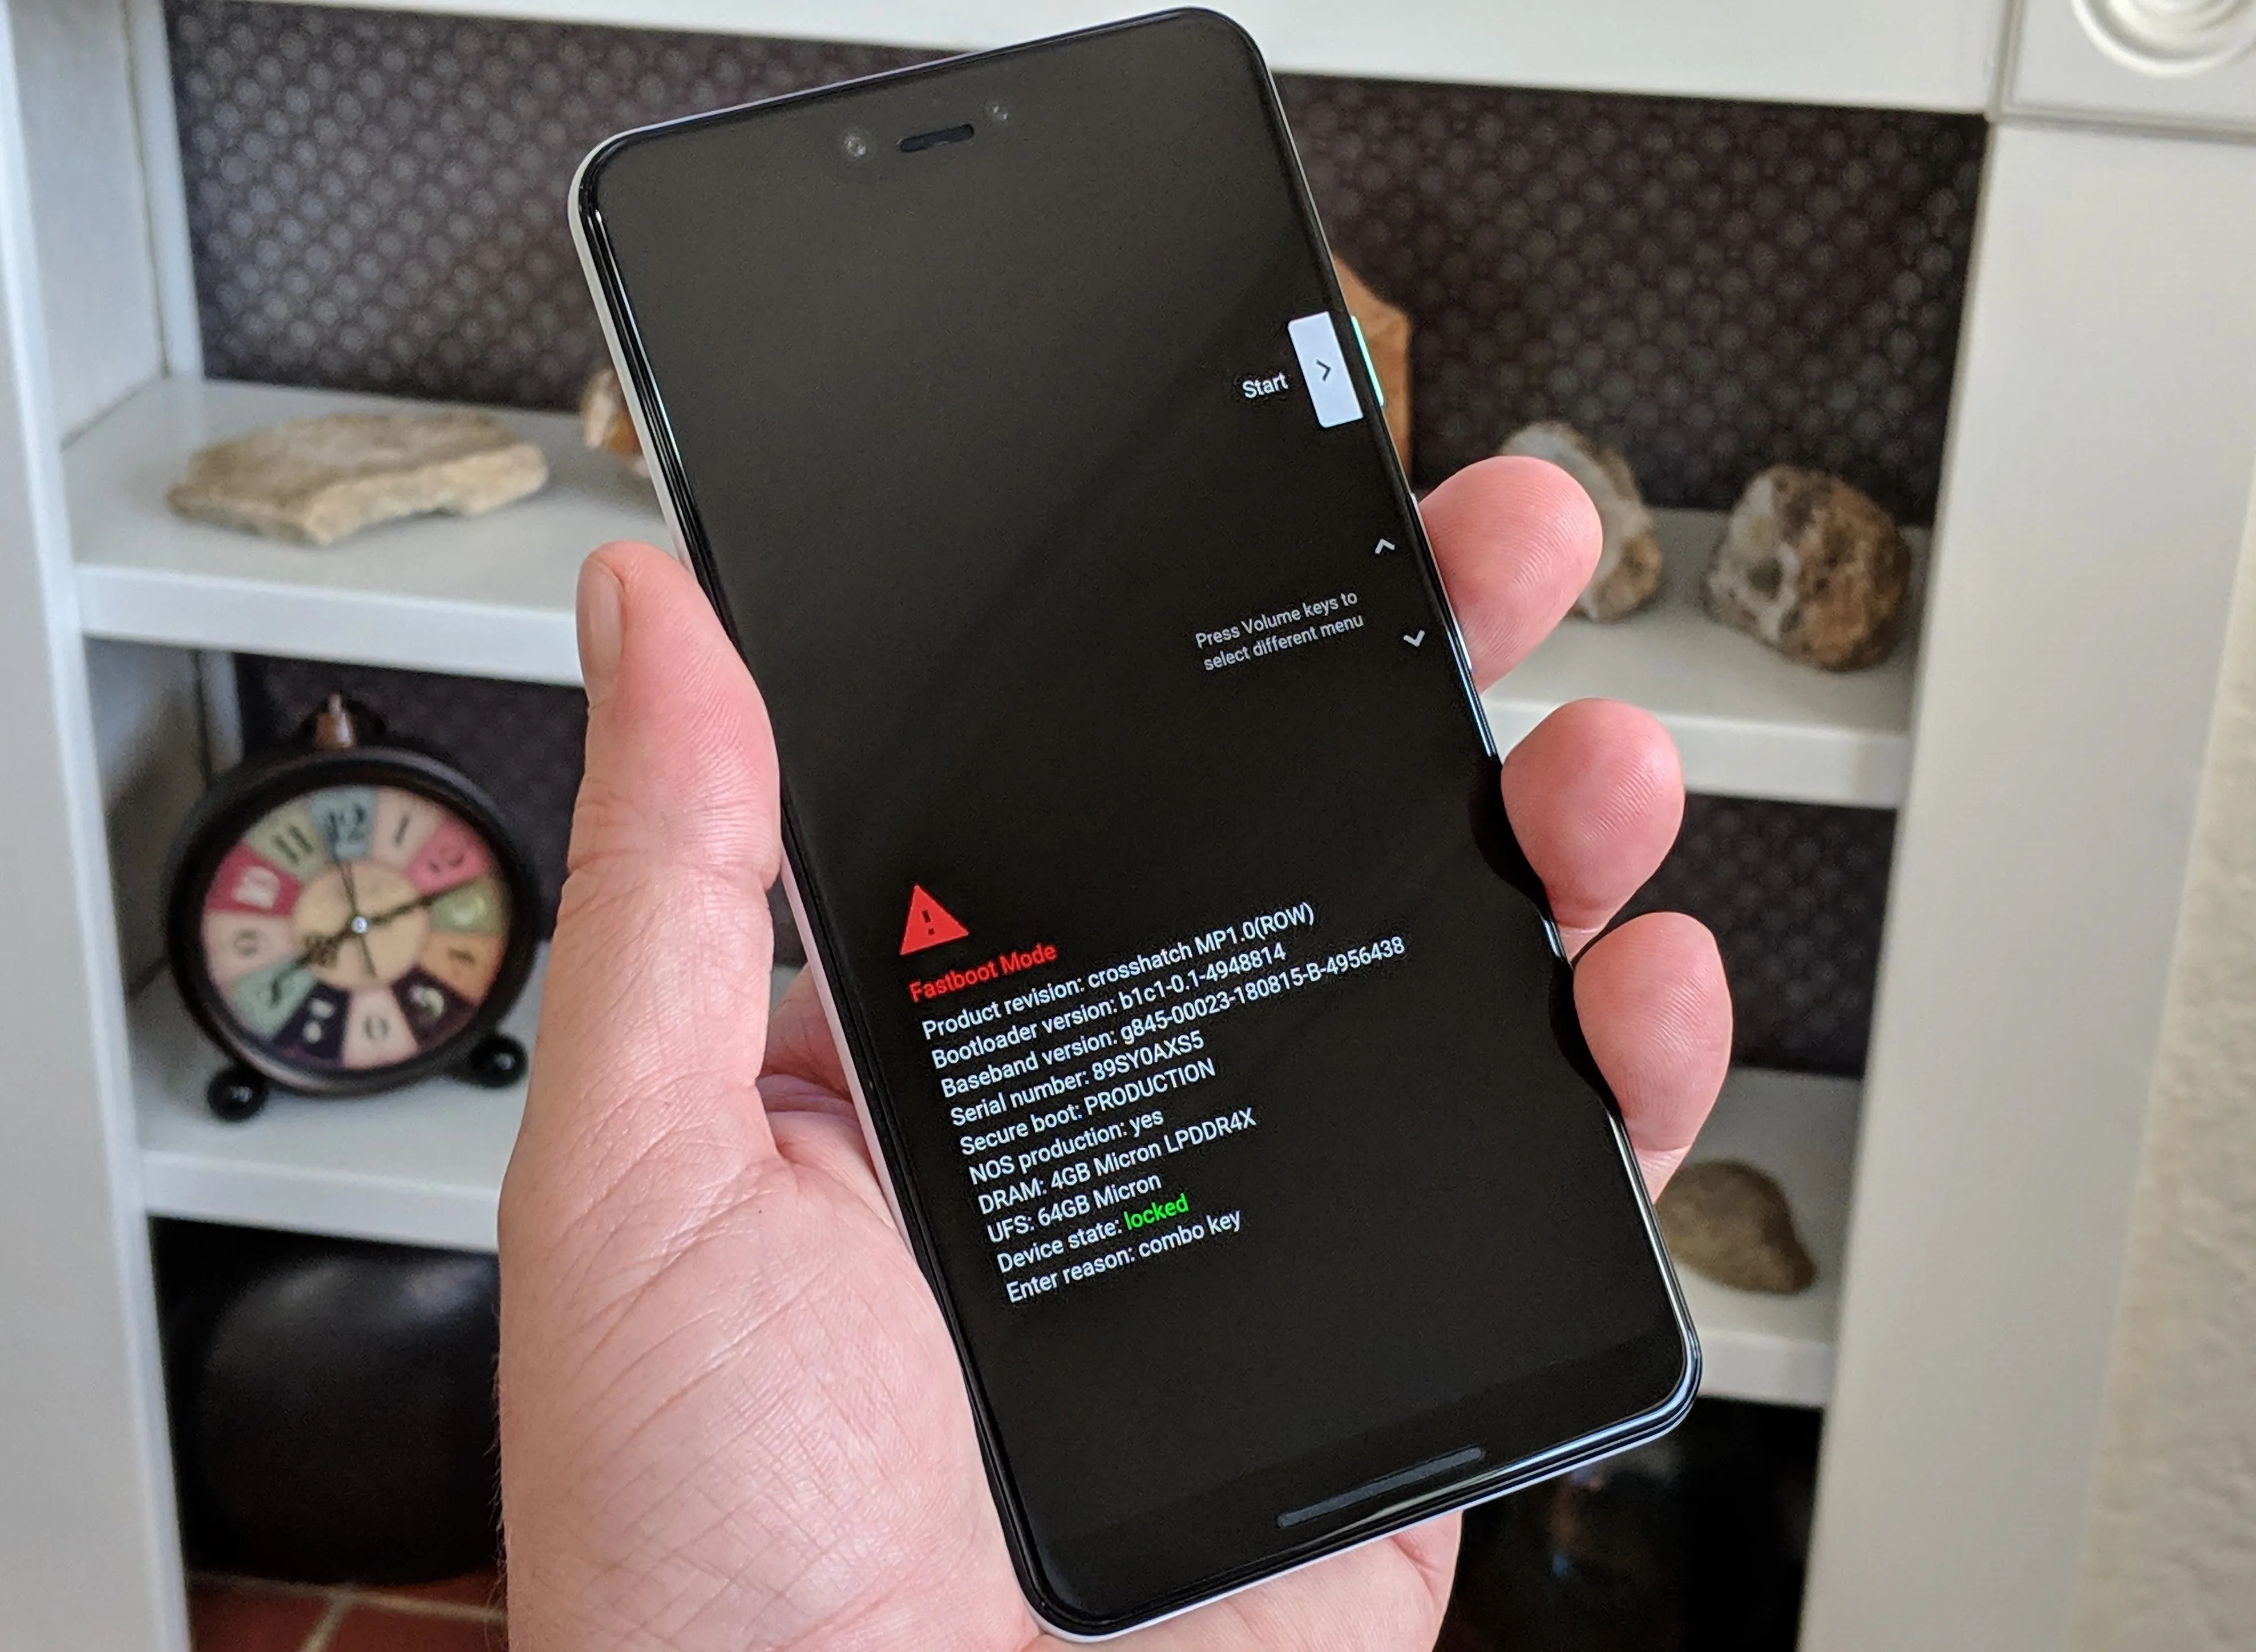
Bootloader mode on the Pixel 3 XL.
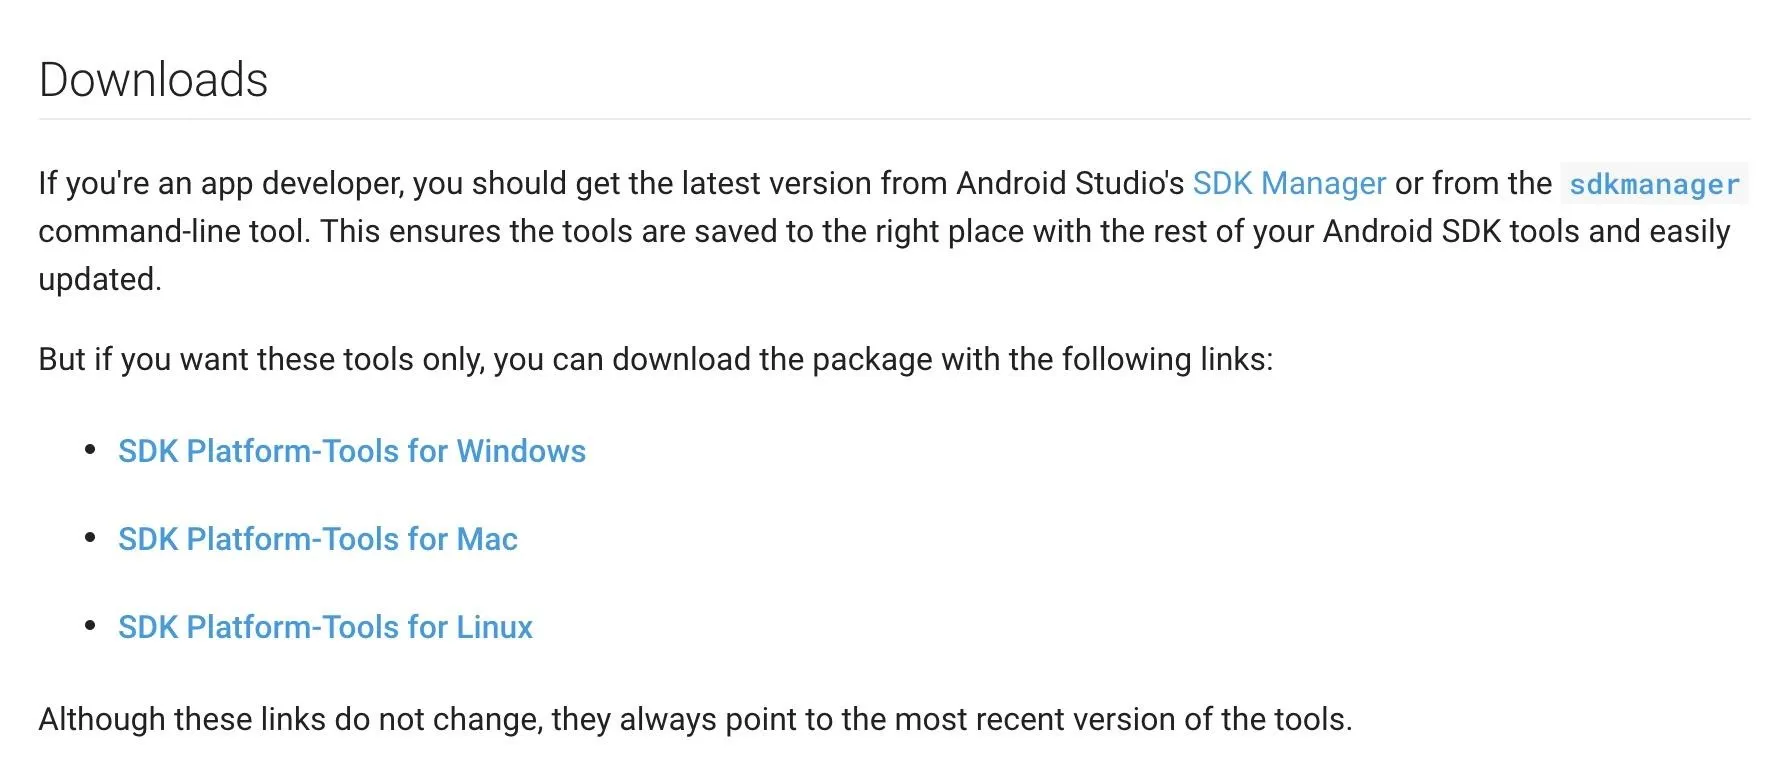
Get the SDK Platform-Tools
On your computer now, you'll need a tiny piece of software in order to send commands to your phone. Google's SDK Platform-Tools are now available as a standalone download, so it's not as complicated as it's been in the past. Simply download the ZIP for your operating system from the link below, then move the ZIP to your desktop and extract it.
Open a Command Window in the Right Directory
Next, you'll need to open a command prompt or terminal window inside of the platform-tools folder you just extracted to your desktop. To do that, you'll need to know the full file location of the platform-tools folder.
If you're on Windows, open the platform-tools folder on your desktop, then click the bar at the top of the Explorer window to reveal the folder's location. Copy this to your clipboard.
If you're on Mac, open the platform-tools folder, then open any of the other folders inside of it. Right-click any empty space, then choose "Get Info." Highlight the text to the right of the "Where" field, then right-click and copy it.
If you're on Linux, open the platform-tools folder on your desktop, then right-click any empty space and choose "Open in terminal."
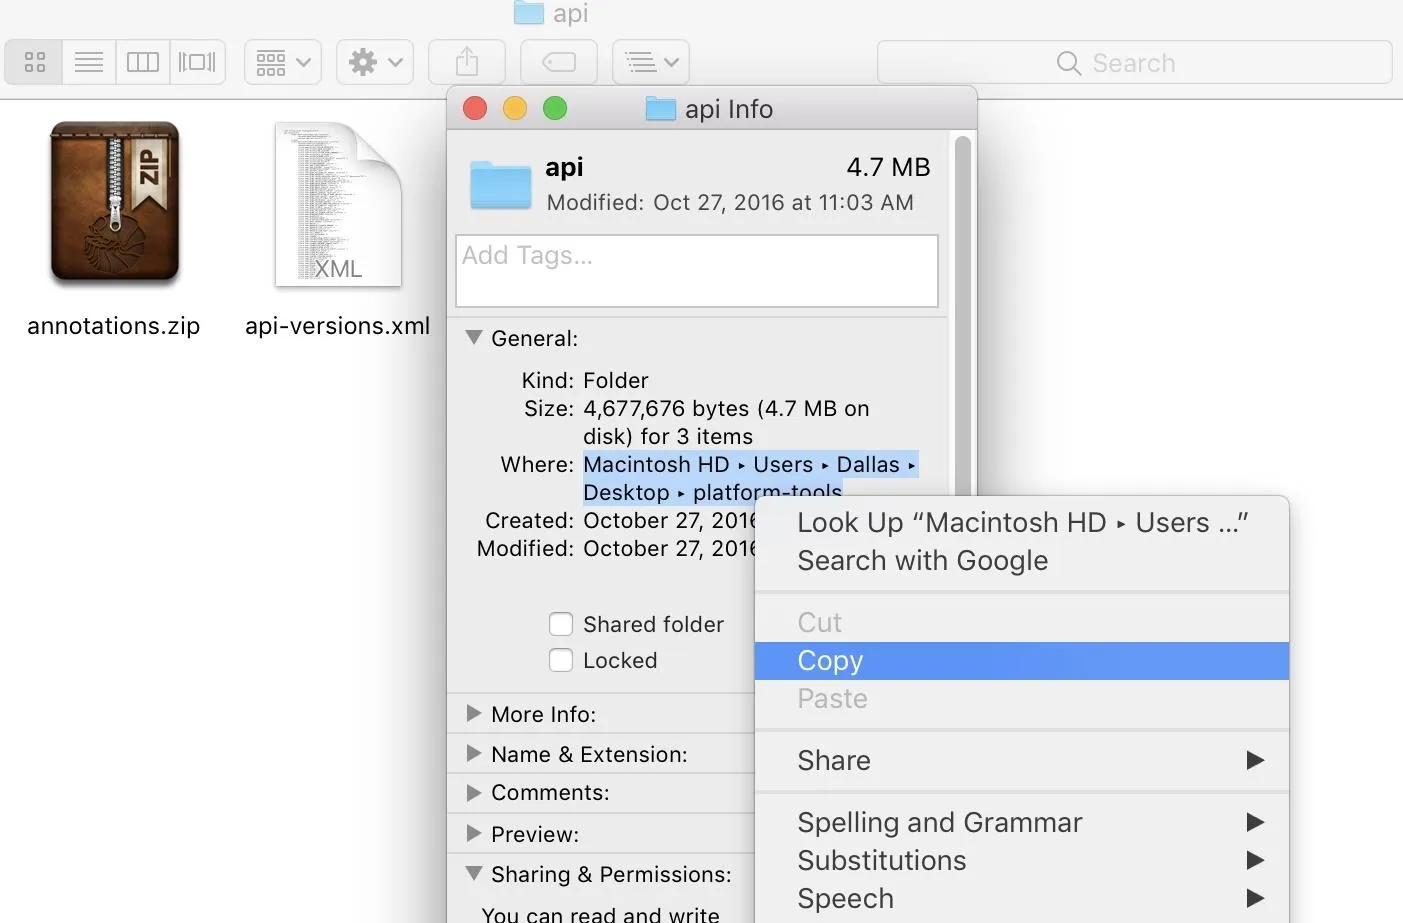
Copying the file location of the platform-tools folder on Mac.
Now it's time to open a command prompt or terminal window. If you're on Linux, you can skip ahead to the next step.
If you're on Windows, press the Windows button on your keyboard, then type "cmd" and hit enter. If you're on Mac, open Spotlight Search by pressing command and the space bar simultaneously, then type "terminal" and hit enter.
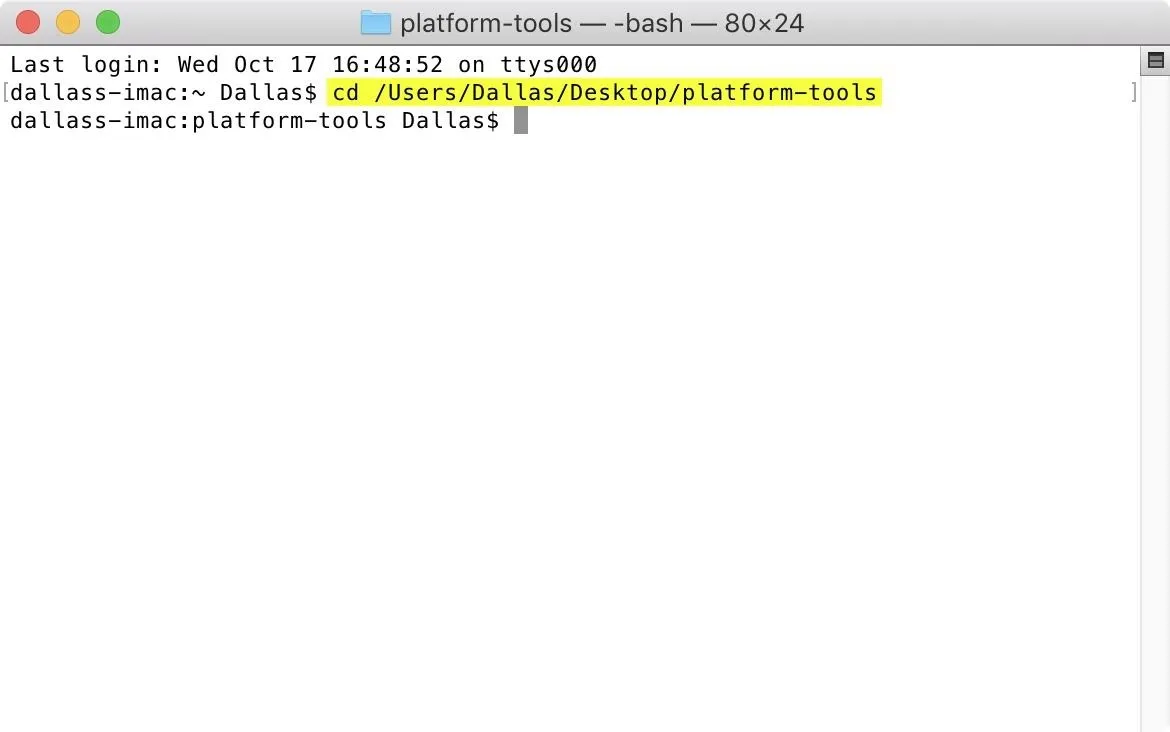
Next, change directories to the platform-tools folder by typing "cd" into the command prompt, then adding a space. Finally, paste in the file location you copied earlier, then hit enter.
Unlock the Bootloader
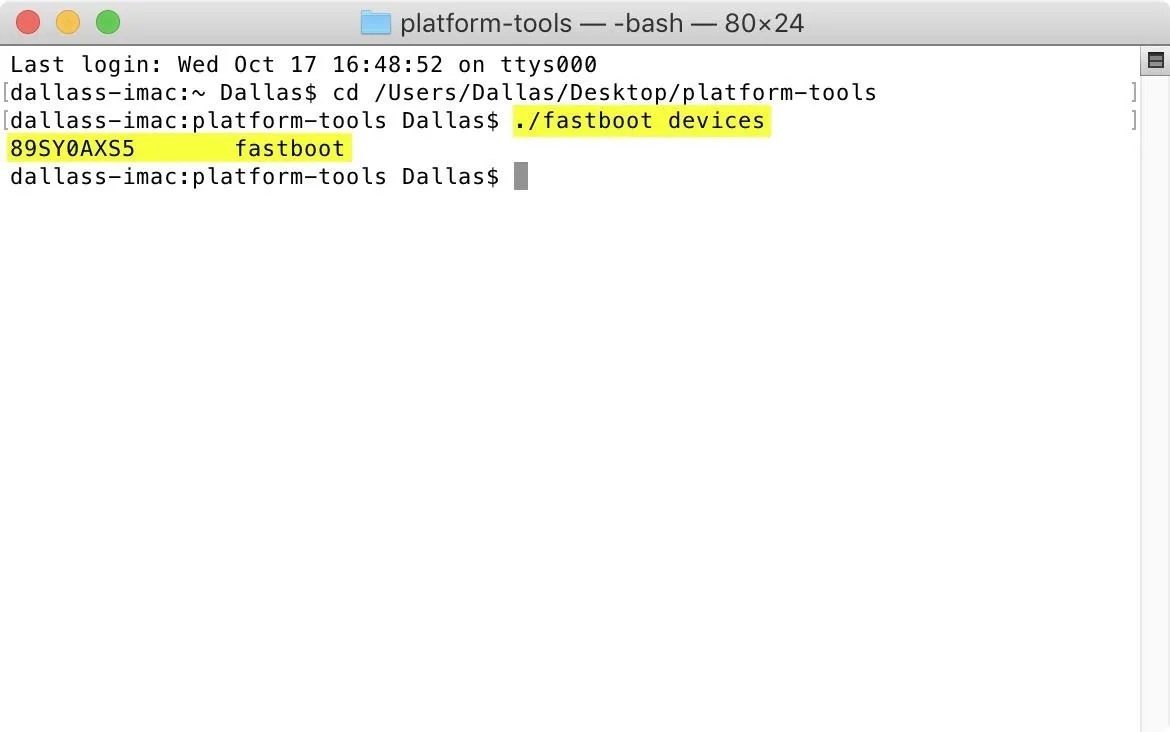
Now, enter the following command into the command prompt or terminal window to check the Fastboot connection:
fastboot devicesIf you're on Mac or Linux, you might get an error after sending the above command. If so, send this one instead:
./fastboot devicesThis should return a series of letters and numbers followed by the word "fastboot." If so, you're good to go. If you get any errors, check out our guide for setting up ADB and fastboot for more help.
Now, enter the following command to initiate the bootloader unlocking process:
fastboot flashing unlockAgain, if you're on Mac or Linux, you may get an error with the above command. If so, just enter this command instead:
./fastboot flashing unlock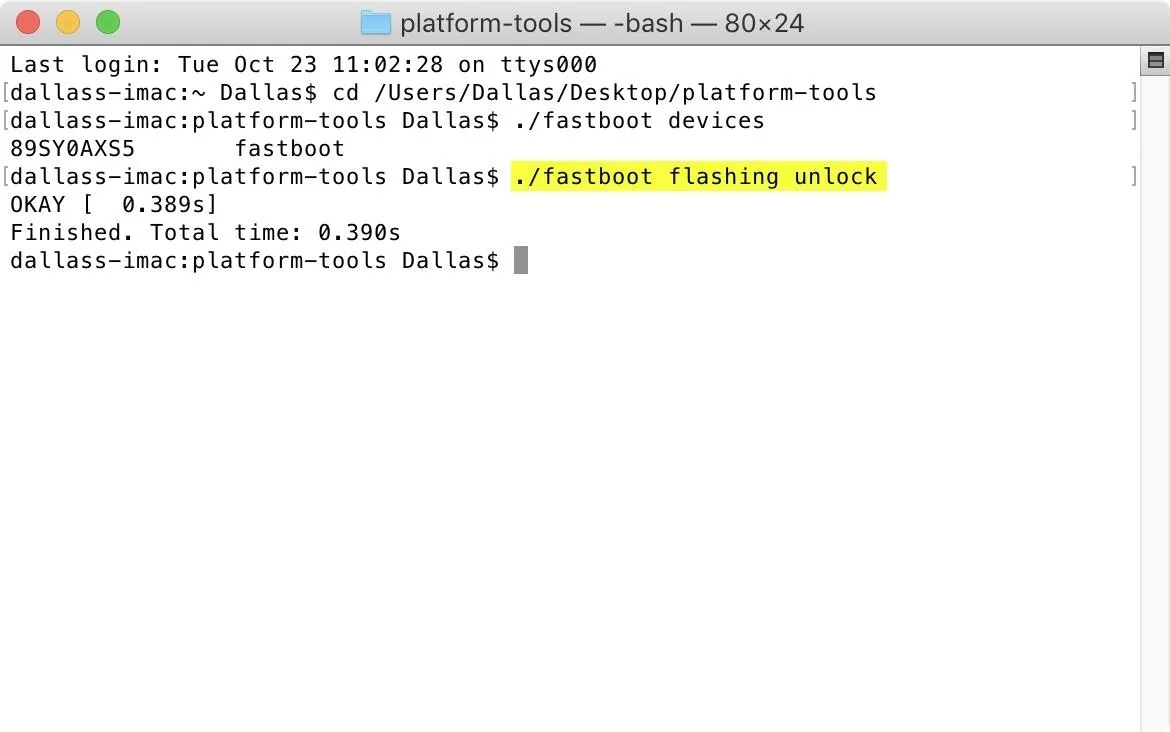
A new menu will appear on your phone. Use the volume keys to highlight the "Unlock the bootloader" option, then press the power button to select it. Your screen will go black for about 5 seconds, then the Bootloader menu will reappear. When this happens, press the power key to boot your phone back into Android.
Dallas Thomas/Gadget Hacks
When you get back up, you'll have to run through initial setup again. So log into your Google account and repeat the process you went through when you first took your phone out of the box, then you'll be all set to start flashing custom images like TWRP, which will then enable you to root your phone and perform all sorts of mods.
If you're ready to root your phone, we'll soon have a guide on rooting with Magisk in a way that lets you easily apply OTA updates in the future.
- Follow Gadget Hacks on Pinterest, Reddit, Twitter, YouTube, and Flipboard
- Sign up for Gadget Hacks' daily newsletter or weekly Android and iOS updates
- Follow WonderHowTo on Facebook, Twitter, Pinterest, and Flipboard
Cover image and screenshots by Dallas Thomas/Gadget Hacks


Comments
Be the first, drop a comment!