


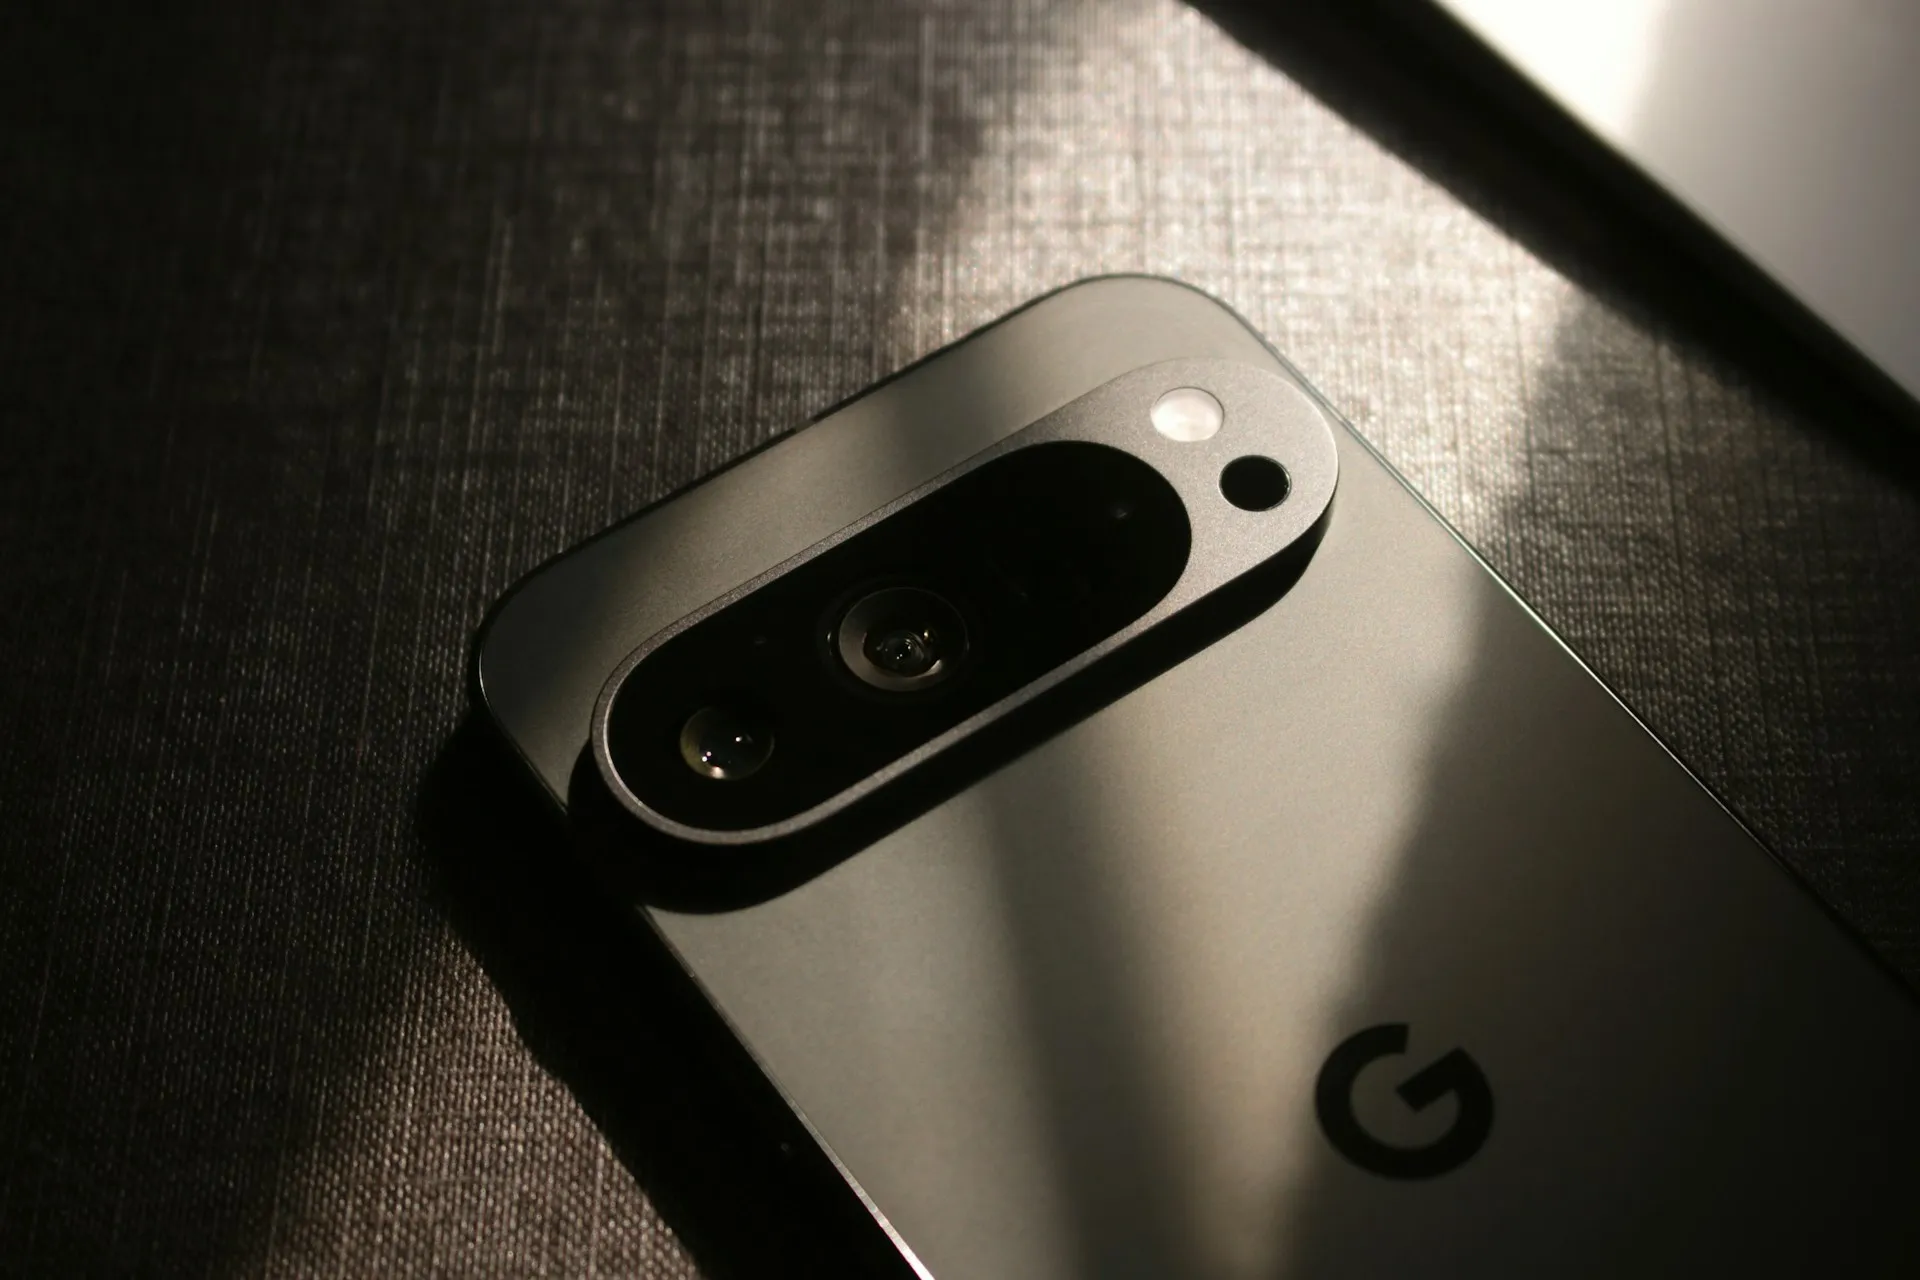
The Pixel 5 is a great value proposition in this era of $1,500 phones. With its reasonable price tag, fully open-sourced software, and unlockable bootloader, it's also an ideal phone for rooting.
The process of rooting the Pixel 5 is a tried and true method: Unlock the bootloader, patch the stock boot image with Magisk Manager, then flash the patched image in Fastboot Mode. But there are some new hurdles if you still want to pass all the latest SafetyNet checks, so I'll cover every step of the process in detail to help you avoid any issues.
- On Your Phone? Open These Instructions in Split-Screen View
Requirements
- Google Pixel 5 (any non-Verizon model)
- Windows, Mac, or Linux computer
- USB data cable
Back Up Your Data
Save documents and media files externally
This process will wipe your device, so make sure any important data is backed up. Installed apps generally back up to your Google account, so really, the things to worry about are documents, photos, videos, and music files.
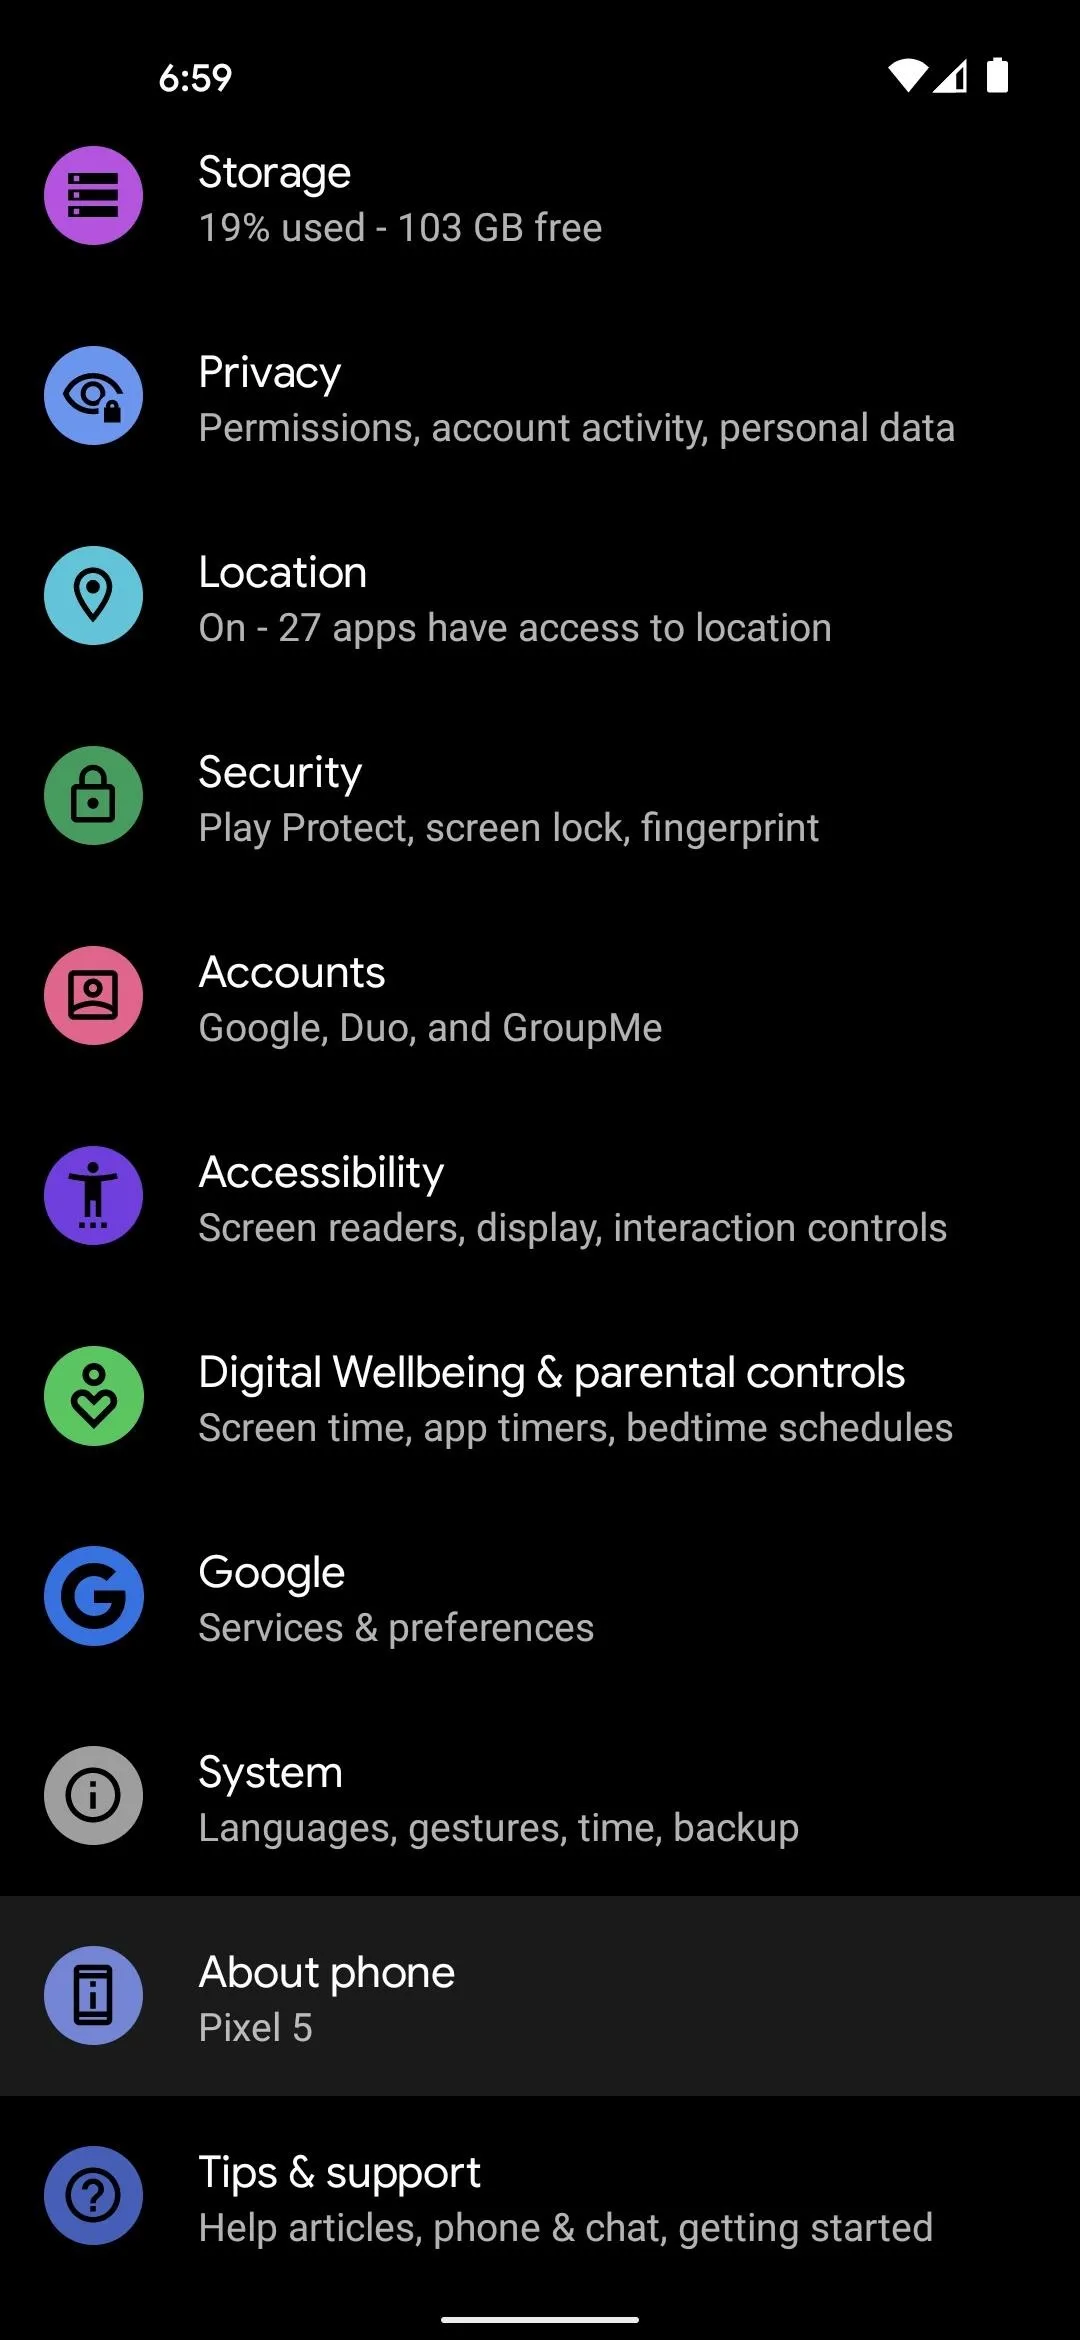
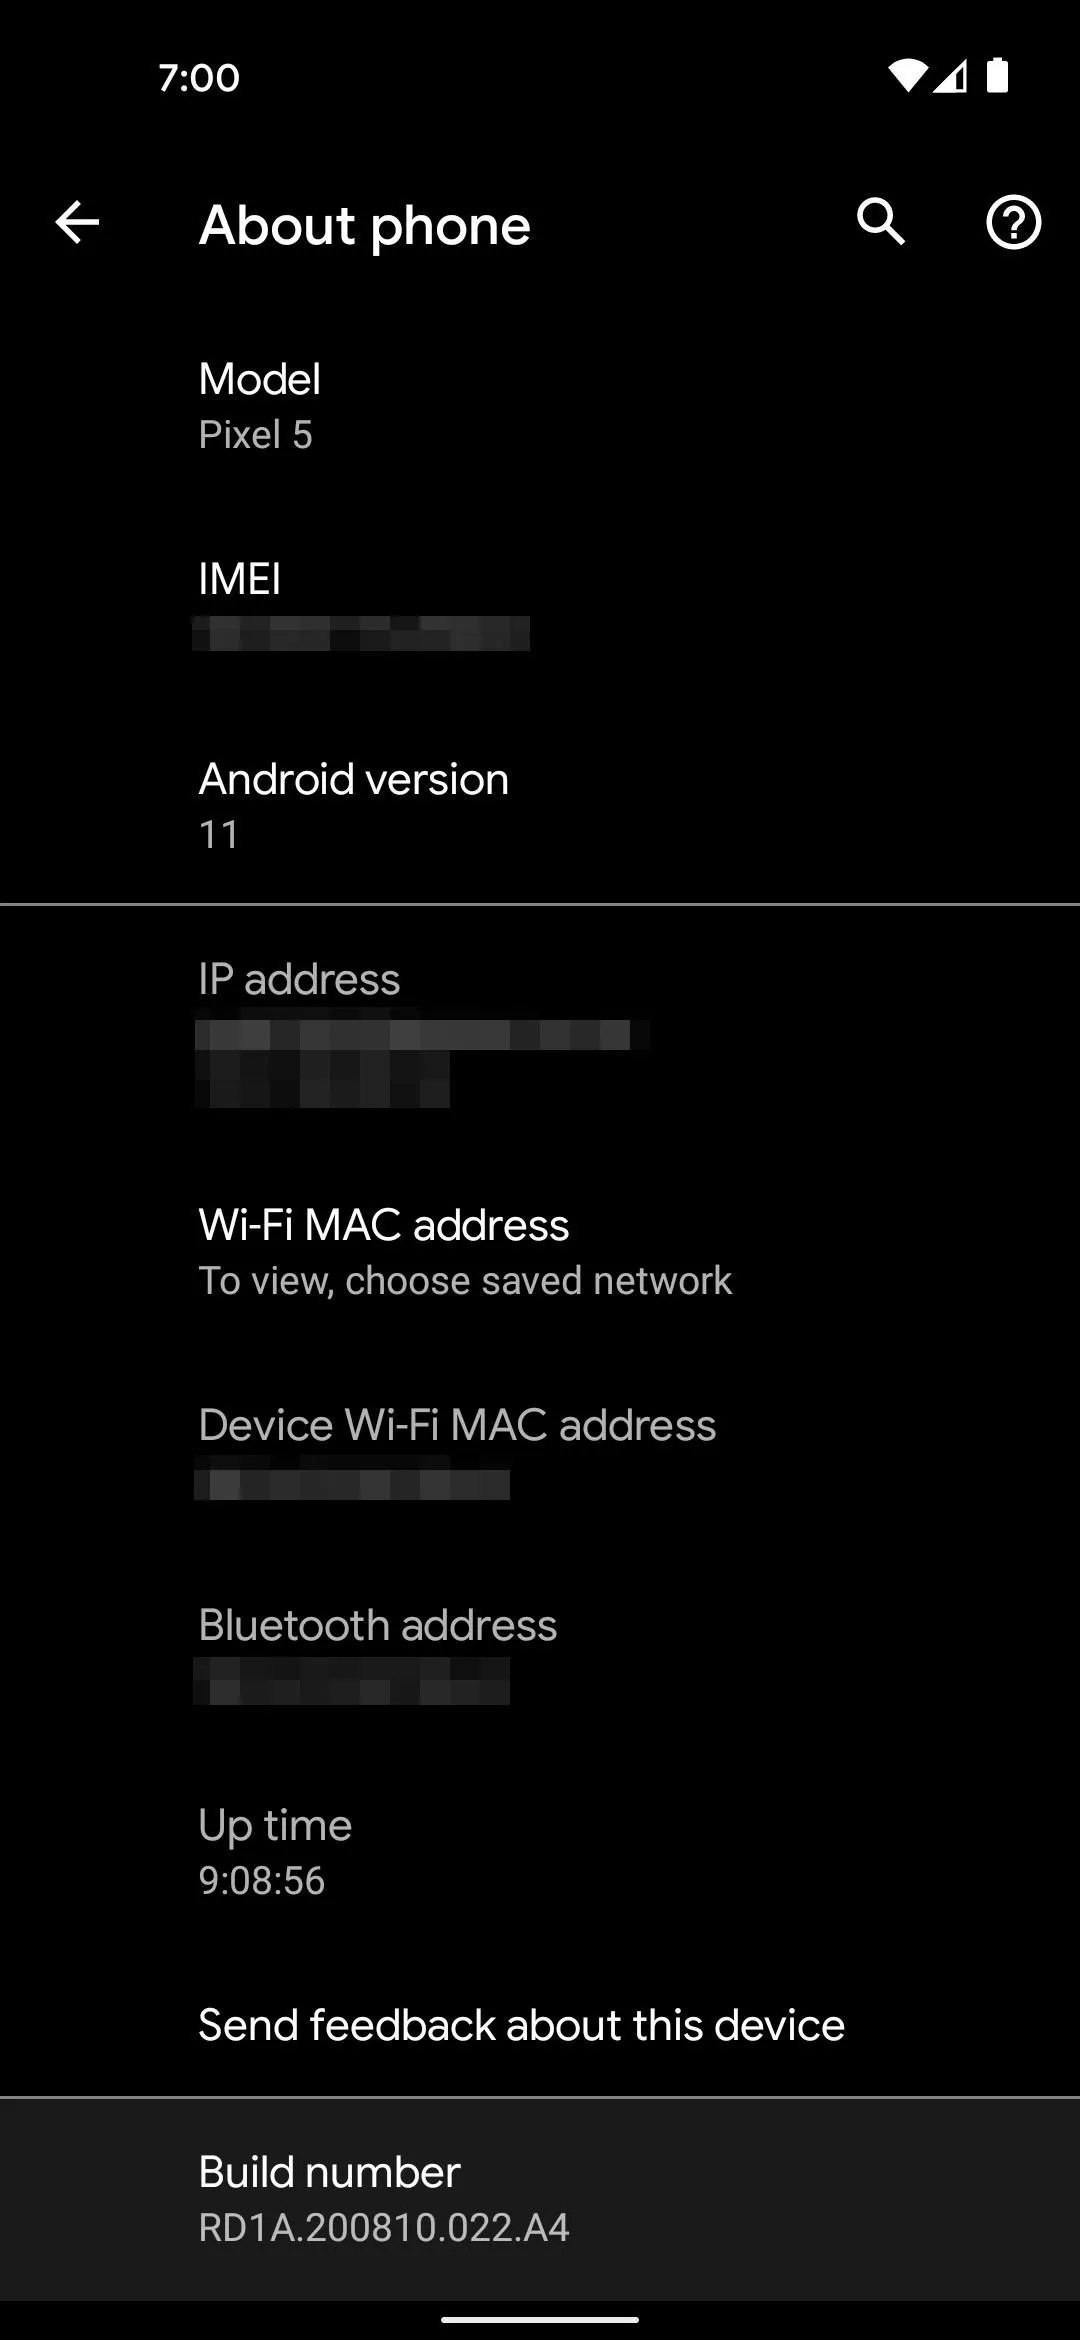
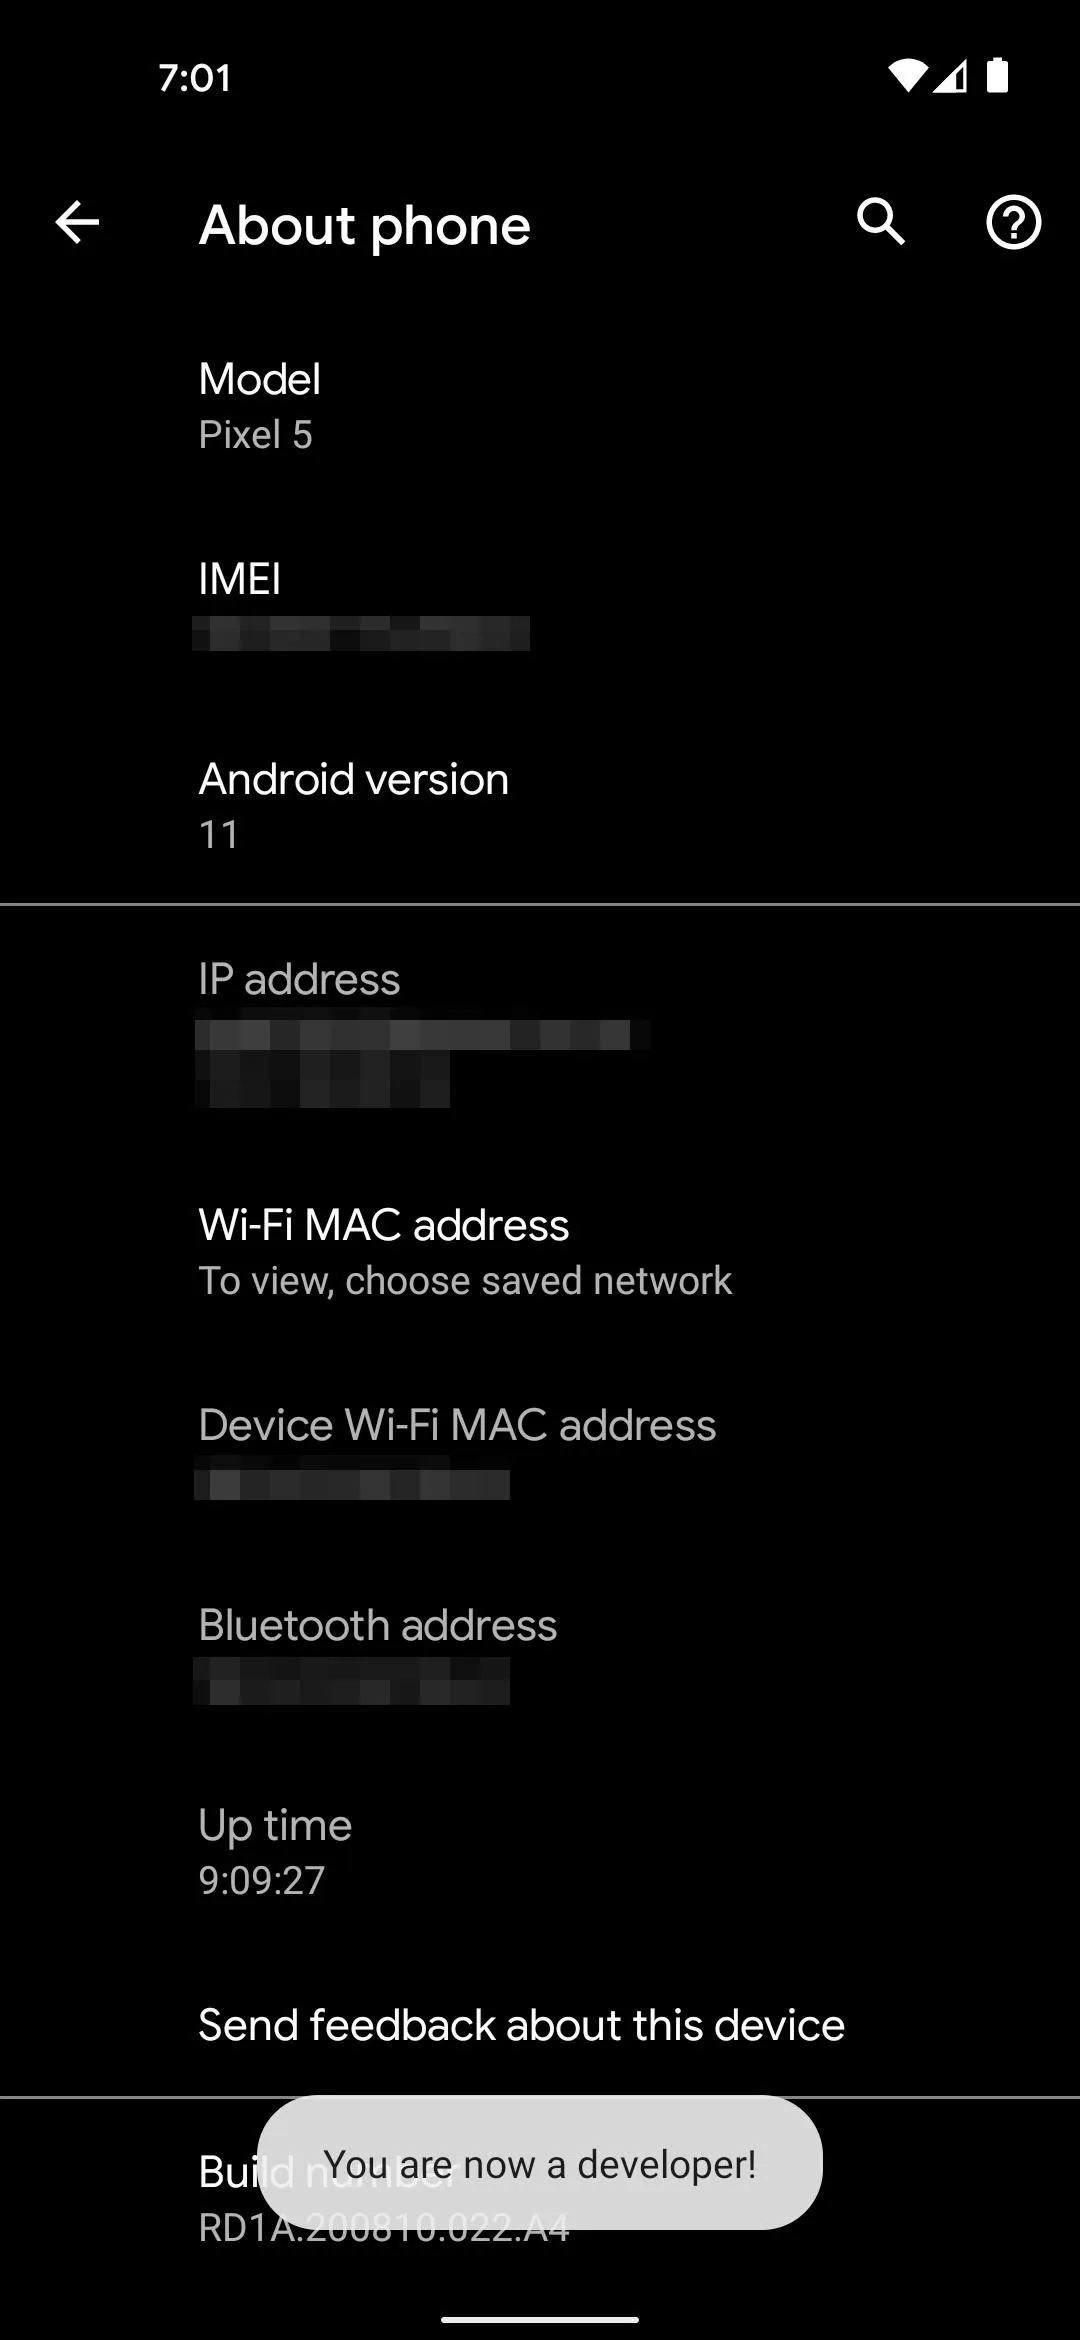
Enable Developer Options
Settings –> About phone –> tap "Build number" seven times –> enter PIN
Before you can root, you'll need to unlock the phone's bootloader, which is a piece of software that loads up the OS every time you boot up. By default, it will only load firmware signed by Google, but once it's unlocked, it will load anything you tell it to — in this case, the modified boot image that will root your phone.
However, to be able to unlock the bootloader, you'll need to change a hidden setting.
So to start, open Settings and select "About phone," then tap "Build number" seven times in rapid succession and enter your lock screen passcode to confirm. This will unlock the hidden "Developer options" menu.
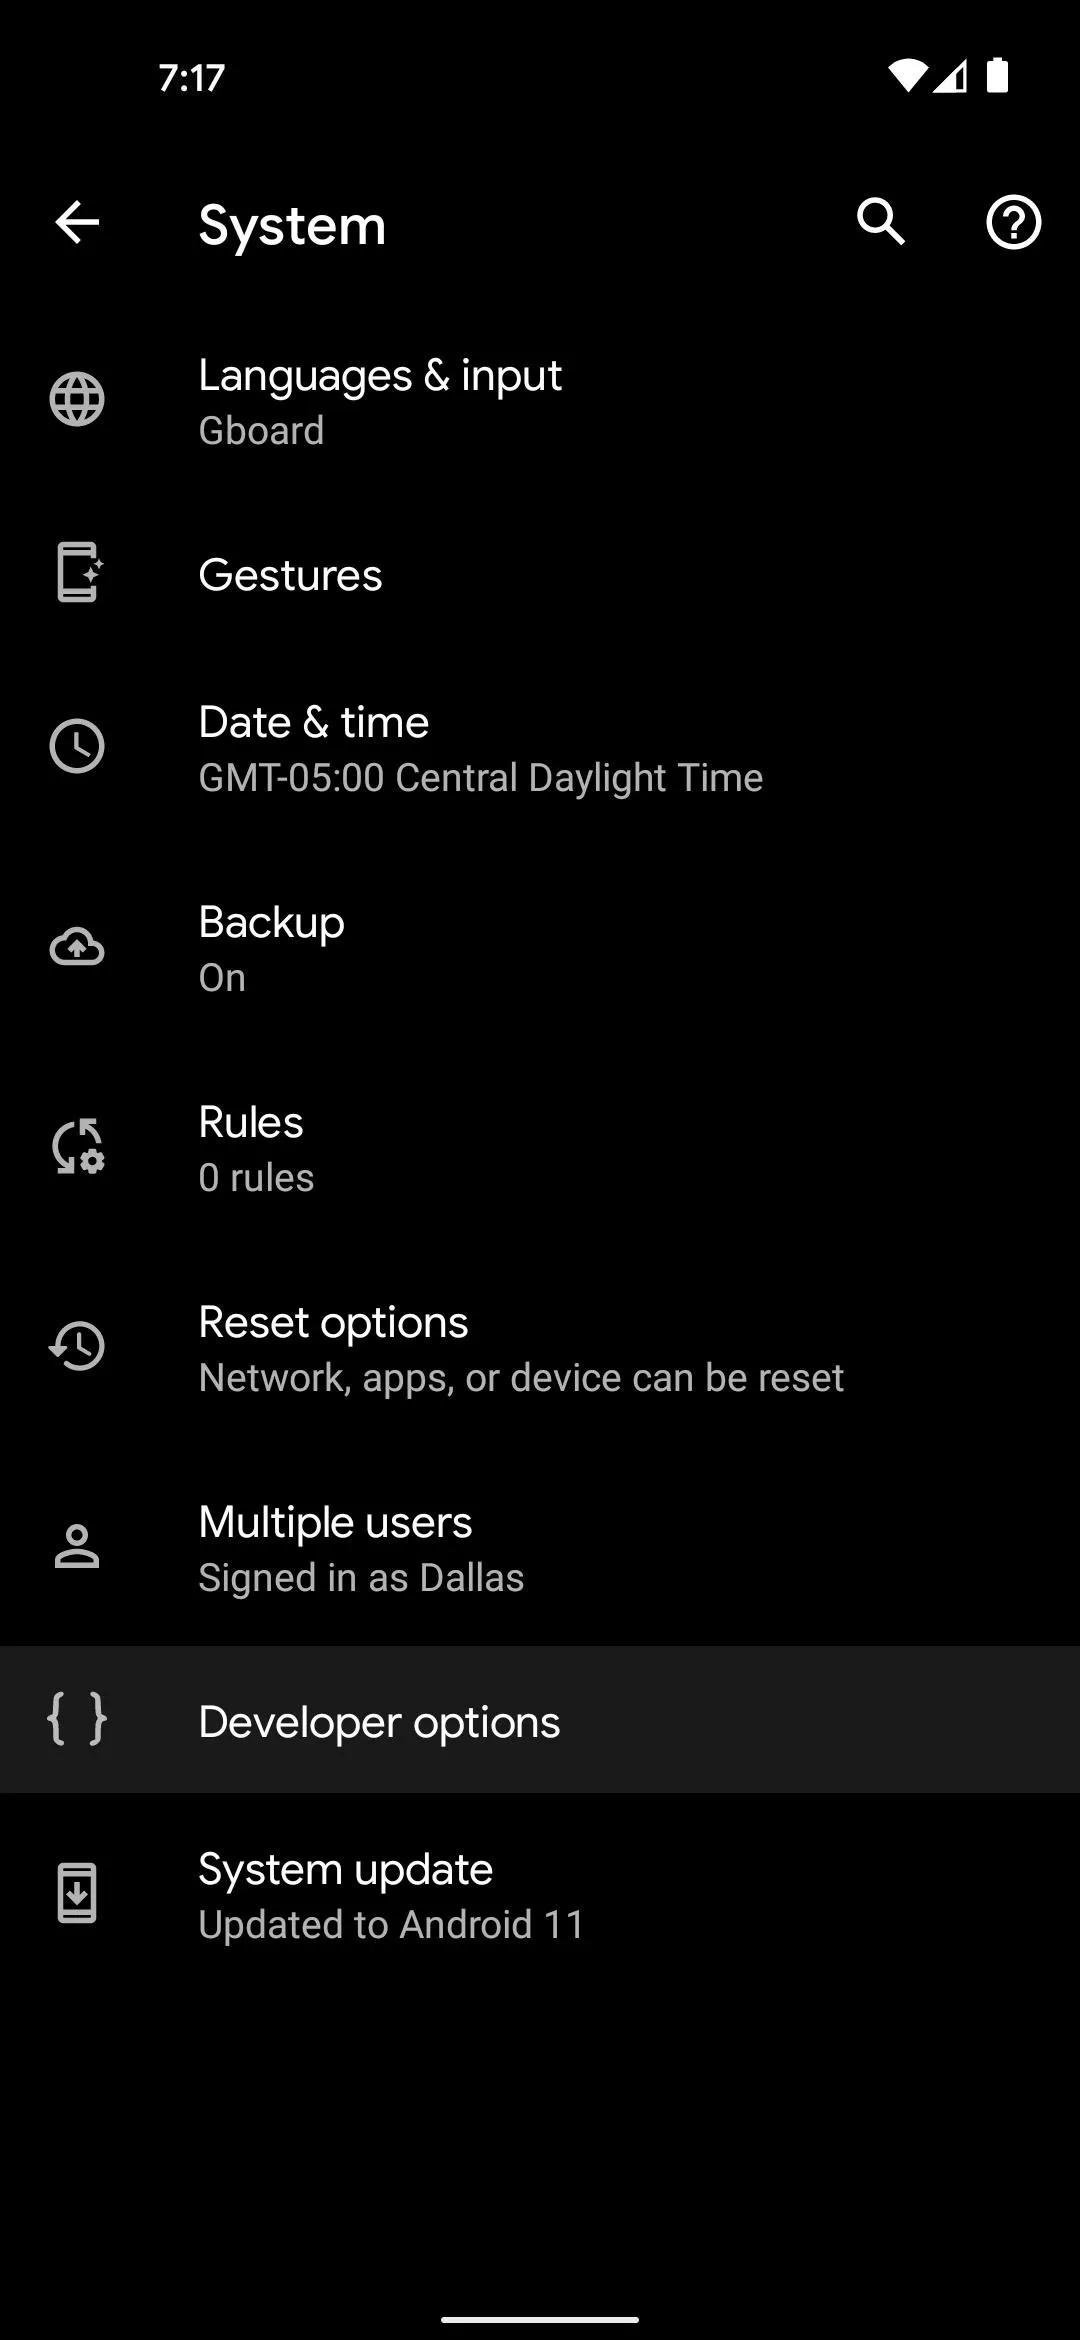
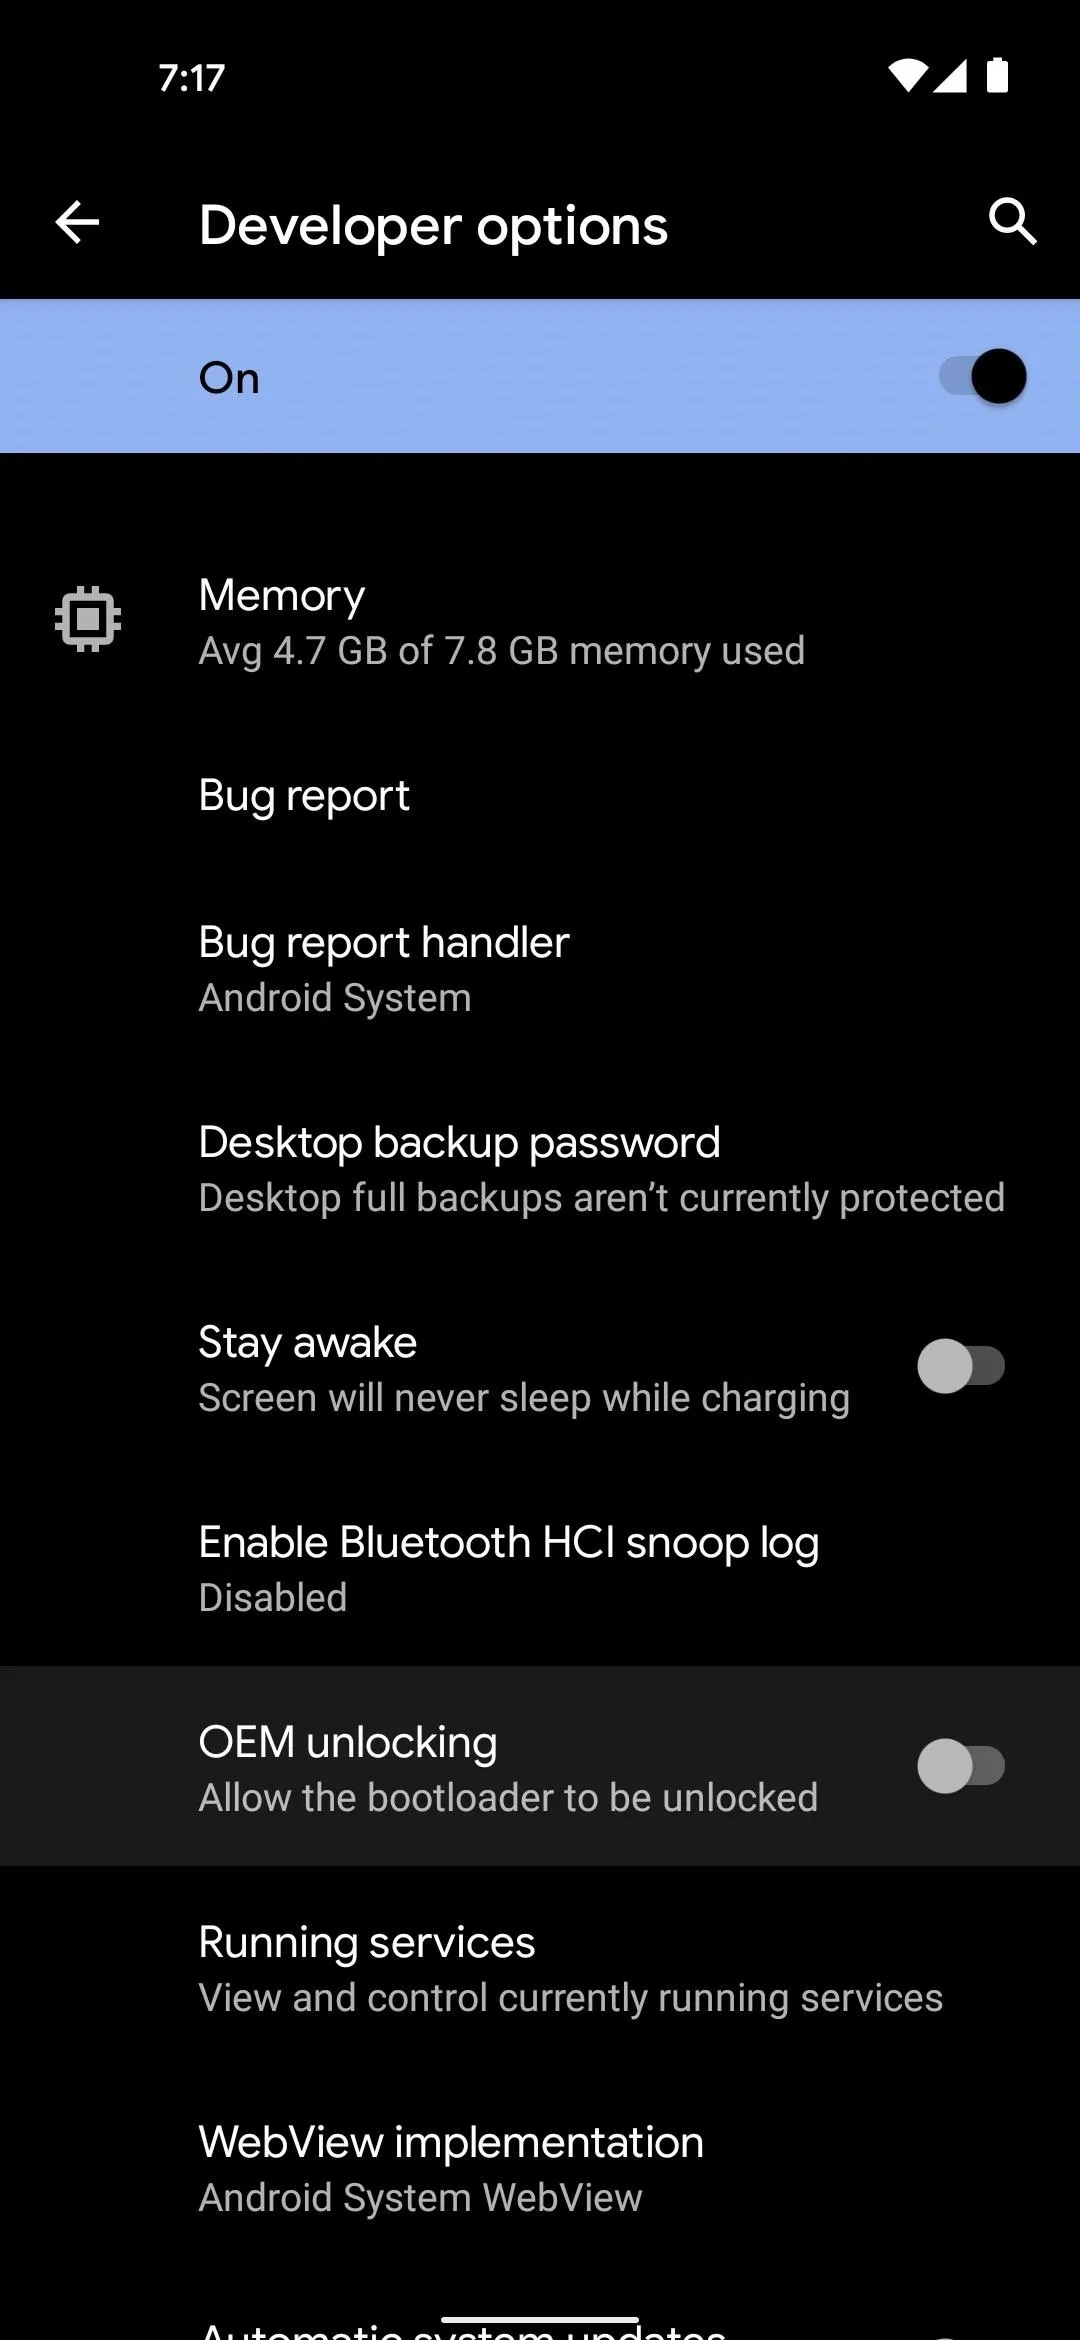
Enable OEM Unlocking
Settings –> System –> Advanced –> Developer Options –> OEM Unlocking –> Enable
Now, head back out to the main Settings menu and scroll down towards the bottom. Select "System," then tap "Advanced," and you'll see "Developer options" at the bottom — go ahead and tap it.
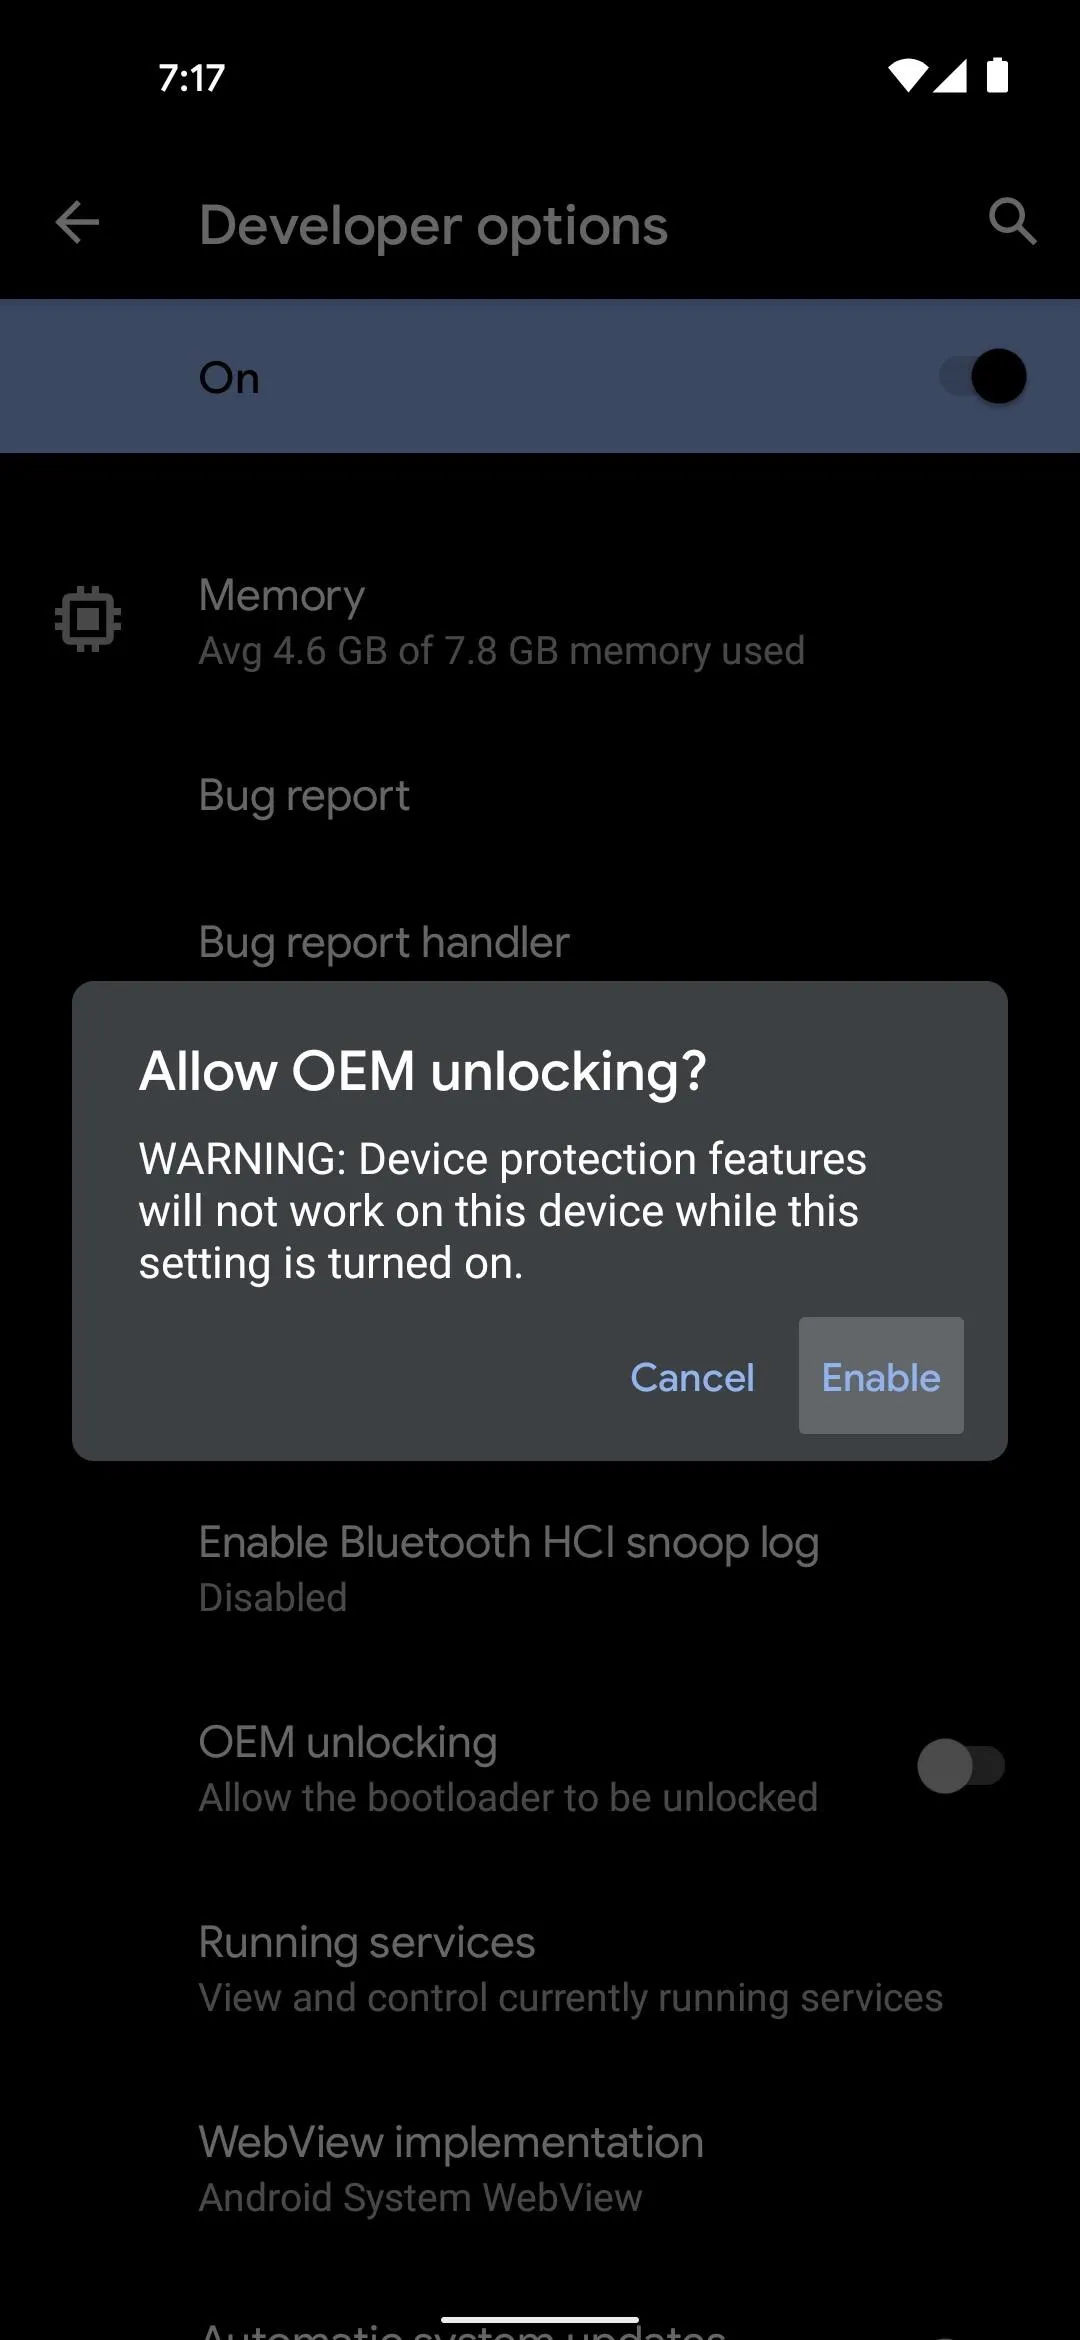
Inside, scroll down a tiny bit and tap the toggle switch next to "OEM Unlocking," then press "Enable" on the popup. To be clear, your bootloader isn't unlocked yet, you've just allowed it to be unlocked.
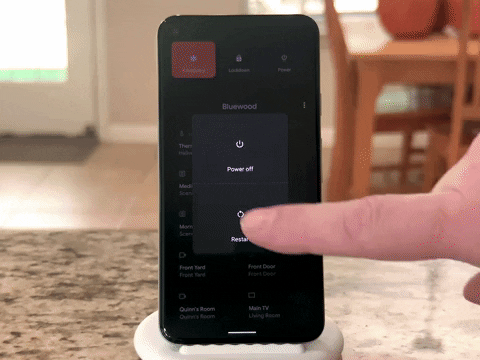
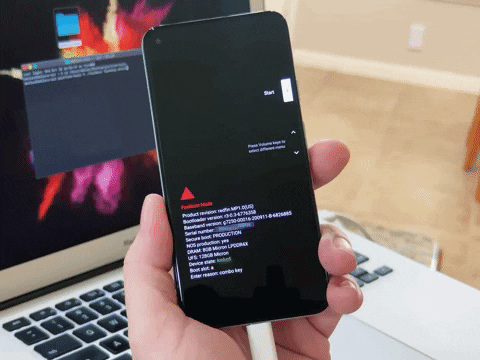
Boot into Fastboot Mode
Restart phone, press and hold volume down button, connect USB cable
Now, you'll need to boot your Pixel 5 into Fastboot Mode, which is the interface that lets you send Fastboot commands from your computer.
To do that, begin by restarting the phone. When the screen goes black, press and hold the volume down button. Keep holding it until the Fastboot Mode main menu appears, as shown below. Once you arrive at this screen, leave the phone as it is and connect it to your computer with a USB data cable.
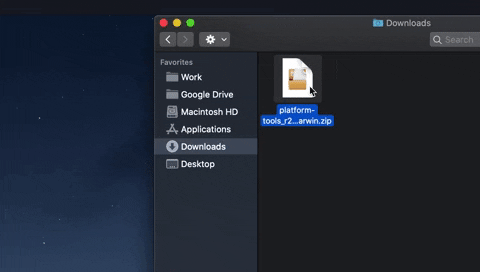
Download Google's Platform-Tools to Your Computer
Grab the new lightweight ZIP
On your computer now, download Google's platform-tools. This is a small piece of software, colloquially known as ADB and Fastboot, that allows your computer to communicate with your phone on a low level.
Extract the ZIP
Extract the platform-tools folder to your desktop
Once you've downloaded the ZIP file, extract its contents to a location on your computer that you can access easily. Personally, I like to put that extracted platform-tools folder right on my desktop.
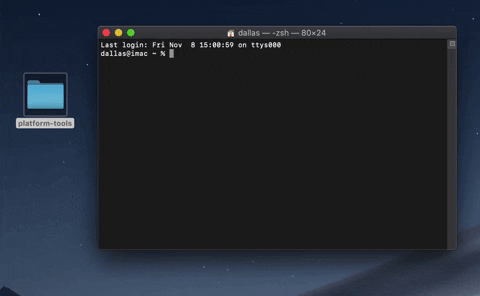
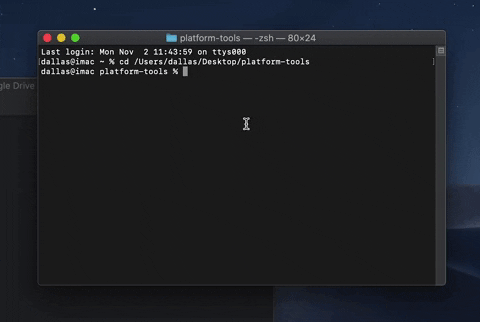
Open a Command Prompt in the Right Directory
Type "cd" followed by a space, then drag and drop platform-tools folder
Now, you'll need to get a command window operating out of the platform-tools folder. If you're on Windows, press the Windows button on your keyboard, then type "cmd" and hit enter to open a command prompt window. If you're on Linux or Mac, simply open the "Terminal" app.
Now, type "cd" in the prompt, then add a space, but don't hit enter yet. Instead, drag the platform-tools folder you extracted in Step 6, then drop it right on top of the command window. This will populate the folder's location. When it does, hit enter.
Unlock the Bootloader
Send "fastboot flashing unlock" command, press volume down, then power
With your phone still connected to the computer via USB and still in Fastboot Mode, copy and paste the following command into your Terminal window, then go ahead and hit enter:
fastboot flashing unlockIf that returns a "command not found" error, you'll have to add a period and a slash to the beginning of this and any future Fastboot commands. So copy and paste the following, then hit enter again:
./fastboot flashing unlock
NOTE: Leave the command window open because you'll need it later.
Your phone should now display a warning message instead of the standard Fastboot Mode menu. Press the volume down button, and the text at the top of this screen should change to say "Unlock the bootloader." When it does, press the power button to confirm your choice.
The screen will go black for about ten seconds while a factory reset is performed, then your phone will boot back into Android.
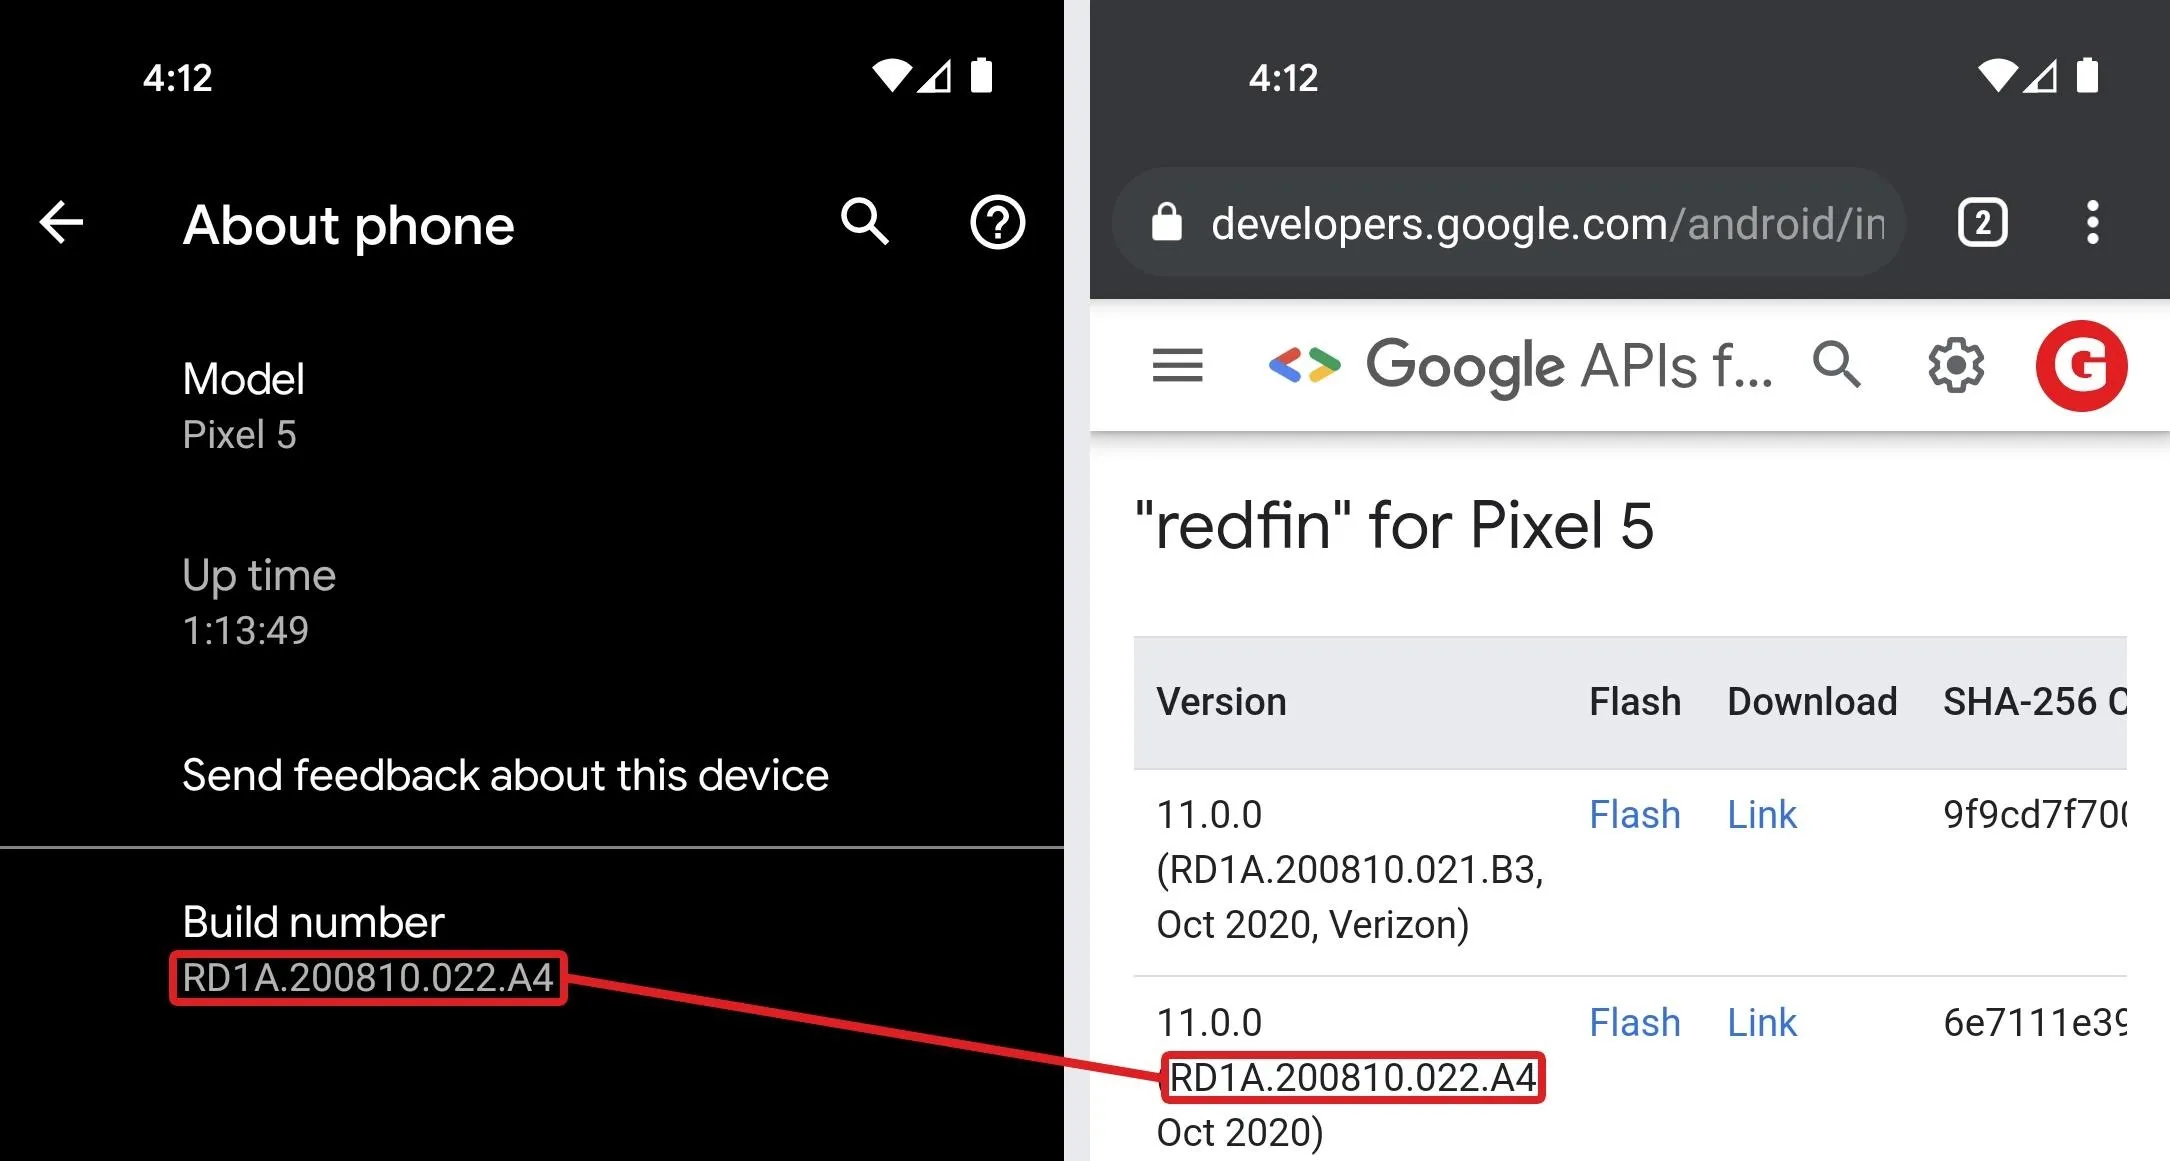
Download the Factory Images Package to Your Phone
Get your stock firmware
On your freshly unlocked phone now, go ahead and complete initial Android setup, add your accounts, and get at least the basics set back up.
Once done, head to Settings –> About phone and take note of the "Build number" at the bottom. Now, head to Google's firmware site for Pixel devices using Chrome for Android. You can use the link below to skip straight to the Pixel 5 section:
Use the "Link" option (rather than the "Flash" one) to download the version that matches your build number. And just to reiterate, make sure you're downloading this file to your phone.
Extract the Boot Image
Extract first ZIP, then second ZIP, then boot.img file
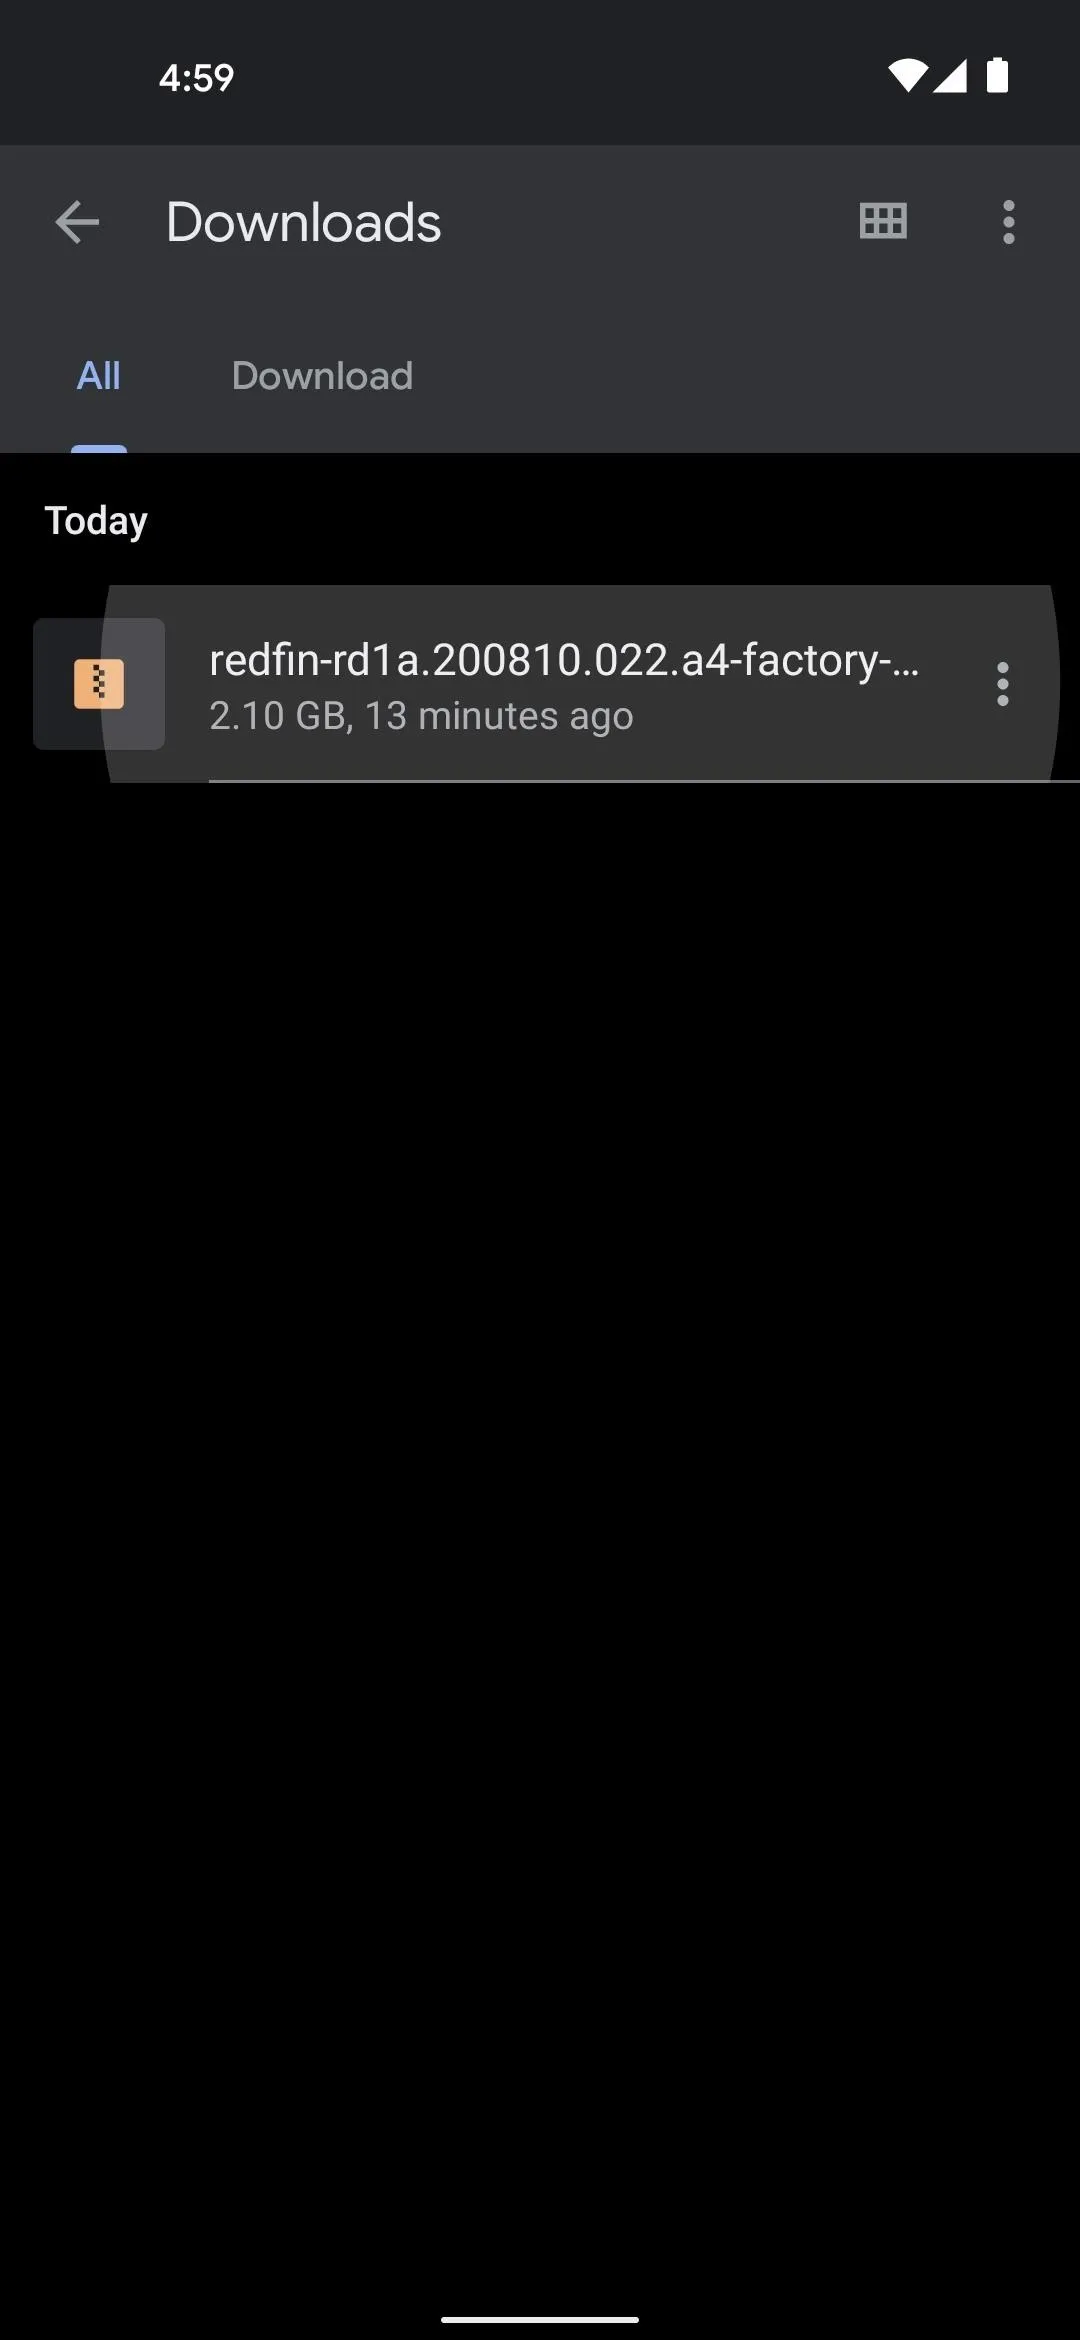
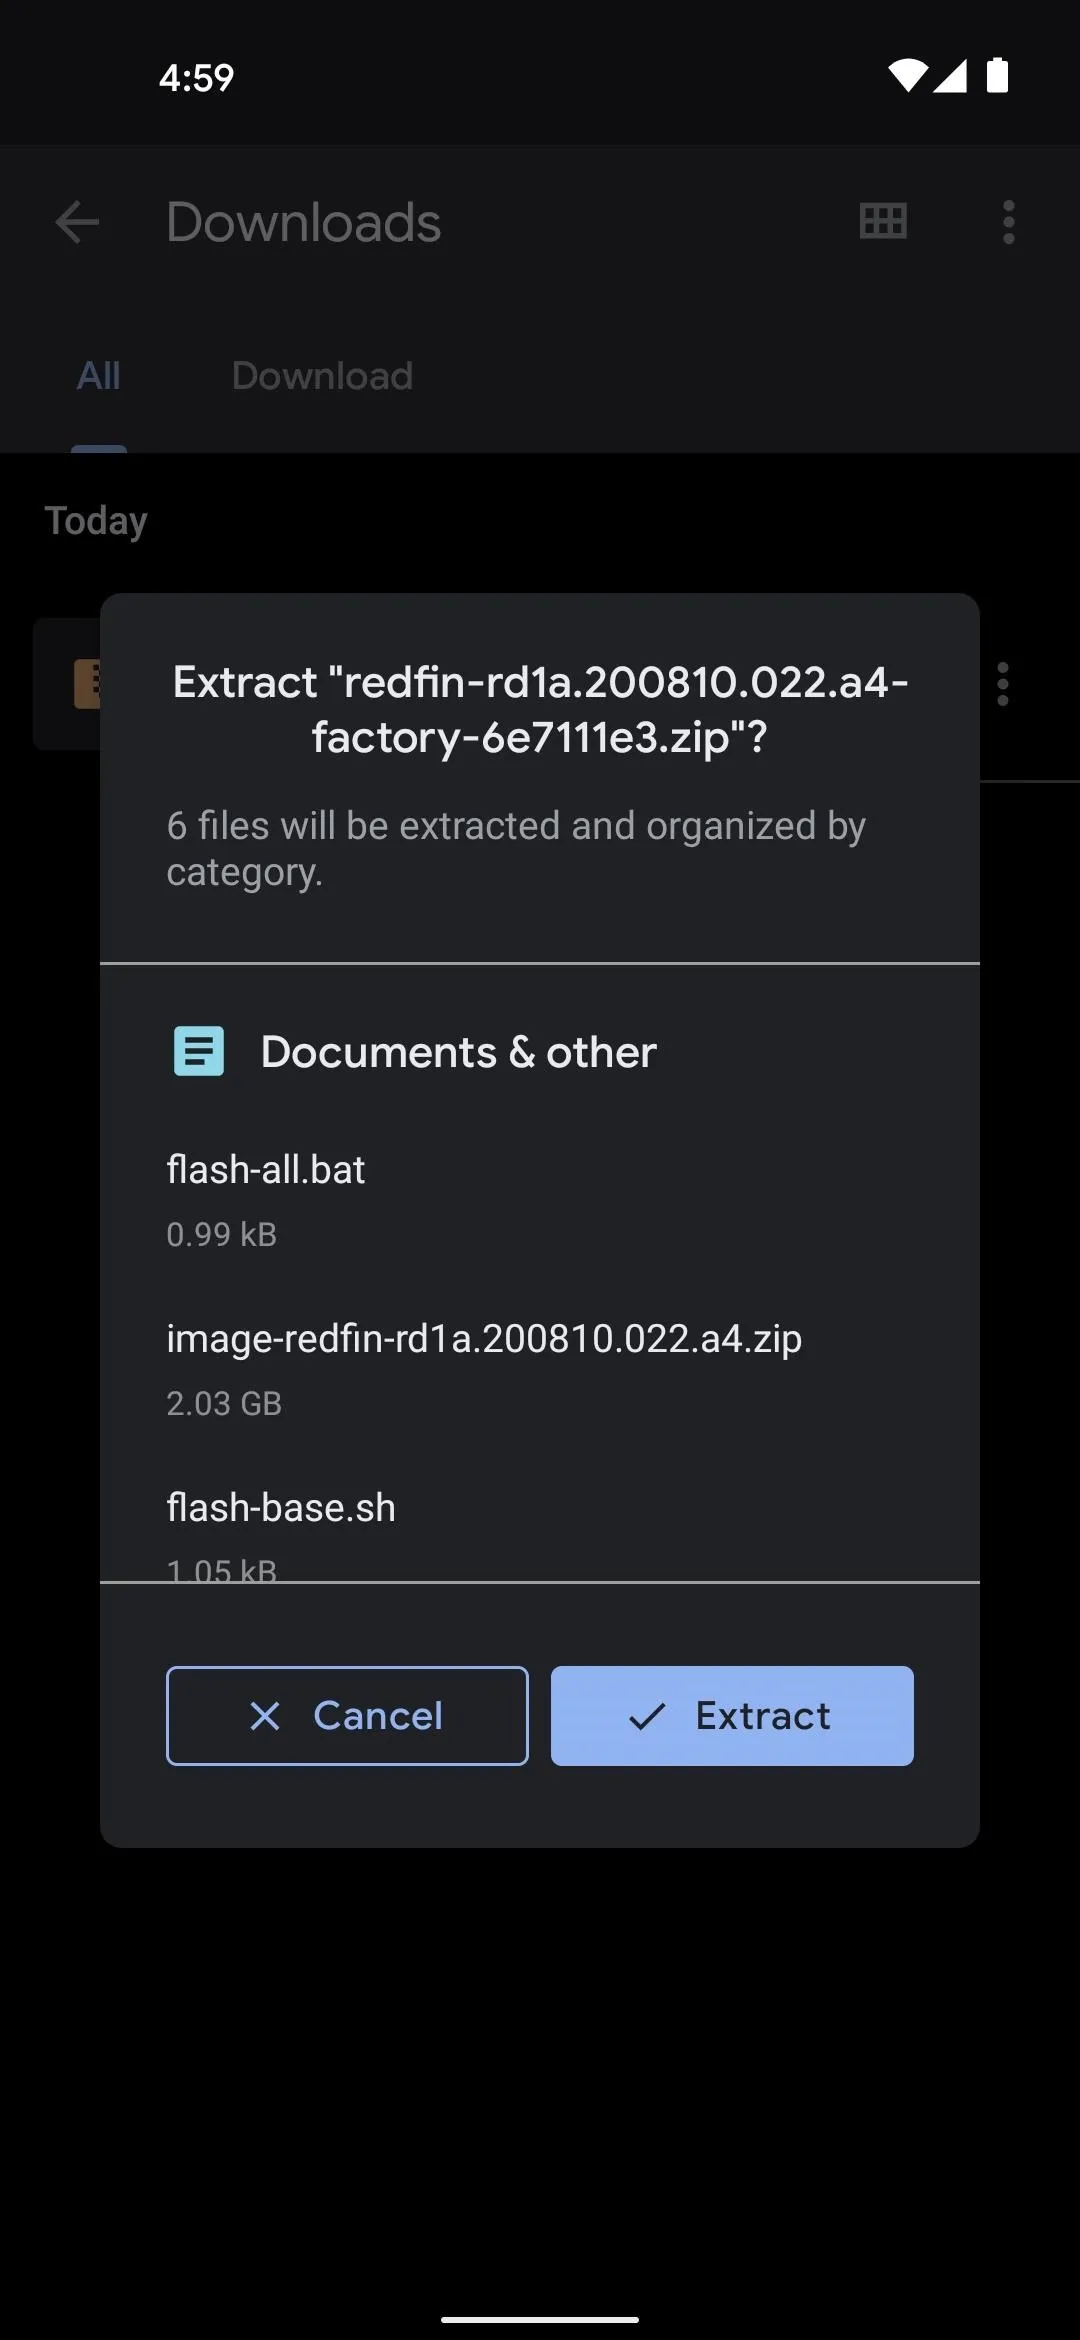
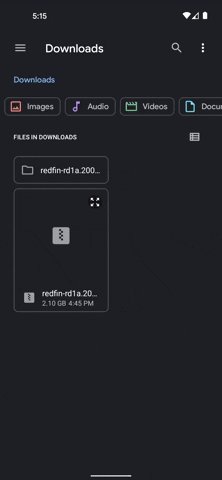
Now, open the Files app from your app drawer. Select "Downloads" from the main menu, and make sure you're on the Browse tab. From there, tap the redfin-rd1a ZIP file, then a second or two later you'll see a popup. Tap "Extract" here, and when it's finished about ten seconds later, tap "Done."
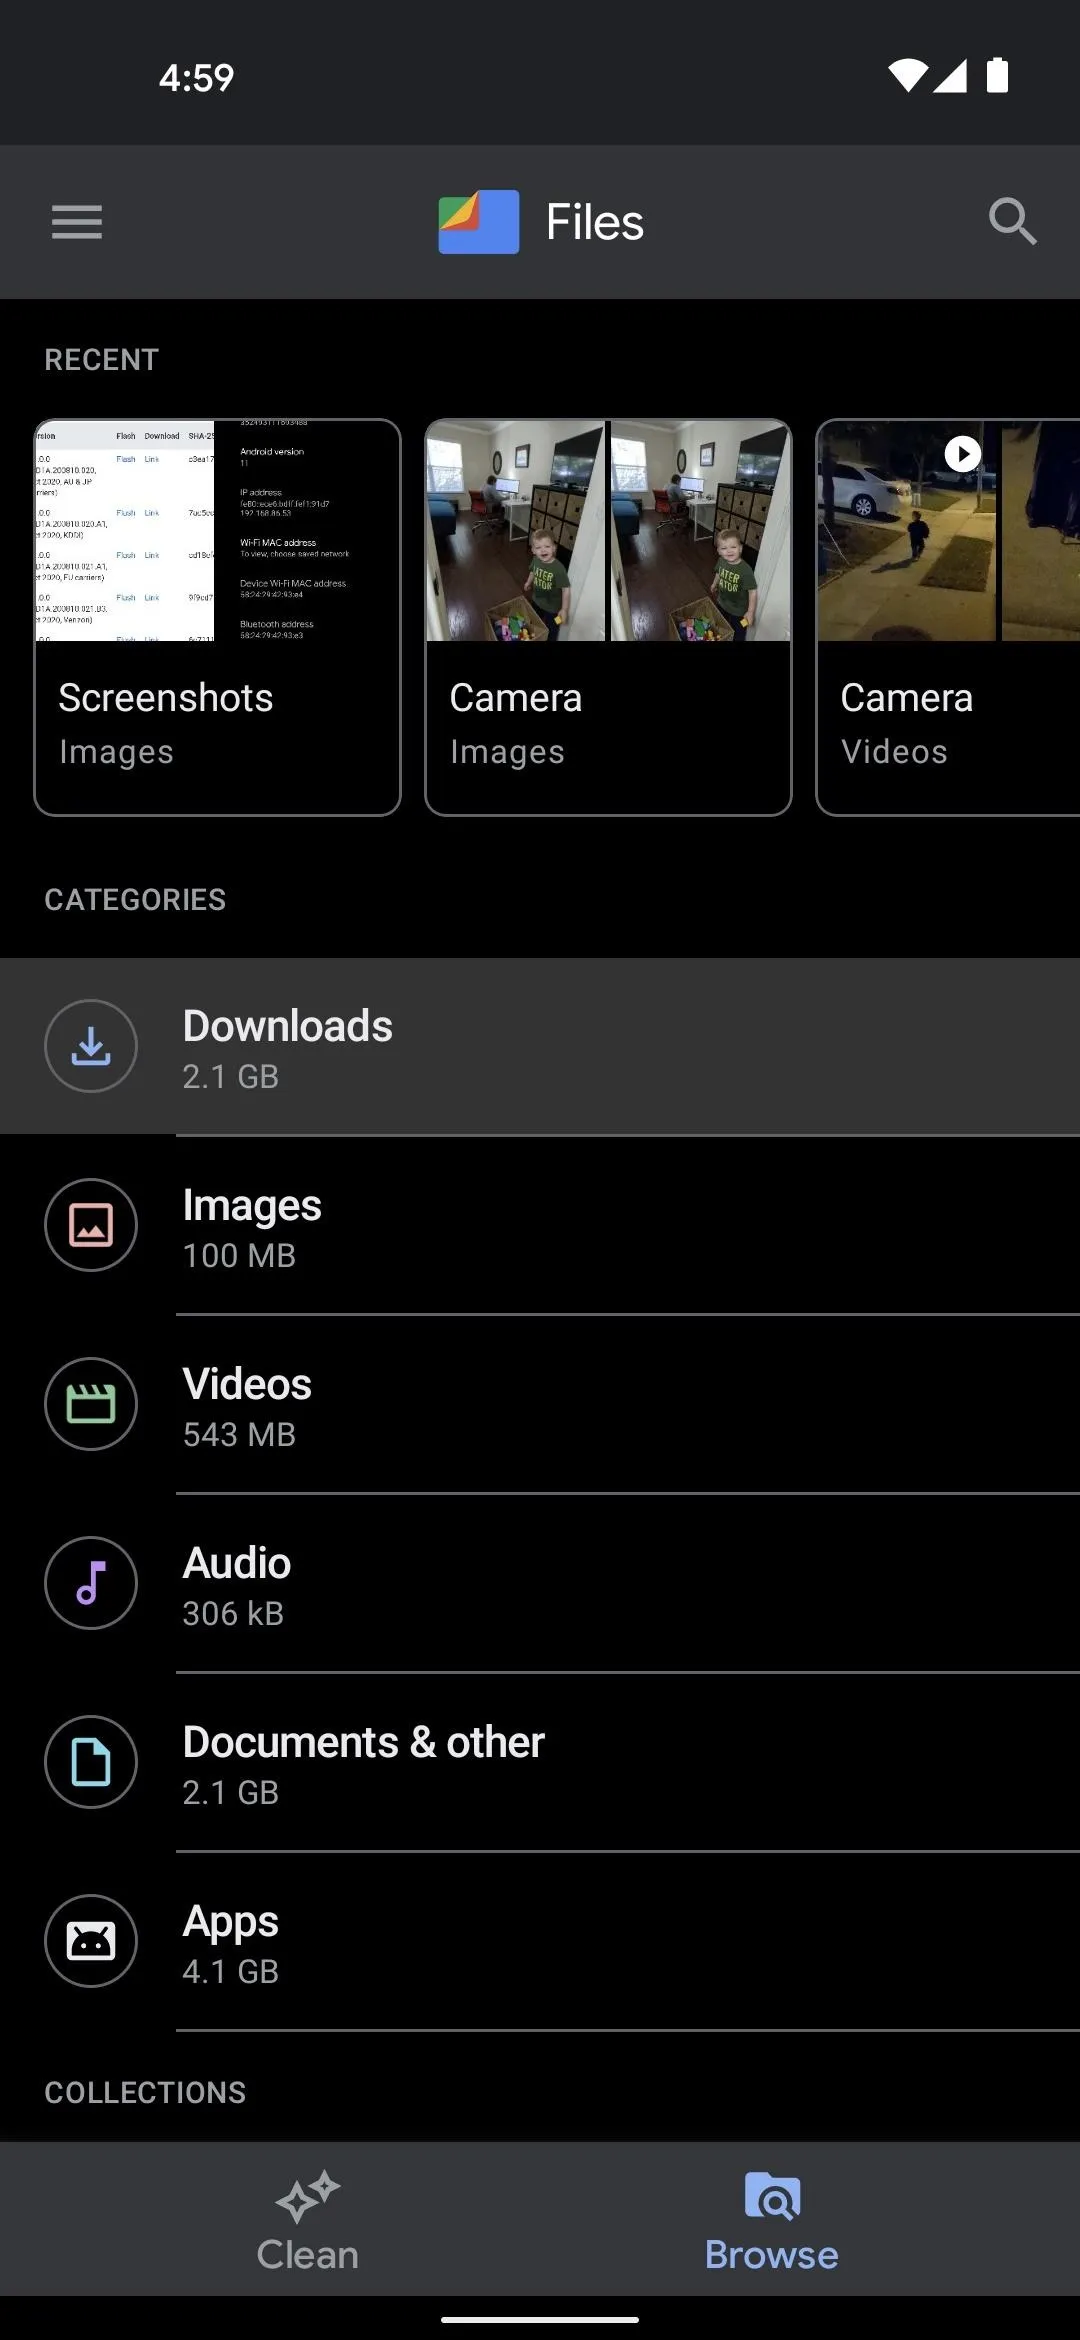
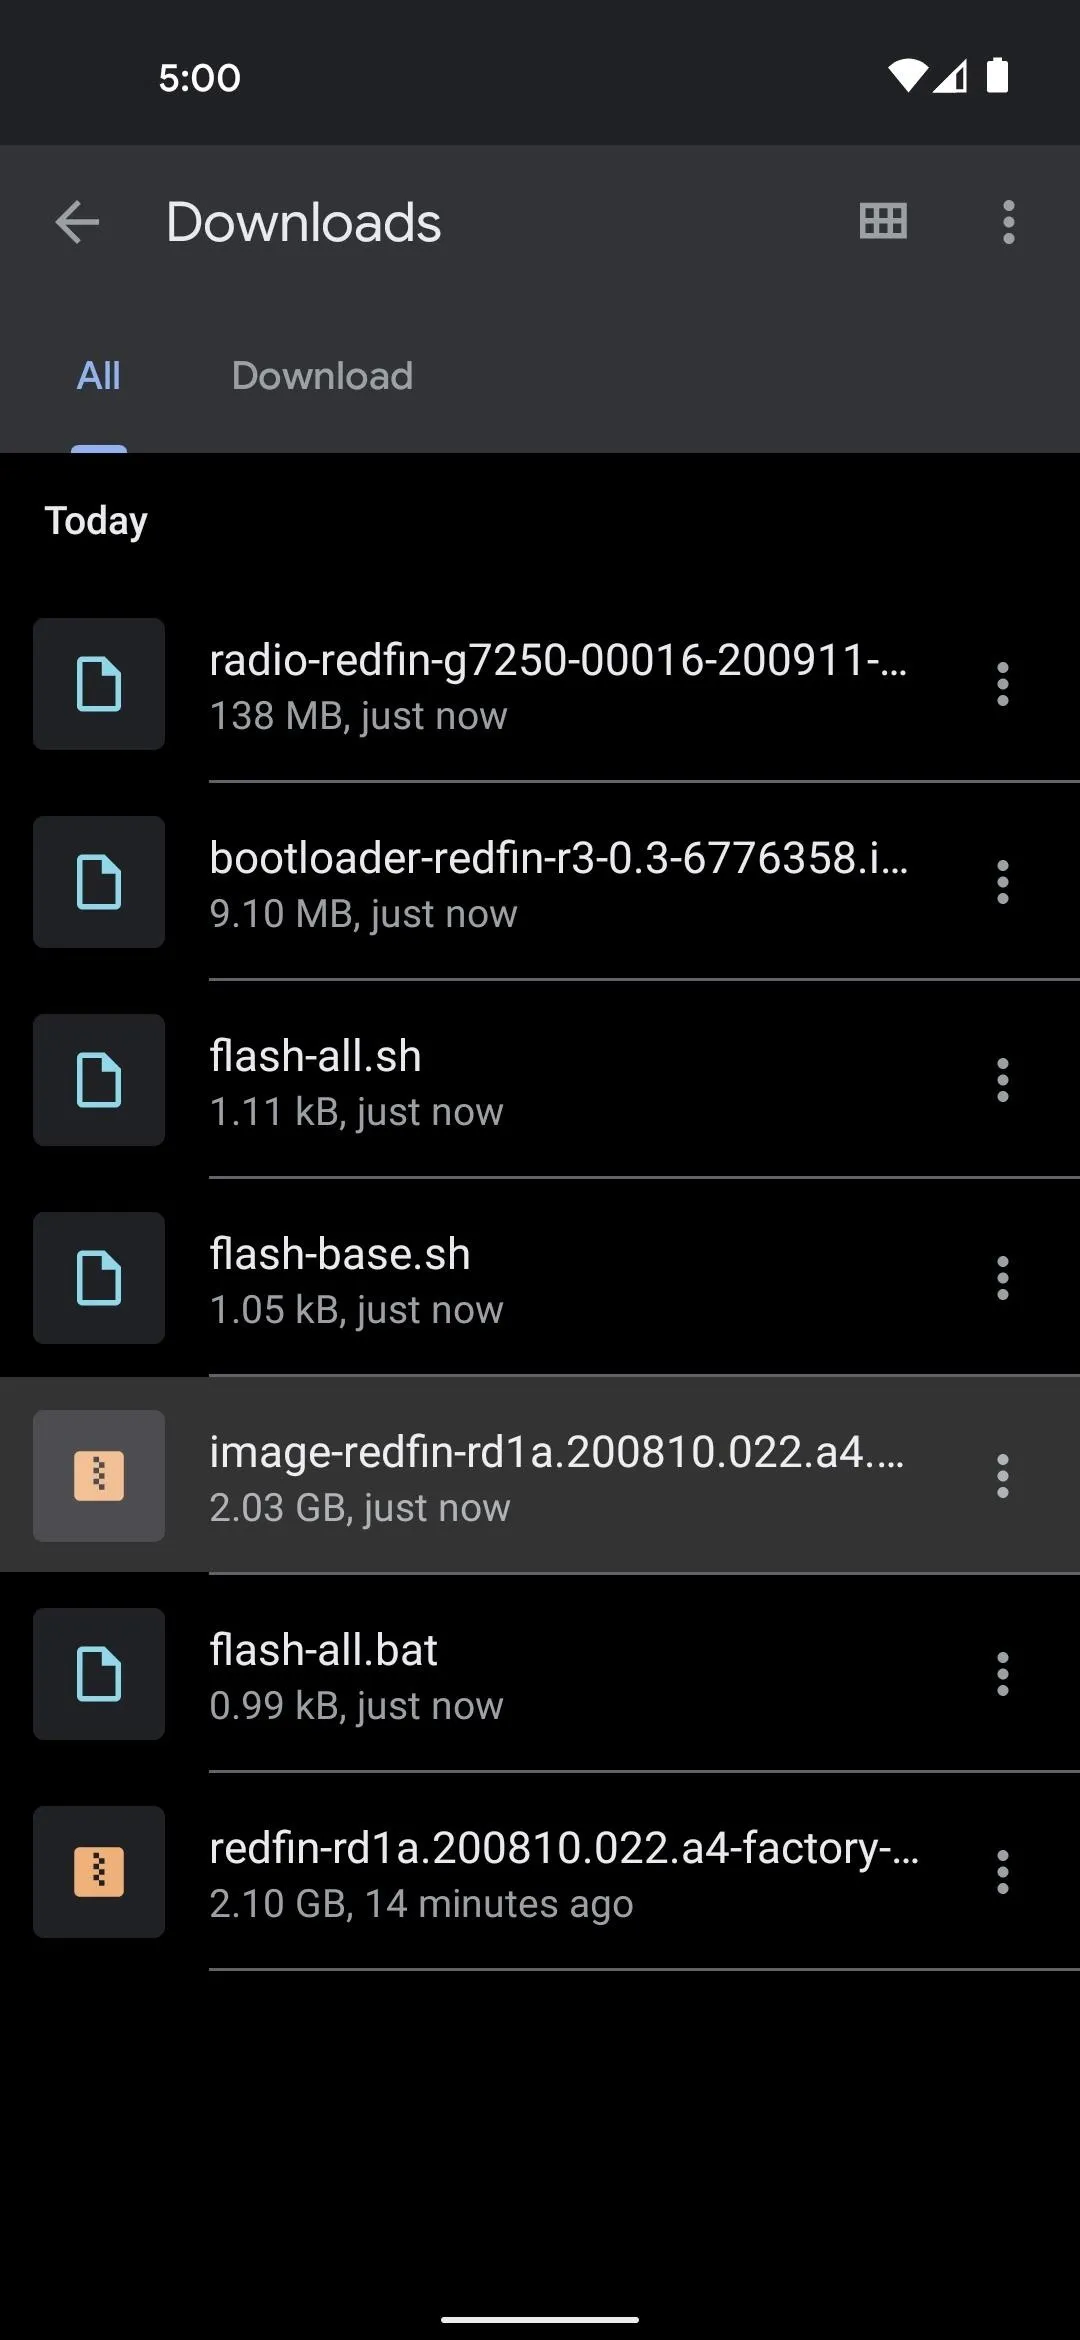
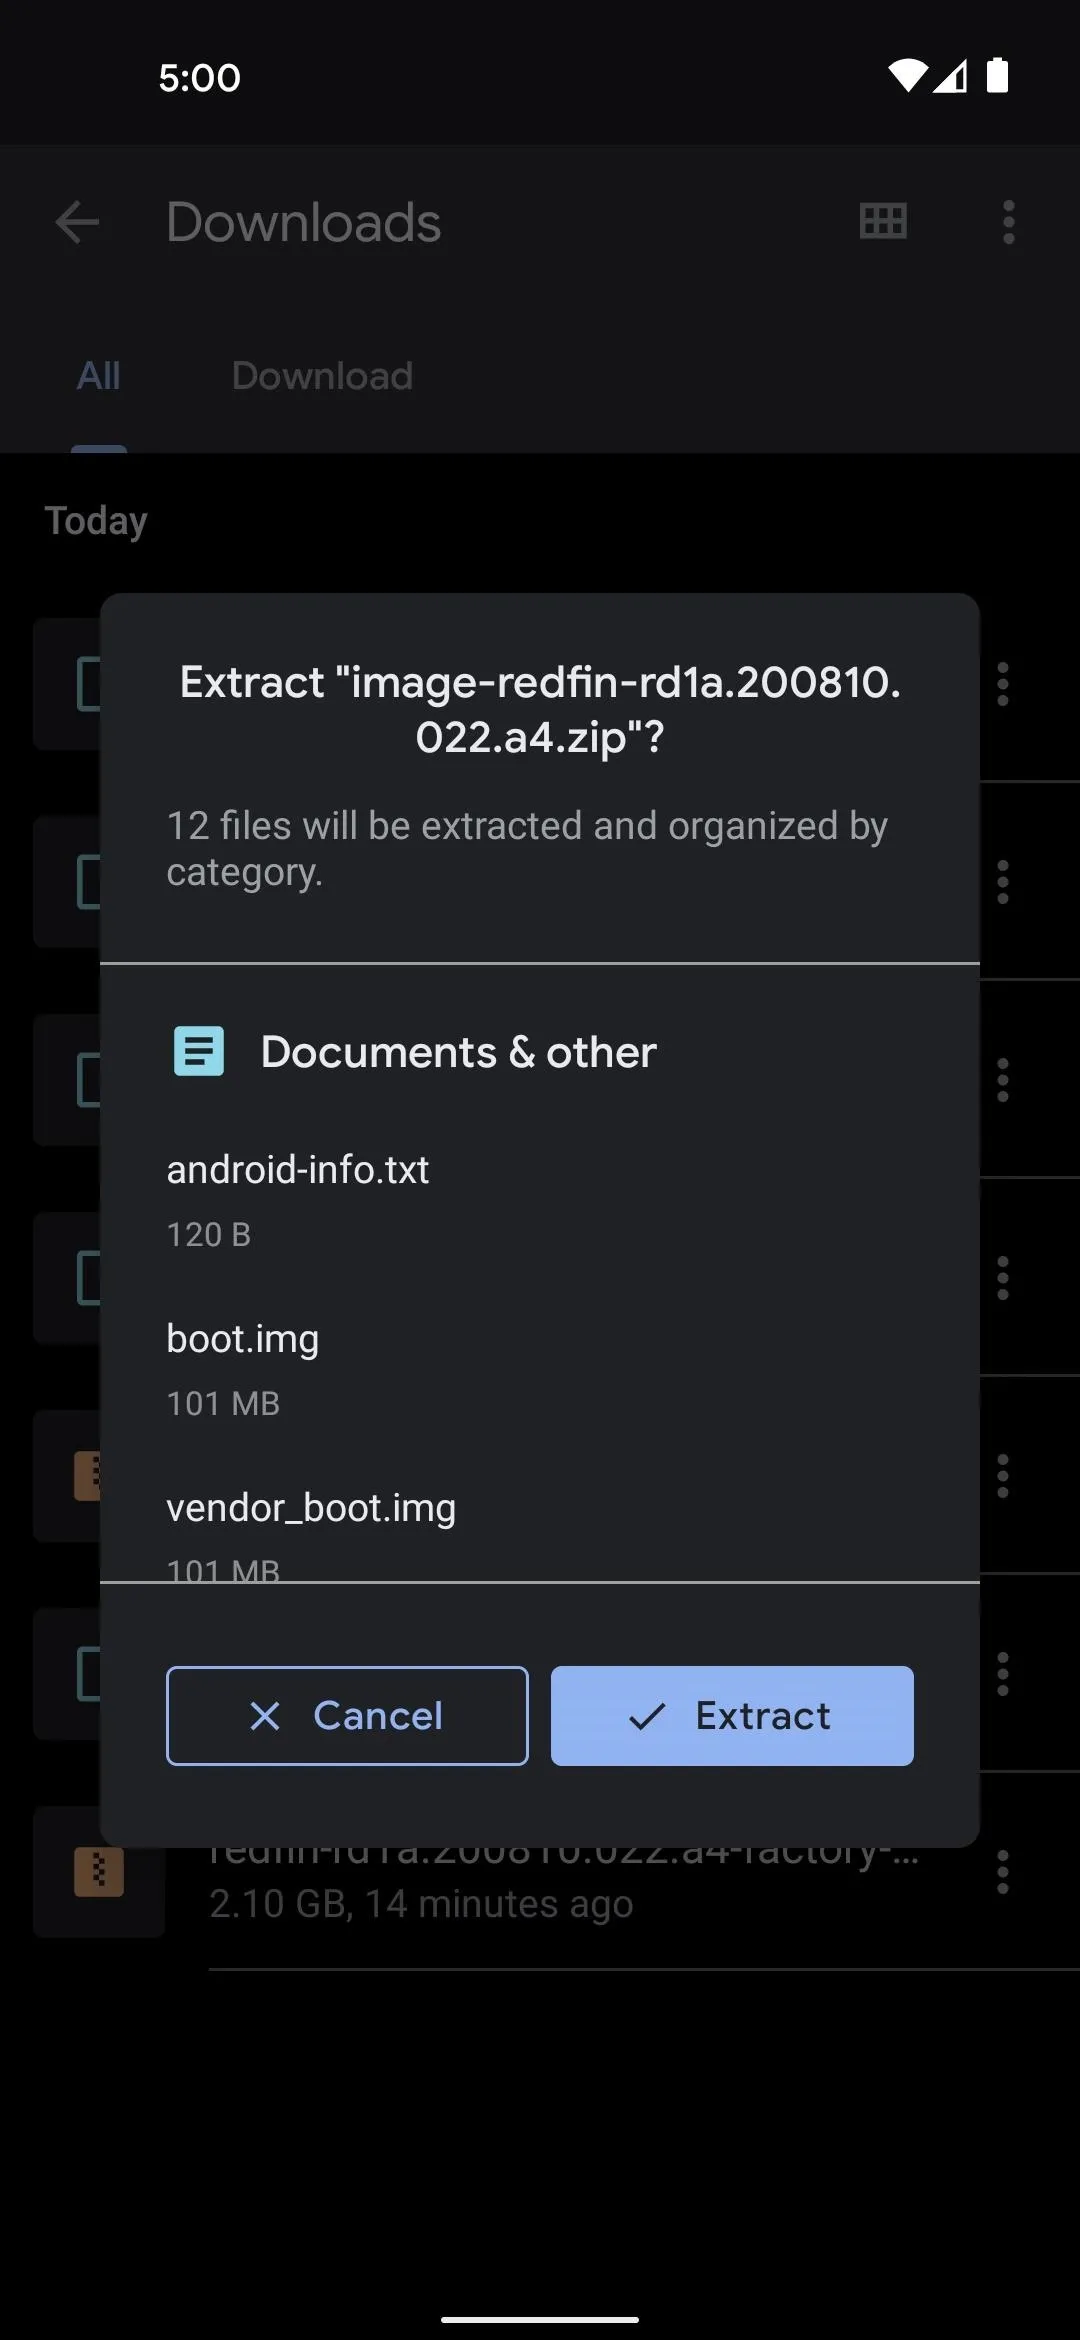
There's a second level to this nested archive. So next, tap the image-redfin ZIP, then press "Extract" and hit "Done" when it's finished.
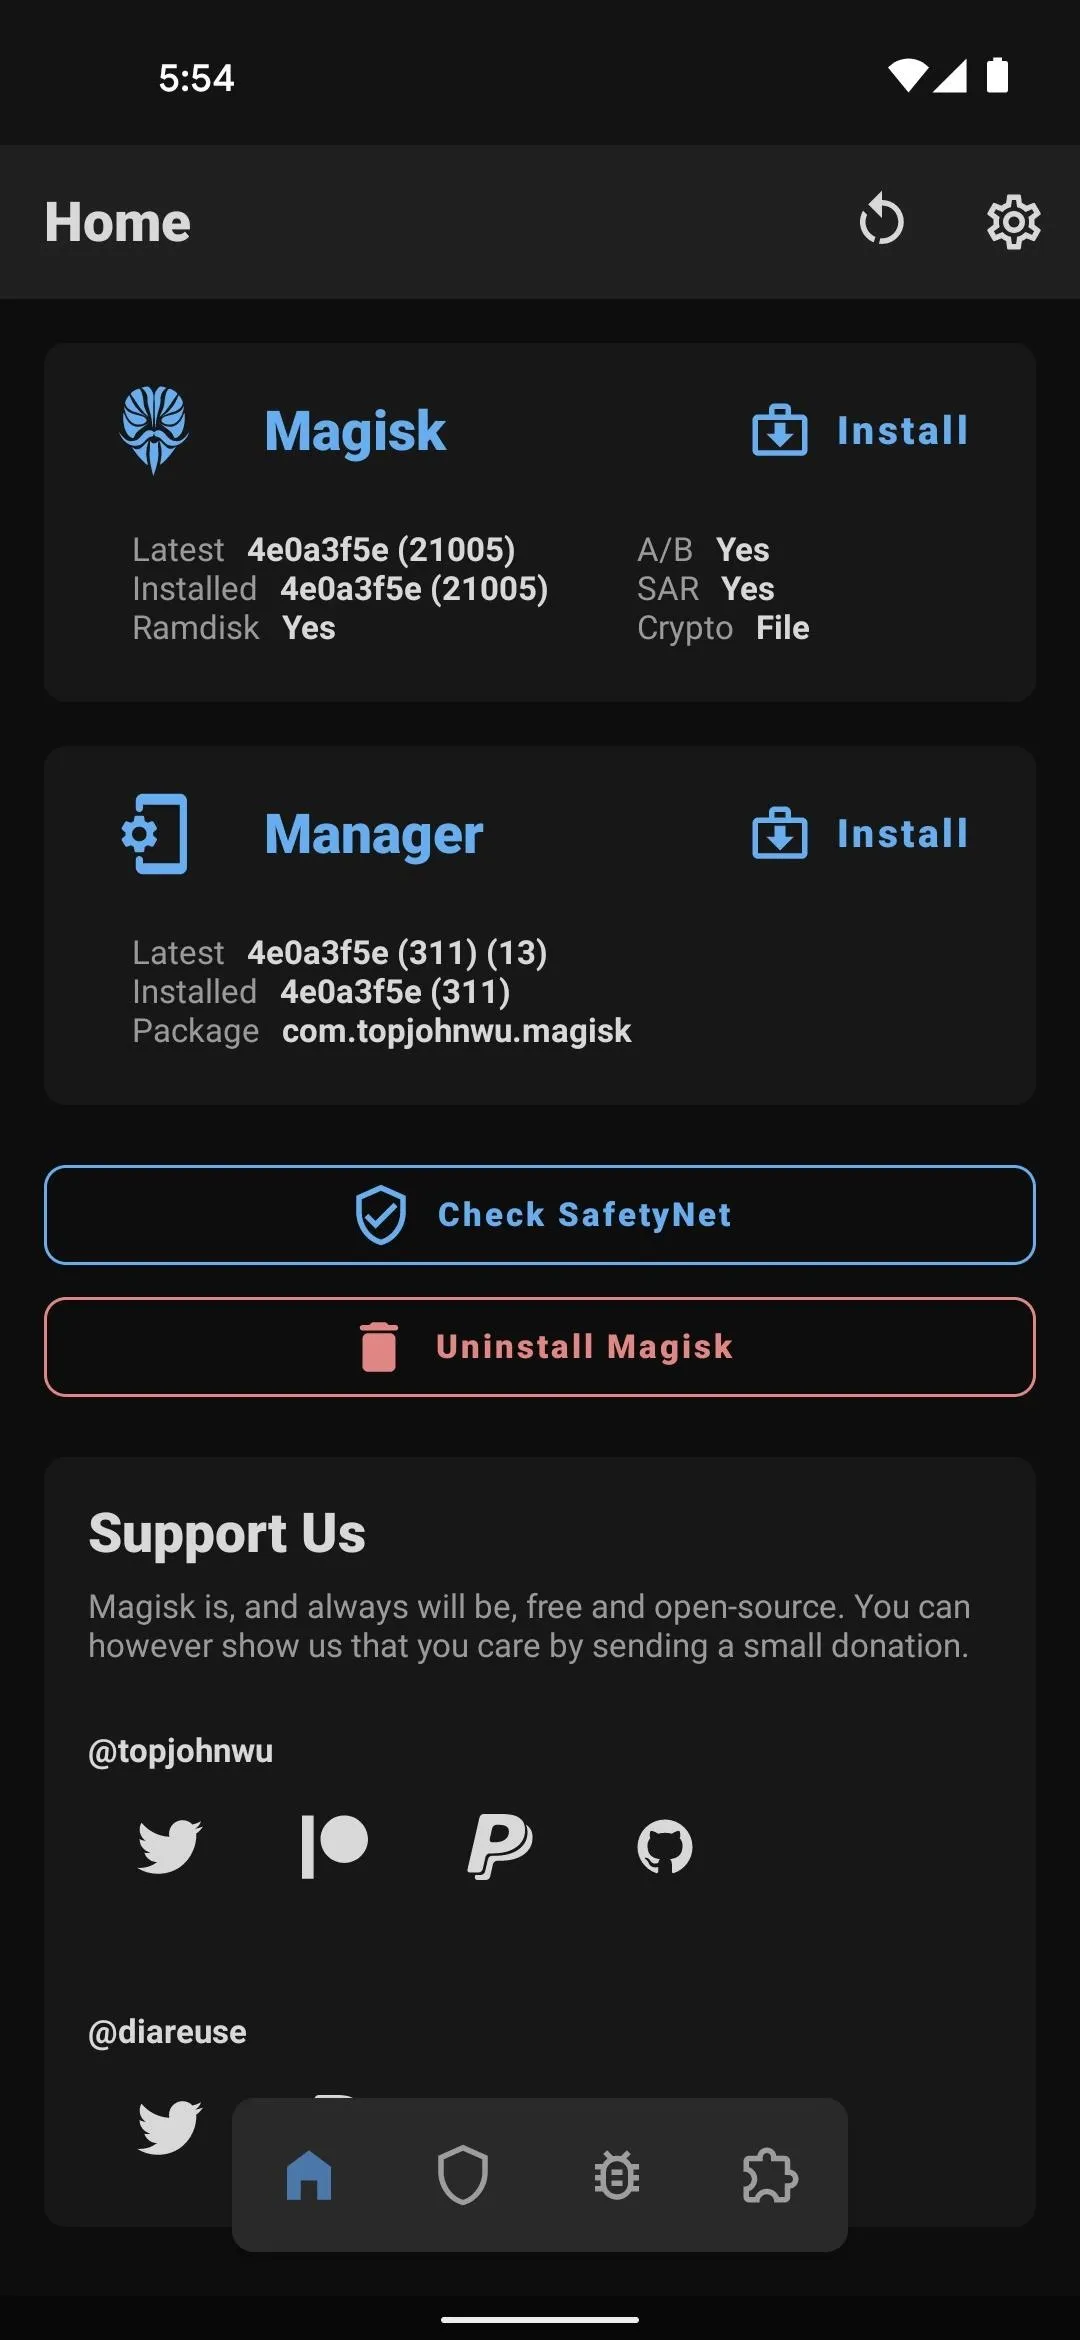
Install Magisk Manager Canary
Get the alpha version of Magisk
Next, you'll need to get the bleeding-edge version of Magisk Manager installed. It's the app that will allow you to install Magisk modules, as well as dole out root access to other apps. It's also the only version of the app that will patch the Pixel 5's boot image and create a rooted version just for your phone.
So head to the Magisk Canary page on GitHub at the link below. Once there, scroll down and tap the "Download" button. You'll then need to press "OK" when Chrome warns you about the file type.
Next, tap the Download complete notification to launch the APK, then press "Install" when prompted. If this is your first time sideloading an app, you'll have to tap "Settings" on the popup, then enable the switch next to "Install from this source" and go back. At that point, you'll be able to tap "Install."
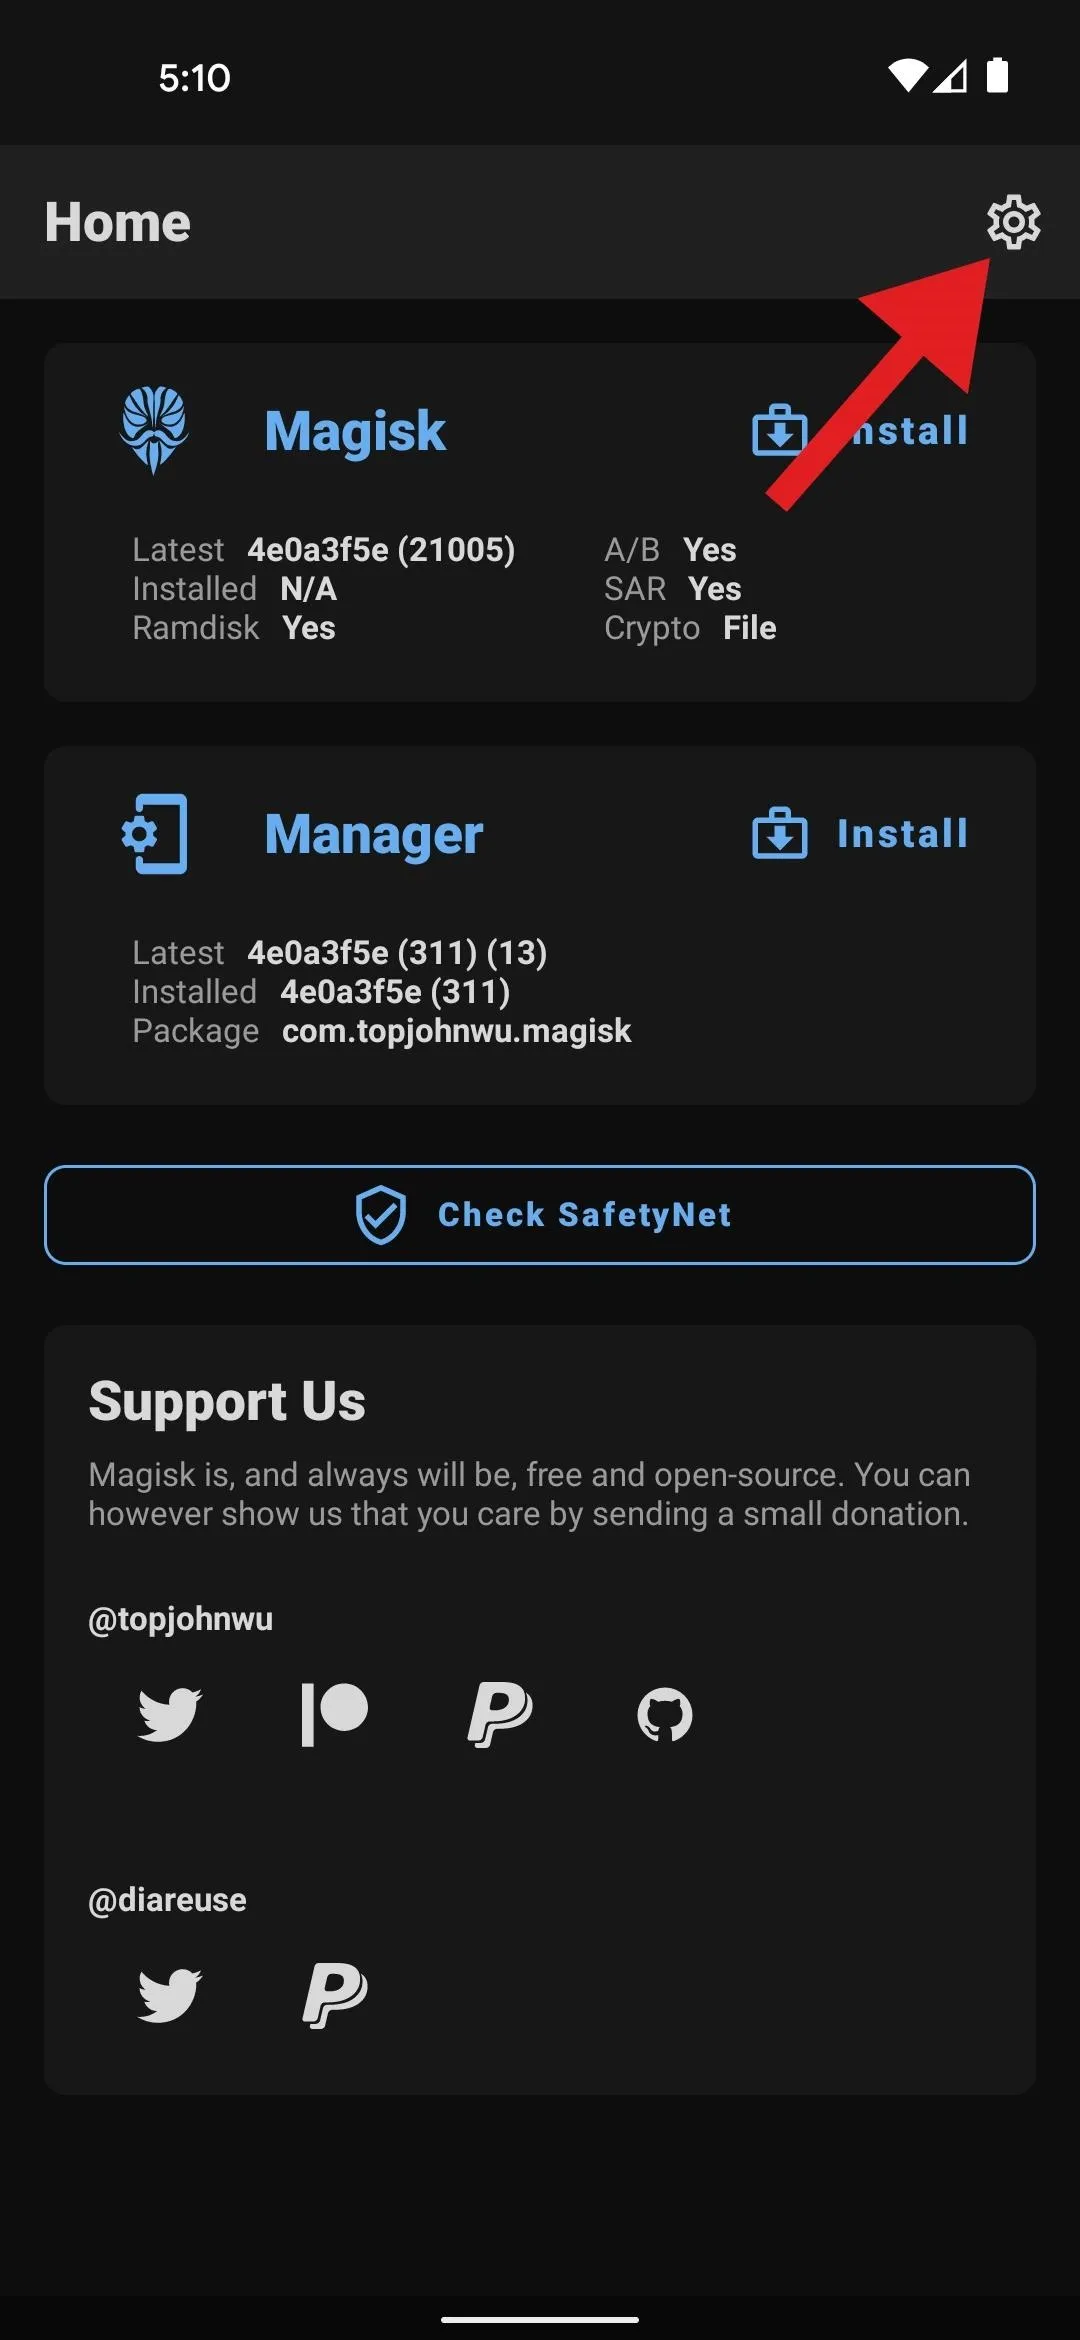
Finally, open Magisk Manager and tap the gear icon in the top-right corner. From there, under the Manager section, make sure "Update Channel" is set to "Canary."

Patch the Stock Boot Image in Magisk Manager
Install button –> Select and Patch a File –> choose the boot.img file
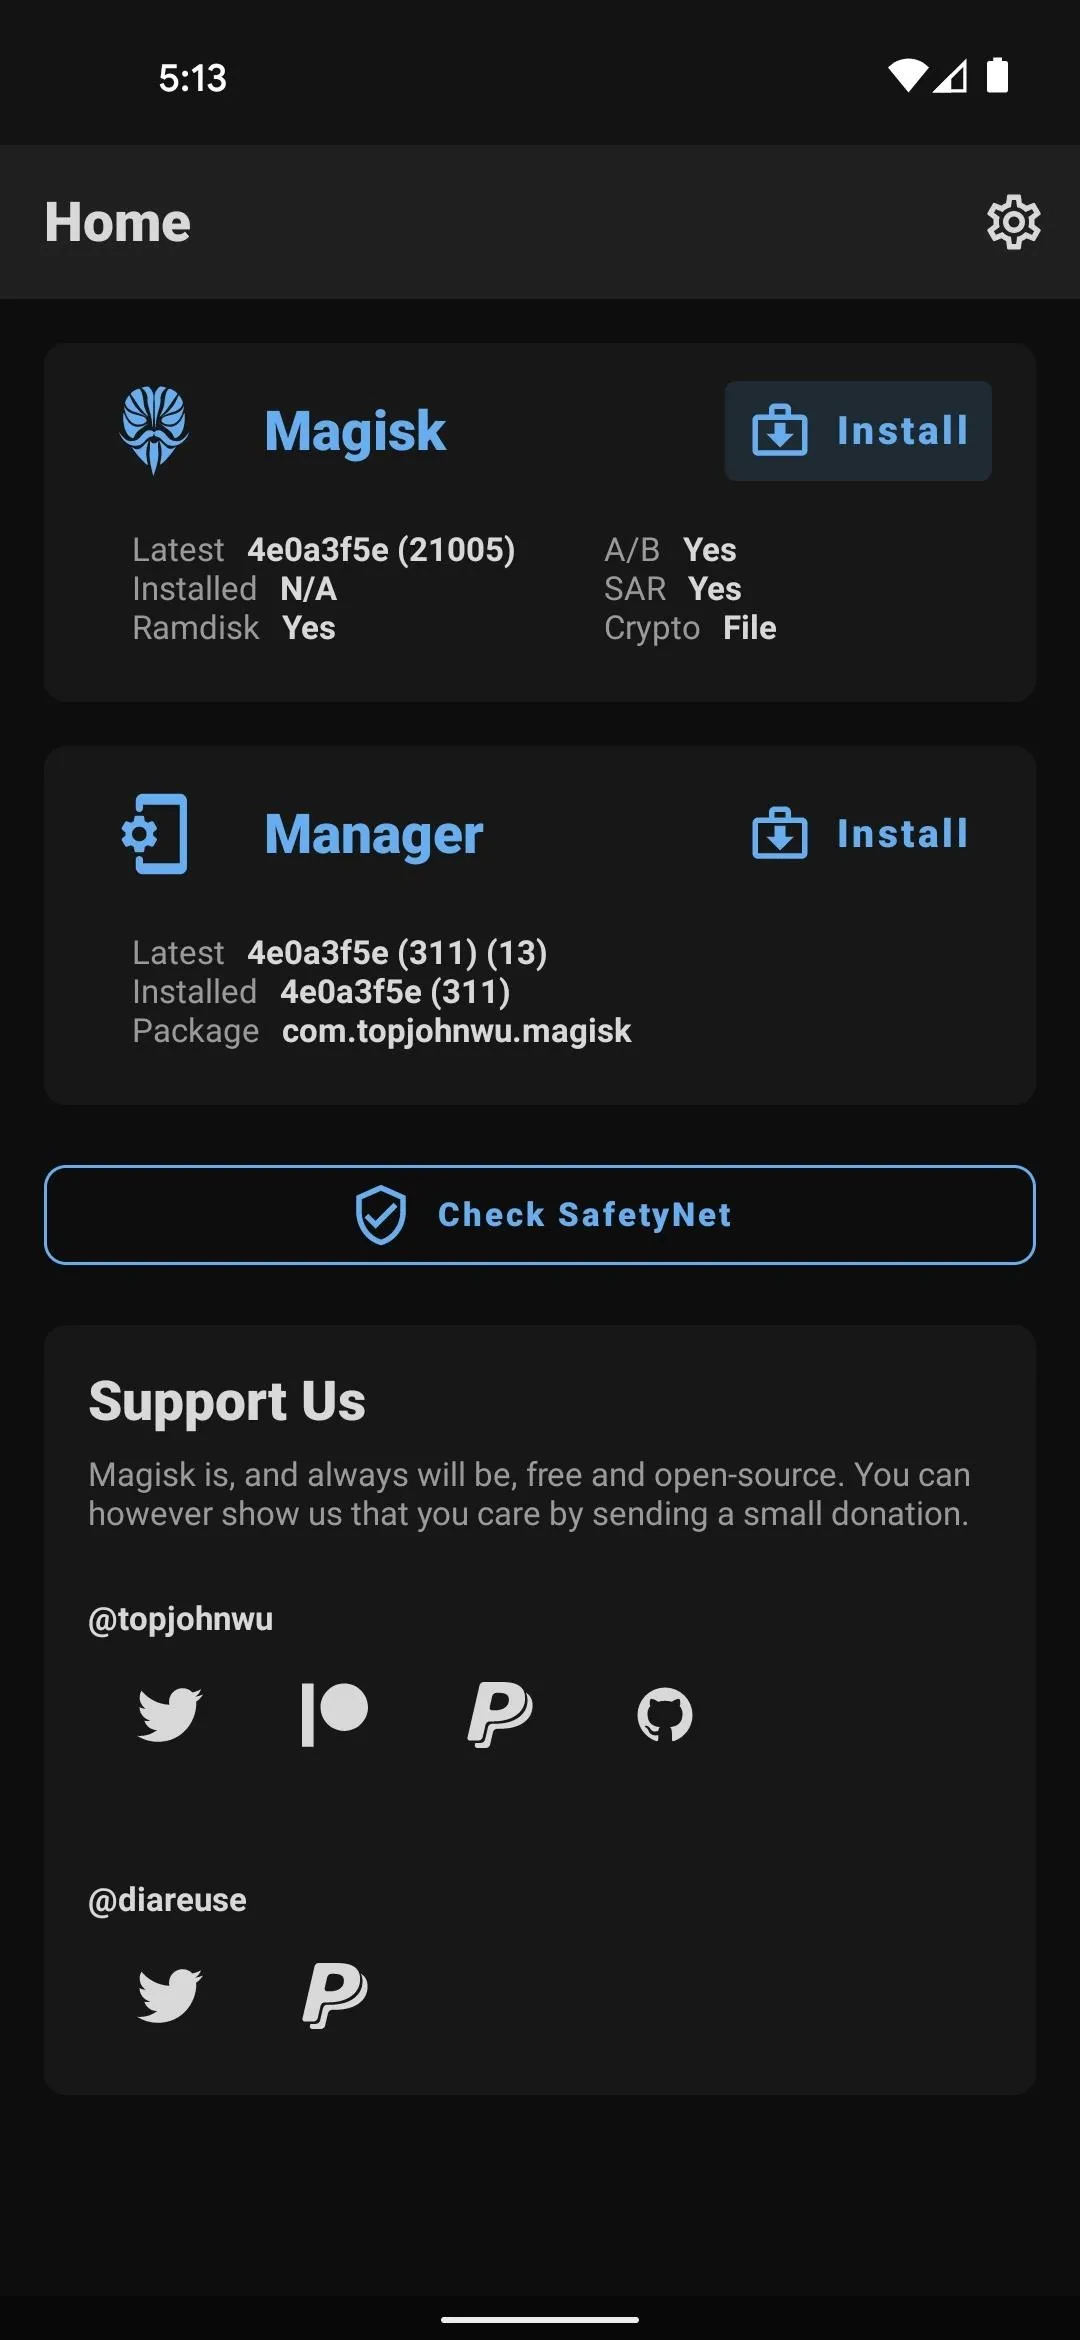
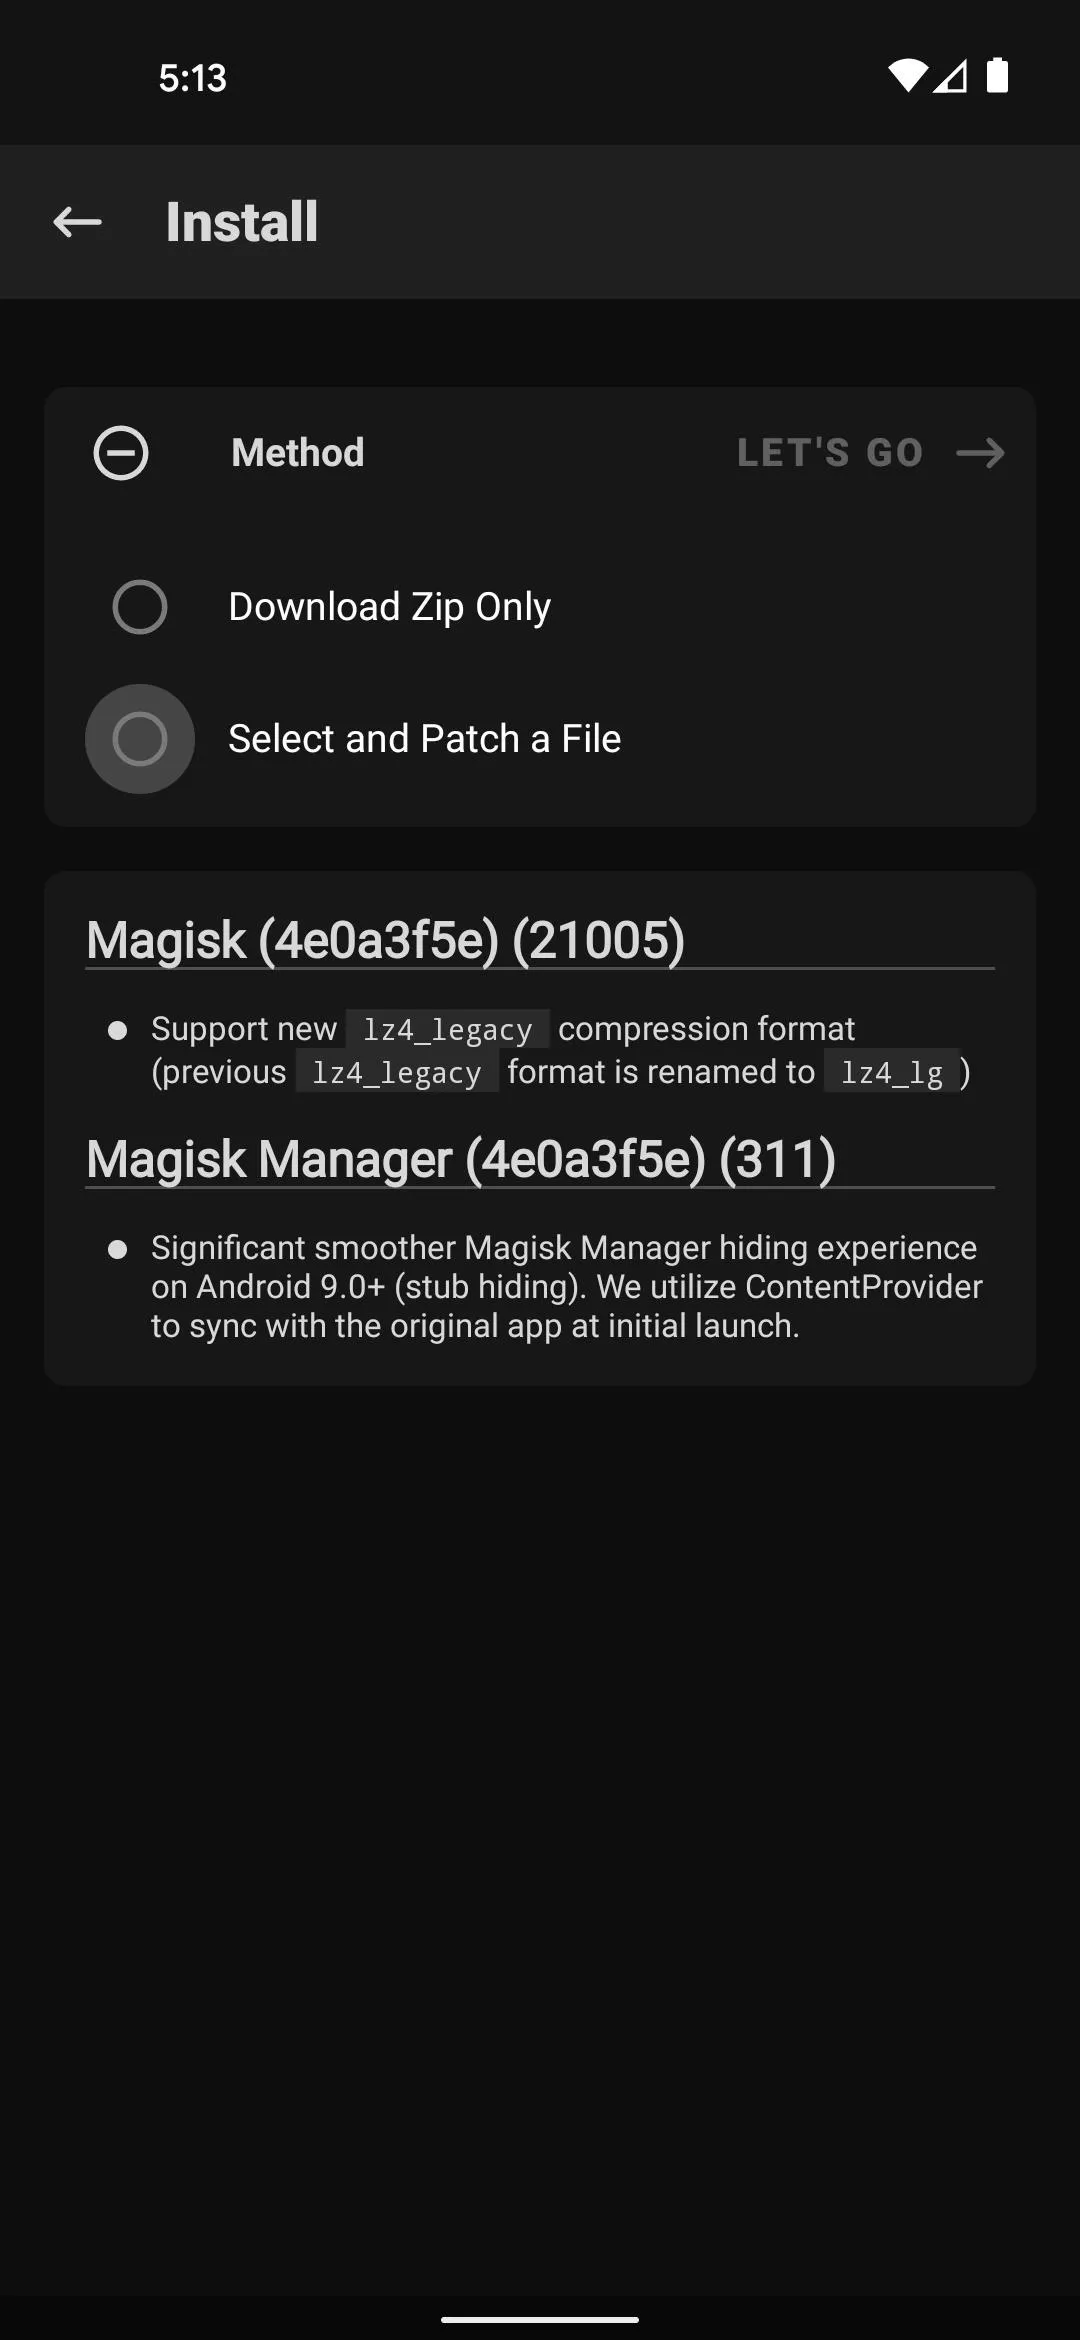
Now, head back out to Magisk Manager's main menu. Here, tap "Install" next to the Magisk header towards the top of the screen. Next, choose "Select and Patch a File," then the Files app will appear.
Open the hamburger menu in the file picker by tapping the three horizontal lines in the top-left corner. Here, select "Downloads." From there, open the redfin-rd1 folder, then the redfin folder inside of that. Next, open the image-redfin folder and select the "boot.img" file. You'll be taken back to Magisk, where you should now tap "Let's Go." After about 30 seconds, your stock boot image will be patched.
Move the Patched Boot Image to Your Computer
Move magisk_patched.img file to your computer
The patched boot image Magisk Manager just created will be located in your phone's Download folder with the name "magisk_patched.img."
You'll need to move this patched boot image over to your computer. You can do that with a USB data cable if you want to be extra careful, or you can upload the file to Google Drive, then re-download it on your computer.
Boot Back into Fastboot Mode
Reboot, press and hold volume down
As in Step 4, you'll need to boot into Fastboot Mode again. So restart your phone, then press and hold the volume down button. Once on the main Fastboot screen, connect your phone to your computer with a USB cable again.
Open a Command Prompt in the Right Directory
"cd" + spacebar, then drag and drop platform-tools folder
If you left the command window open after unlocking the bootloader, you can skip this step. But if not, you'll need to open your computer's command line tool and change directories to the platform-tools folder. In other words, repeat Step 7.
Flash the Patched Boot Image to Root Your Phone
"fastboot flash boot" + spacebar, then drag and drop magisk_patched.img
Now, think back to what worked for you when you unlocked your bootloader. If you needed to add a period and a slash to the beginning of that command, you'll need to add one here. If not, you won't.
So type fastboot flash boot into the prompt (or ./fastboot flash boot), then add a space, but don't hit enter yet. Instead, locate the magisk_patched.img file you just moved over to your computer. Drag and drop it onto the command prompt to populate its full file path, then hit enter.
Within seconds, the terminal should say "Finished." Congrats! You just rooted your phone. You can now type fastboot reboot (or ./fastboot reboot) to boot back into Android, then unplug your phone.
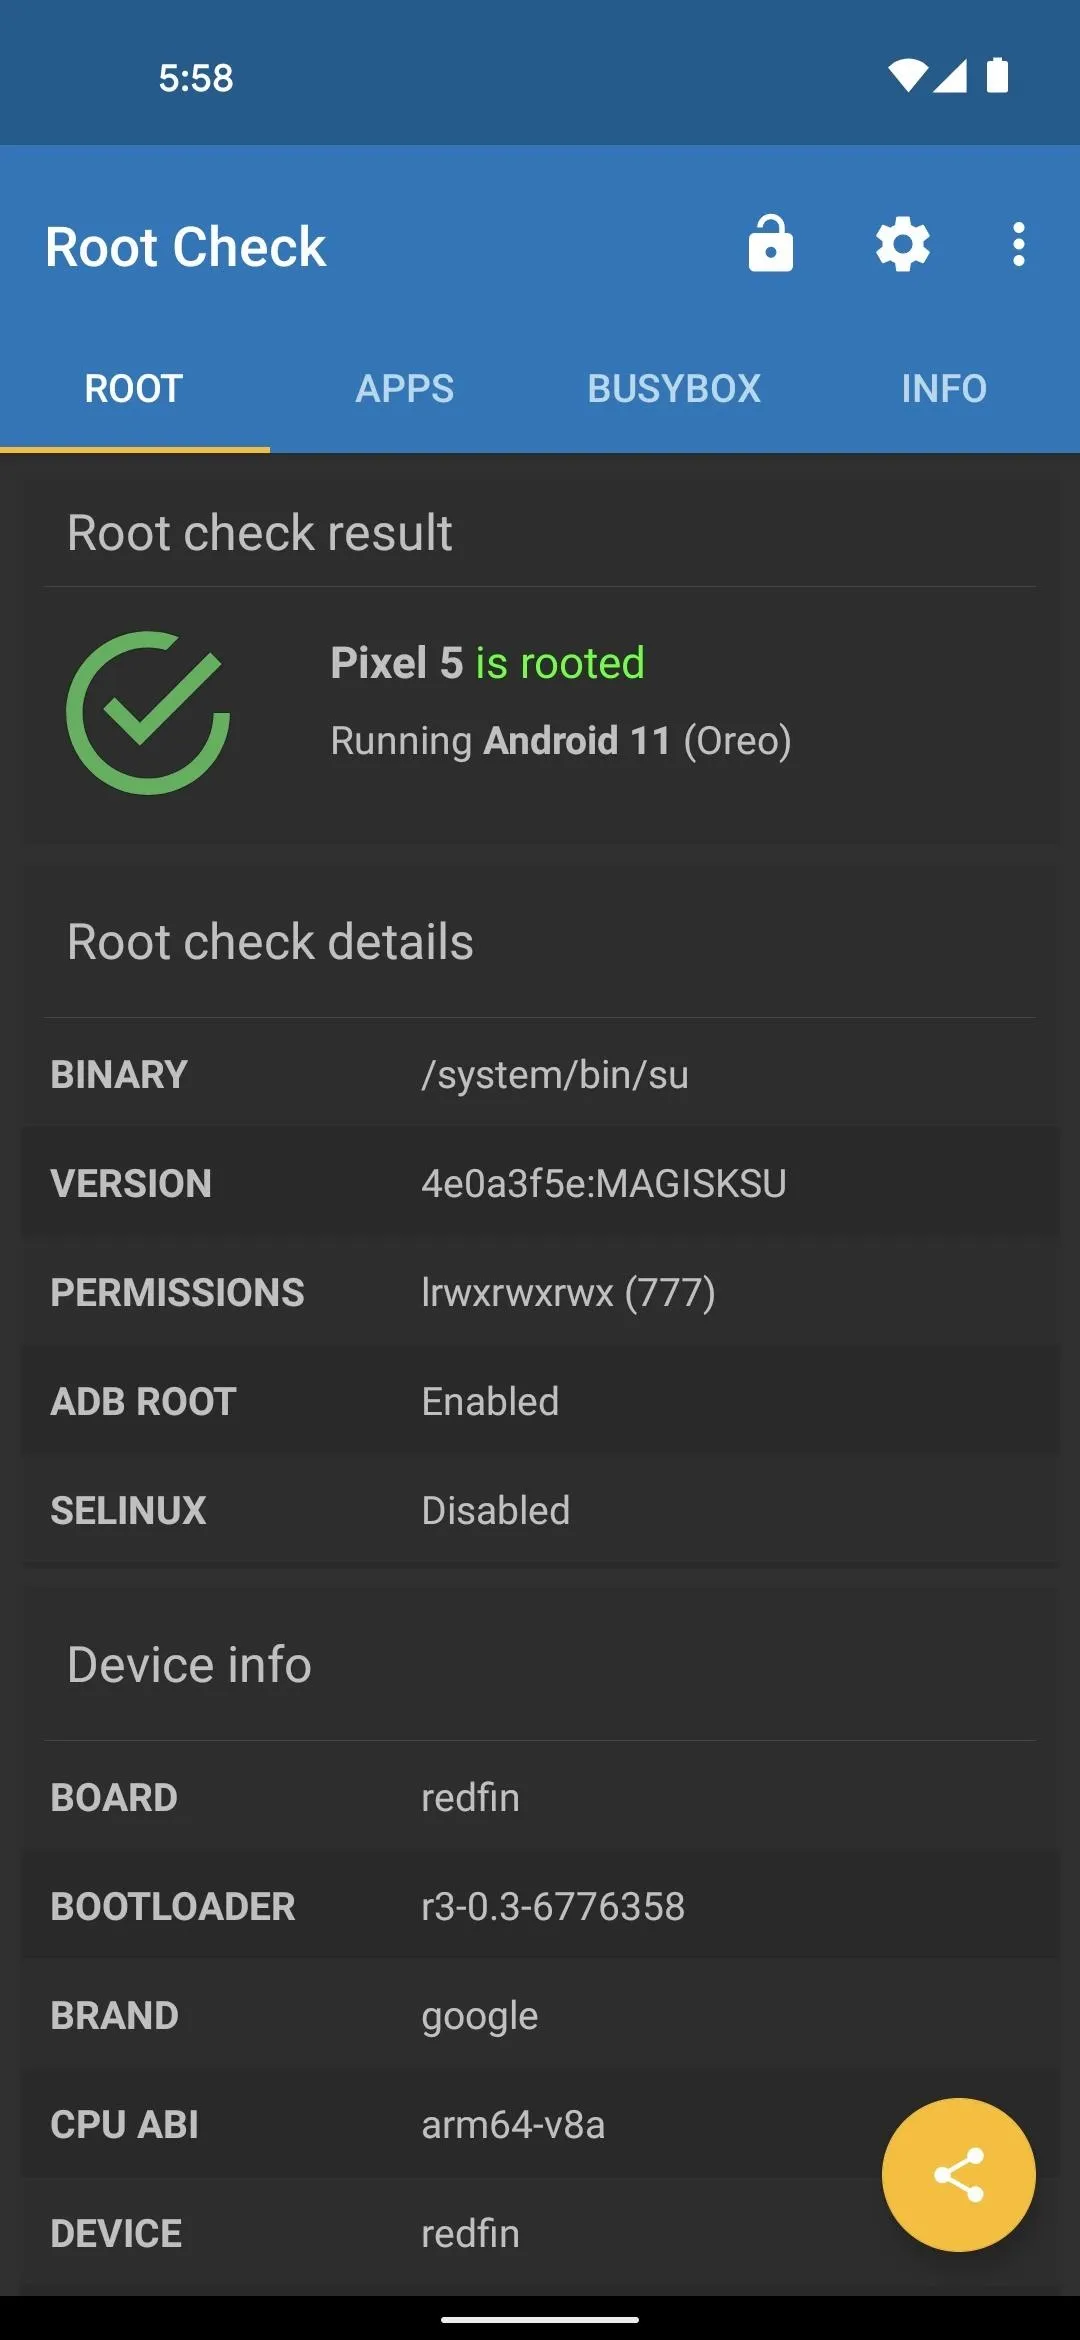
Verify Root
Check in the Magisk Manager app or just try to run any root app
When your phone finishes booting, open the Magisk Manager app — there should now be a big red "Uninstall Magisk" button towards the middle of the screen, which means you're rooted! Go ahead and install any root app, then tap "Grant" on the popup when asked for Superuser access.
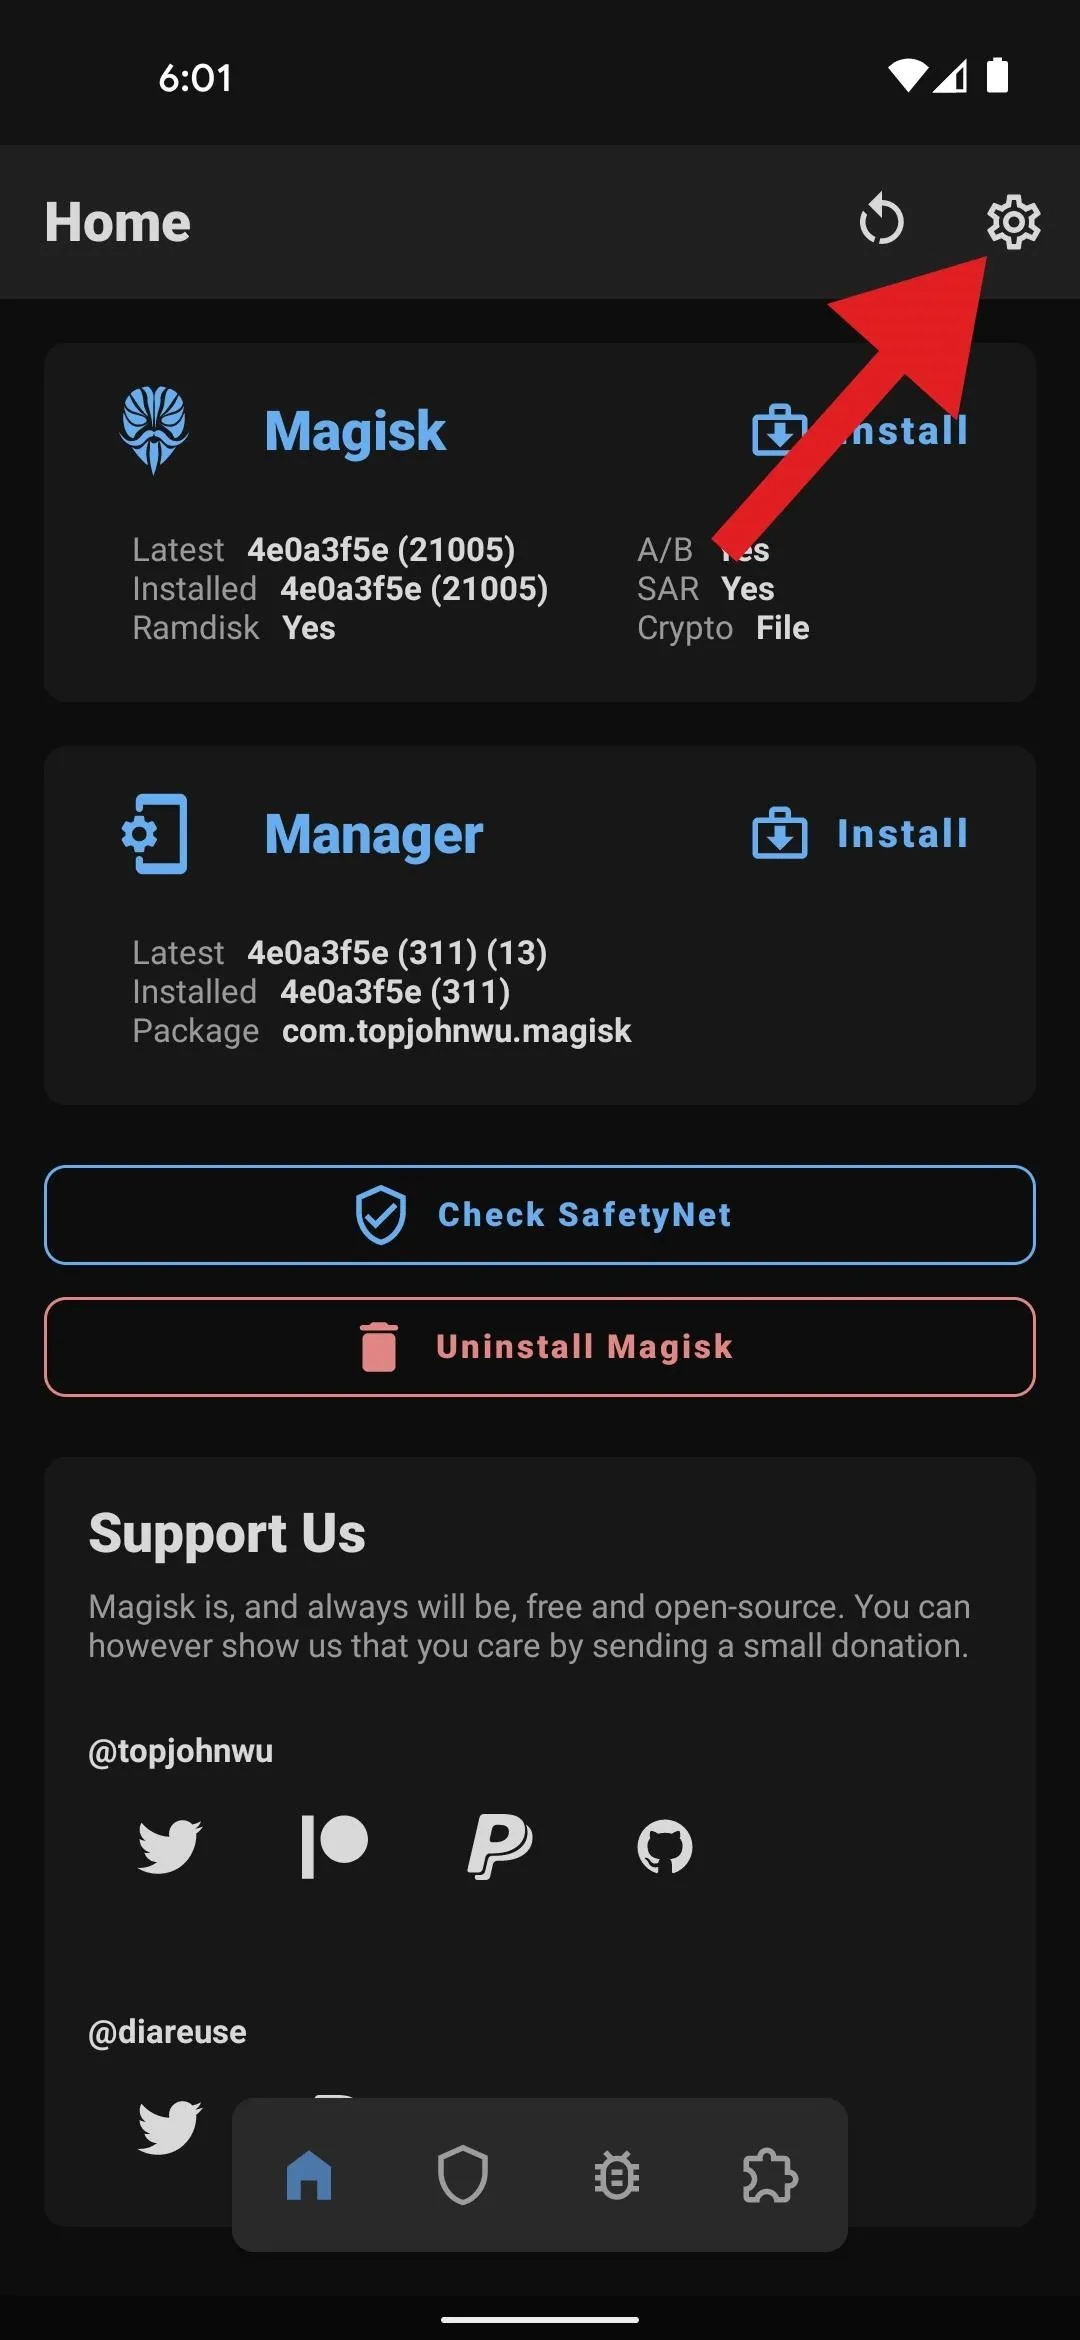
Enable MagiskHide (SafetyNet)
Magisk Manager –> Settings –> MagiskHide, Hide Magisk Manager
Google's SafetyNet system can now detect Magisk unless you take a few extra measures. In other words, you'll want to do these last few steps if you don't want to be blocked from using secure apps like Google Pay or games that people use root to cheat in like Pokémon GO.
So open Magisk Manager and tap the gear icon in the top-right corner. Next, scroll down a bit and enable the toggle next to "MagiskHide."
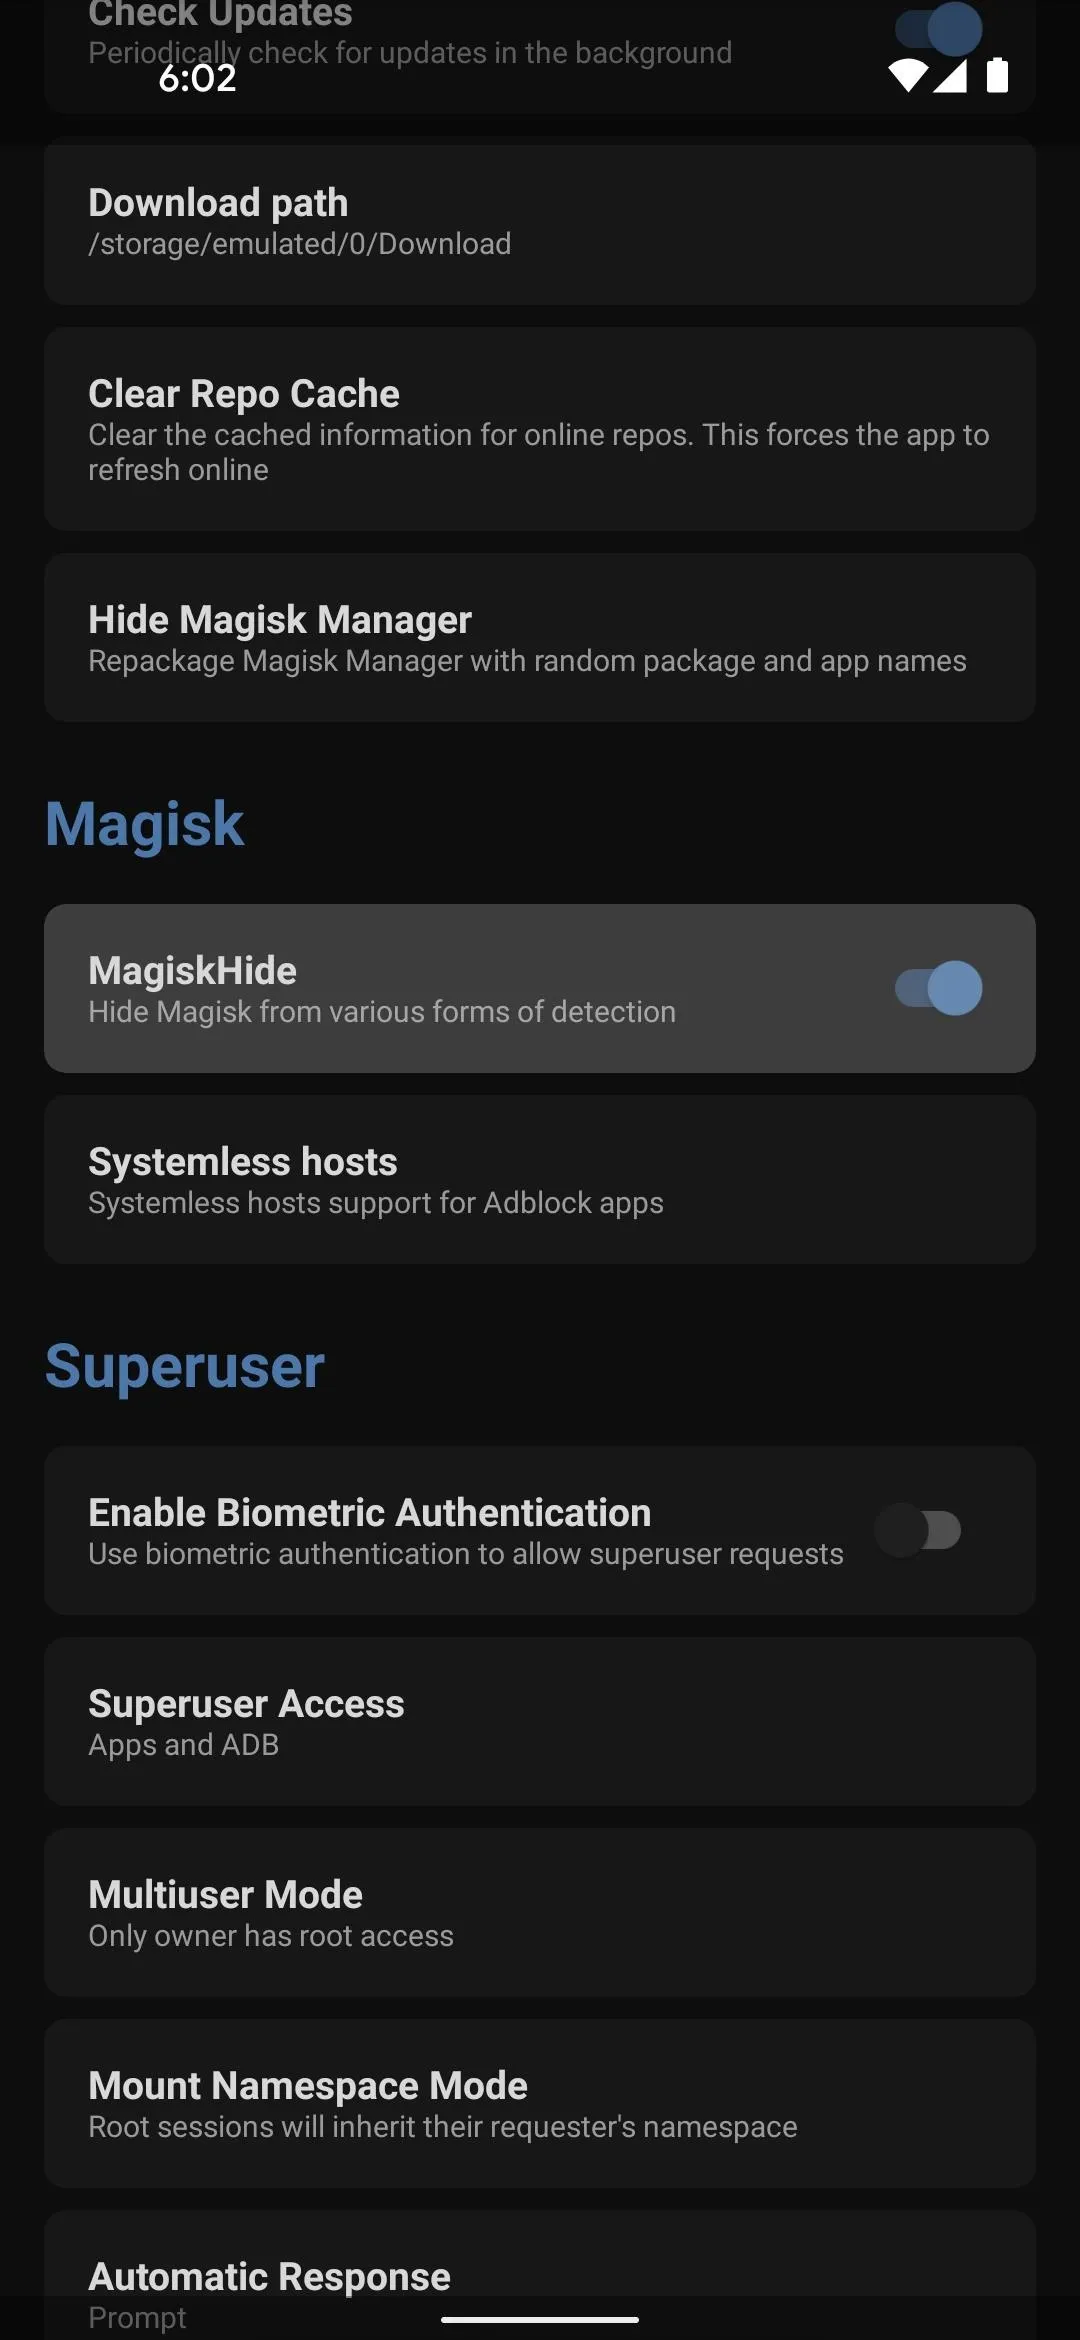
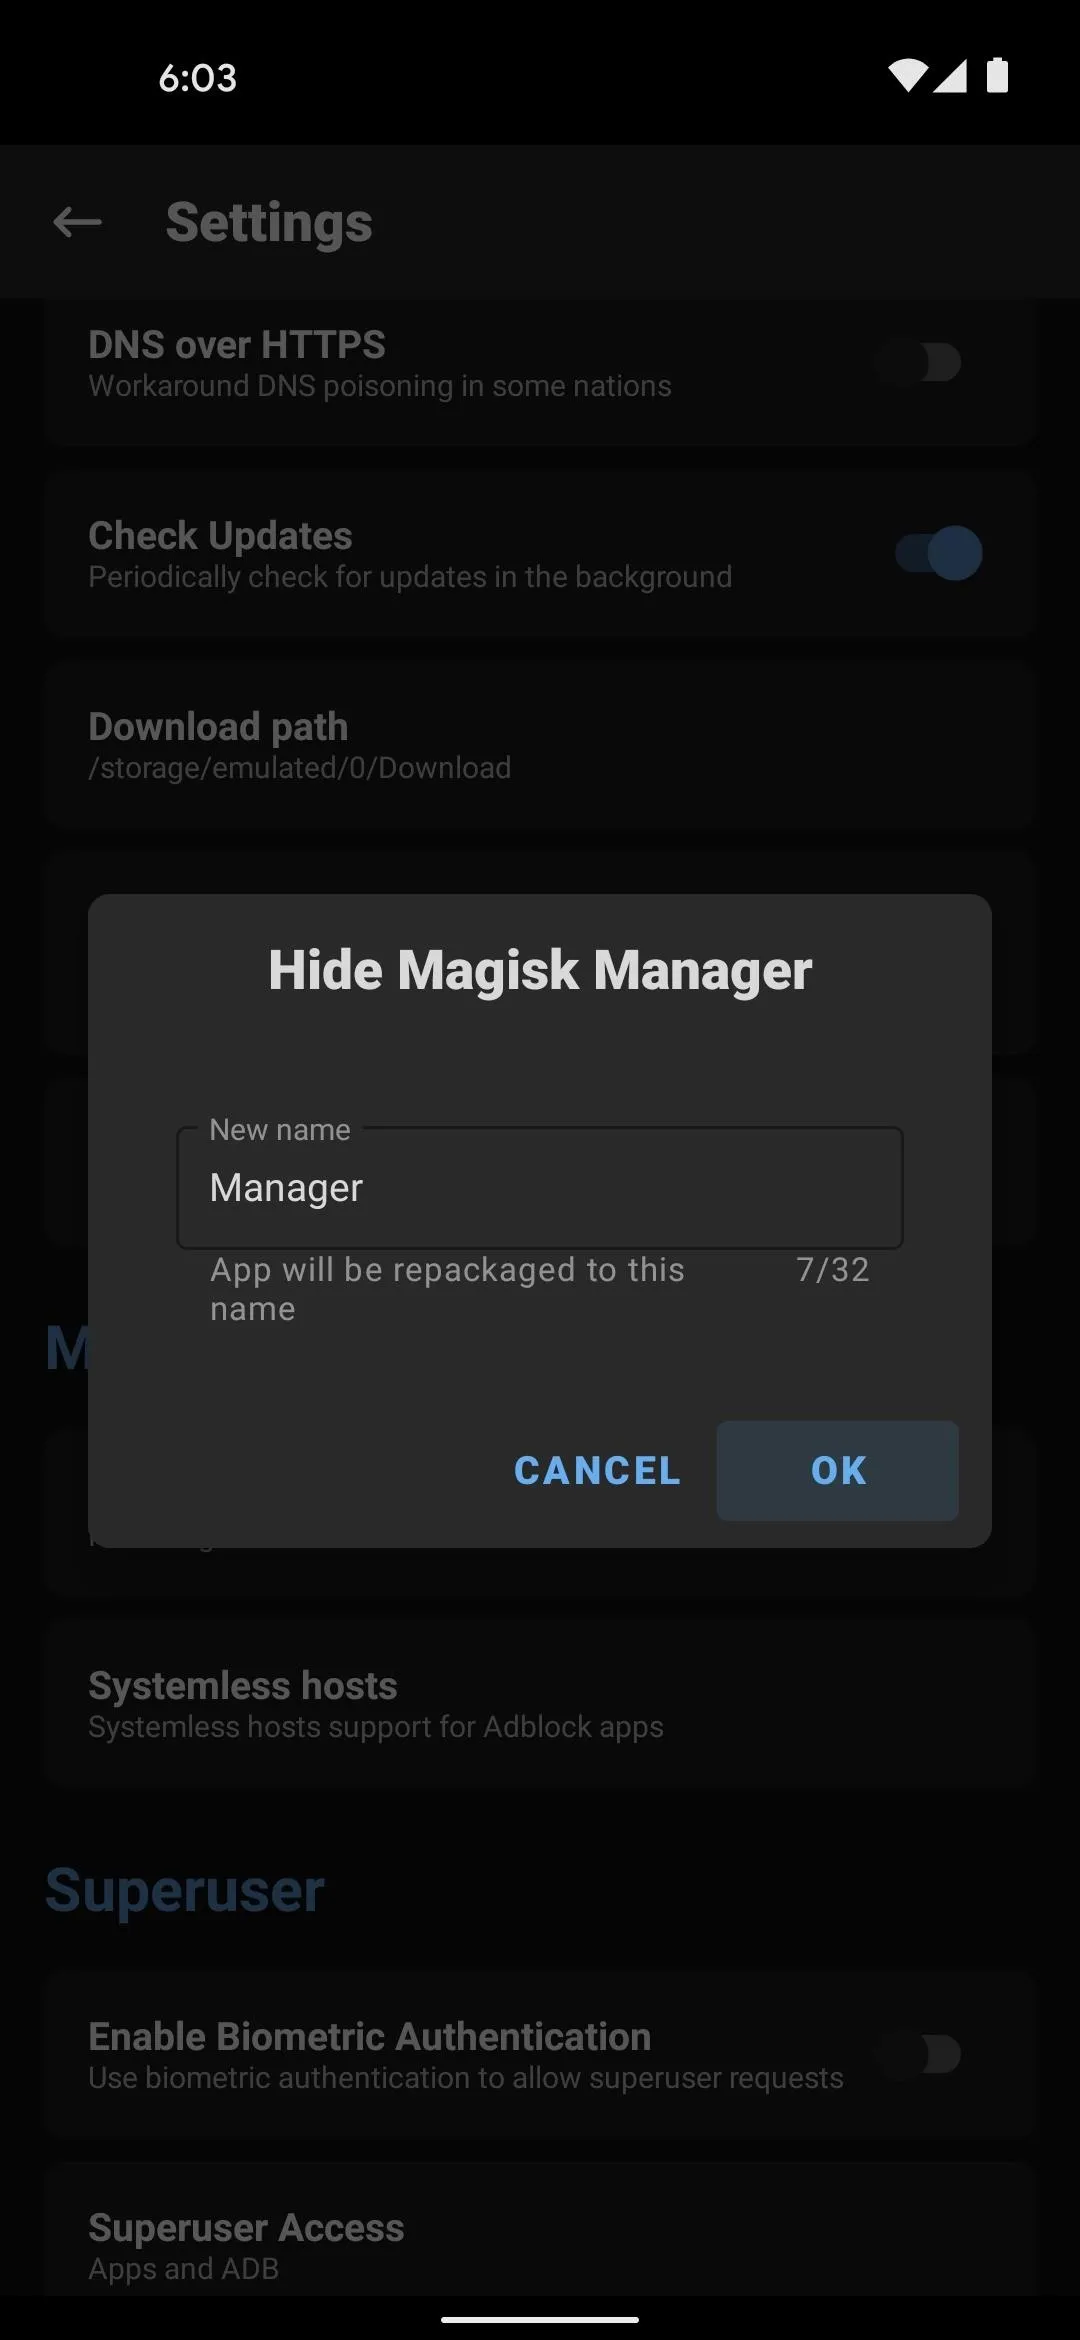
Now, just above the "MagiskHide" option, tap "Hide Magisk Manager." Give the app a new name on the prompt, then hit "OK." Magisk Manager will now close and reopen — from now on, you'll find it in your app drawer under the name you entered.

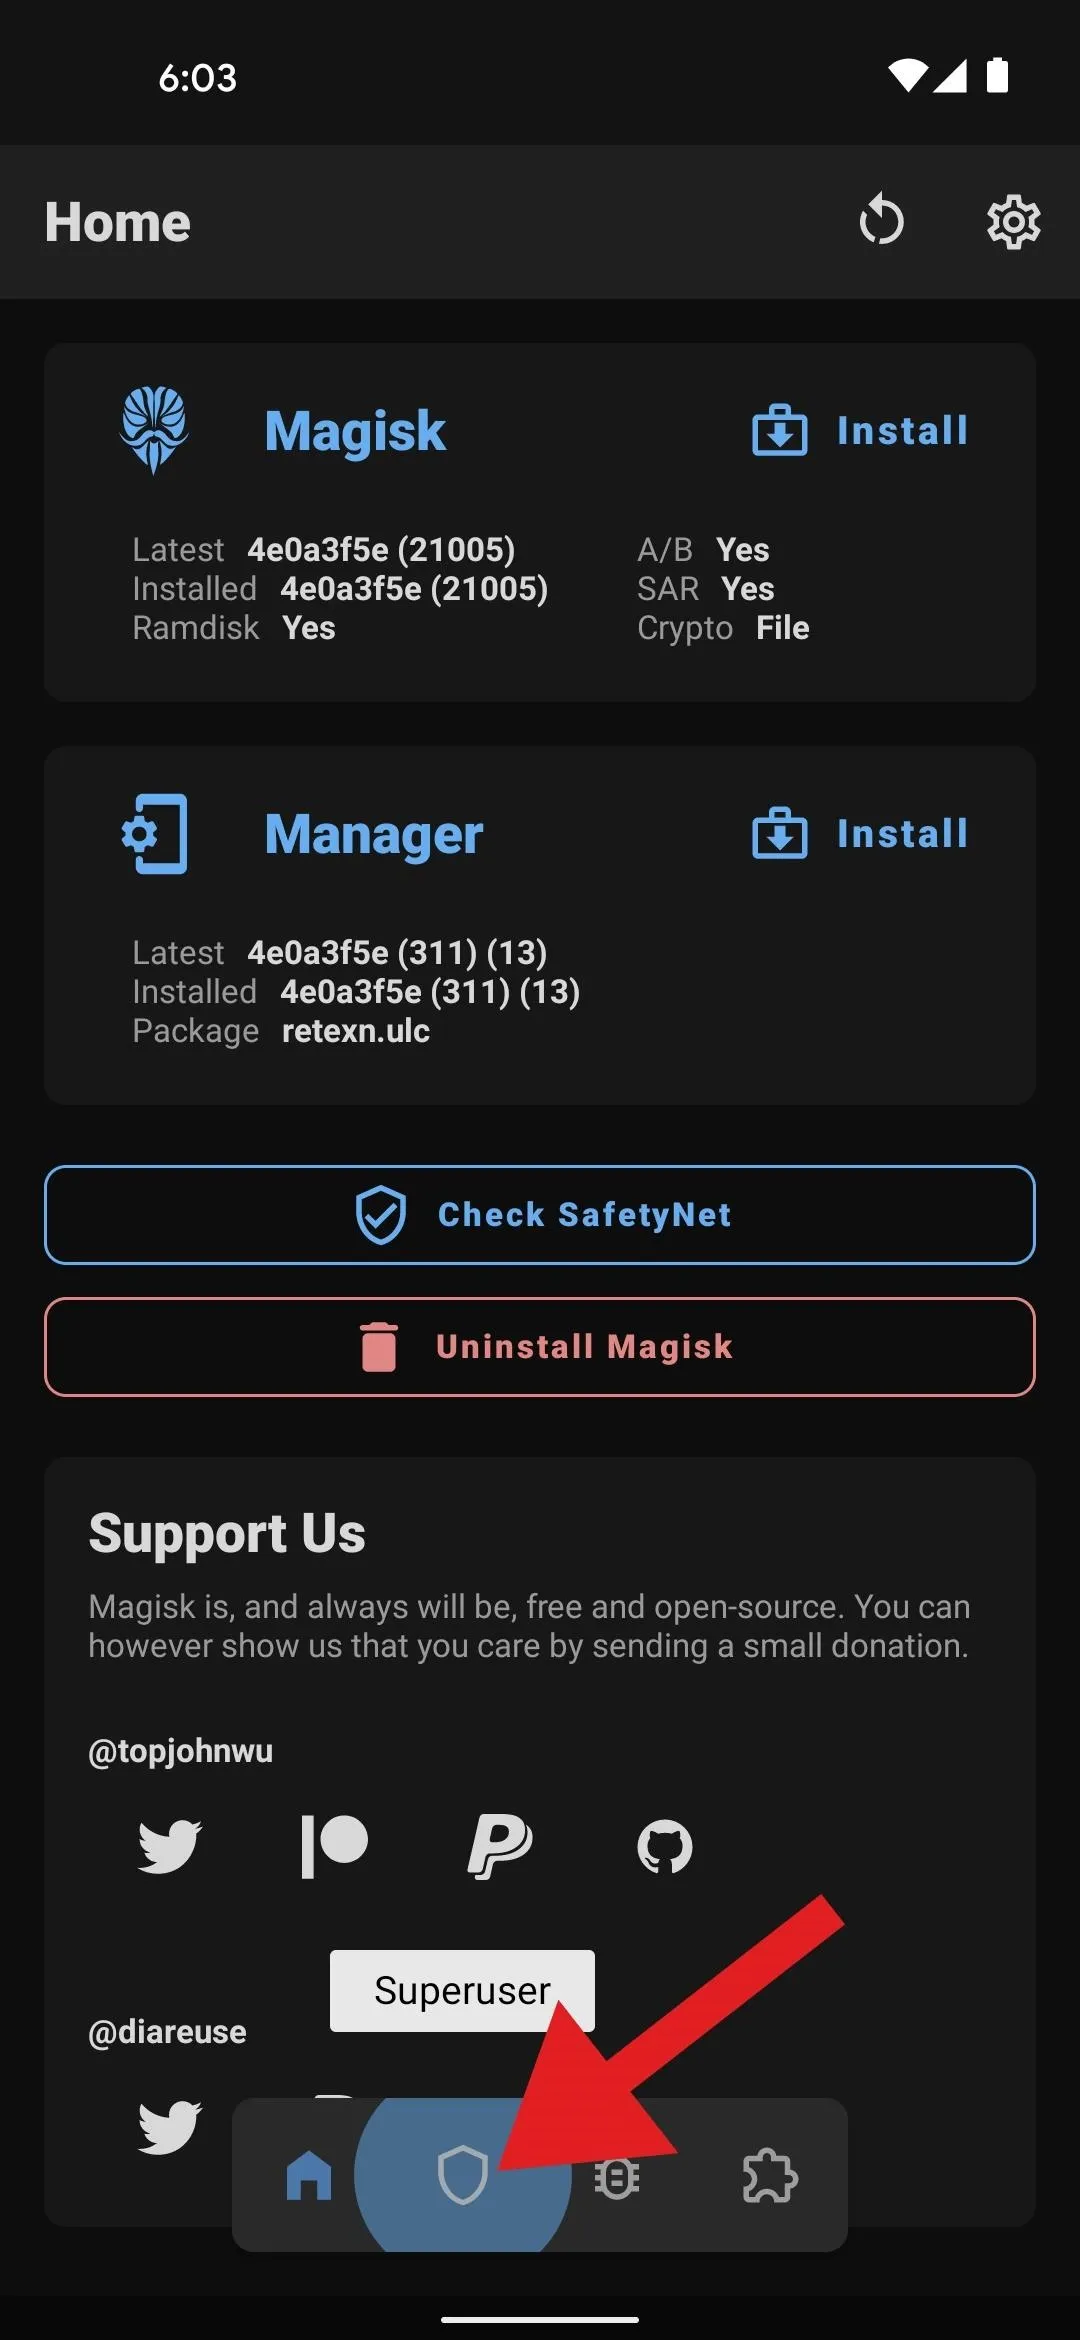
Hide Magisk from Google Play Services (SafetyNet)
Shield button –> MagiskHide -> Google Play services –> enable all toggles
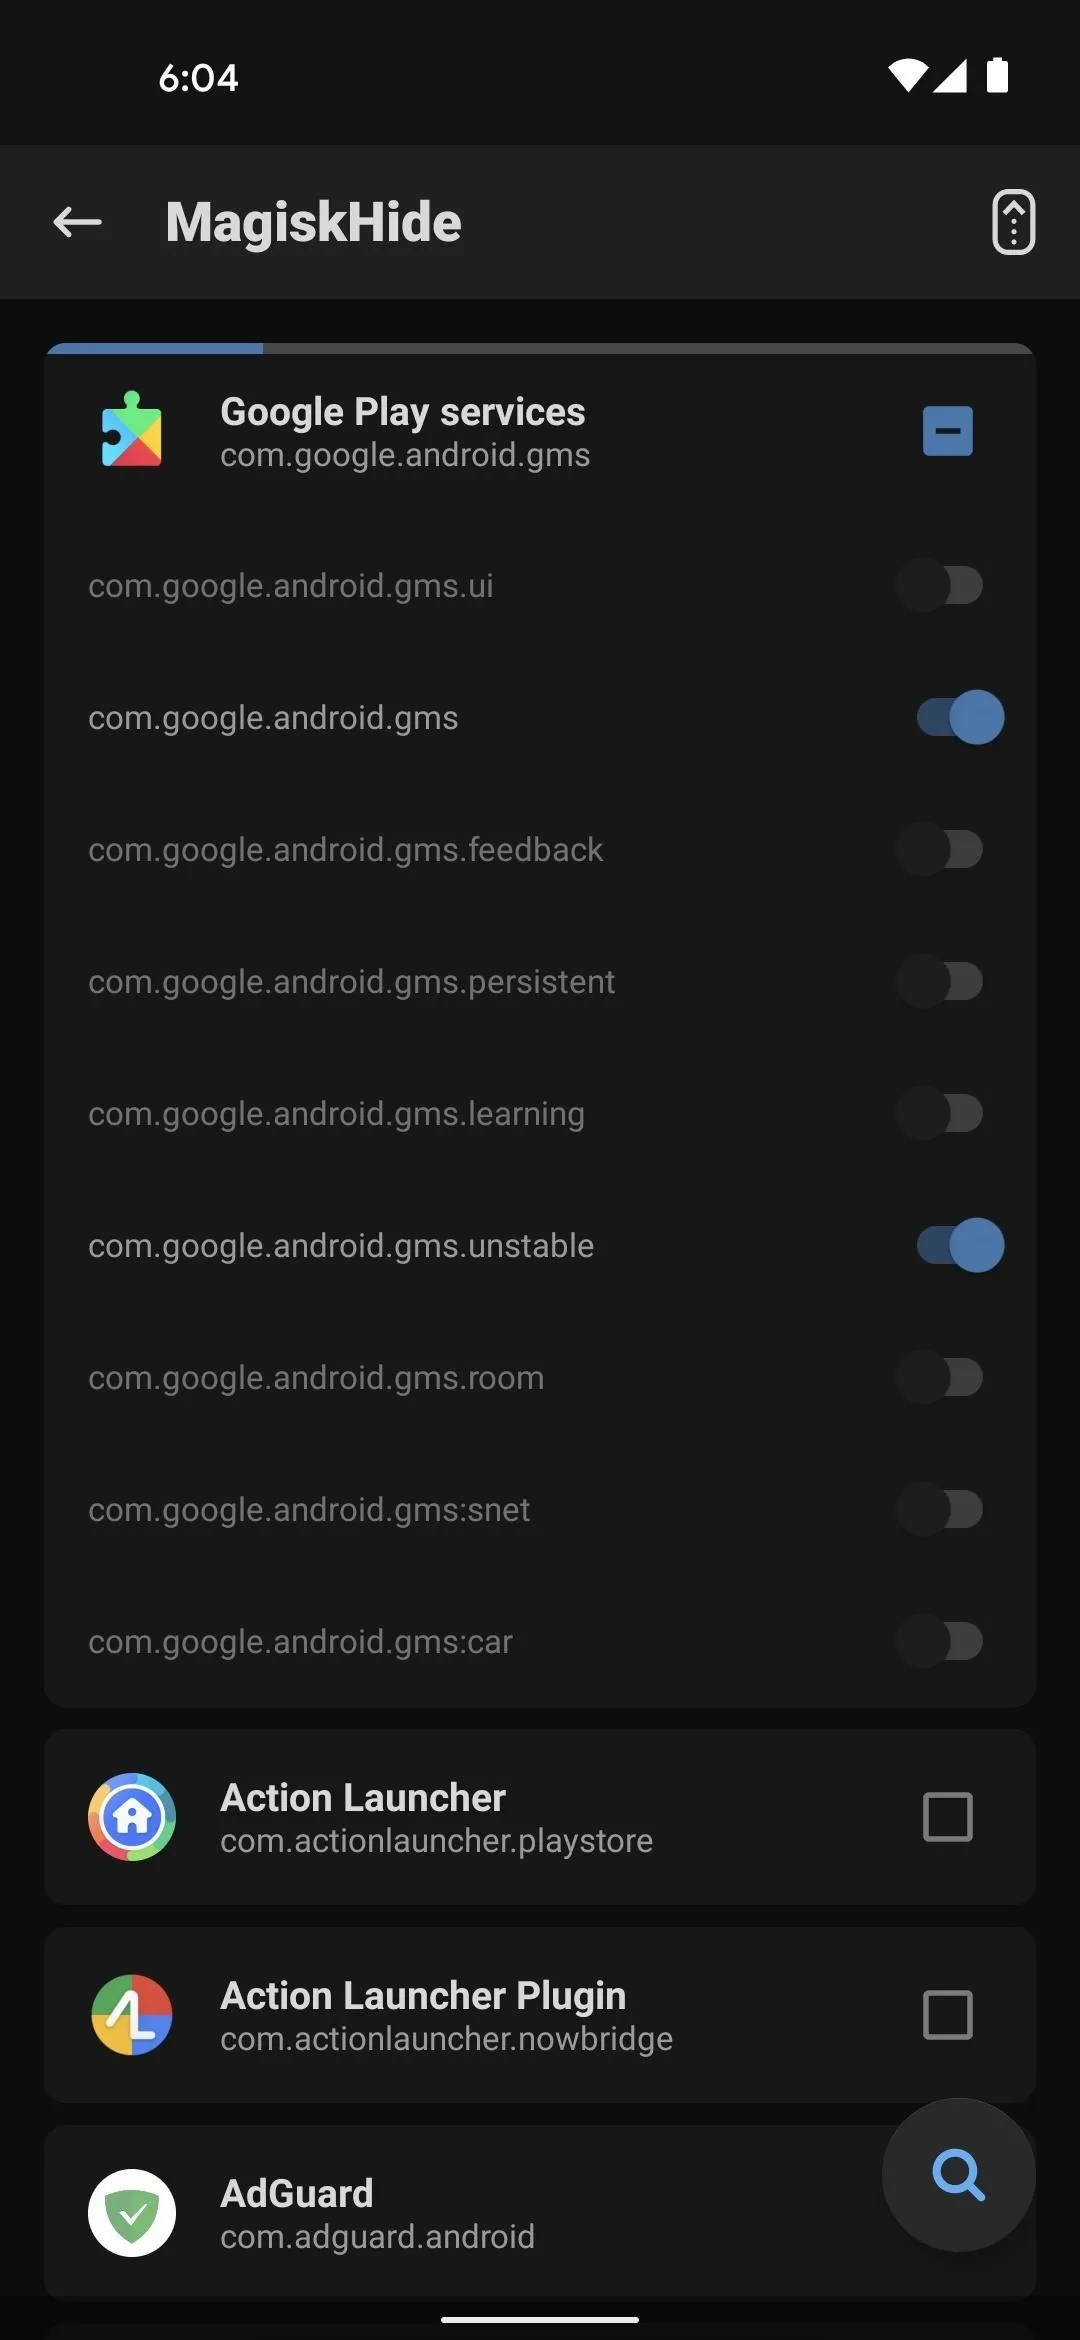
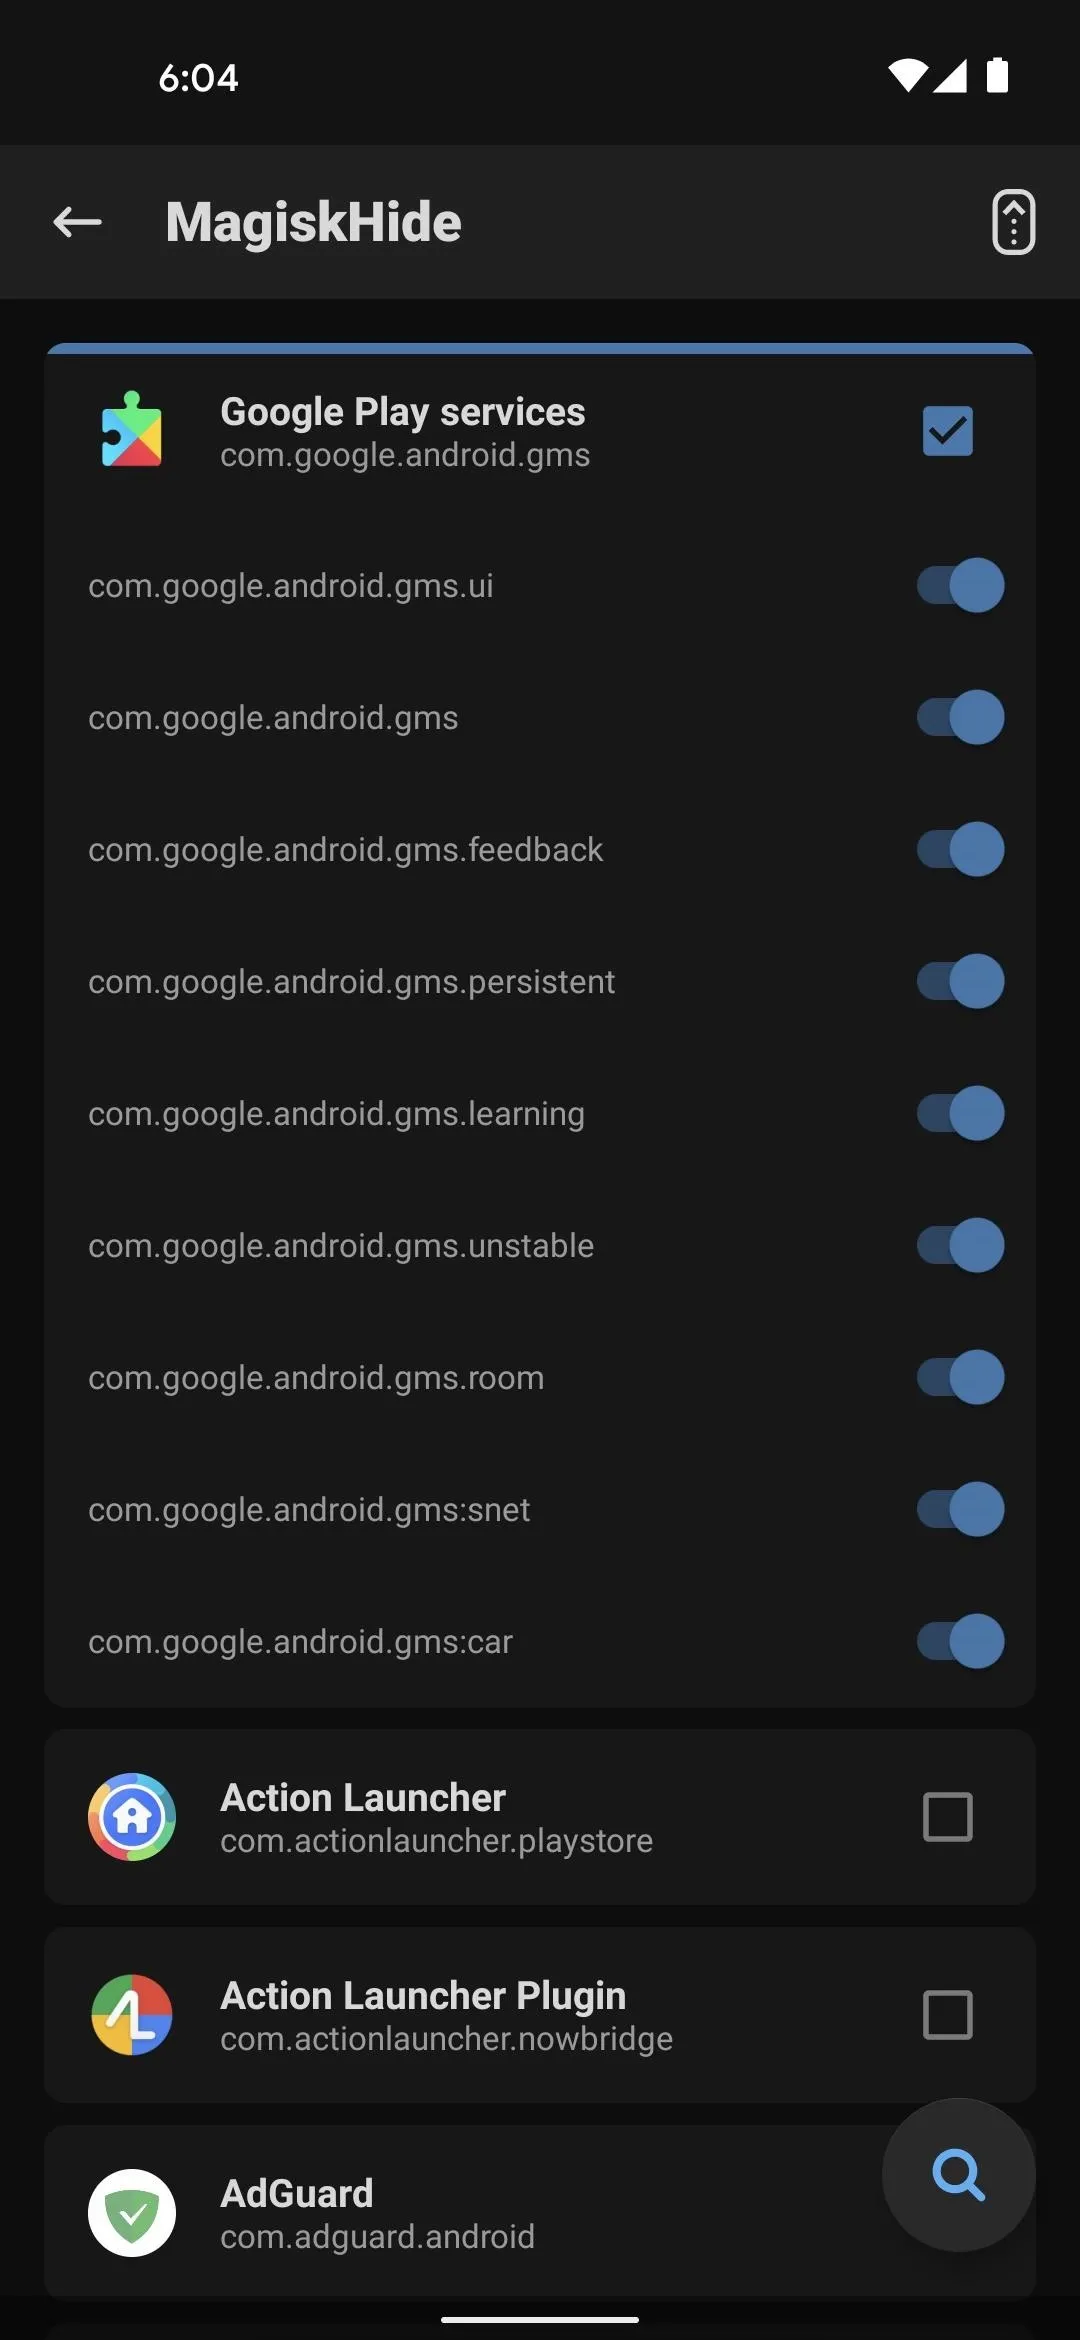
Back on Magisk Manager's main menu, tap the shield icon on the floating menu bar at the bottom of the screen. Next, tap "MagiskHide," then find the Google Play Services entry — it should be at the top of the list.
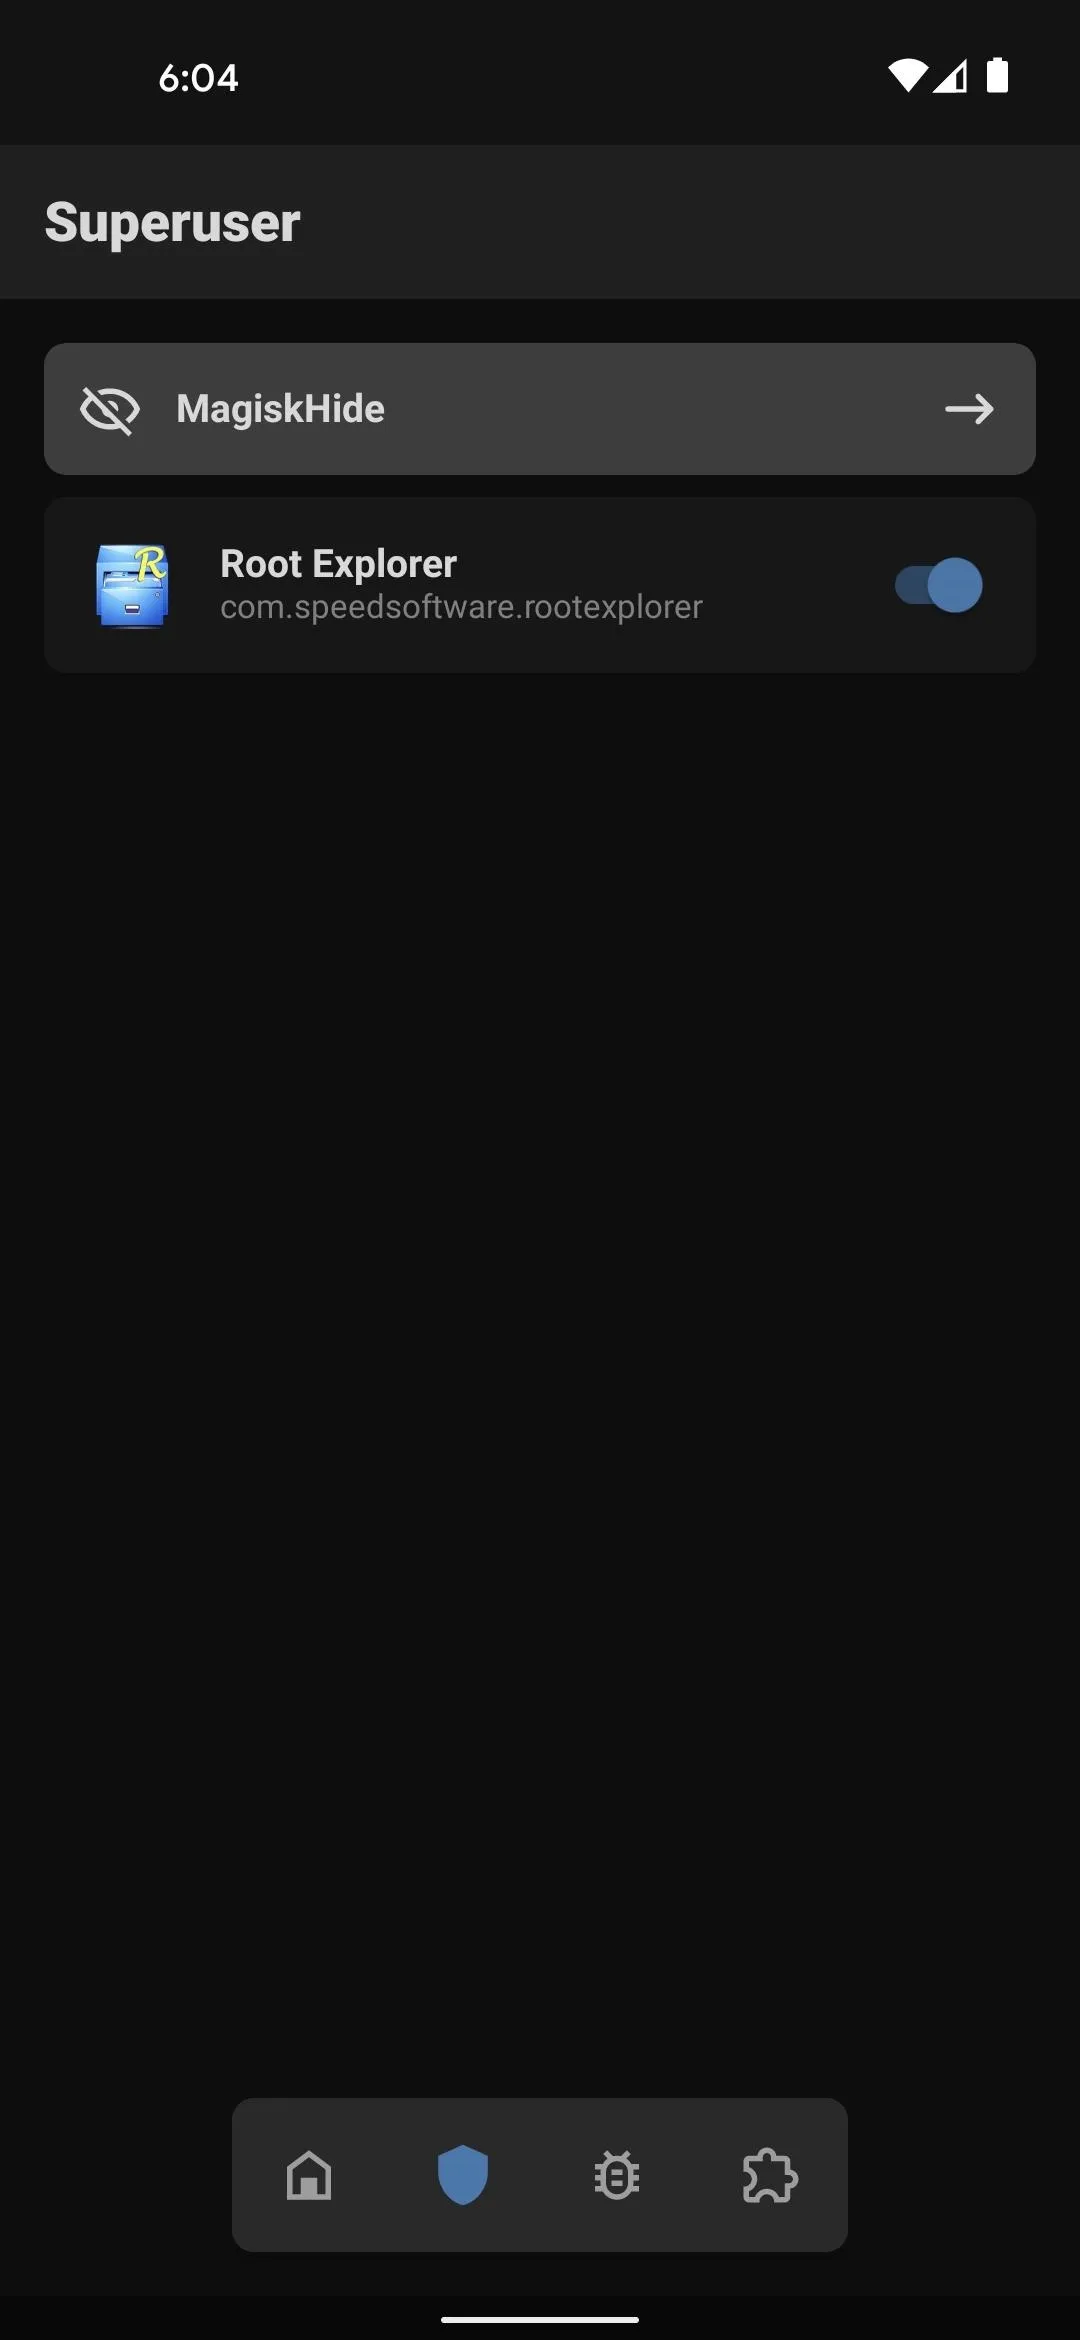
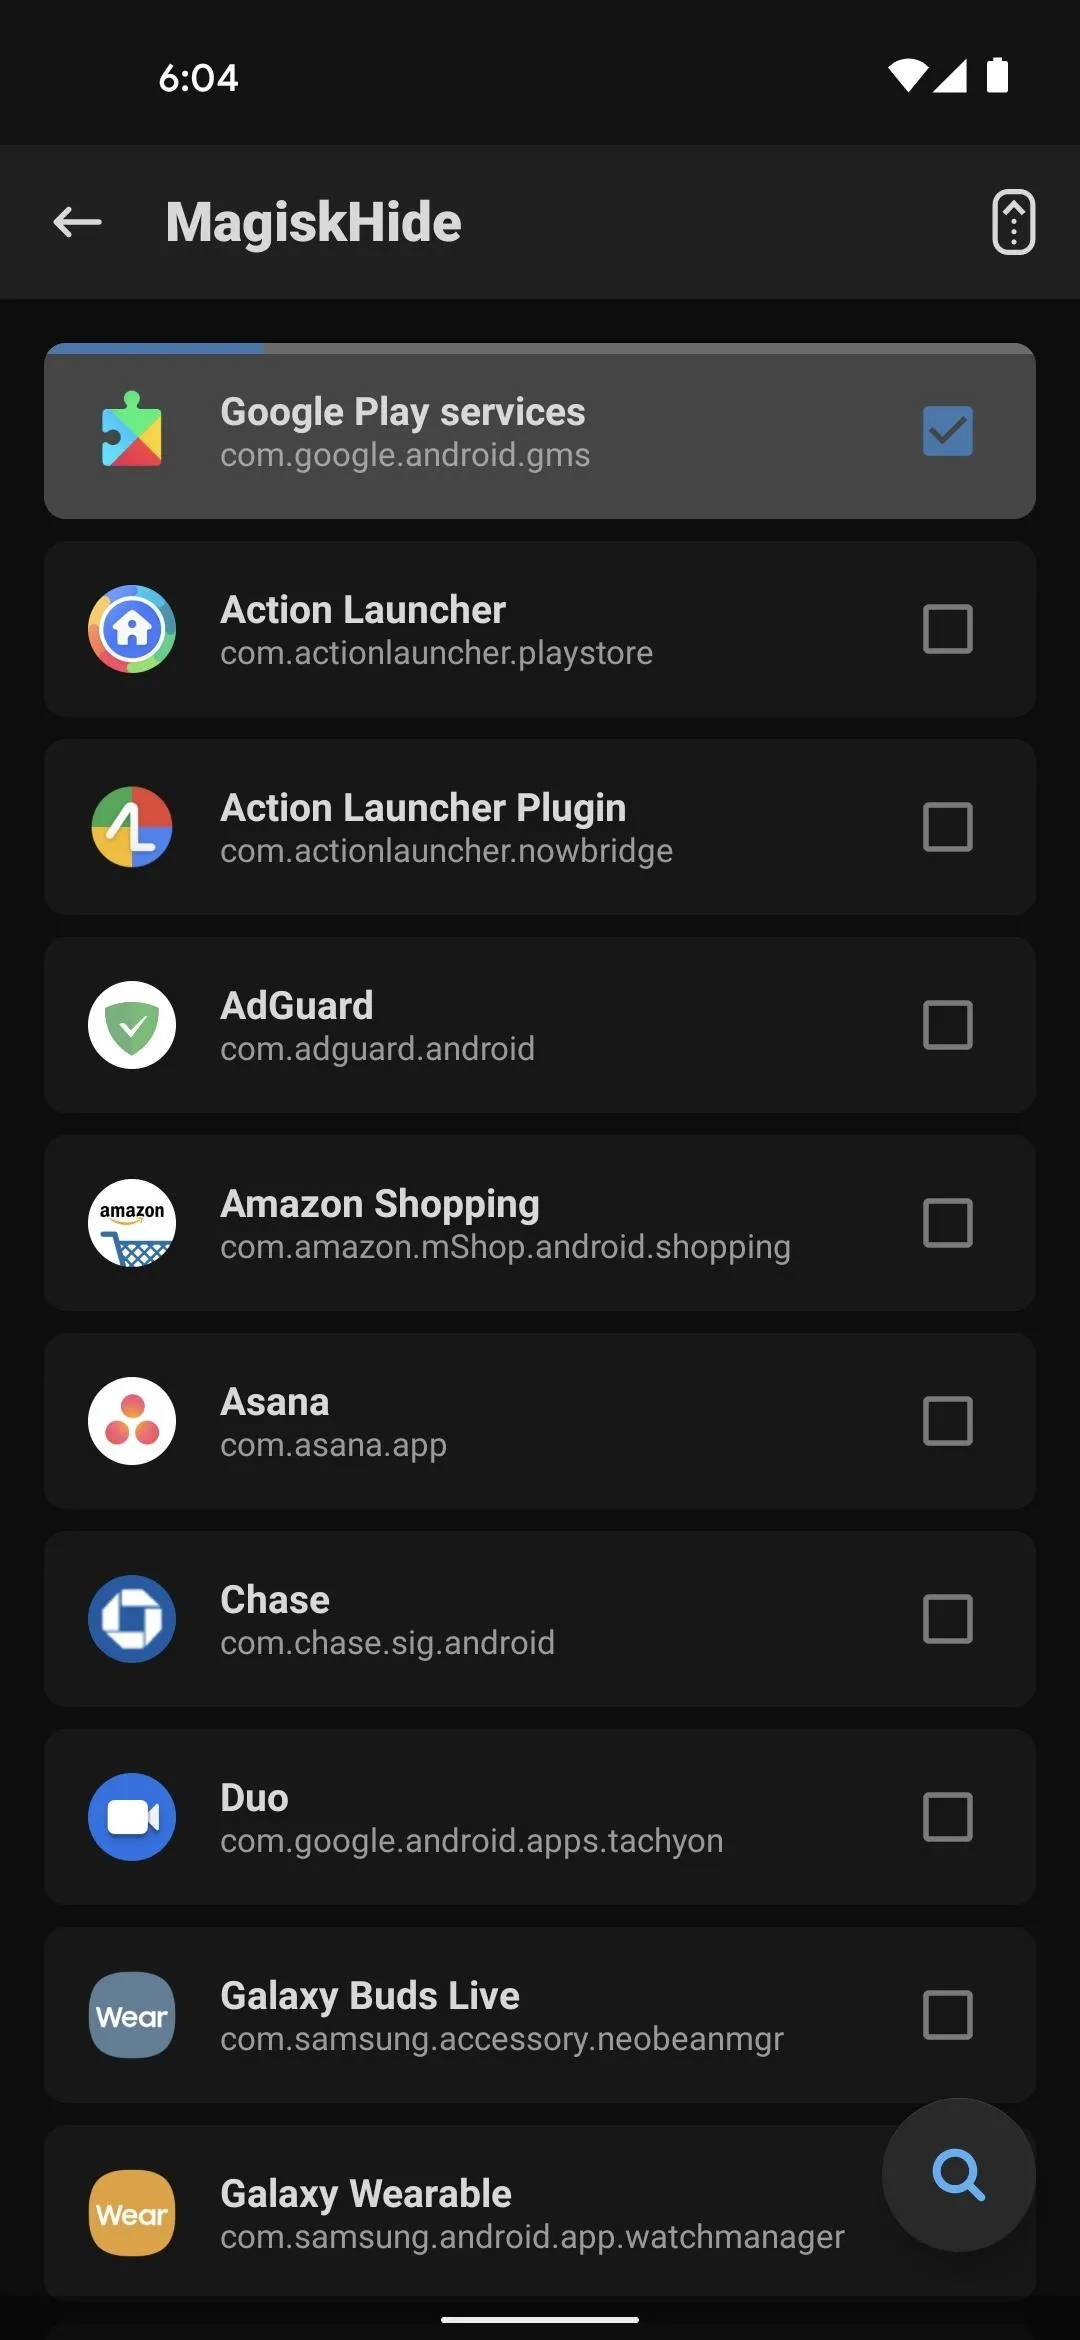
Tap the "Google Play Services" text to expand several more options. Here, make sure the switches next to each hook are enabled.
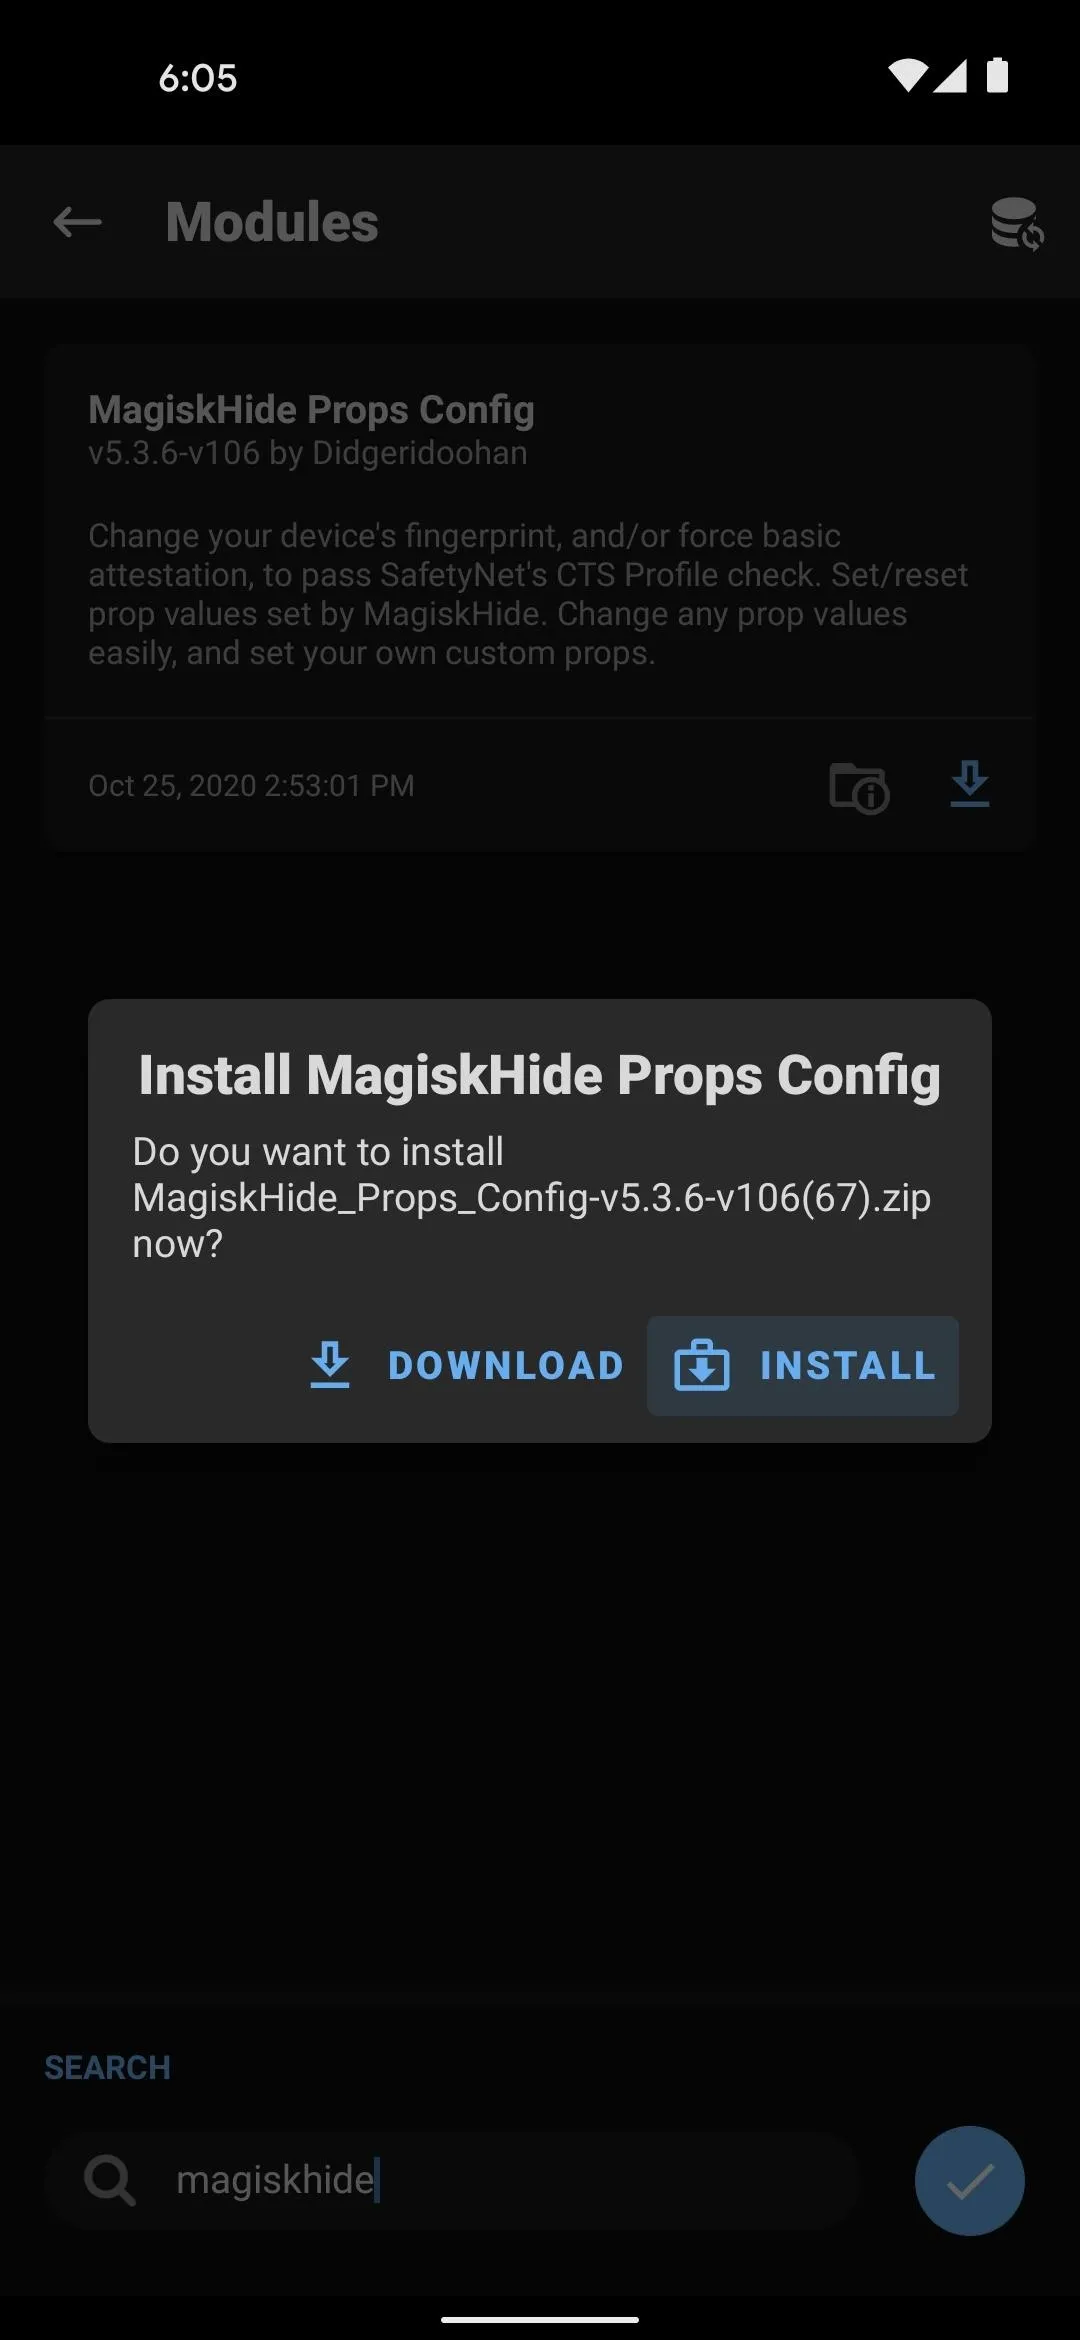
Install the MagiskHide Module
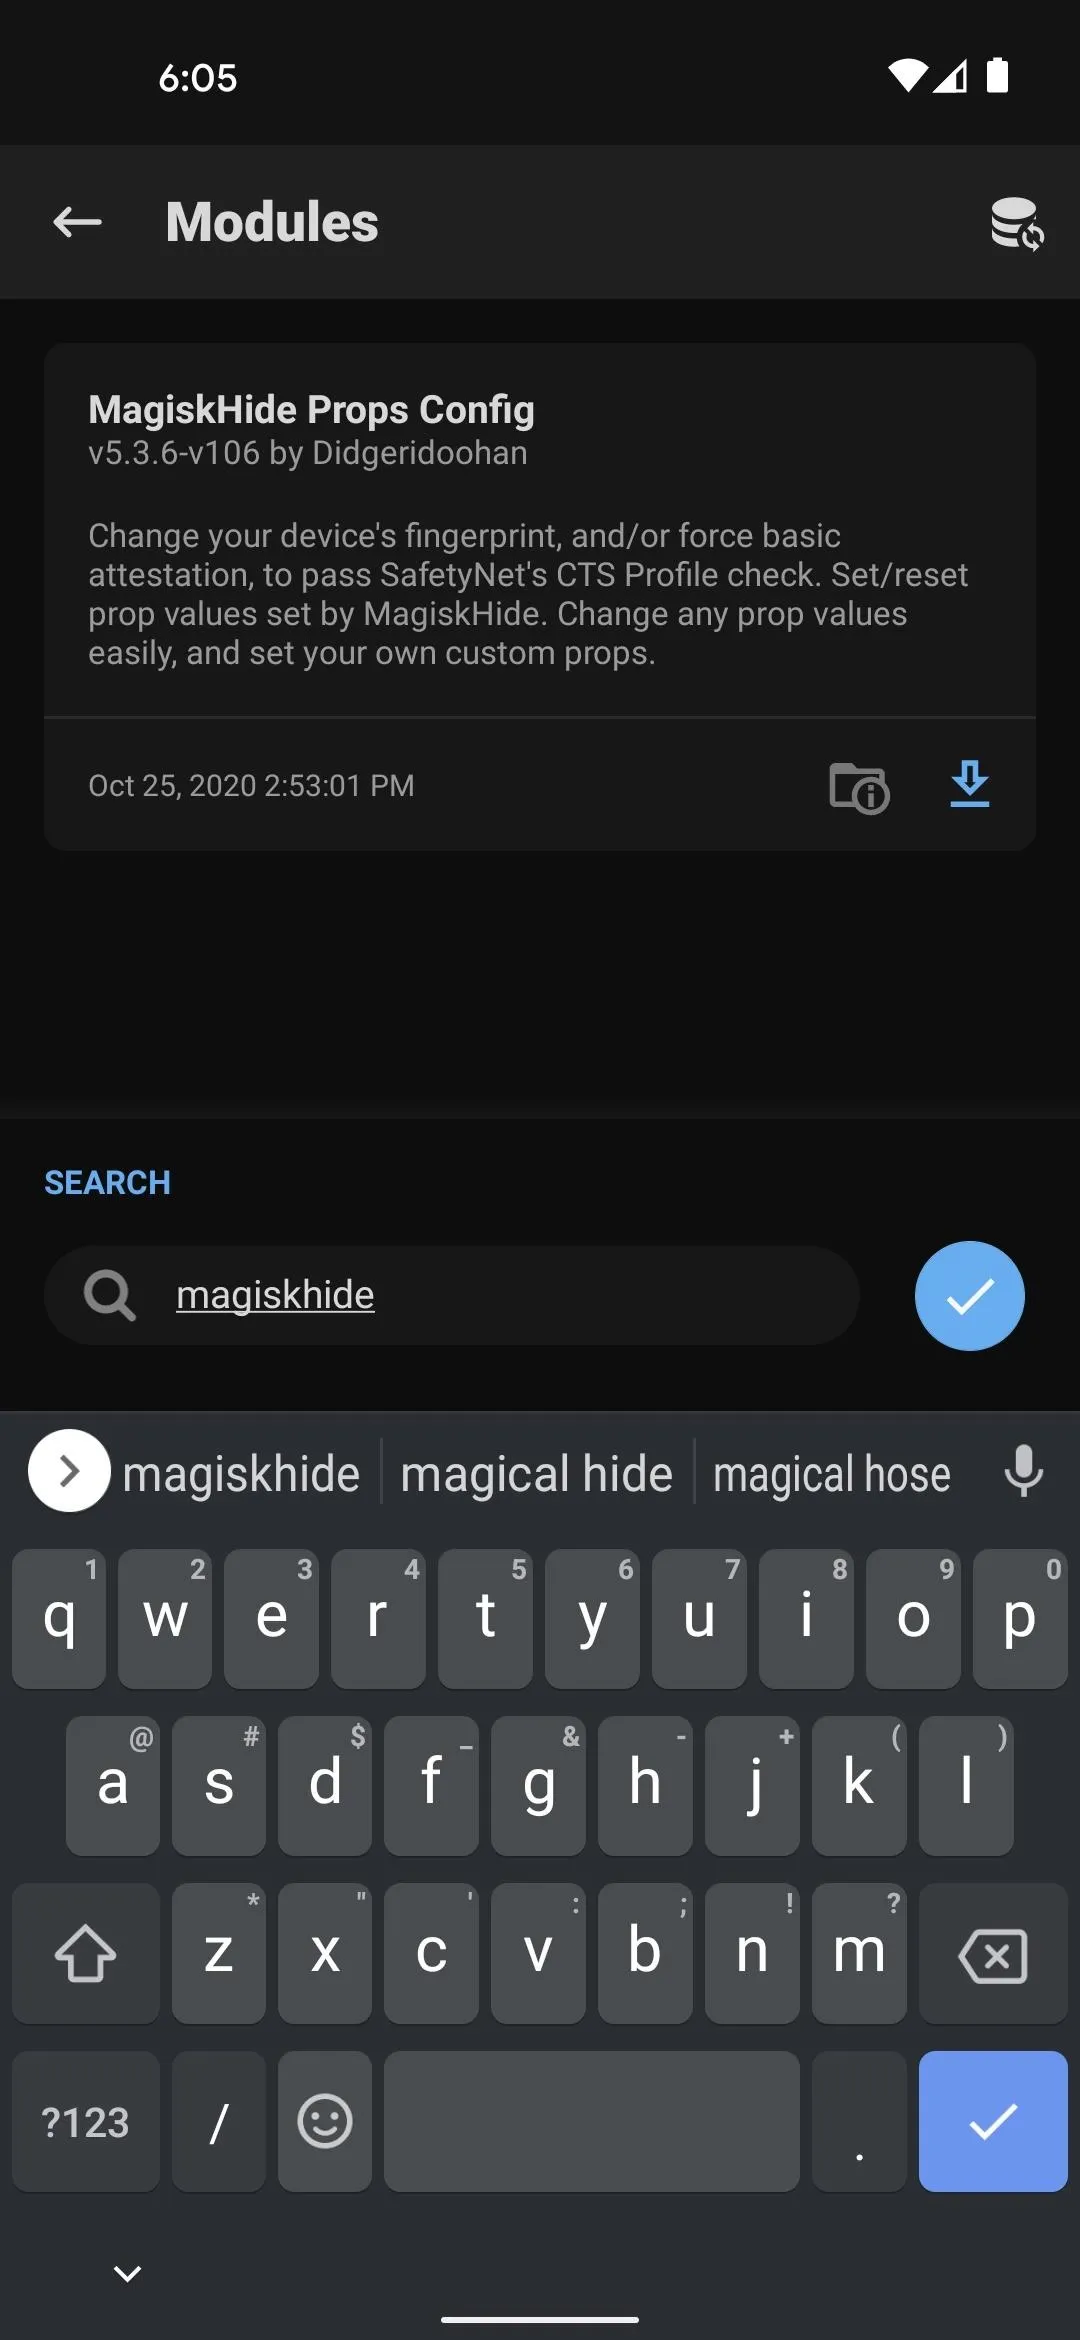
Install "MagiskHide Props Config" from the Modules Tab
Now, head back to Magisk Manager's main menu and tap the puzzle icon on the floating menu bar at the bottom of the screen. Here, tap the search icon and type in "magiskhide." Tap the top result (MagiskHide Props Config), then press "Install" on the popup. When that's done, hit "Reboot."

Mimic the Pixel 3a's SafetyNet Attestation
Use command interface to select Google Pixel 3a, then reboot
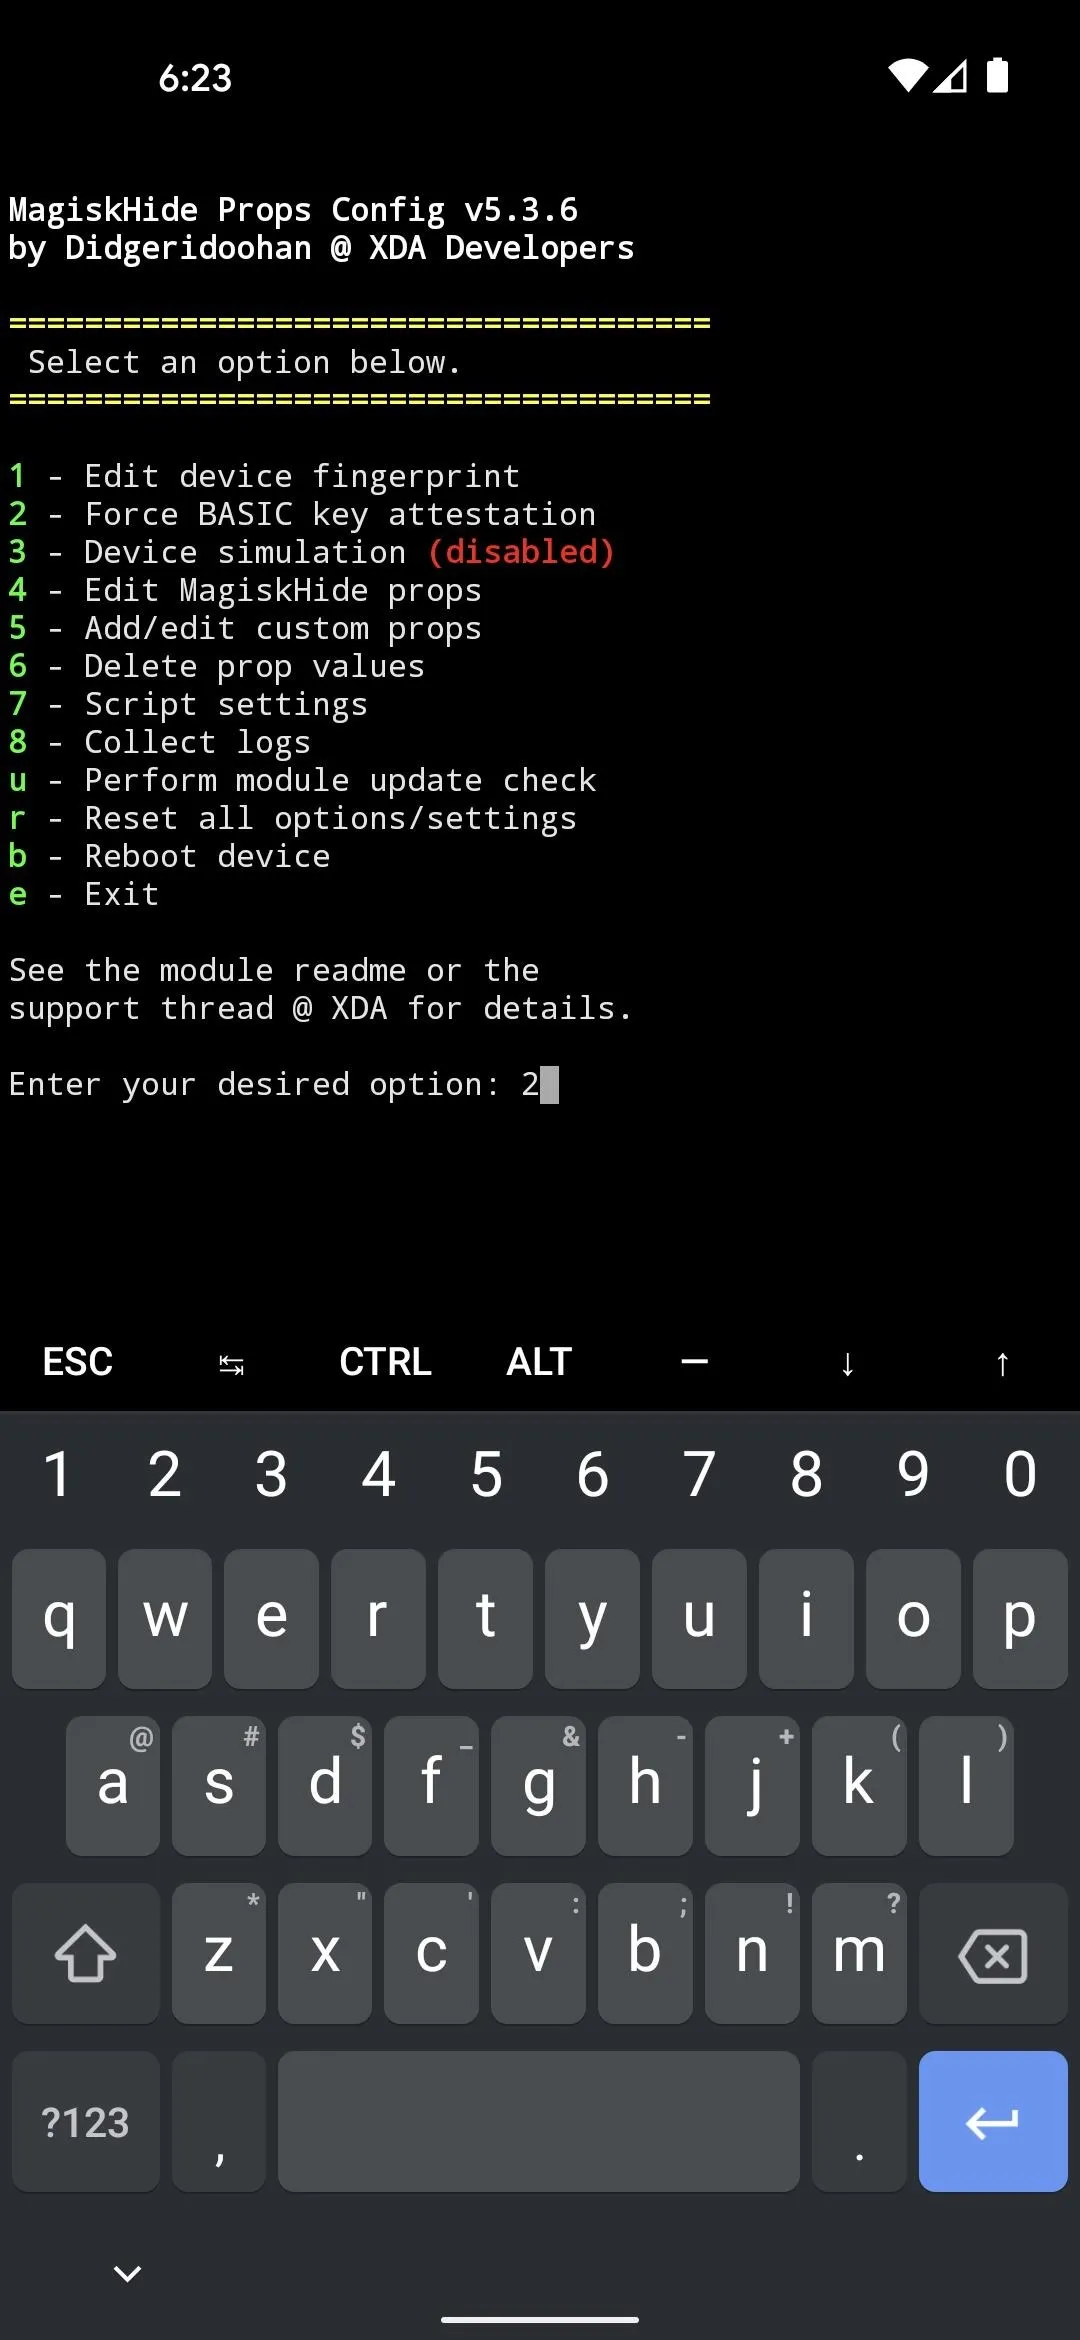
When you get back up, install Termux from the Google Play Store. Open it up and type su, then hit enter and tap "Grant" on the popup to give the terminal app root access.
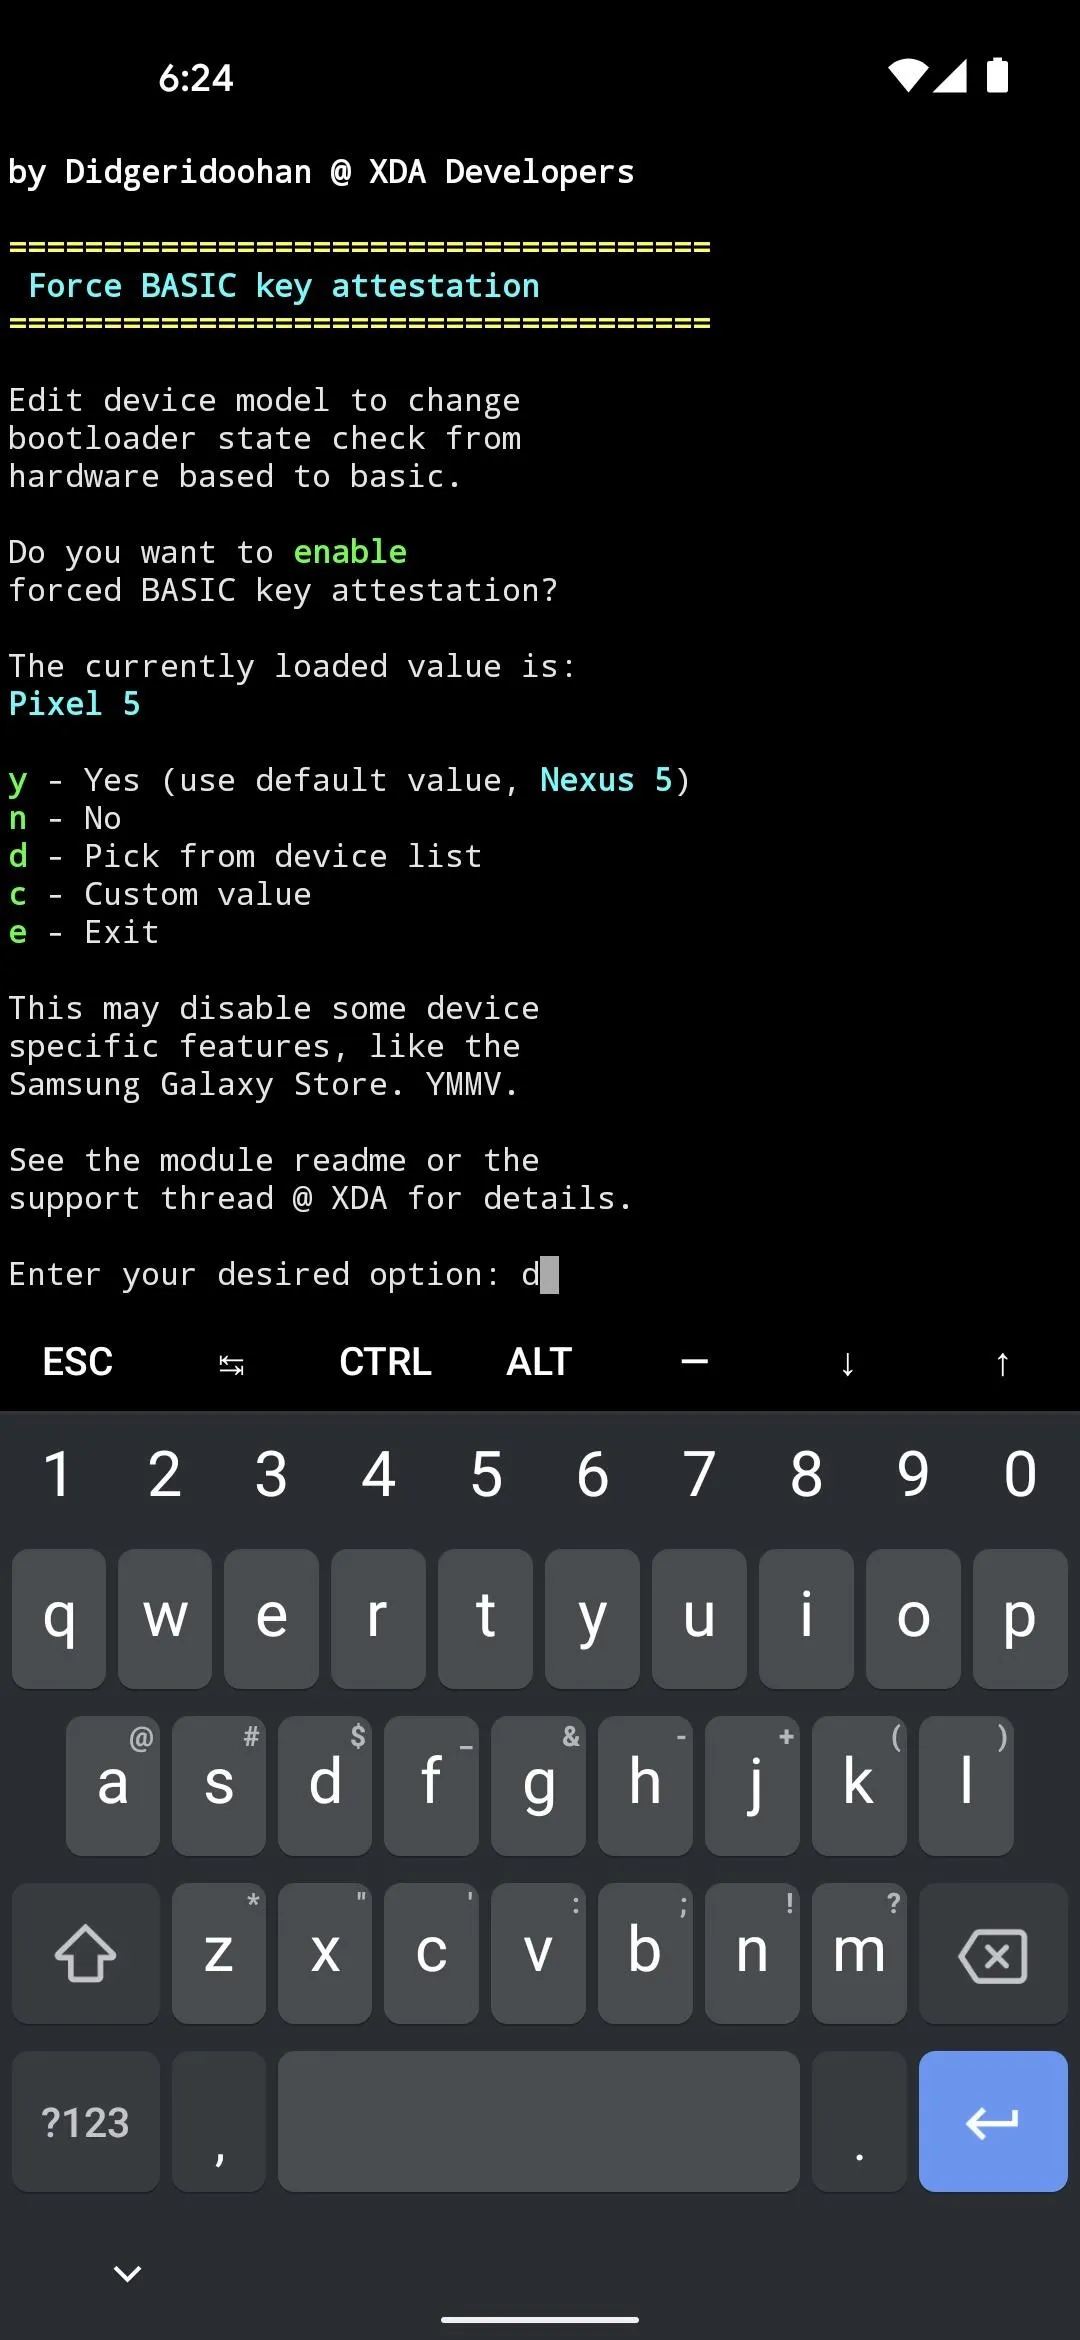
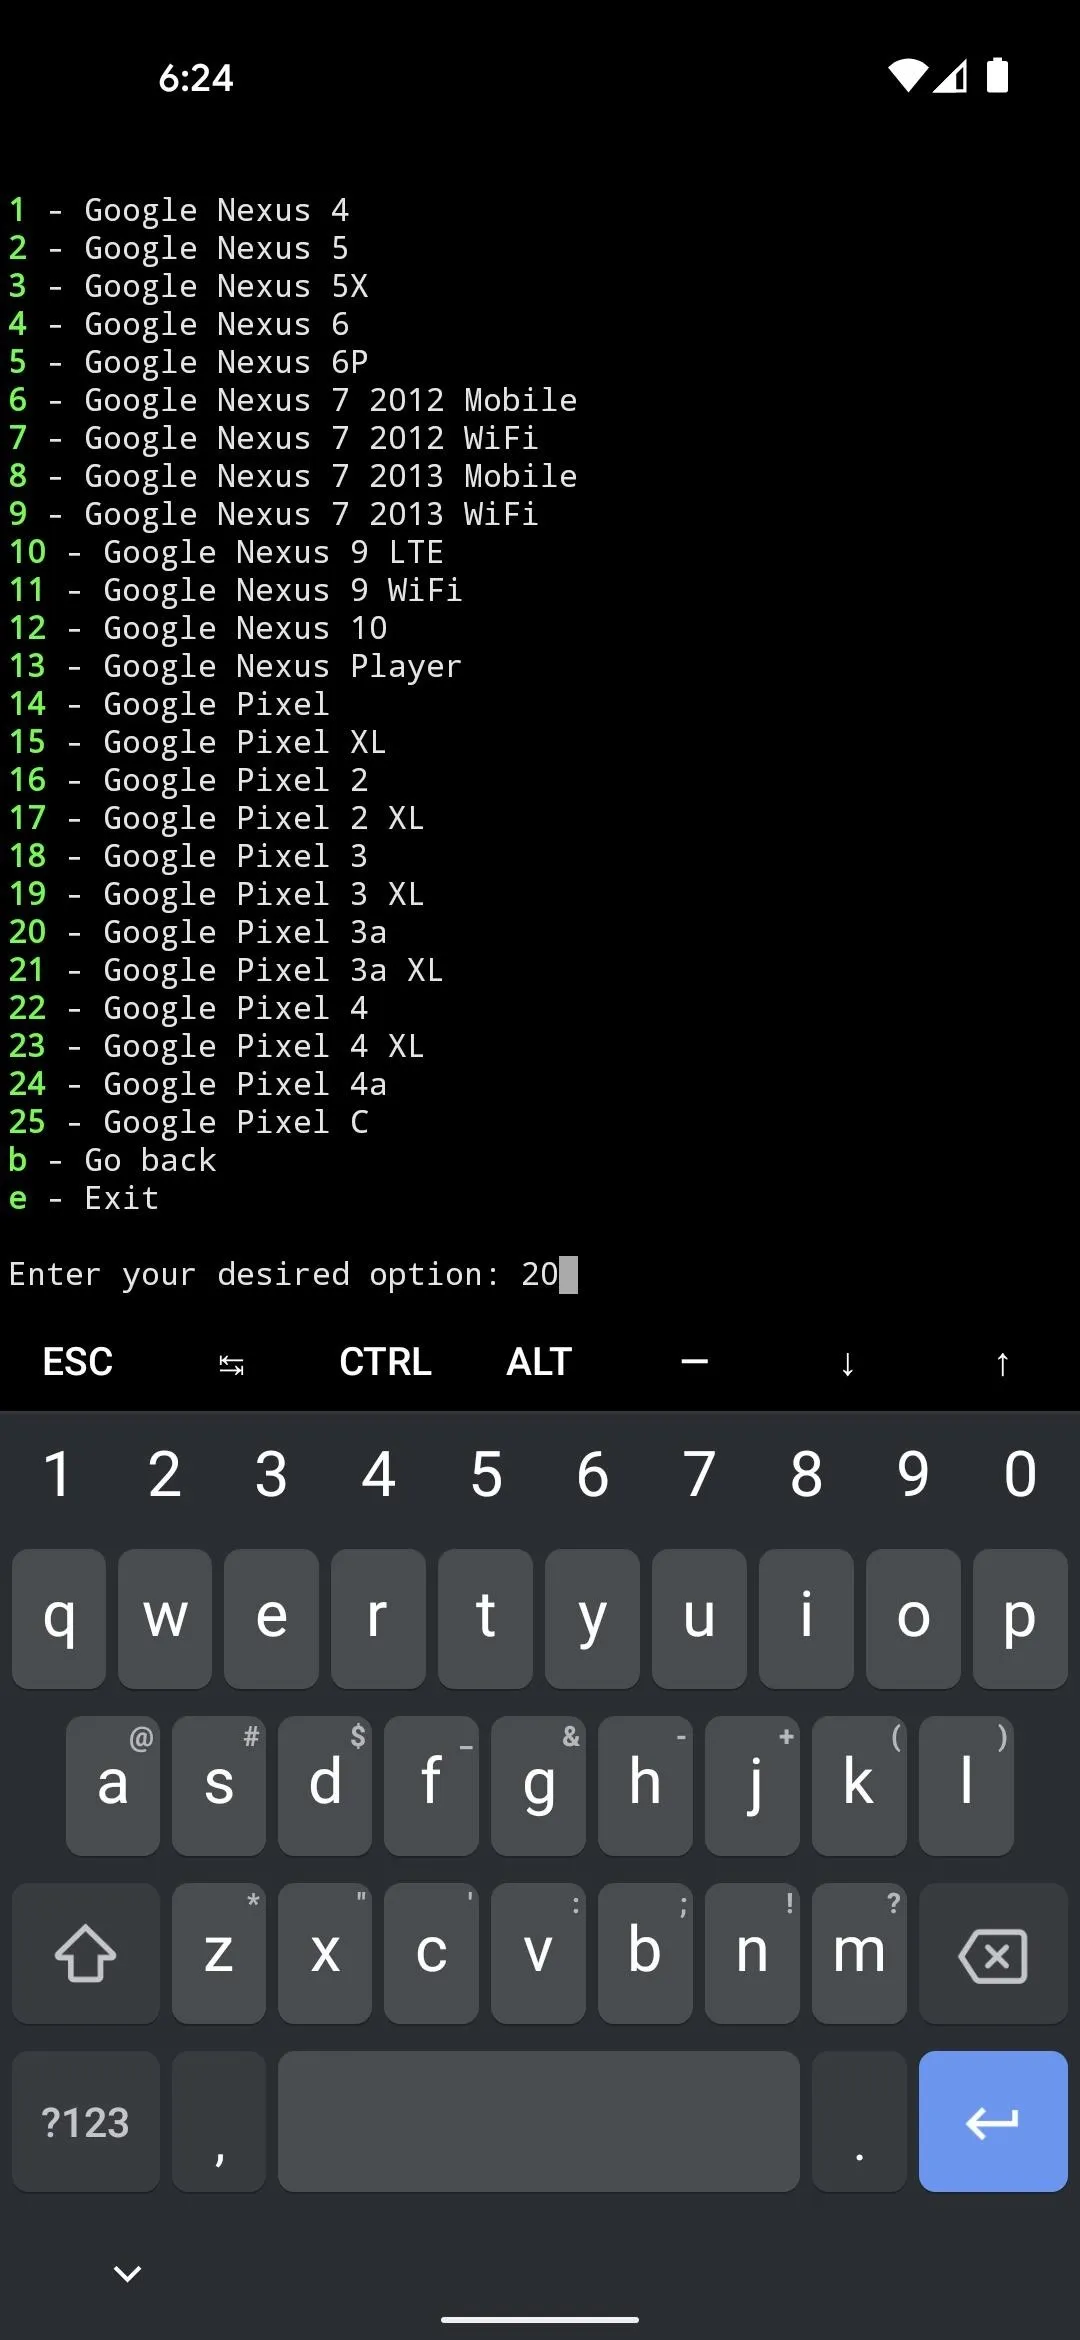
Now, type props and hit enter to run the MagiskHide module. Next, type 2 and hit enter to select the "Force BASIC key attestation" option.

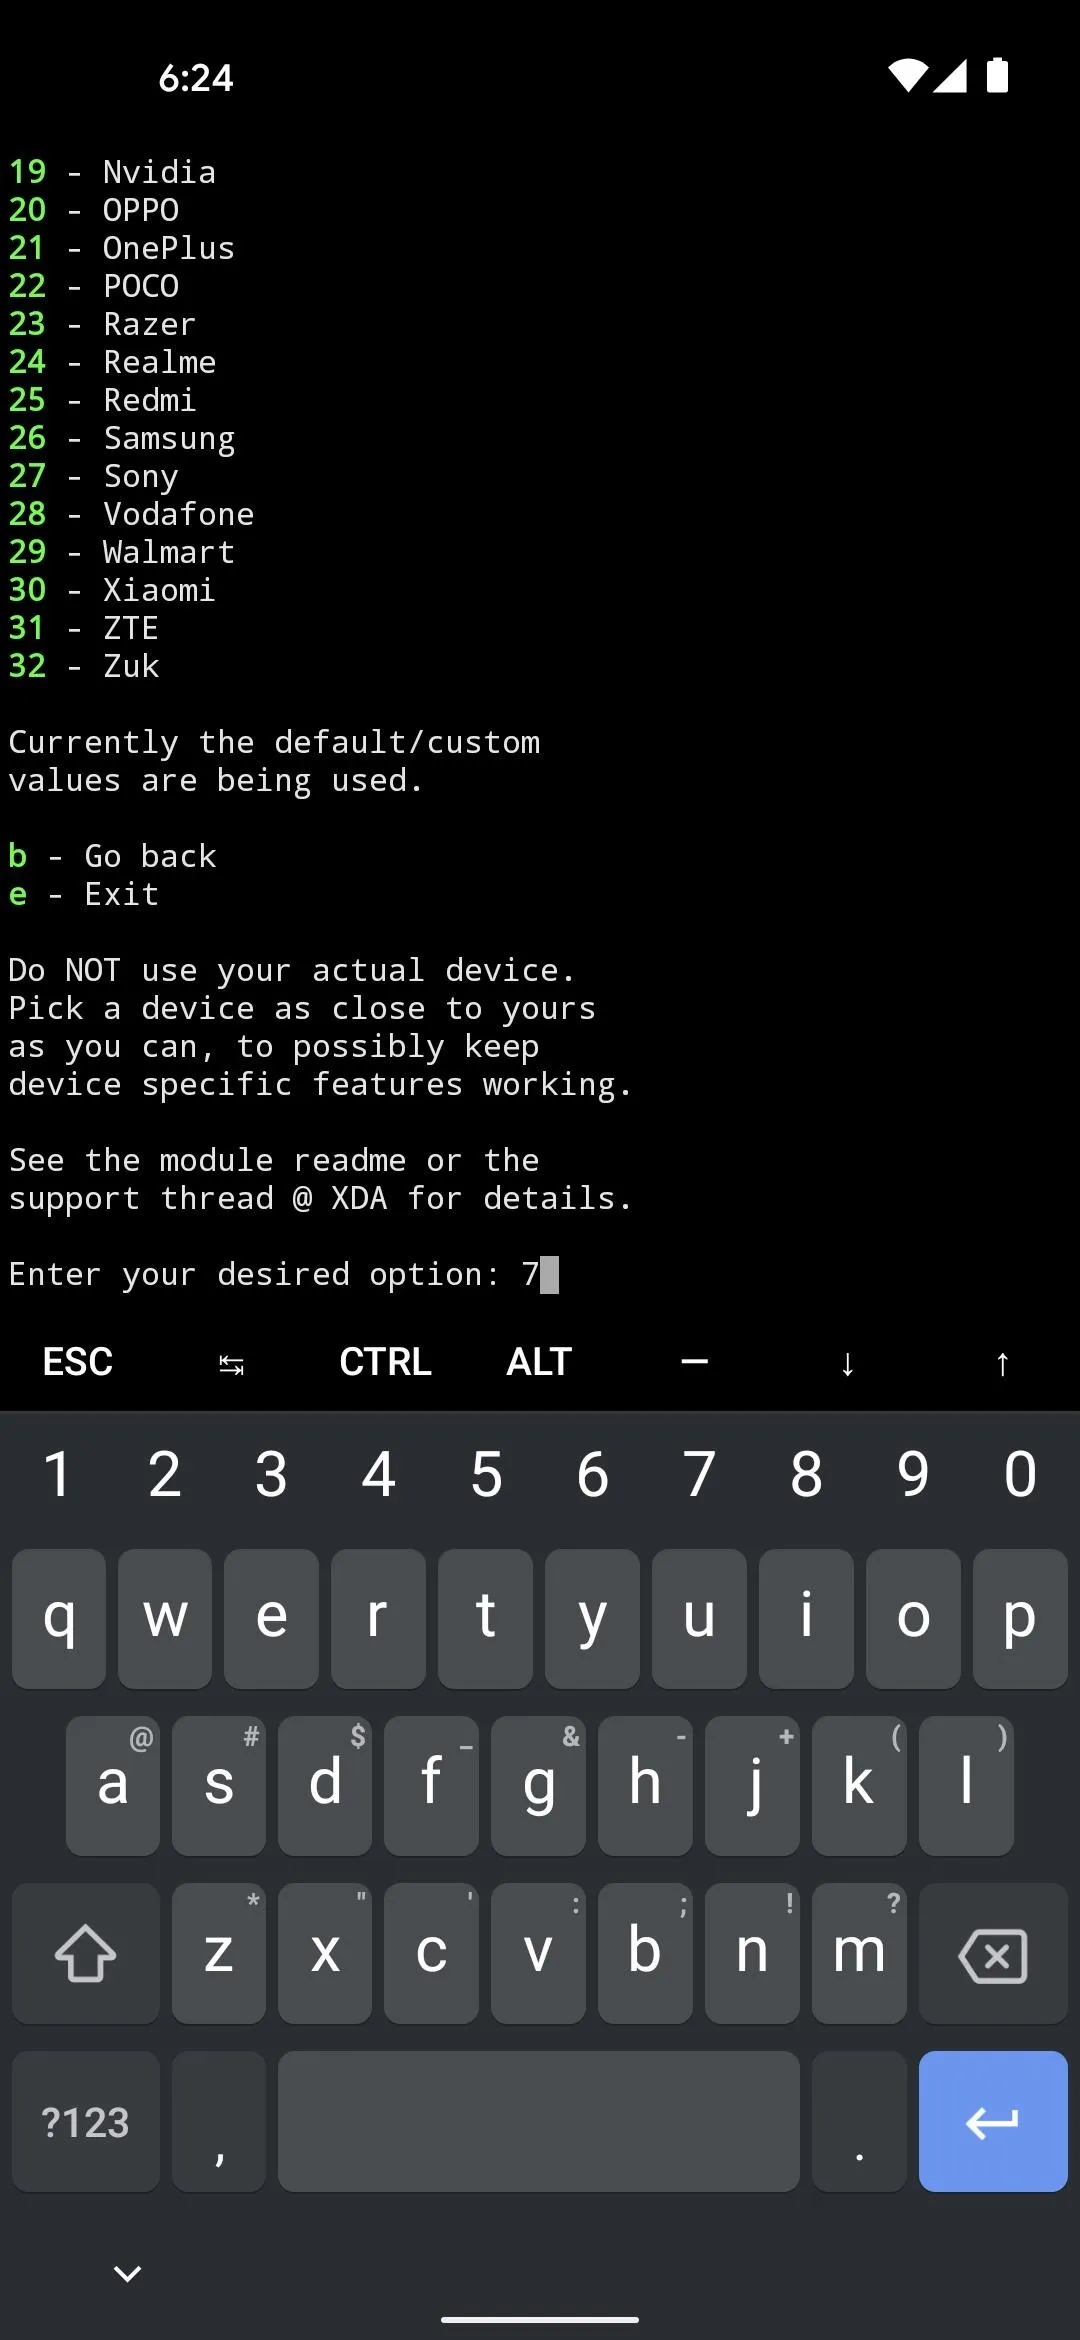
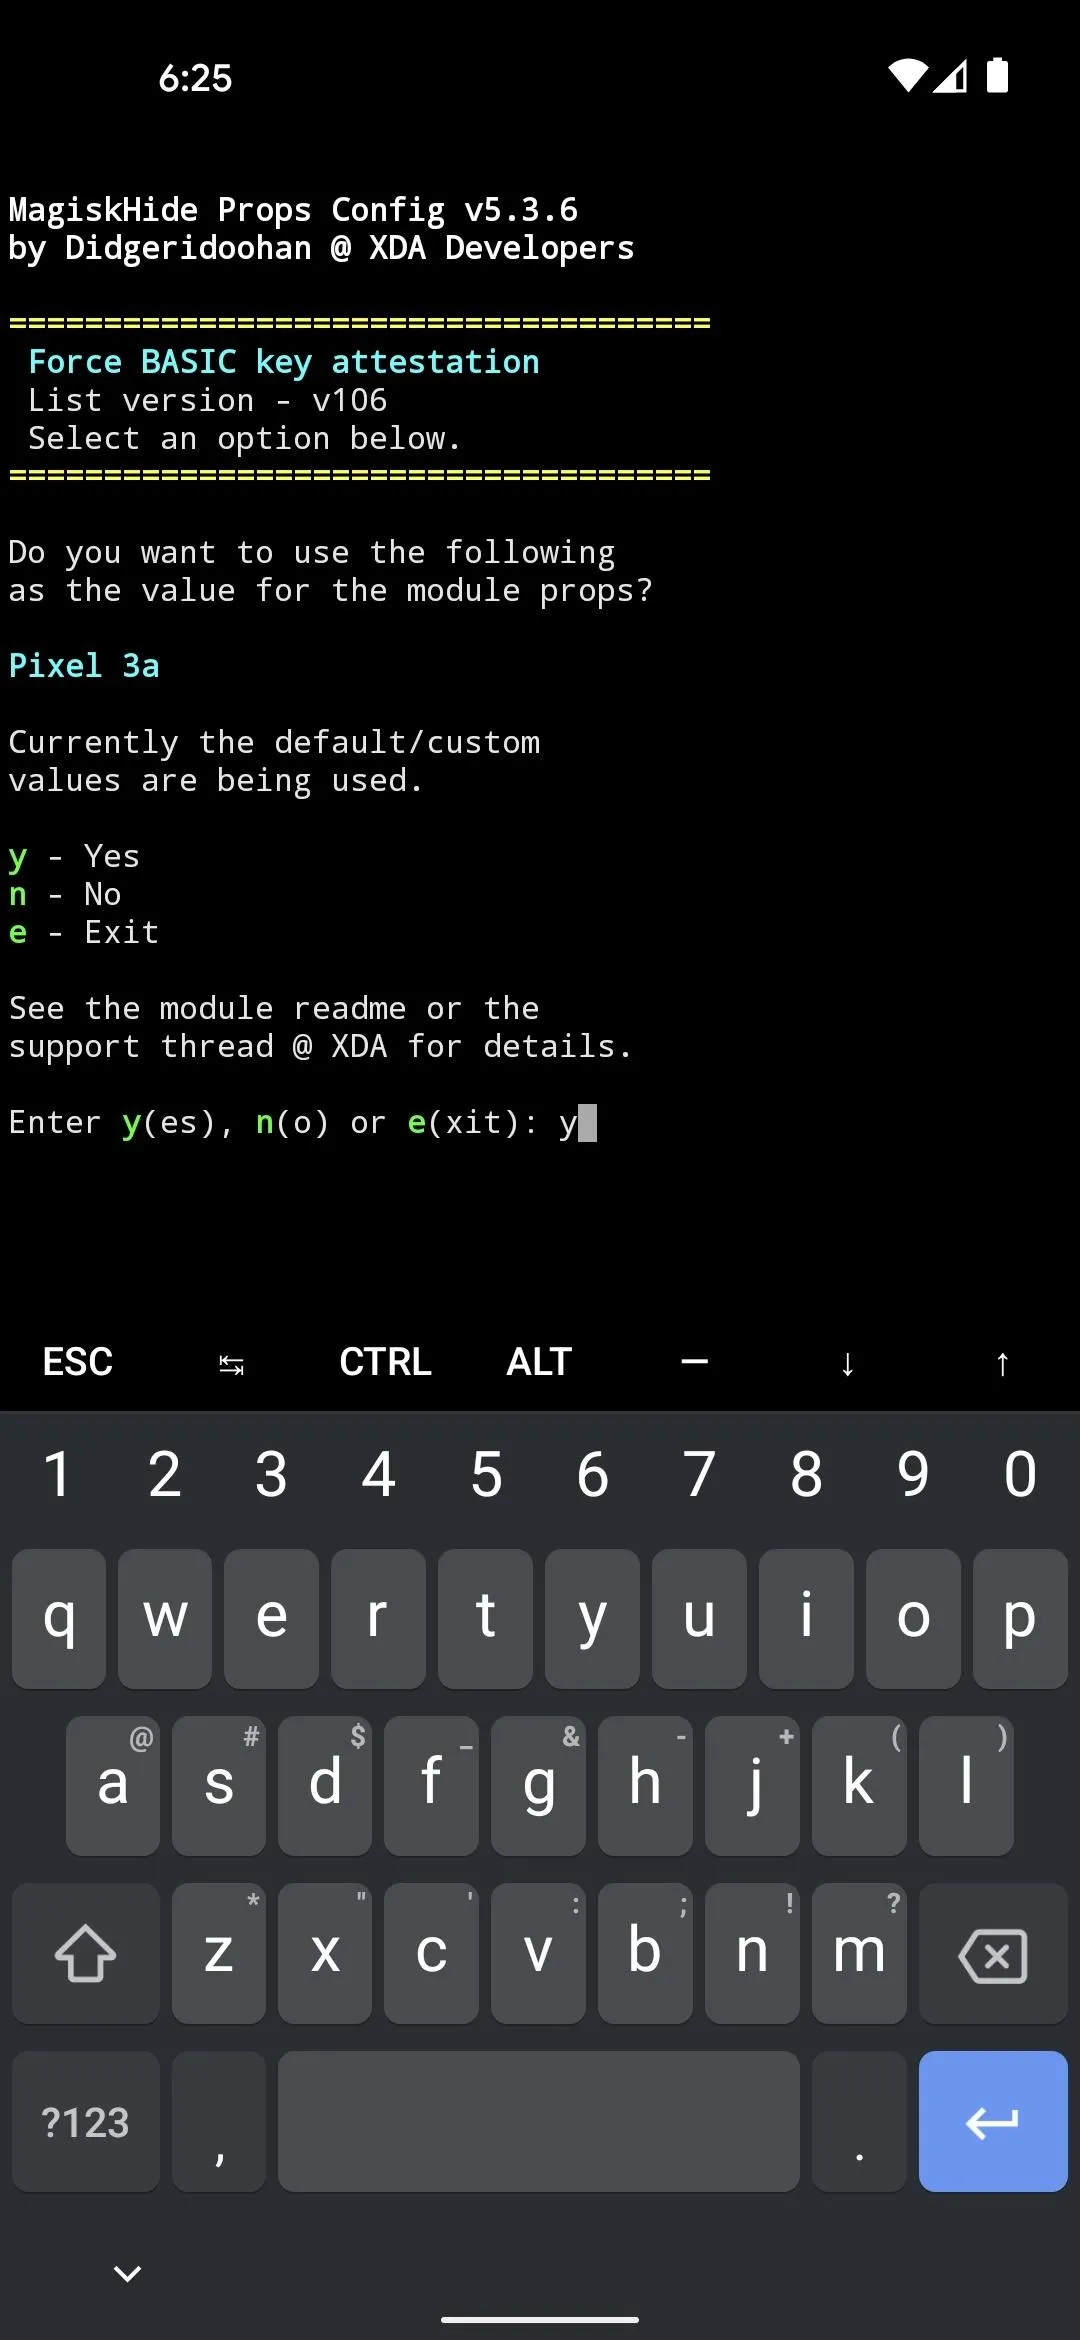
Now, enter d to select "Pick from device list." From there, enter 7 to select "Google," then 20 to select "Google Pixel 3a." The reason for this is the Pixel 3a was the last Google device to use the old SafetyNet attestation method, which Magisk can hide from. So essentially, you're making SafetyNet think you have the Pixel 3a so it will use its old method of checking for root.
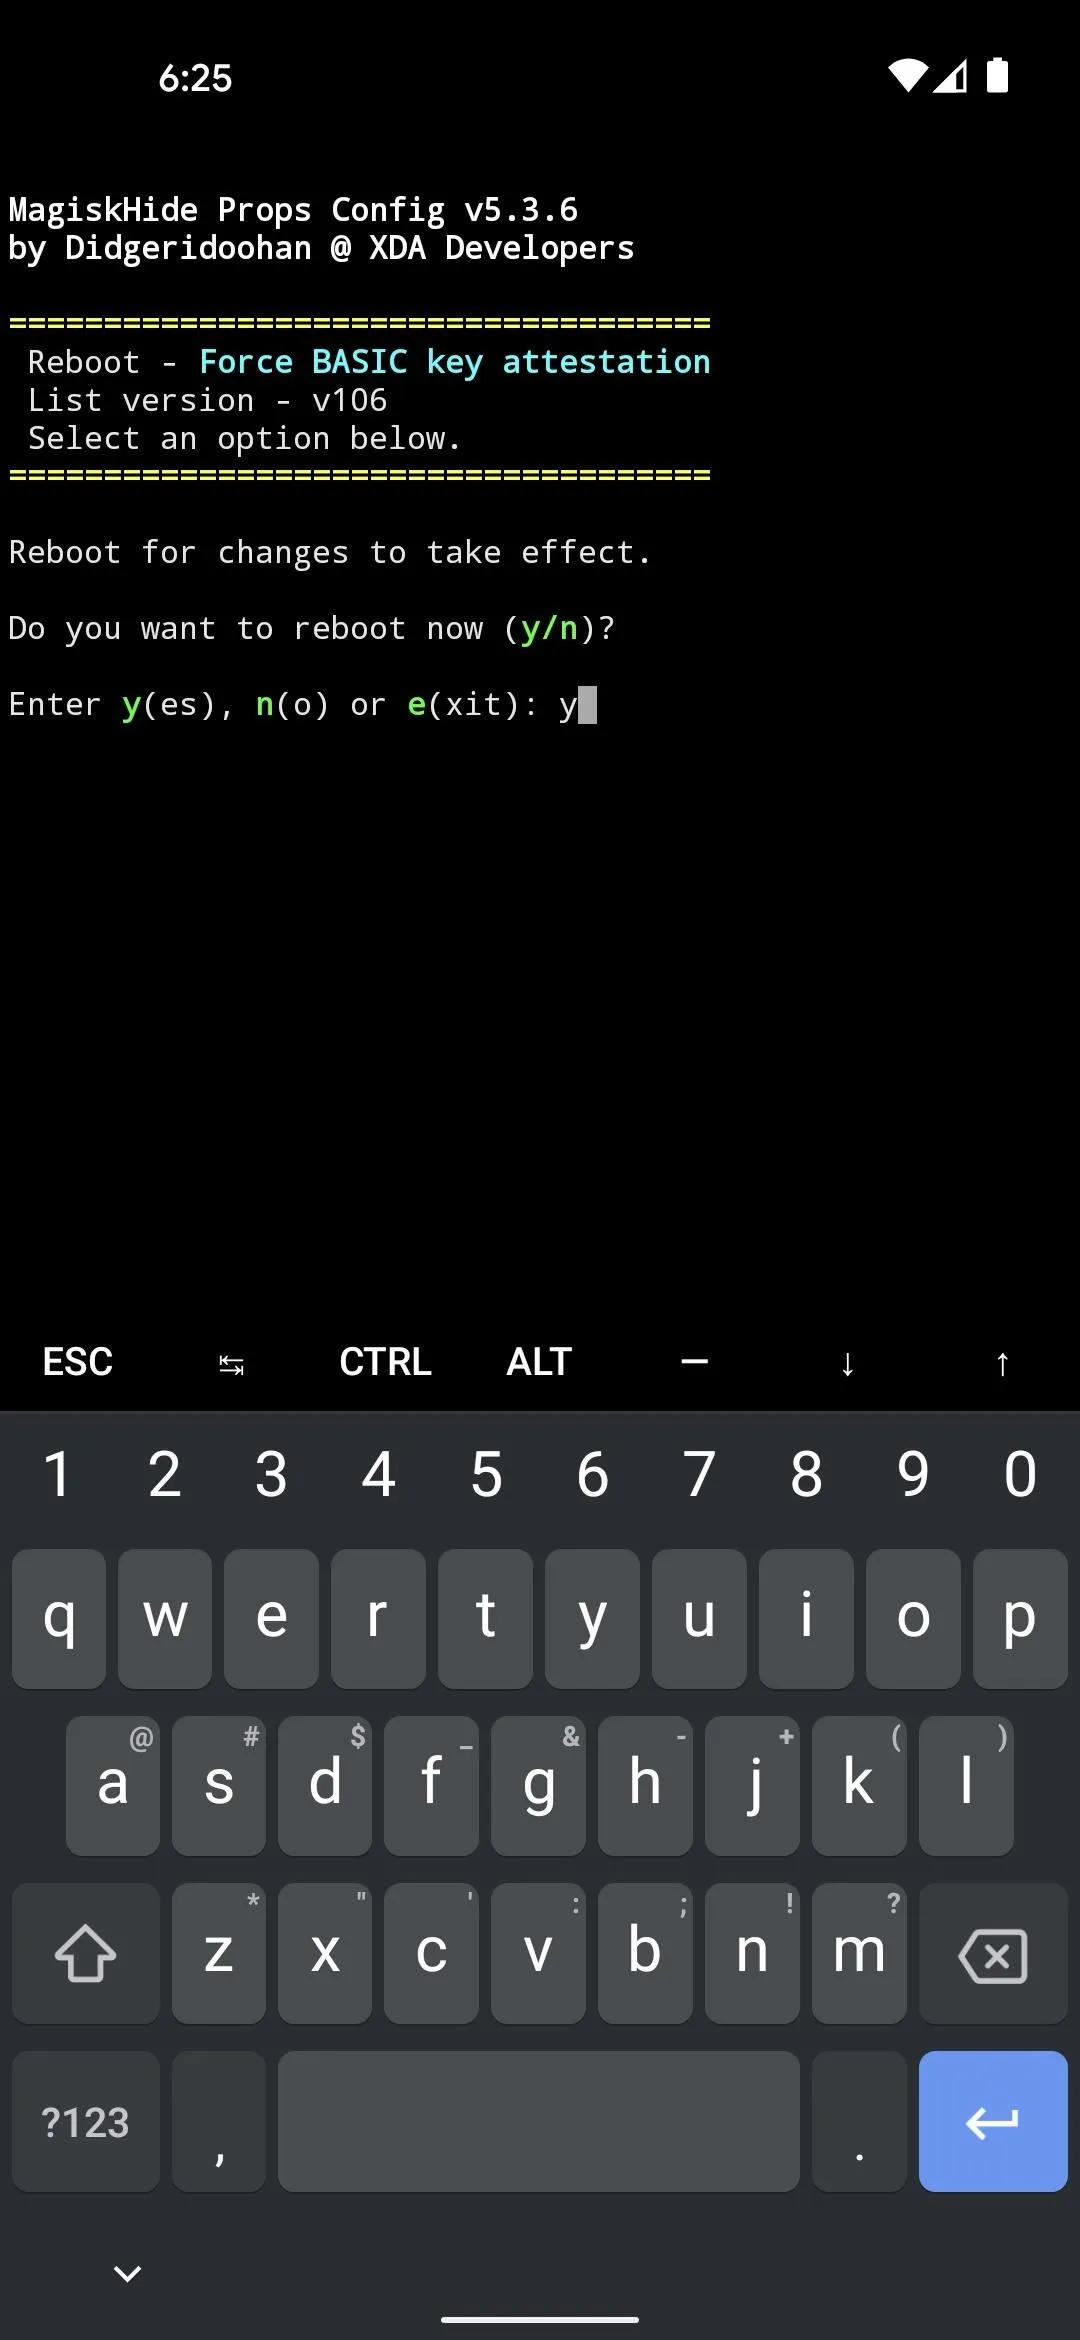
Finally, enter y to confirm your choice, then enter y again to reboot. When you get back up, you'll be rooted and you'll pass SafetyNet! Note that you may have to clear data on the Google Play Store app before you'll see apps that are normally hidden from rooted users.
Cover image, screenshots, and GIFs by Dallas Thomas/Gadget Hacks


Comments
Be the first, drop a comment!