


The Pixel 4 and 4 XL are the first Android phones released in the US to support secure facial recognition. You no longer have to hate on your Apple's friends because you now have "Face ID" as well. So I assume you want to set it up right away — here's how.
The new facial recognition technology on the Google Pixel 4 replaces the fingerprint scanner of previous generations. While rumors speculated Google might add an in-display fingerprint scanner, it instead opted for a single biometric authentication method, which happens to be more secure. Setup is a breeze, but Google does provide several toggles that will help customize how this technology works.
Register Your Face
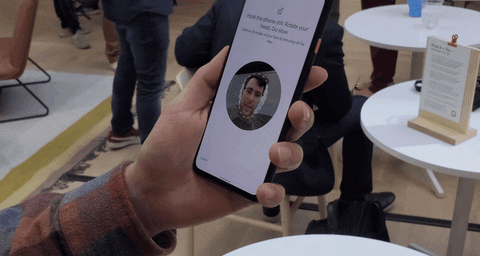
When you initially set up the phone, Google will prompt you to add face unlock to your device. However, if you decided to skip it initially, open Settings select "Security," and choose "Face unlock" to start the process. You'll be prompted to input your PIN to proceed.
The next page will be a list of instructions as to how to add your face. For the best experience, you should be in a well-lit environment. You can wear a hat or lightly tinted sunglasses, but for the best results, keep your head and face unadorned. That said, prescription glasses are perfectly fine.
Hit "Next" and center you face in the provided circle. Once aligned, move your head around to "hit" each of the blue tiles on the display while facing your phone. Once you hit each area, your face will be registered.
Jon Knight/Gadget Hacks
Customize Face Unlock
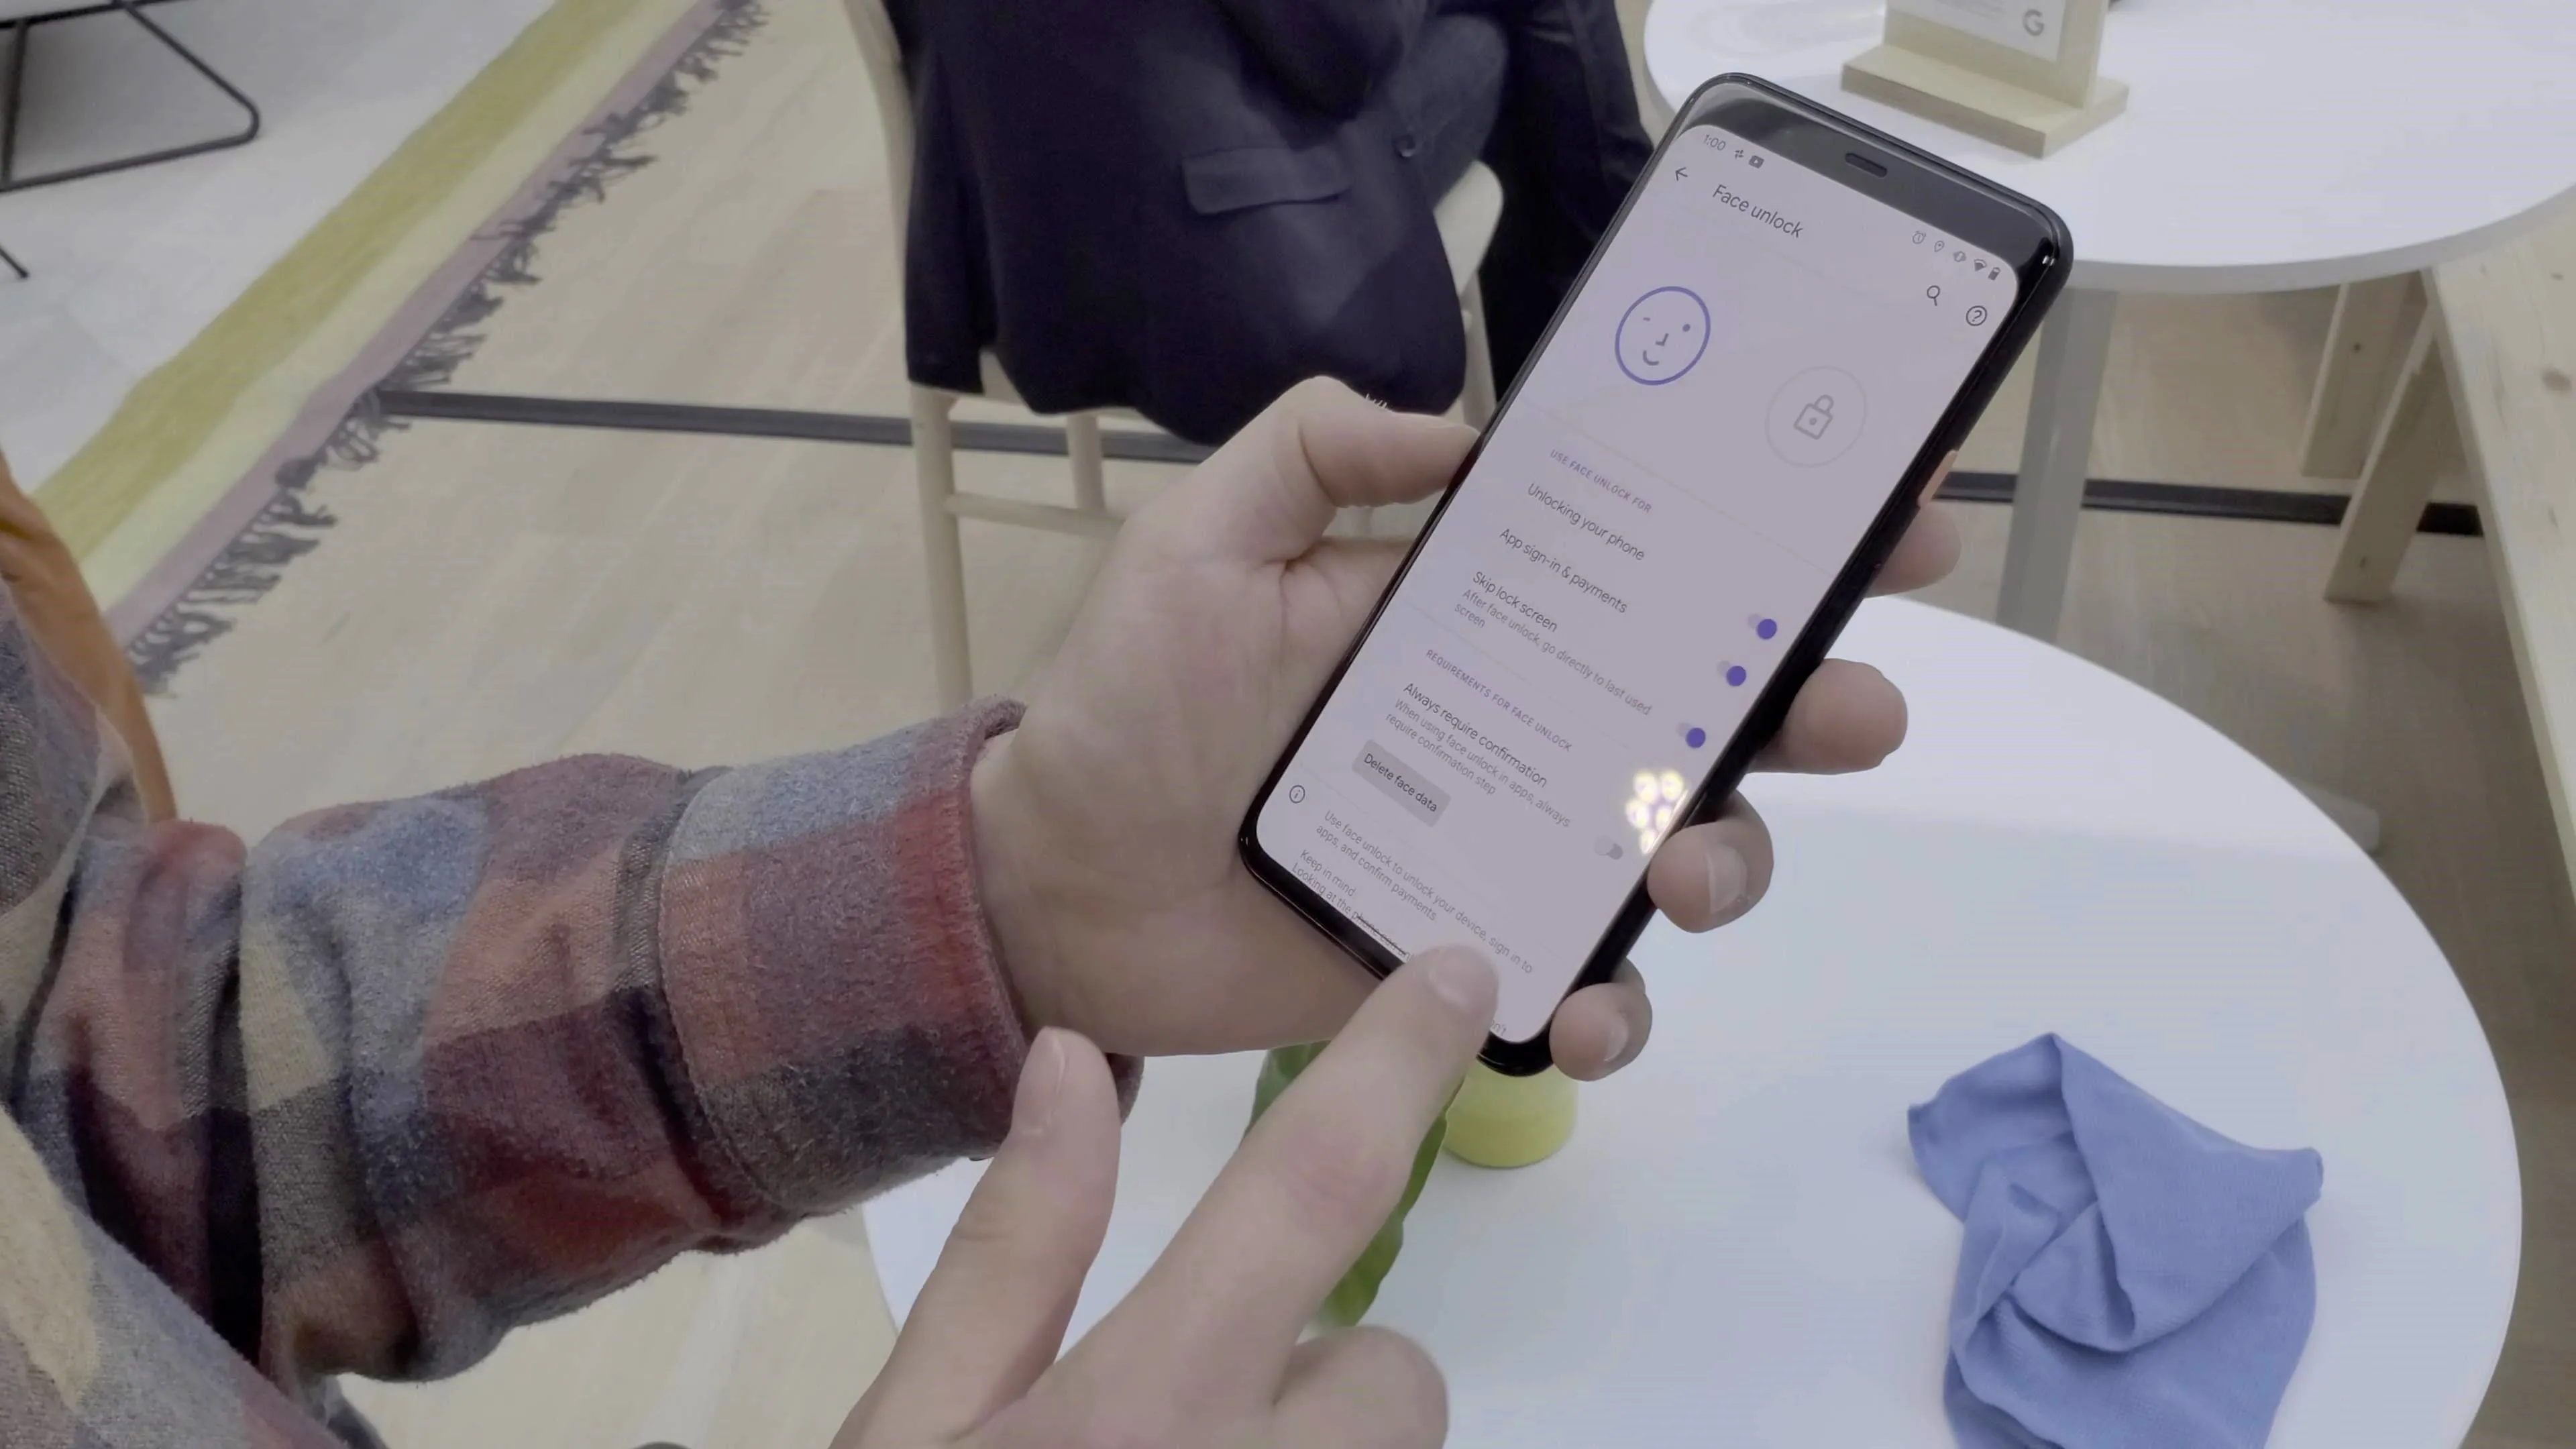
Now you can adjust how the face unlock feature works. Head to Settings –> Security –> Face unlock and enter your PIN when prompted. Here, you have a few options.
First, you can decide whether or not facial recognition unlocks your phone. If you want, you can disable the first toggle and the face scanner will only be used to sign into apps and authenticate you for payments. For those looking to be the most secure, this is the way to go, because, unlike Apple's Face ID, you can't close your eyes to prevent access. So if someone forces the phones toward your face, they are in.
The second option is "App sign-in & payments." This toggle manages whether you can authenticate with face unlock in apps and Google Pay and Play Store payments. Just as with unlocking your phone, it's a matter of security vs. convenience. For the strongest level of protection, disable this toggle. If it is disabled, to access secure apps, the person needs to know your password. This would also apply to making purchases on your phone. But, for convenience and solid security, leave it enabled.
Jon Knight/Gadget Hacks
A related option is the "Always require confirmation" toggle (don't worry, we'll go back to "Skip lock screen" in a second). This is turned off by default. When enabled, any app that uses facial authentication will require you to tap a button to confirm you wanted to authenticate. This is an extra layer of protection against accidentally unlocking an app or making a payment. Do note that some apps (such as Signal Private Messenger) require confirmation even if this toggle is off.
Finally, there is "Skip lock screen," a feature that many Face ID iPhone users having been begging for. Instead of having to swipe up after your Pixel 4 authenticates you with face unlock, you'll be taken right to the last app you were using. This could pose privacy risks, but it makes unlocking your phone nearly as quick as less secure face unlock methods (such as using the front-facing camera).
The different Face authentication, iPhone 11 Pro vs. Google Pixel 4 XL.
Cover image by Jon Knight/Gadget Hacks


Comments
Be the first, drop a comment!