


The Pixel 4 is one of the most talked-about phones of 2019, and it has many things going for it, especially in the world of rooting and modding. Just as with previous Pixel generations, unlocking the bootloader is the gateway to realizing your device's true potential. It can make way for such things as TWRP, Magisk, custom ROMs, and many other device-specific mods just the same.
The bootloader is a piece of software that tells your phone what it needs to run every time you turn it on or have to reboot it. By default, the bootloader only allows for official first-party firmware to be installed and run on the device natively. Unlocking the bootloader gives you the complete freedom to use other third-party firmware on your device, thus making modding a possibility.
Disclaimers
- Unlocking the bootloader will factory reset your device.
- Your phone will now fail SafetyNet checks, but Magisk can fix it.
- Unlocking the bootloader will not void your Pixel warranty.
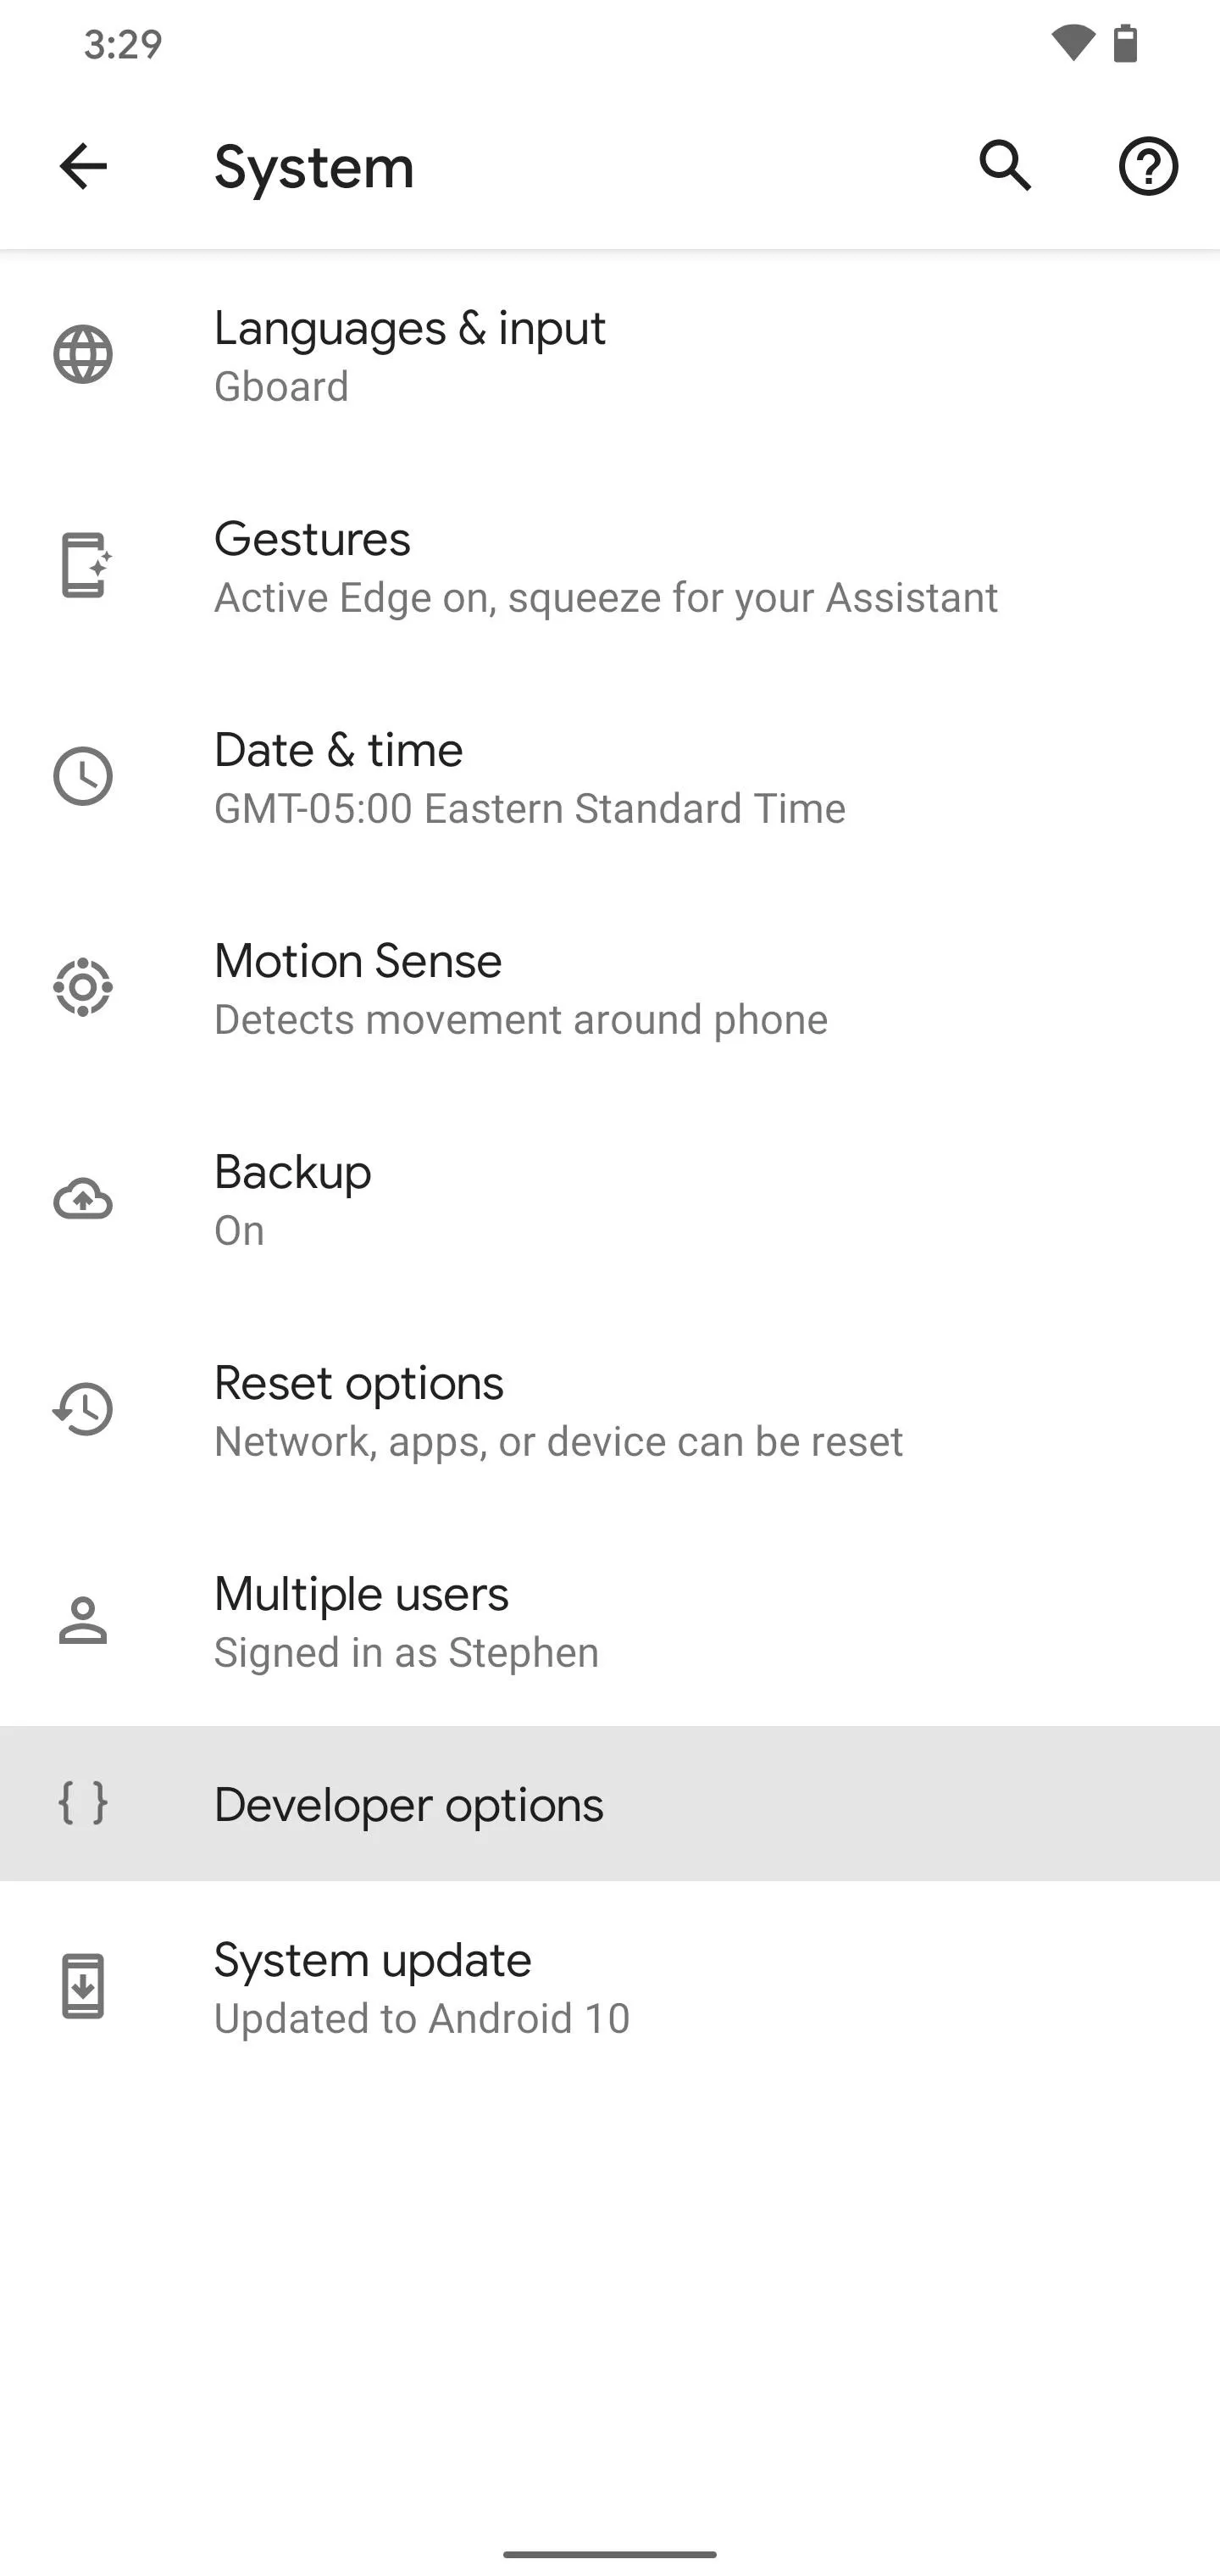
Enable Developer Options
First, you'll need to unlock the Developer Options menu on your Pixel. To do so, head to Settings –> About Phone, then scroll down and tap the "Build number" entry seven times in quick succession. If you'd like more help with this part, head to our full guide below:
Enable OEM Unlocking
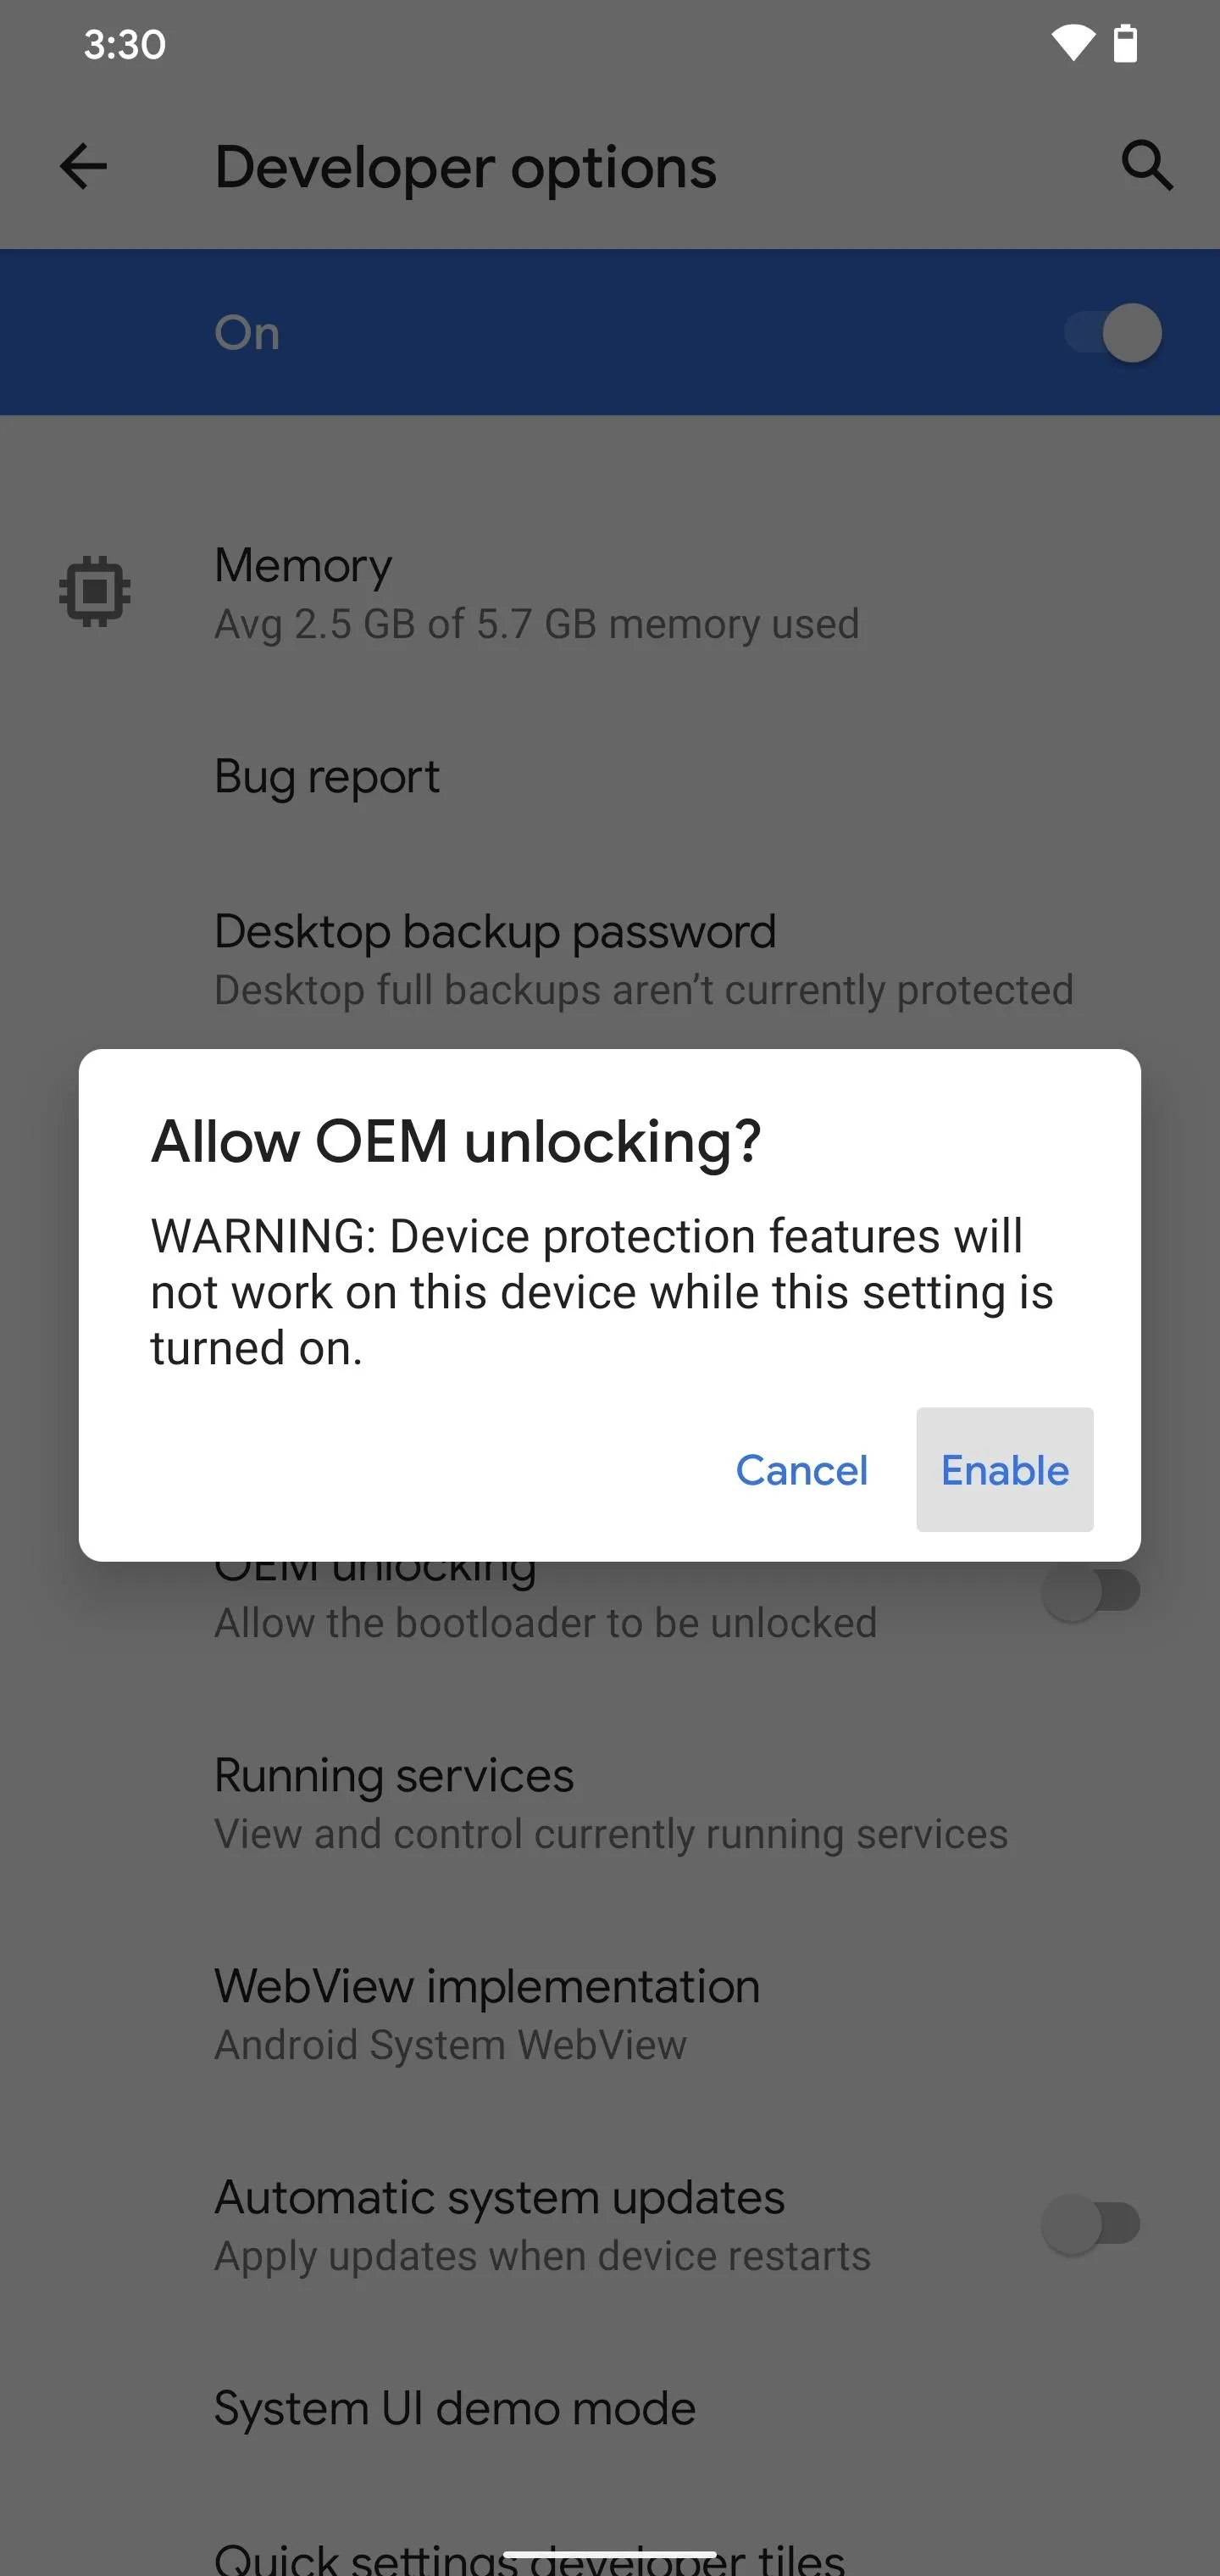
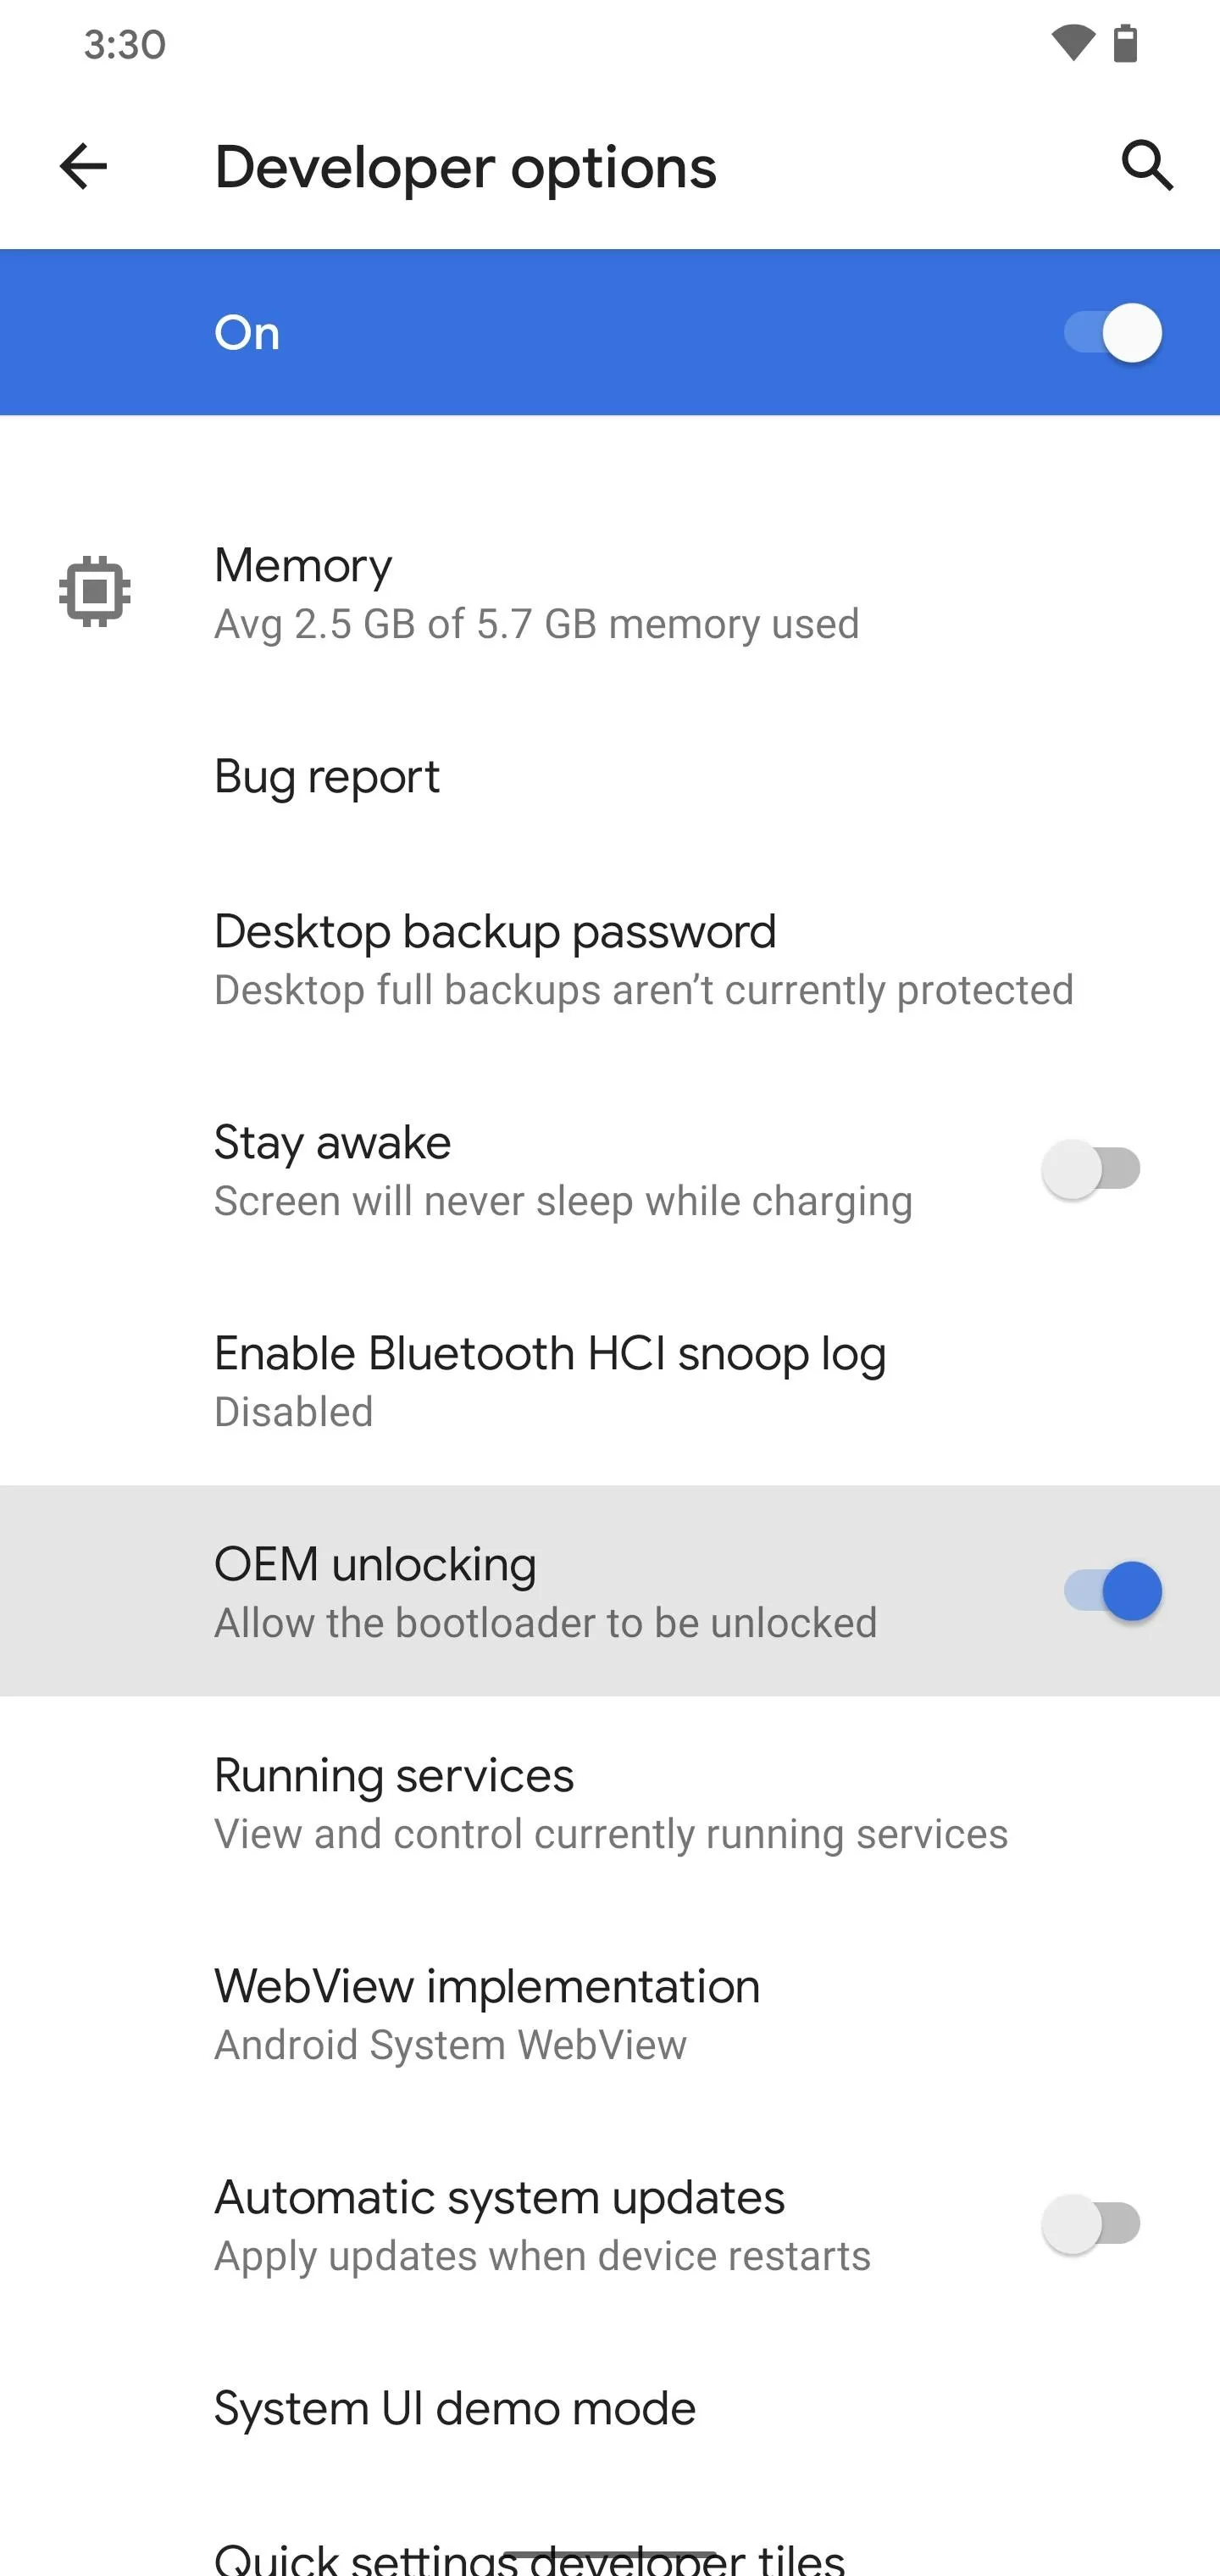
Now, open the Settings app and head to the "System" section. Go to "Advanced," then choose "Developer options." Look for the "OEM unlocking" option, then tap it once to bring up a prompt. Enter your password or PIN, then tap the "Enable" button to confirm your choice.
Boot into Fastboot Mode
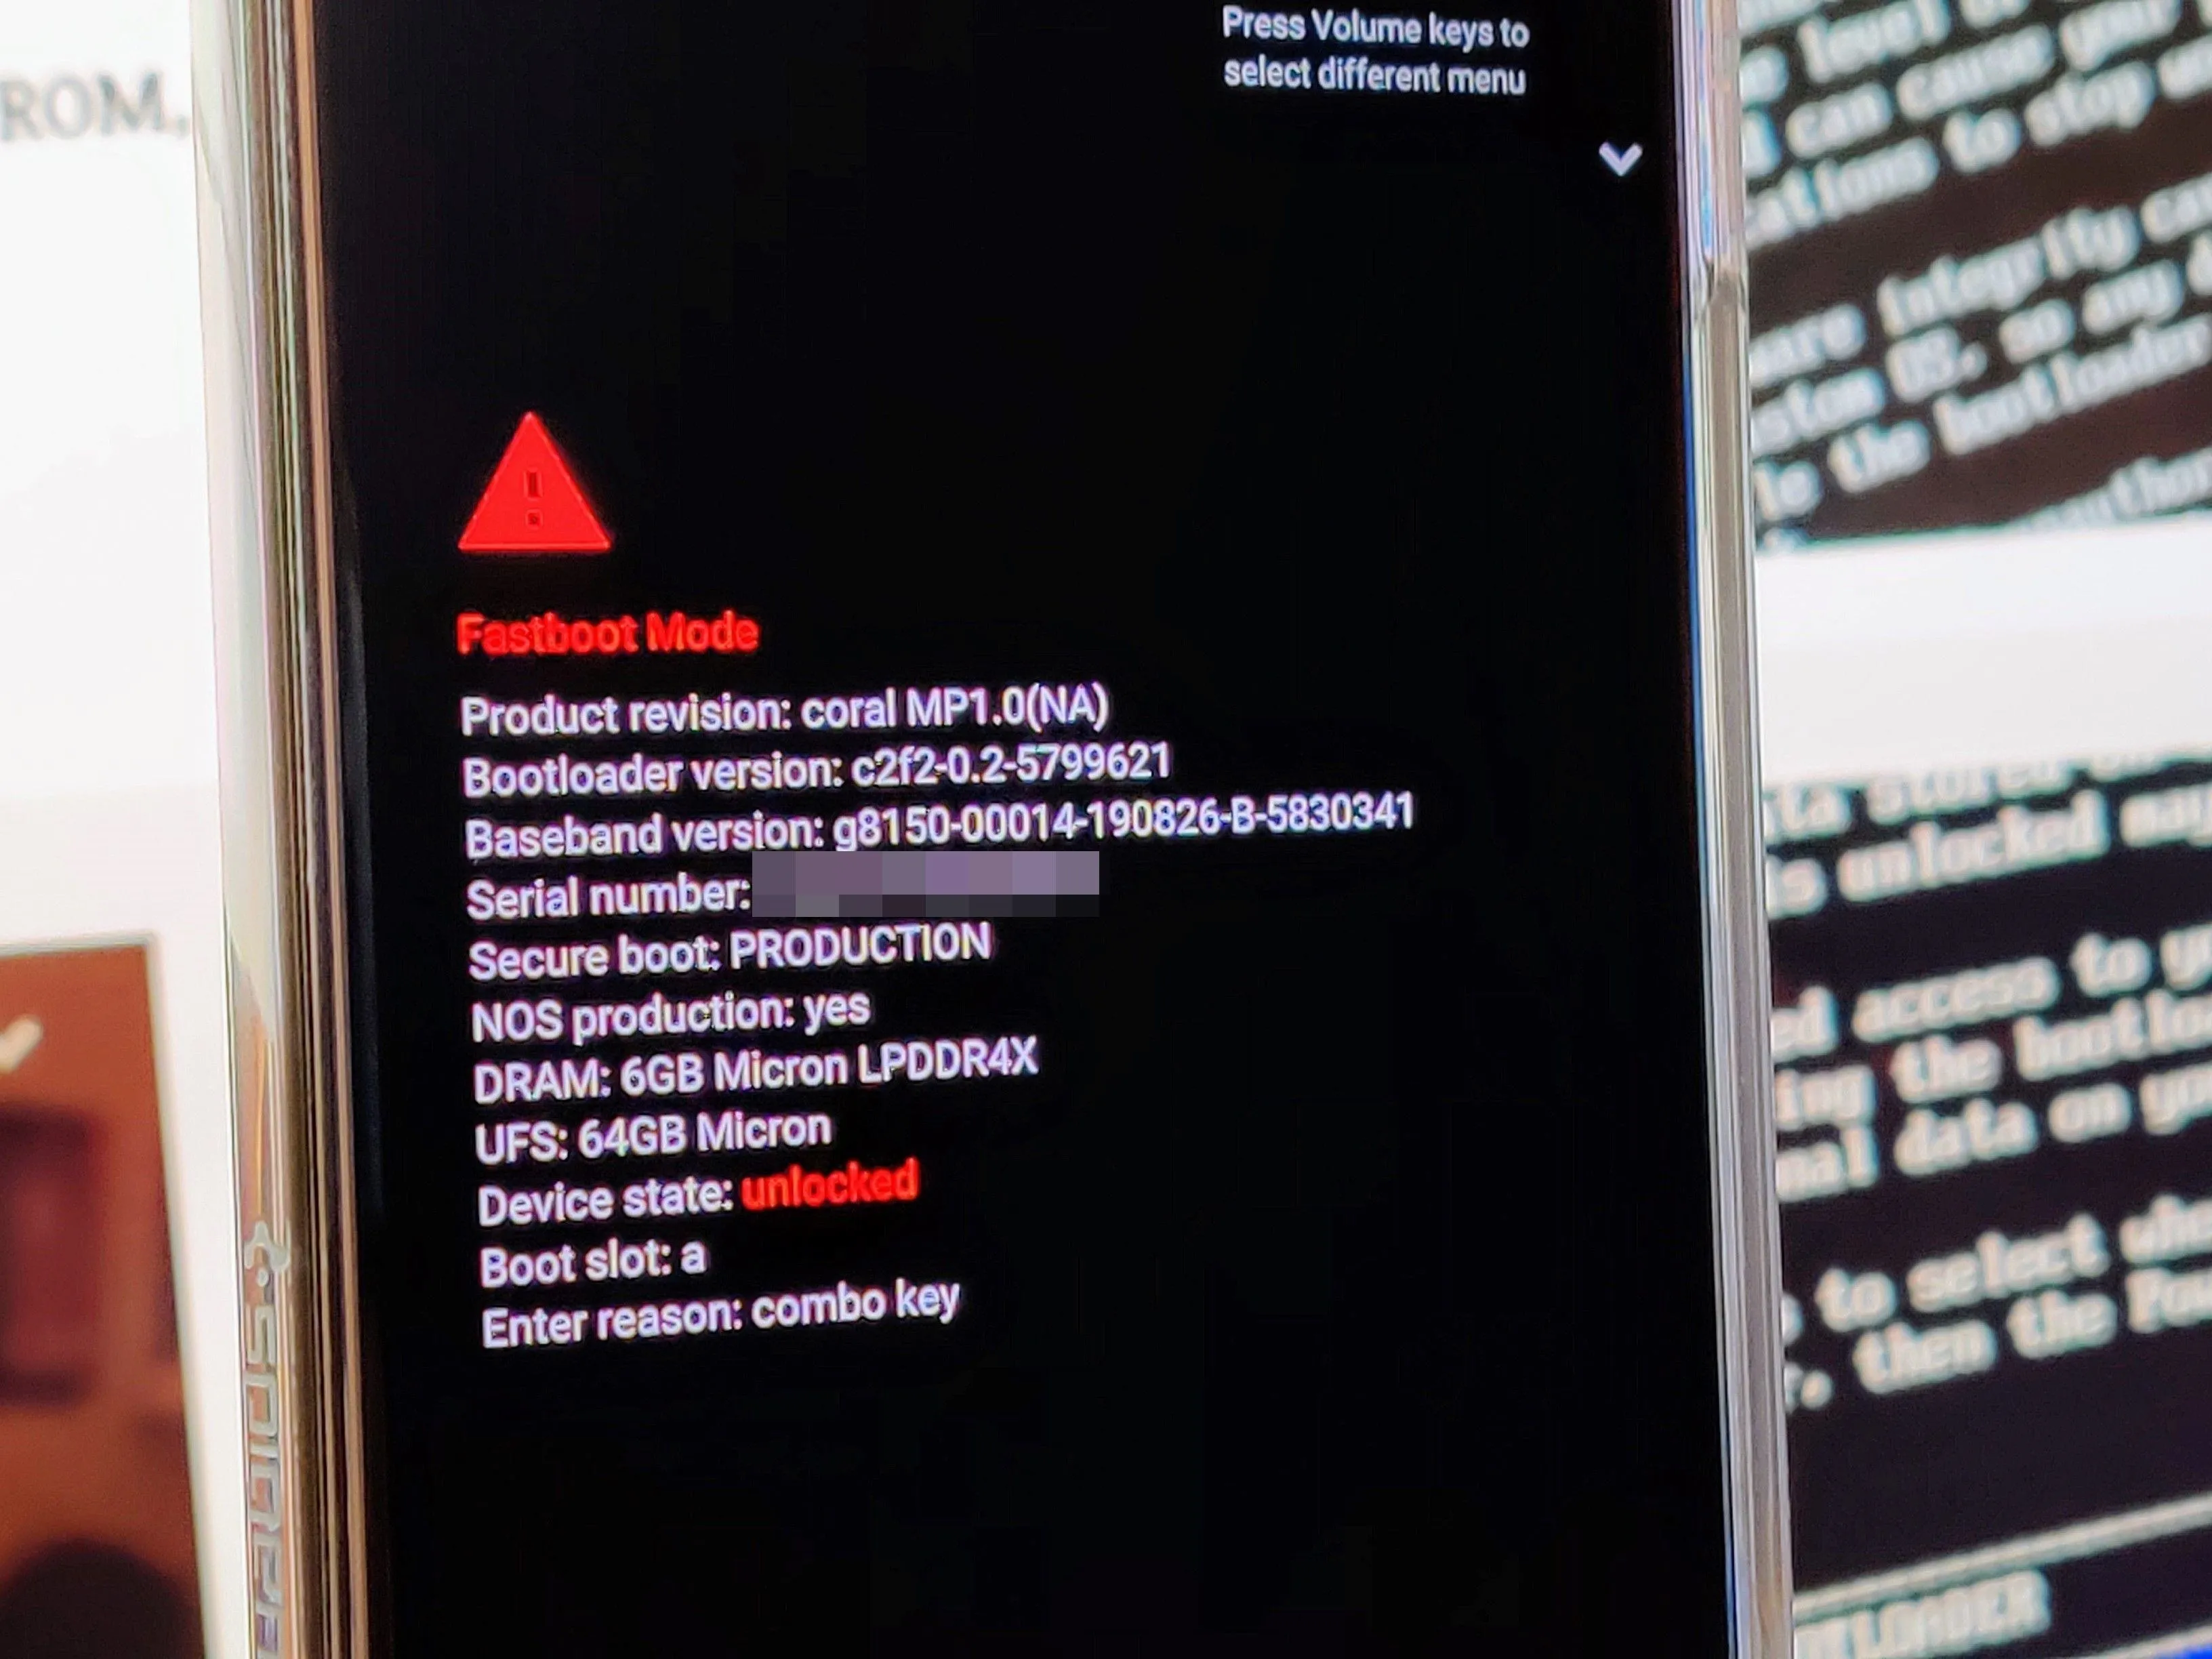
Now that the OEM unlocking option has been flagged to allow the bootloader to be unlocked, it's time to start the actual process of unlocking it. Long-press the power button, then hit the "Power off" option to completely shut down the phone. Once the phone is off, hold the power button and the volume down button at the same time until the Fastboot Mode main menu pops up.
Install ADB & Fastboot on Your Computer
Now you'll need to install the required ADB and Fastboot platform onto your computer so you can send the proper commands to your phone. Google offers the SDK Platform Tools package that includes everything you need in one neat little ZIP file. Follow the link below to grab the latest version for your respective operating system.
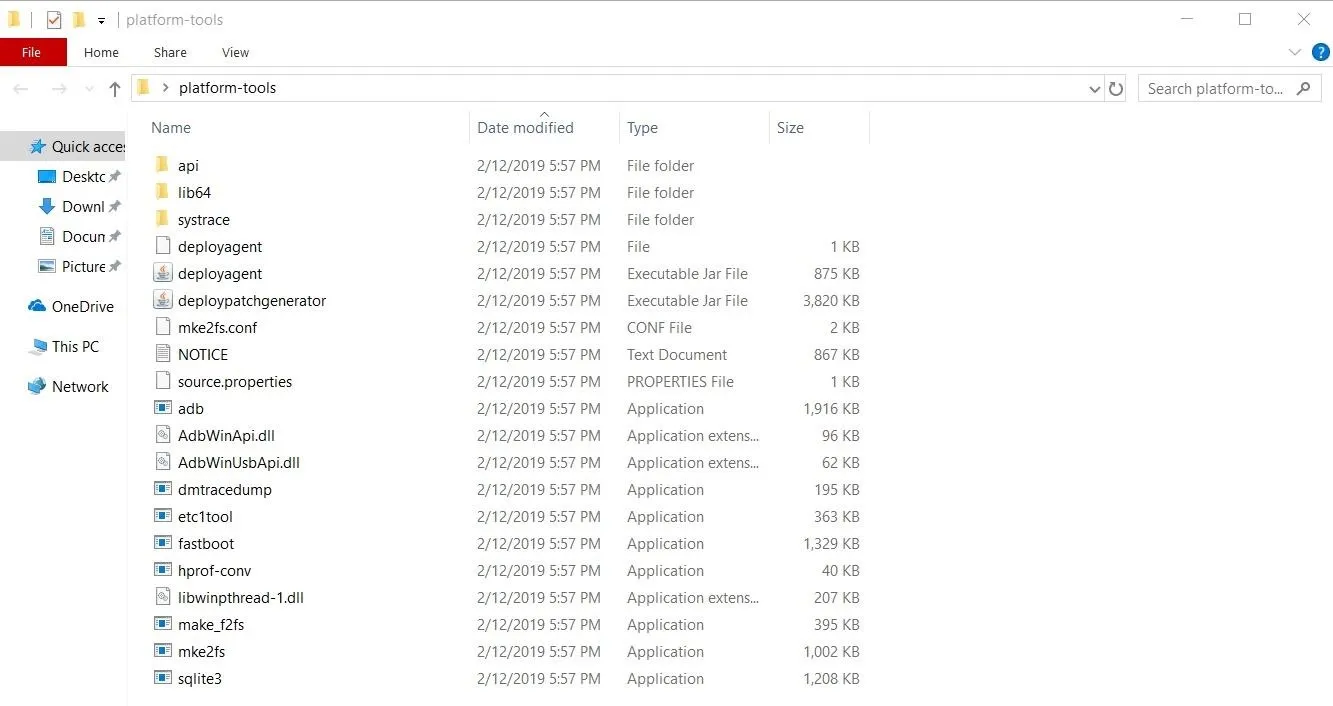
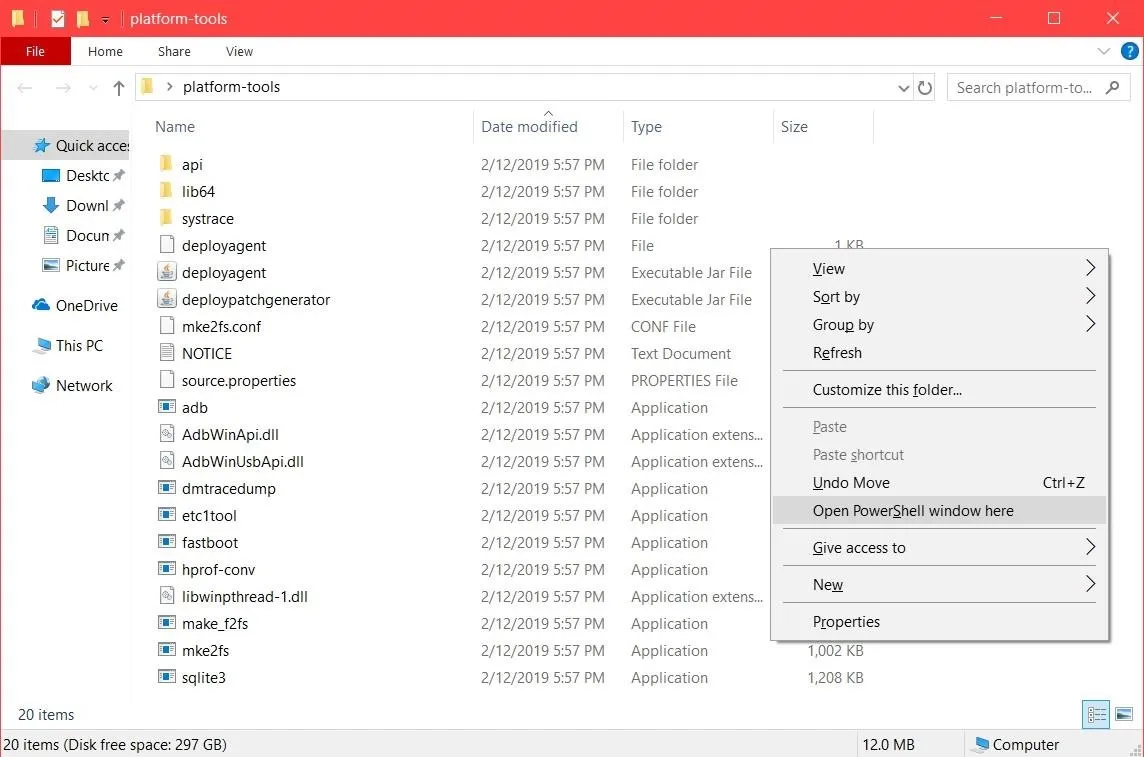
Open a Command Window in Platform-Tools
Now that you have the Platform Tools SDK installed on your computer, you'll need to open a command window to execute the commands from within that folder. You need to do this so your computer and phone can properly communicate with one another in Fastboot Mode. Hit up the link below to get that taken care of, then you can move onto the final step of this guide.
Unlock Your Bootloader
As a reminder, unlocking the bootloader will factory reset your device. Make sure to back up any critical data onto a computer for safekeeping until the process of unlocking your bootloader has been completed.
From this point, you should already have a command window opened from within the platform-tools folder and are ready for the next part. Type in the following command then hit enter to confirm your choice.
fastboot flashing unlockNote: Mac, Linux, and Windows PowerShell users will likely have to add a period and a slash before entering any ADB or Fastboot commands (e.g., ./fastboot flashing unlock).
After confirming the above command, your phone will immediately pop up with the new bootloader unlocking screen. Use the volume keys to highlight the "Yes" option, then you can press the power button to confirm your choice. Your screen will go out for a second while it unlocks your bootloader, then you'll be sitting back in Fastboot Mode once it's finished.

Now, simply hit the power button to confirm the default "Start" option to boot back into Android. Your phone should reboot twice, once to complete the factory reset, then the second time to boot back to the "Hi there" welcome screen. Once you get to this point, you have successfully unlocked your bootloader and are ready to begin your modding journey.
Upon every reboot, you'll notice a message that states something like, "The bootloader is unlocked, and software integrity cannot be guaranteed." This will pop up every time you reboot your phone, which is very typical when your bootloader is unlocked. You could also tap the power button twice to skip this screen to save a few seconds if you wanted to do so. Enjoy!
Cover image and screenshots by Stephen Perkins/Gadget Hacks


Comments
Be the first, drop a comment!