


I think it was about Day 3 of working on our massive, all-encompassing Pixel 4a root guide for beginners when I realized something: Not everyone needs their hands held through each tiny step. If you just need a quick refresher, some links, and maybe a fastboot command to copy, this Pixel 4a root guide is for you.
Unlock the Bootloader
- Make sure you're using a non-Verizon Pixel 4a.
- Back up important data.
- Enable Developer options.
- Enable "OEM unlocking" inside Developer options.
- Boot into Fastboot Mode (hold volume down while restarting).
- Connect to a Windows, Mac, or Linux computer with a USB-A to USB-C cable.
- Open a Command Prompt or Terminal window.
- Download Google's standalone platform-tools (Windows | Mac | Linux).
- Extract the platform-tools folder to your desktop.
- Type "cd" into the prompt, then add a single space, but don't hit enter yet.
- Drag and drop the platform-tools folder onto the command window.
- Once file path is populated, press enter to change directories.
- Type fastboot flashing unlock and hit enter. If you get an error, type ./fastboot flashing unlock instead.
- On your phone, press volume down to highlight "Unlock the bootloader," then press power.
- Wait up to 5 minutes for phone to reboot.
- Complete initial Android setup again.
Patch Your Stock Boot Image with Magisk Manager
- On your phone, go to Google's factory images page.
- Download the version that matches your phone's build number.
- Using Google Files or any file browser app, extract the image-sunfish ZIP out of the main factory images ZIP. More help here.
- Extract the boot.img file out of the image-sunfish ZIP. More help here.
- Sideload the latest Canary version of Magisk Manager.
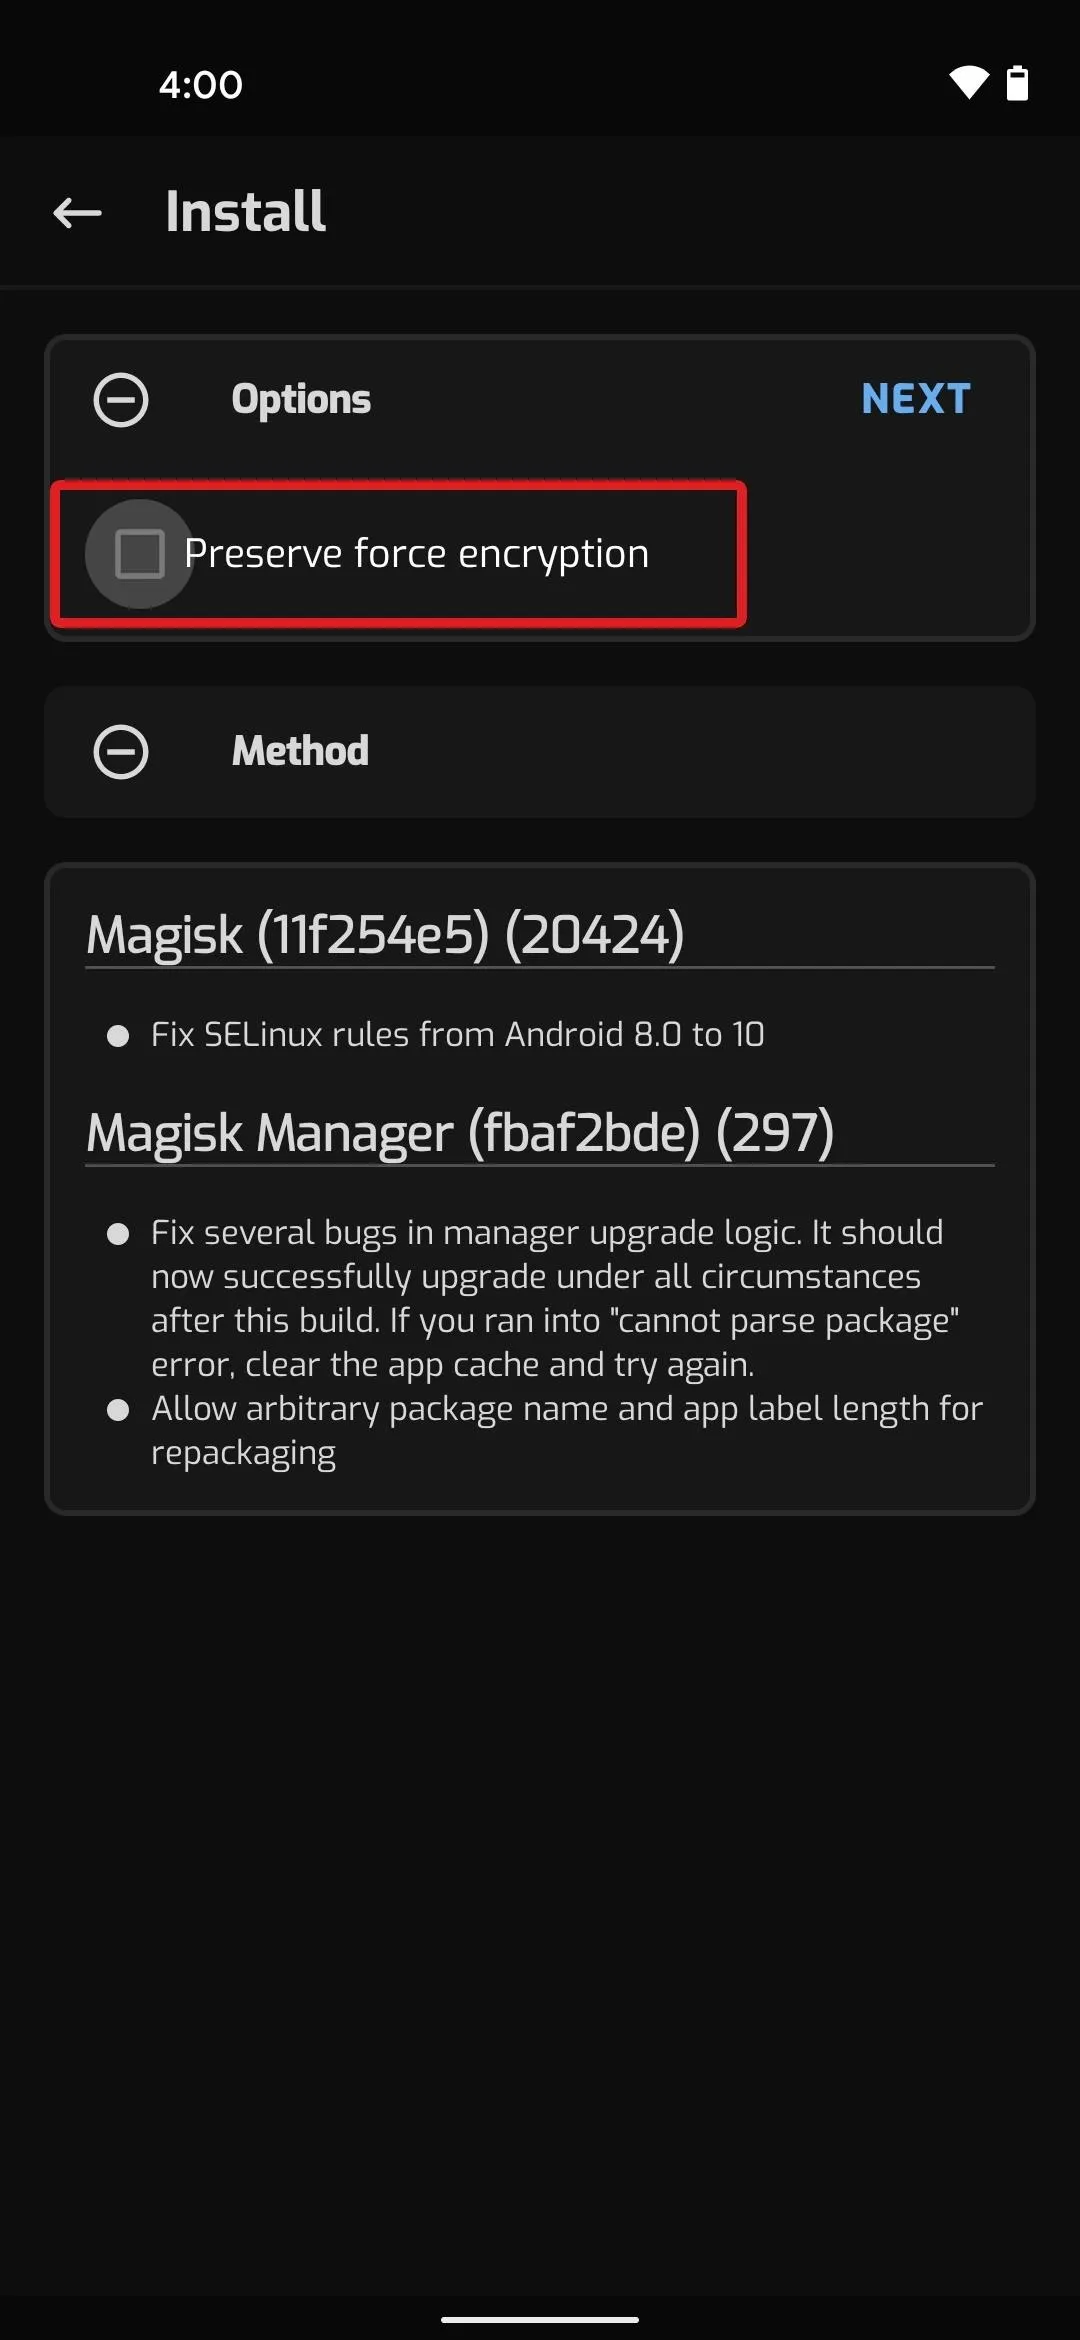
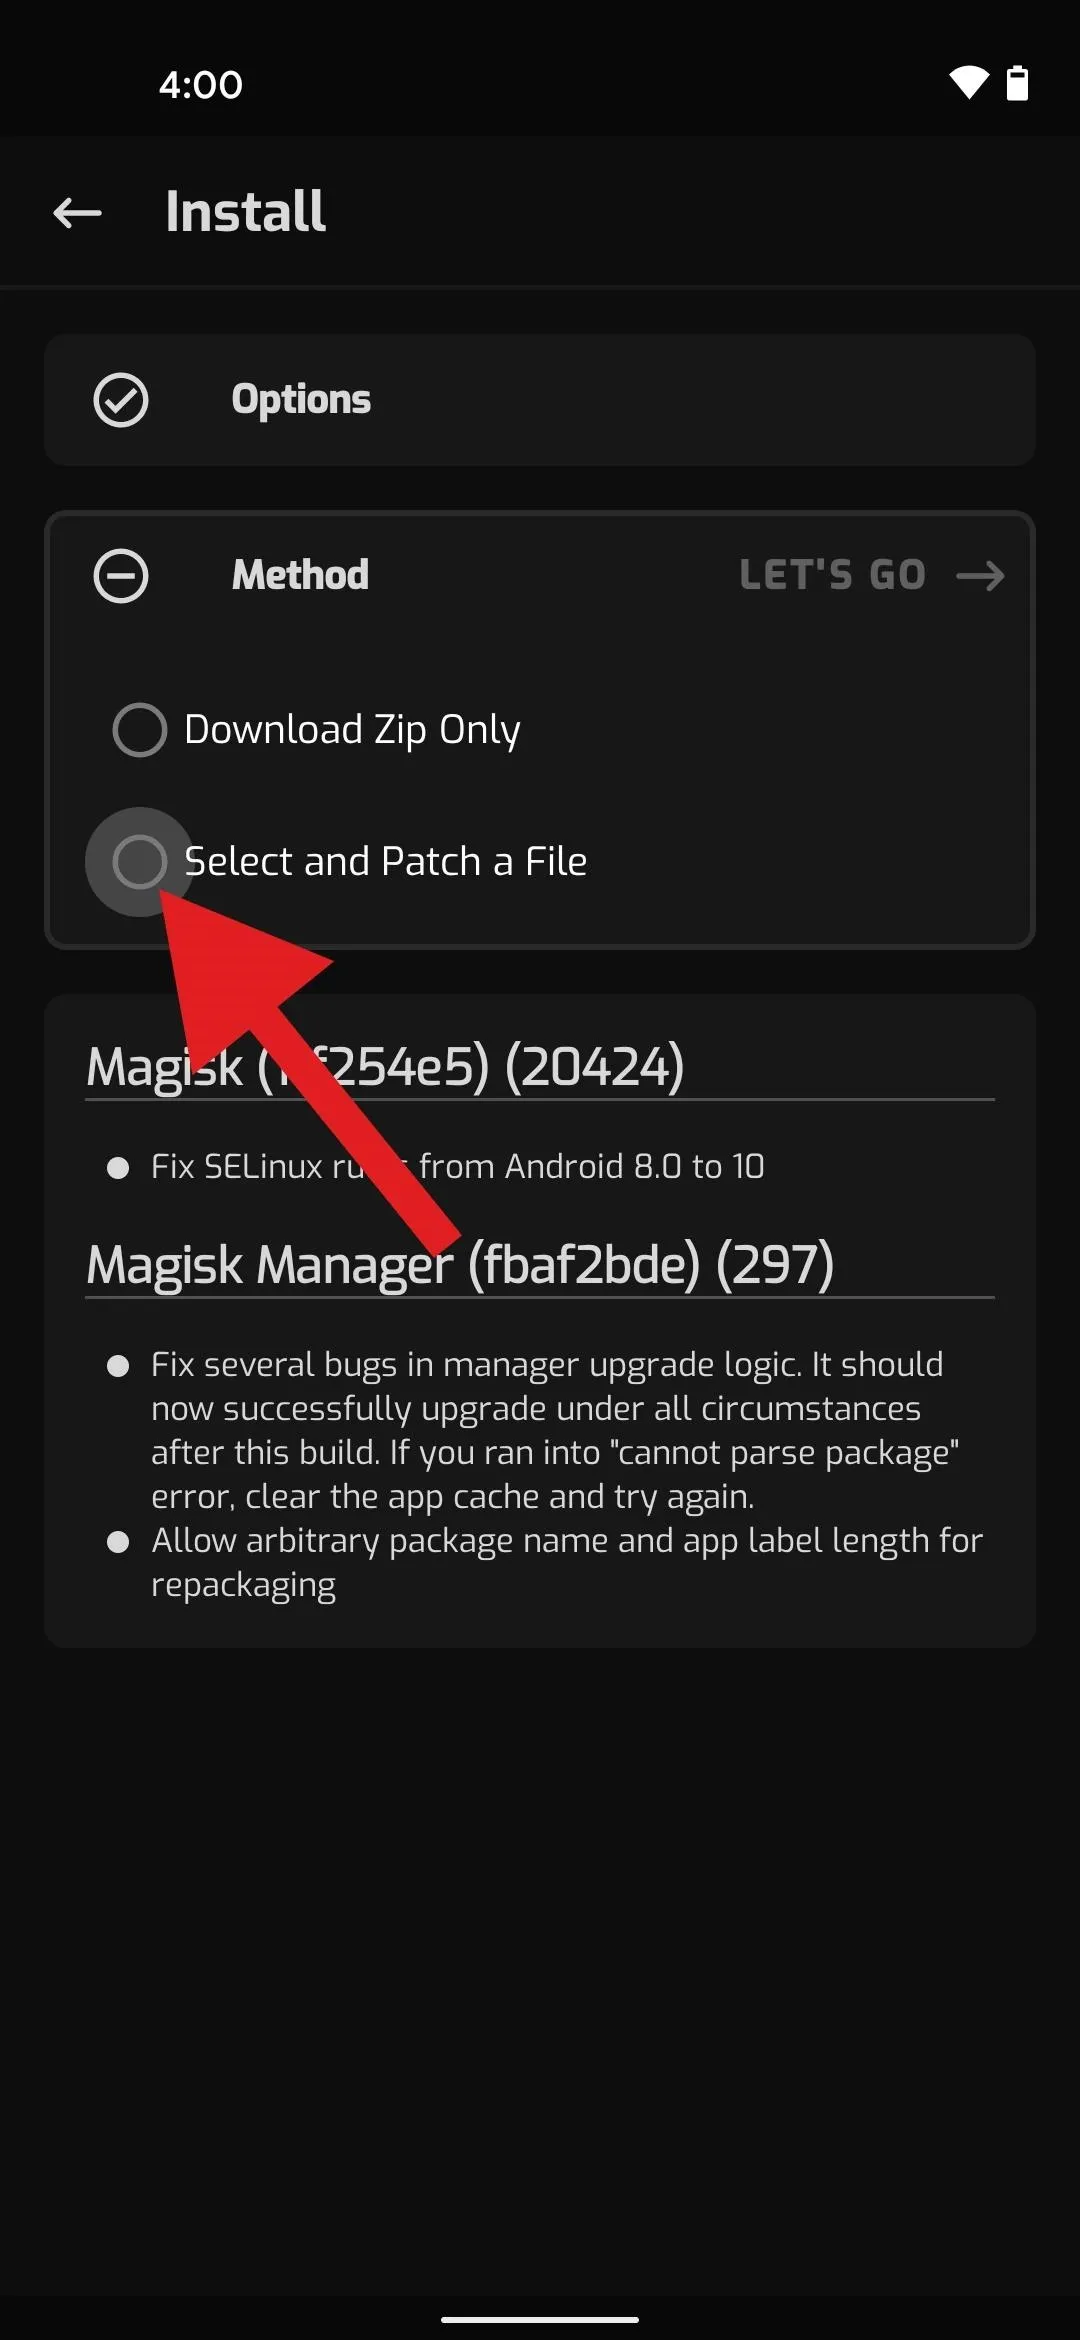
- Open Magisk Manager, tap "Install" in the top-right of the Magisk card. Disable "Preserve force encryption" (required on Android 11 right now), tap "Next," choose "Select and Patch a File." Select the stock boot.img.
- Move the magisk_patched.img file this created from your phone's Download folder over to your computer's desktop.
Flash the Modified Boot Image
- Get a command window operating out of the platform-tools folder again.
- Type fastboot flash boot (or ./fastboot flash boot if you had an error at #13), then add a single space, but don't hit enter yet.
- Drag and drop the magisk_patched.img file from your desktop onto the command prompt.
- Once file path is populated, press enter to flash the patched boot image and root your phone.
- Type fastboot reboot (or ./fastboot reboot) and hit enter to boot back into Android.
- Verify root with an app like Root Checker.
Cover image and GIFs by Dallas Thomas/Gadget Hacks


Comments
Be the first, drop a comment!