


When new Android versions come out, the modding community has to find new ways to root the OS. It's a fun cat and mouse game to follow, but it also means the process of rooting isn't exactly the same as it was the last time you did it. Android 10 changes how root works on a system level for some devices, but luckily, the developers are already on top of things.
- Don't Miss: How to Root Android 11 on Any Pixel Device
Google gave its newest devices (Pixel 3, 3 XL, 3a, and 3a XL) something known as logical partitions with the Android Q release. These new partitions allow for anyone to install a Generic System Image (GSI) without having to unlock the bootloader. That means you could test future versions of Android without jumping through extra hoops — it runs as its own instance while leaving your system intact.
The idea of these logical partitions is a fantastic feature to have going forward for testing out new updates, but it had the root community stumped for a little while as well. The creator and maintainer of Magisk, John Wu, finally figured out how to work these new partitions. Through his remarkable efforts, he managed to get full root access working on Android Q with all Pixel 3 devices.
Unlock Your Bootloader
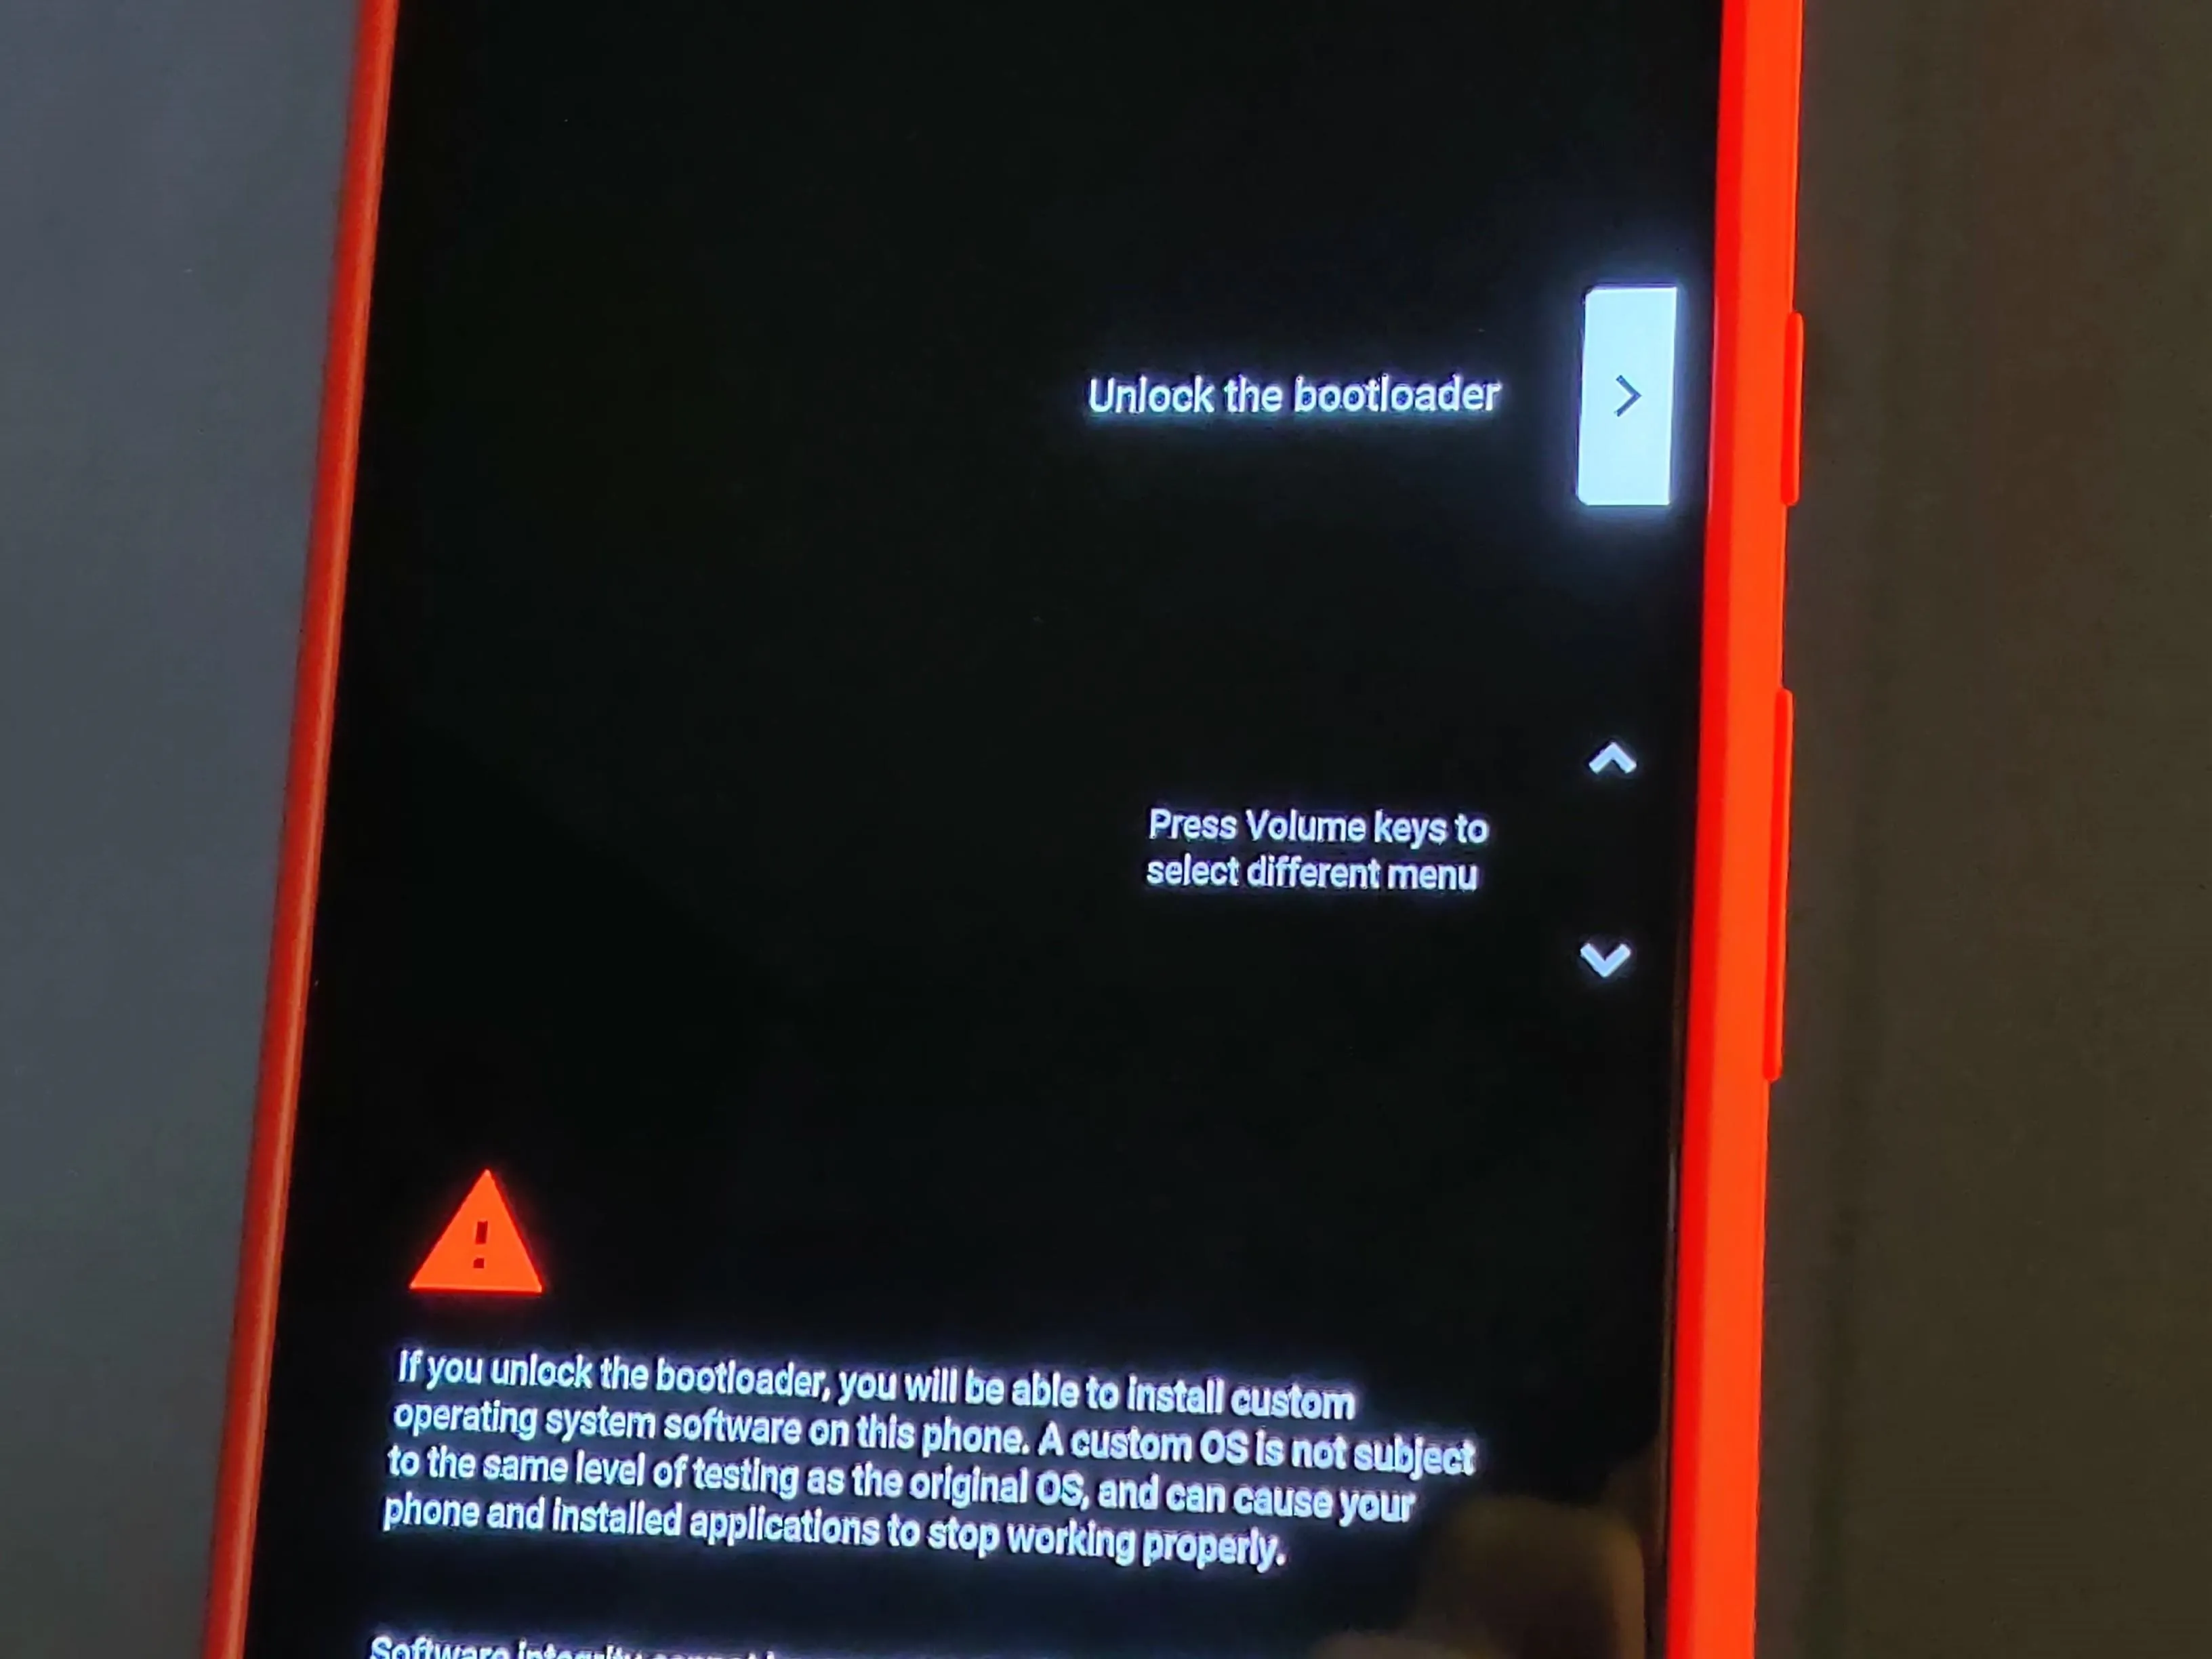
As always, you'll need to make sure your bootloader is unlocked before you can flash any third-party firmware. If you haven't done so yet, visit the guide below to get that all squared away. The guide is for the Pixel 3a, but it works the same for all Pixel 3 devices.
Download the Factory Images
After the bootloader is unlocked and ready to go, you'll need to download the factory images package that matches the version your phone is currently running. As of this guide, Beta 4 is the newest Android 10 "Q" release, but check your build number to verify. Once you know which version you're running, head to a computer to download the version that corresponds with your Pixel 3 model from the link below.
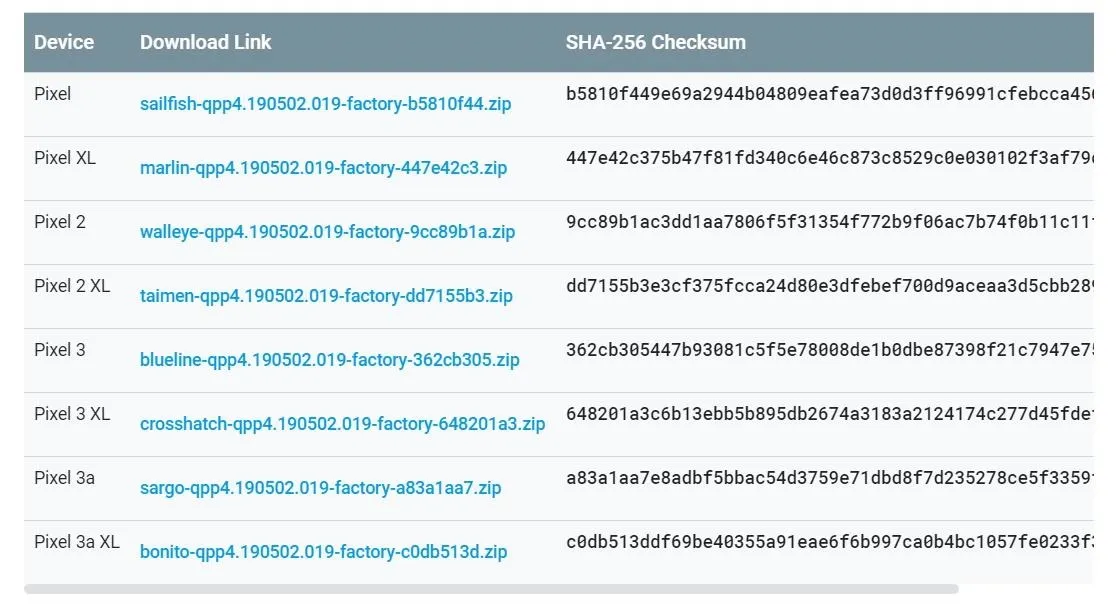
These files are quite large in size since they contain the entire Pixel OS itself, so you might have to wait a few minutes for it to download. For rooting your Pixel 3 on Android 10, you only actually need one specific file from the package to complete the process.
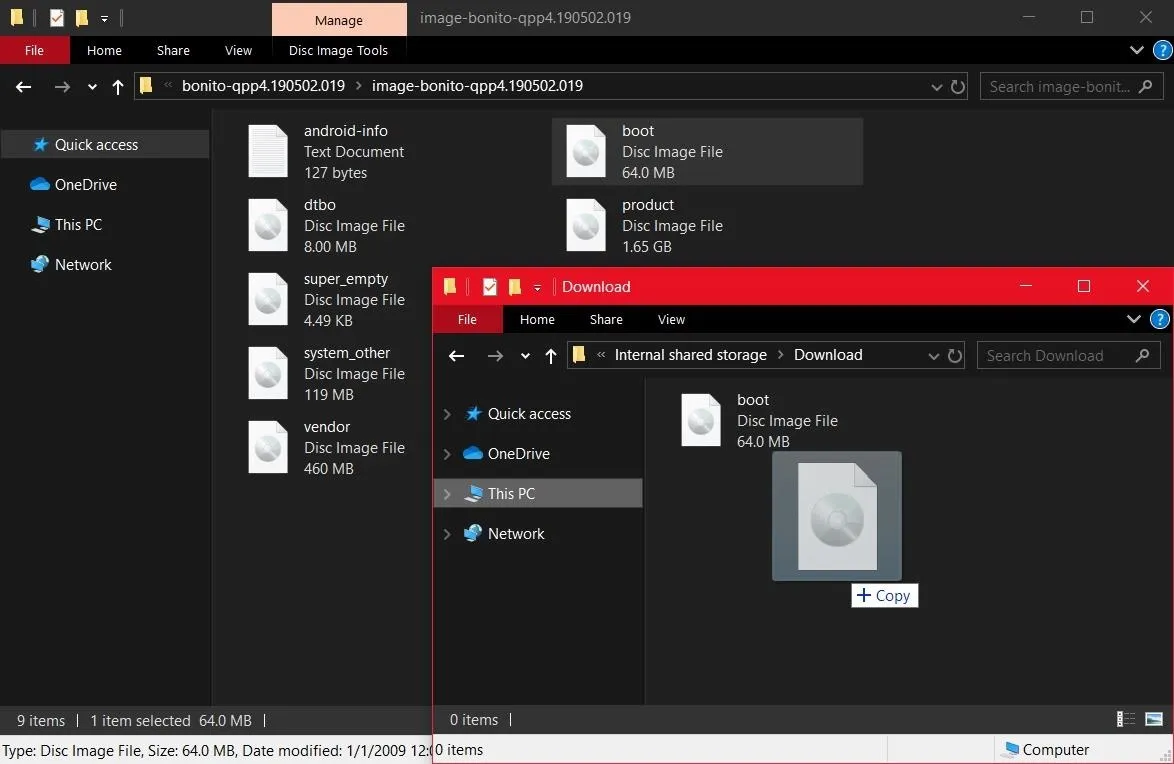
Extract the Boot Image
Once the factory images file has been downloaded successfully, you can extract the archive to any location of your choosing. Once extracted the first time, you need to look for the only ZIP file in the folder that starts with "image," then extract that file within the same folder again to reveal its full contents.
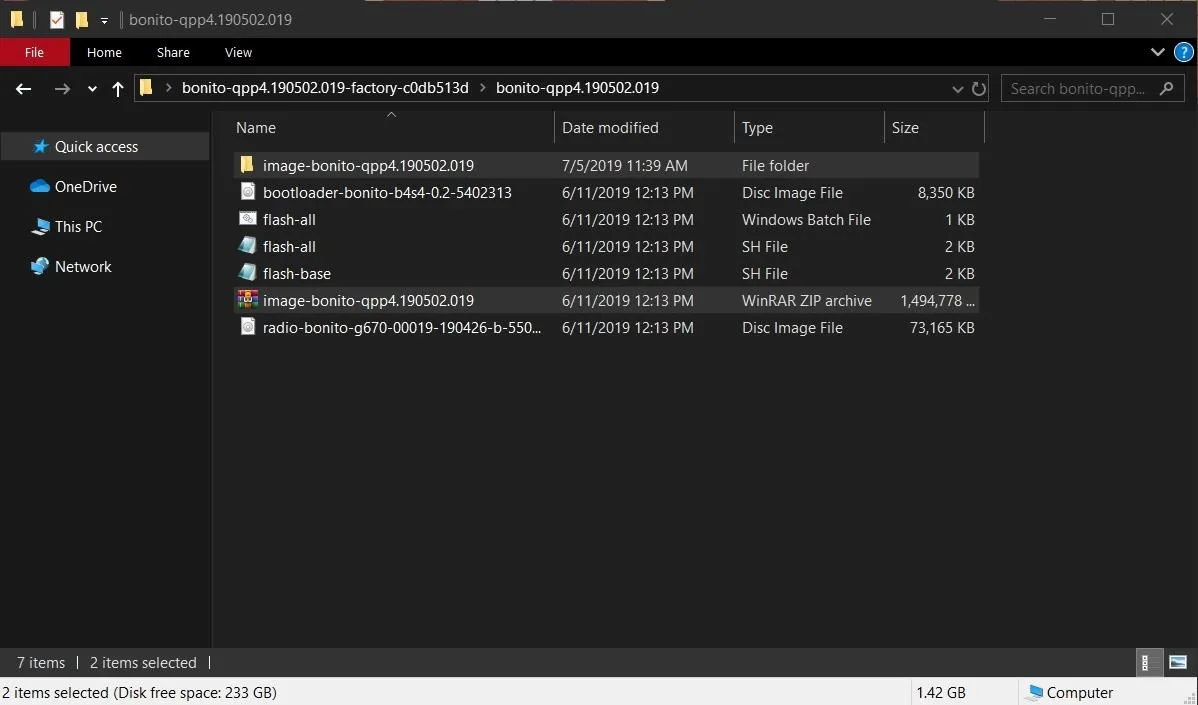
As mentioned before, you can ignore all the other files except for the one named "boot.img." Now, you need to mount your phone to your computer with a USB data cable.
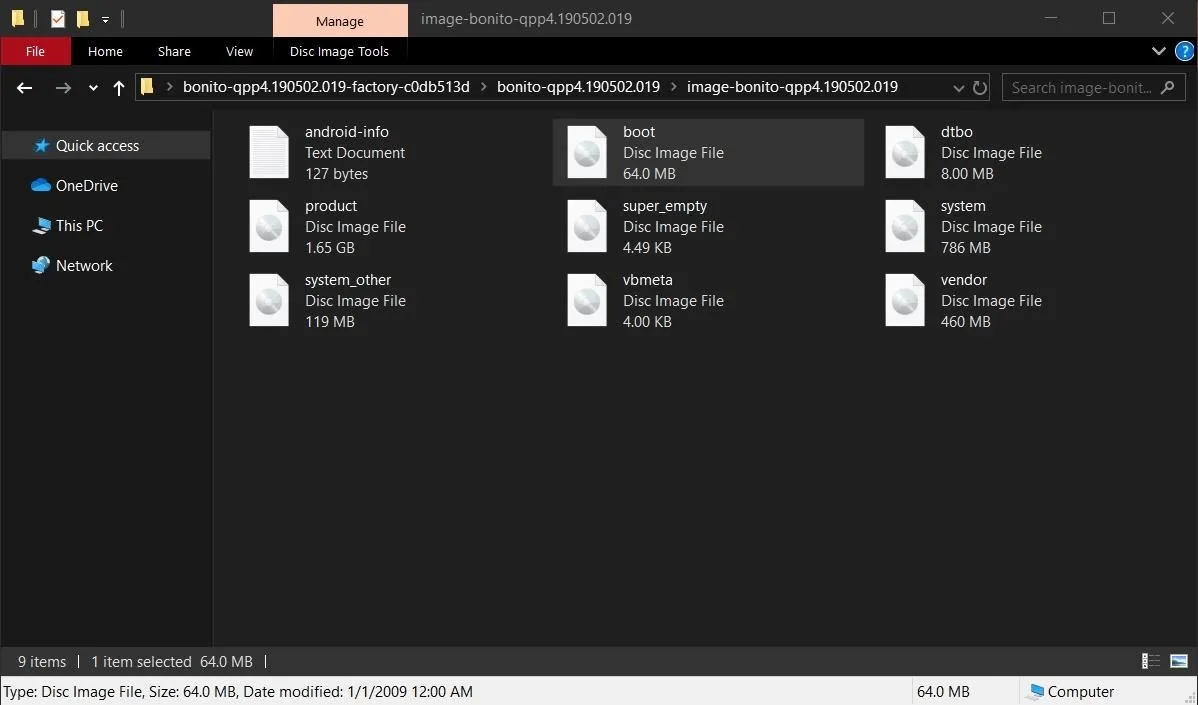
After that, you just need to take that boot image file and transfer it from your computer over to the "Download" folder on your phone.
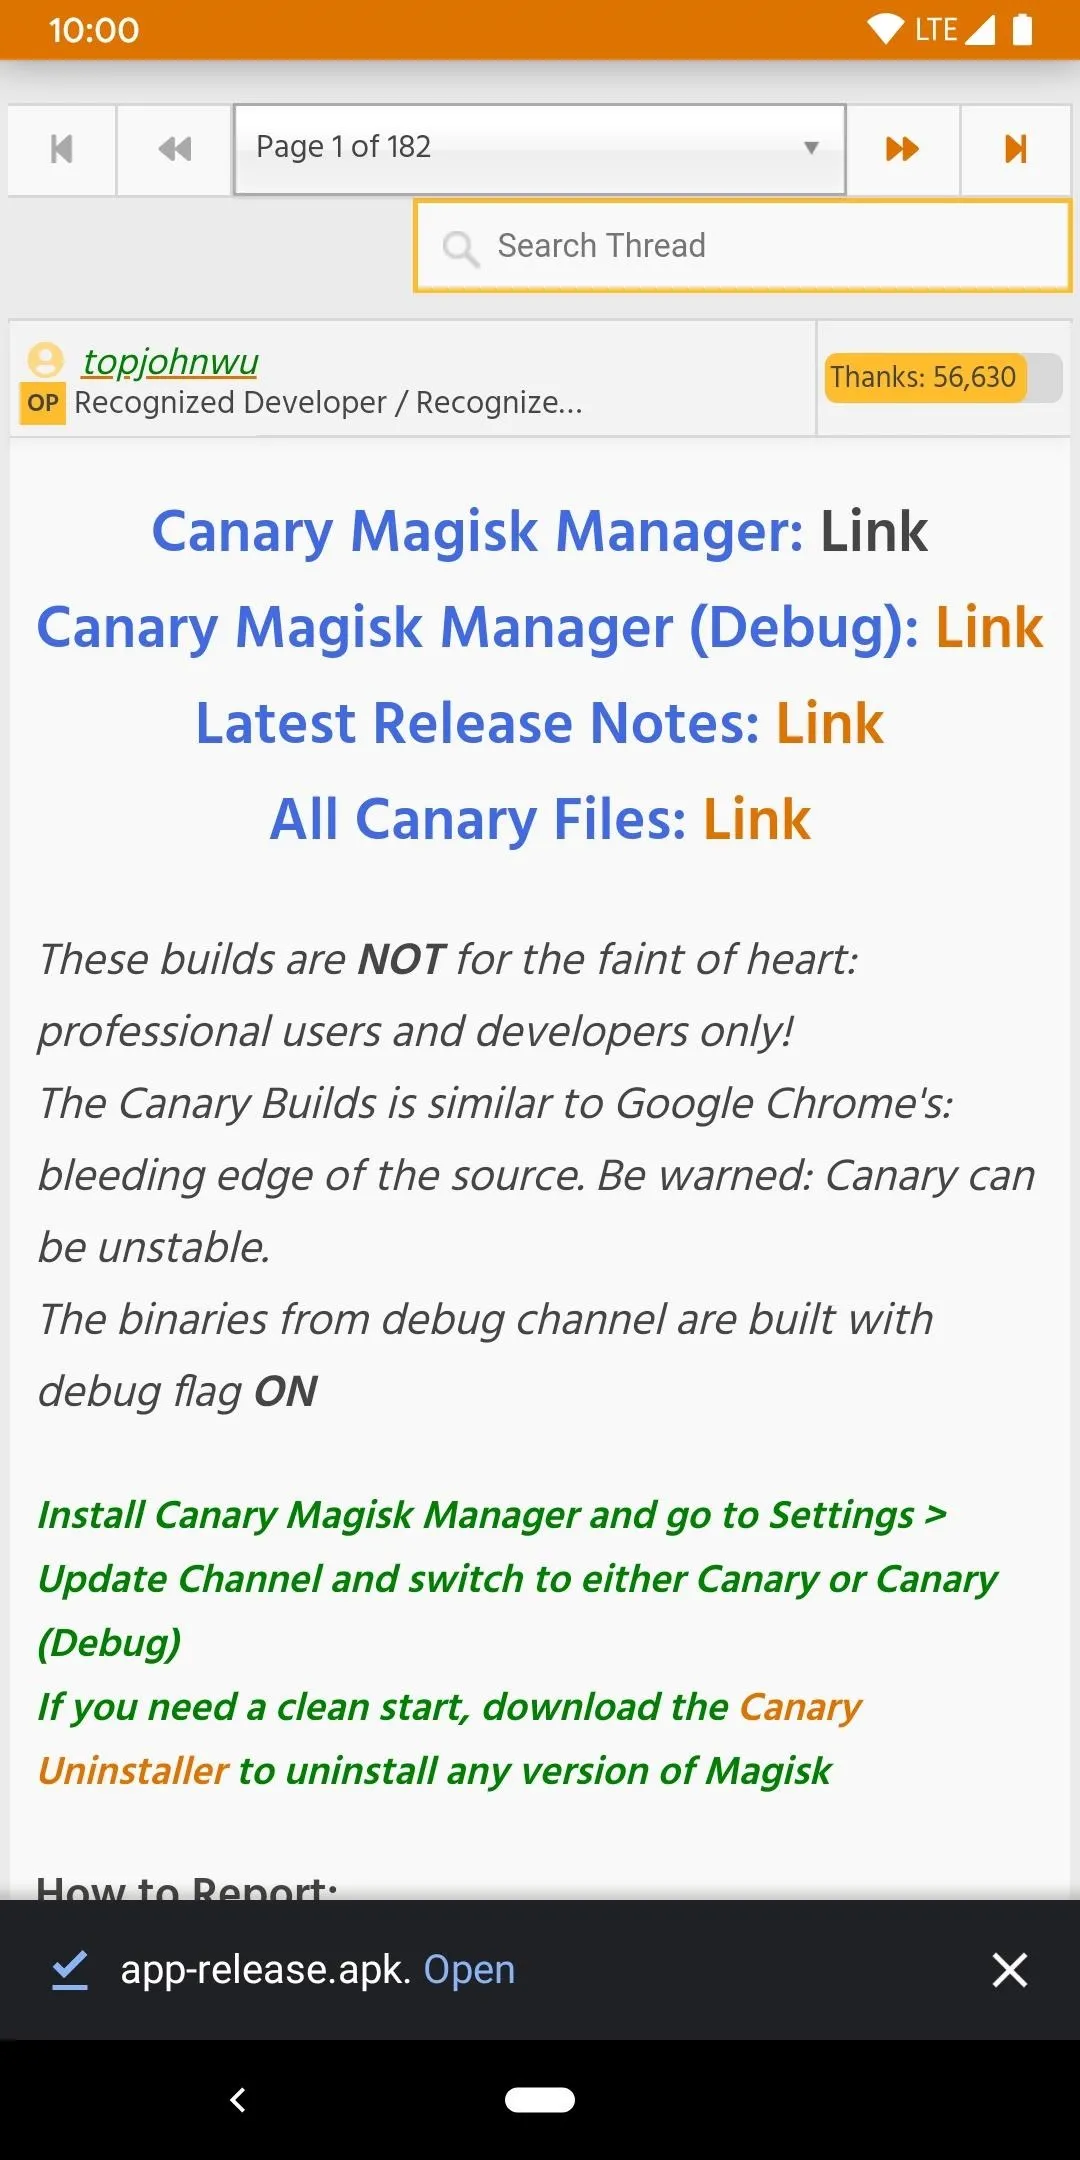
Install Canary Magisk Manager
Generally, at this point, you would download the standard version of the Magisk Manager app, but the Pixel 3 poses an extra challenge with its logical partitions setup in Android 10 "Q." As such, the way root is handled on the Magisk side of things had to change to adhere to the new system ruleset.
For the time being, you'll be using the Canary builds of Magisk to achieve root access on your Pixel 3 because of how Android 10 works. This just means you'll be testing out the latest and greatest features that Magisk is preparing for the final stable builds. Download the latest Canary build from the link below.

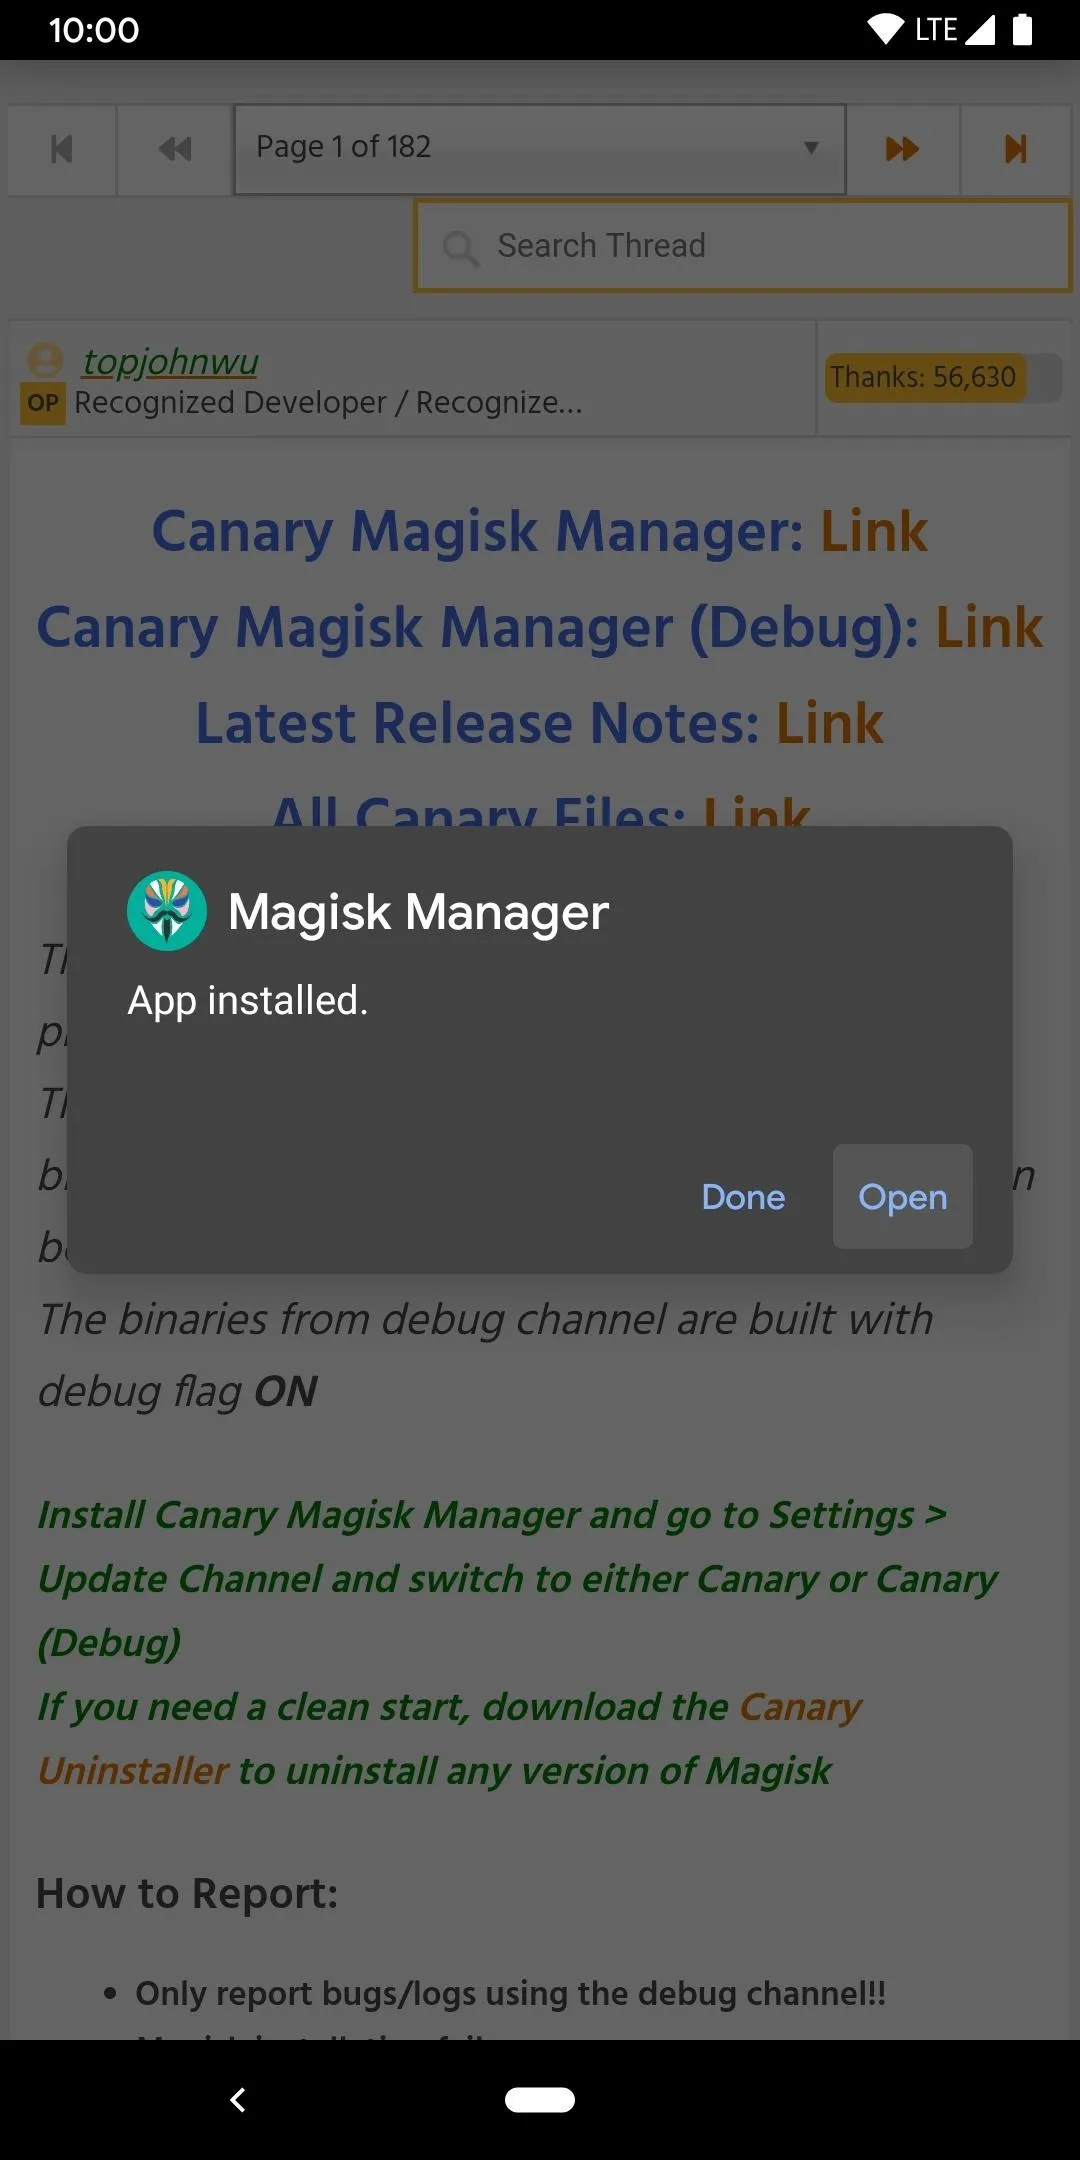
After the app is finished downloading on your phone, tap the "Download complete" or "Open" notification to begin the install process. If necessary, you might have to grant Chrome the proper permissions to sideload the Magisk Manager app. Just tap "Settings," then enable the switch for the "Allow from this source" option. Tap the back arrow once to return to the previous screen, then tap "Install."
In my testing with these new Canary builds on Android Q, I haven't had any issues to report so far on the Pixel 3a XL. Once enough progress has been made with this new root method for the Pixel 3 on Android Q, it will be pushed out to the stable public channel for everyone to use.
Change the Update Channel (If Necessary)
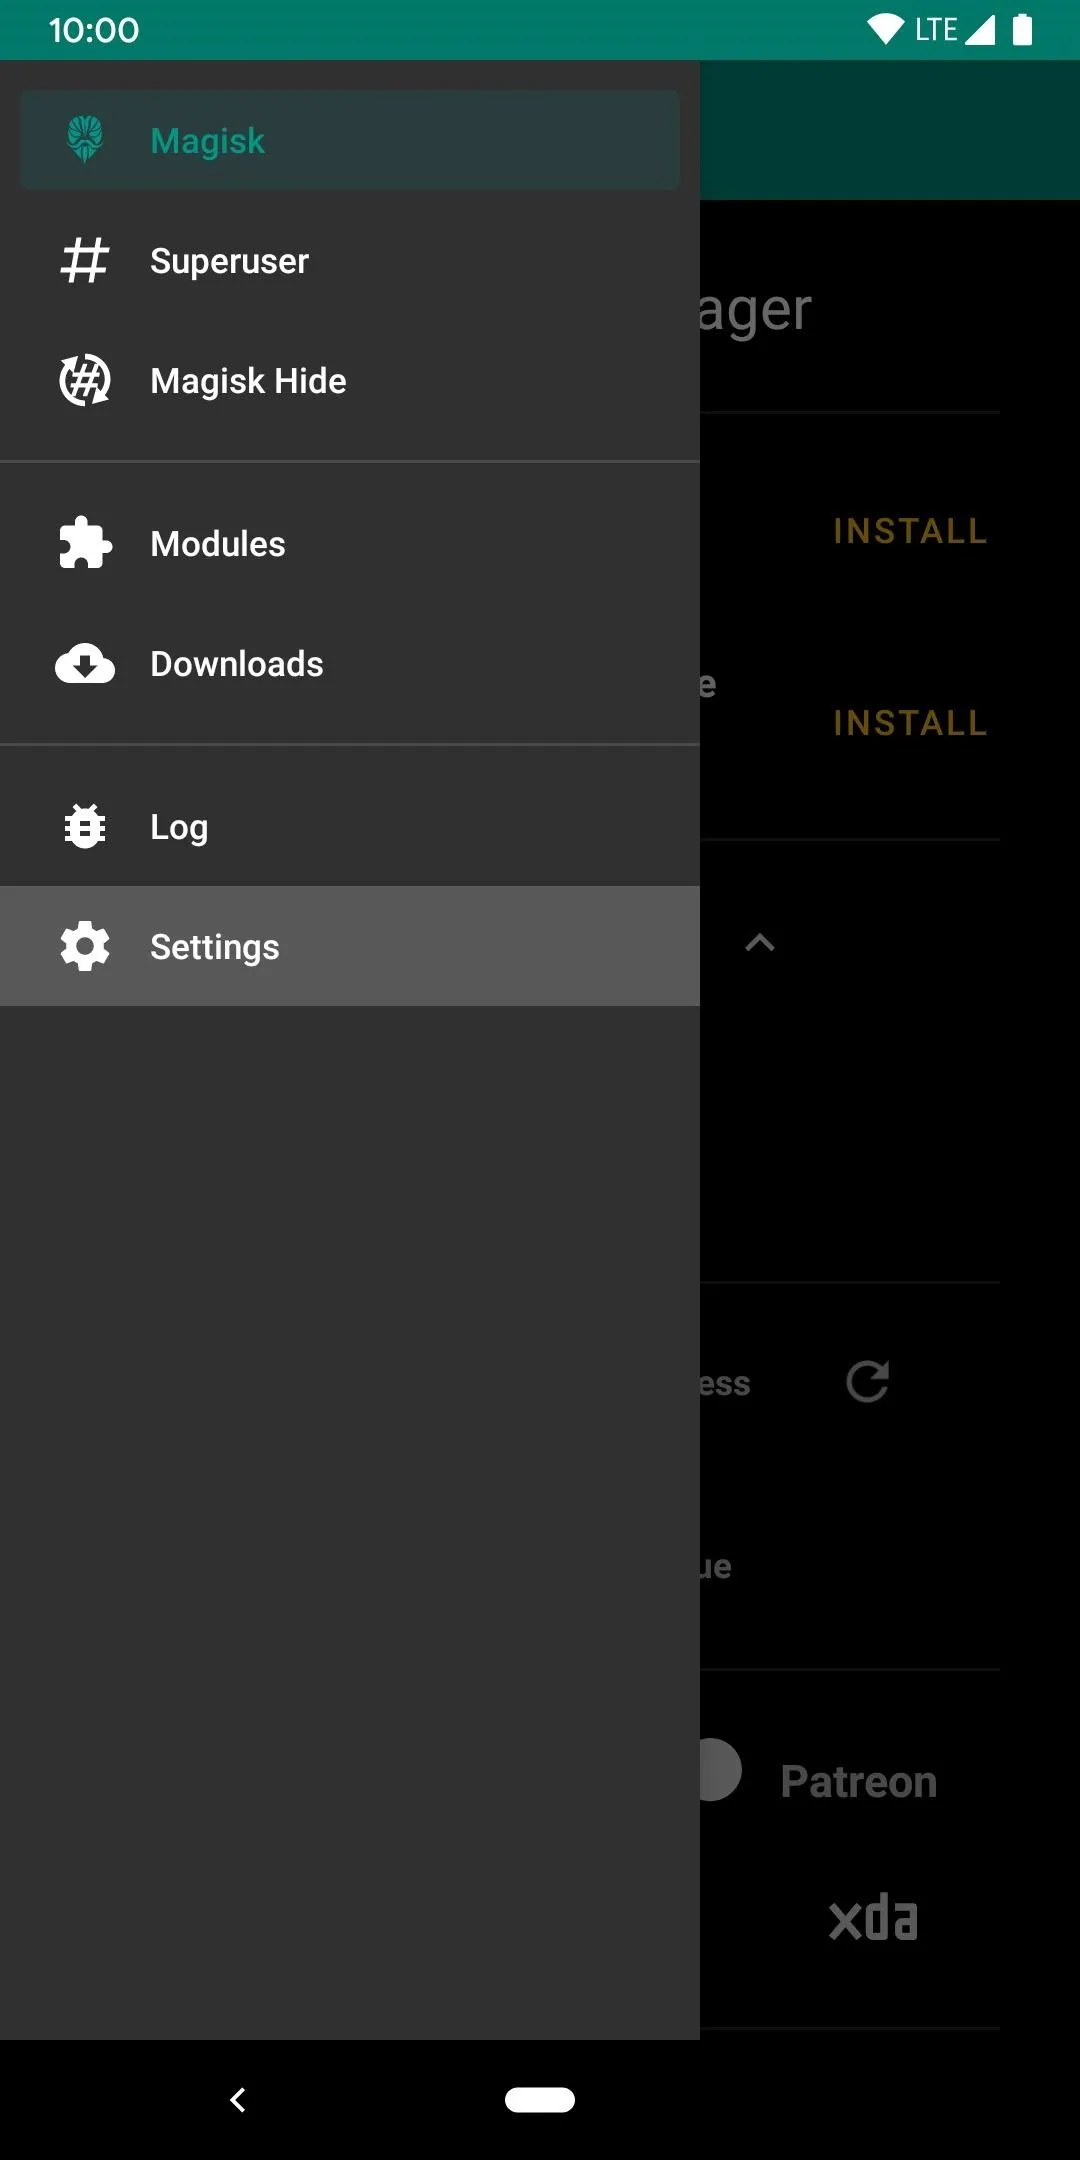
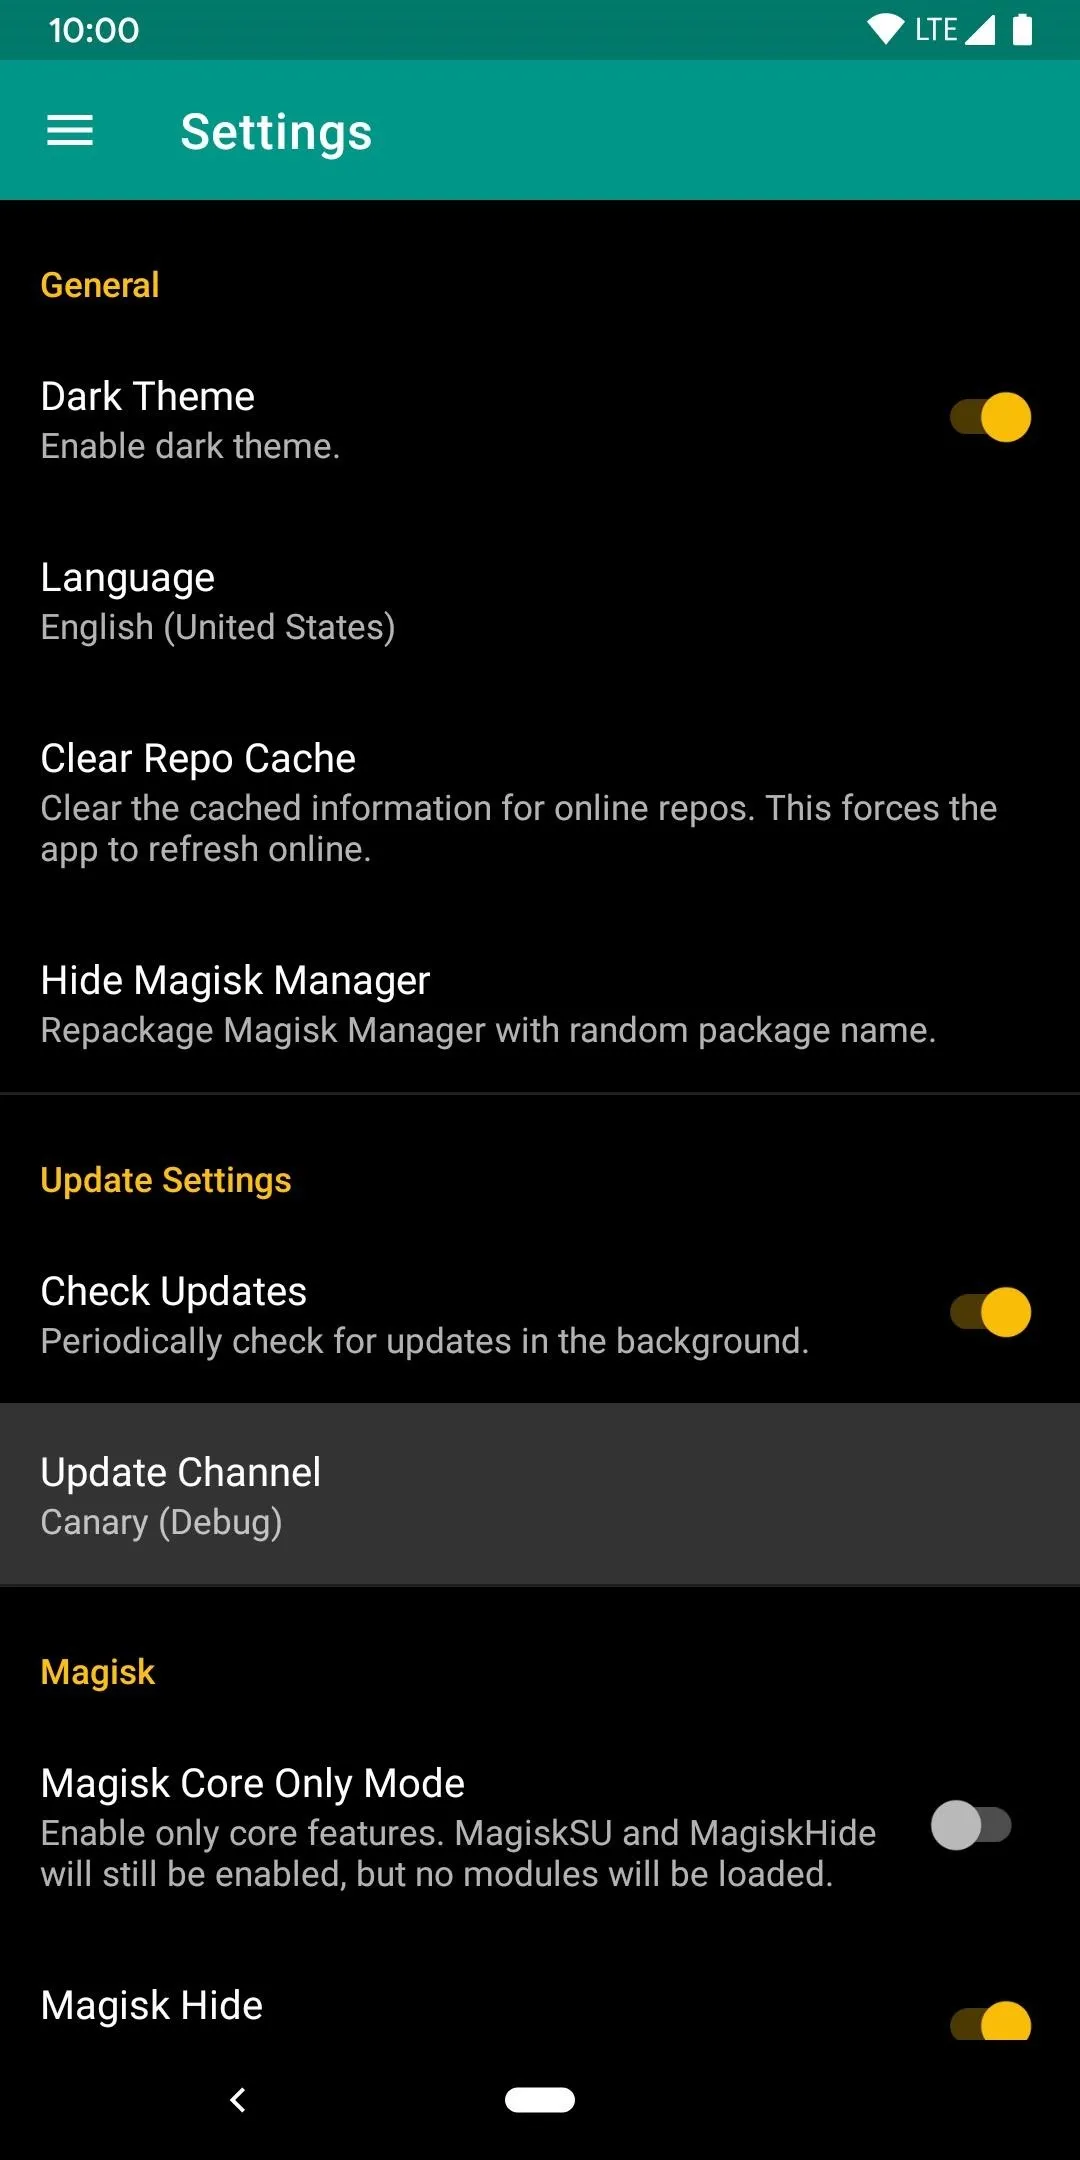
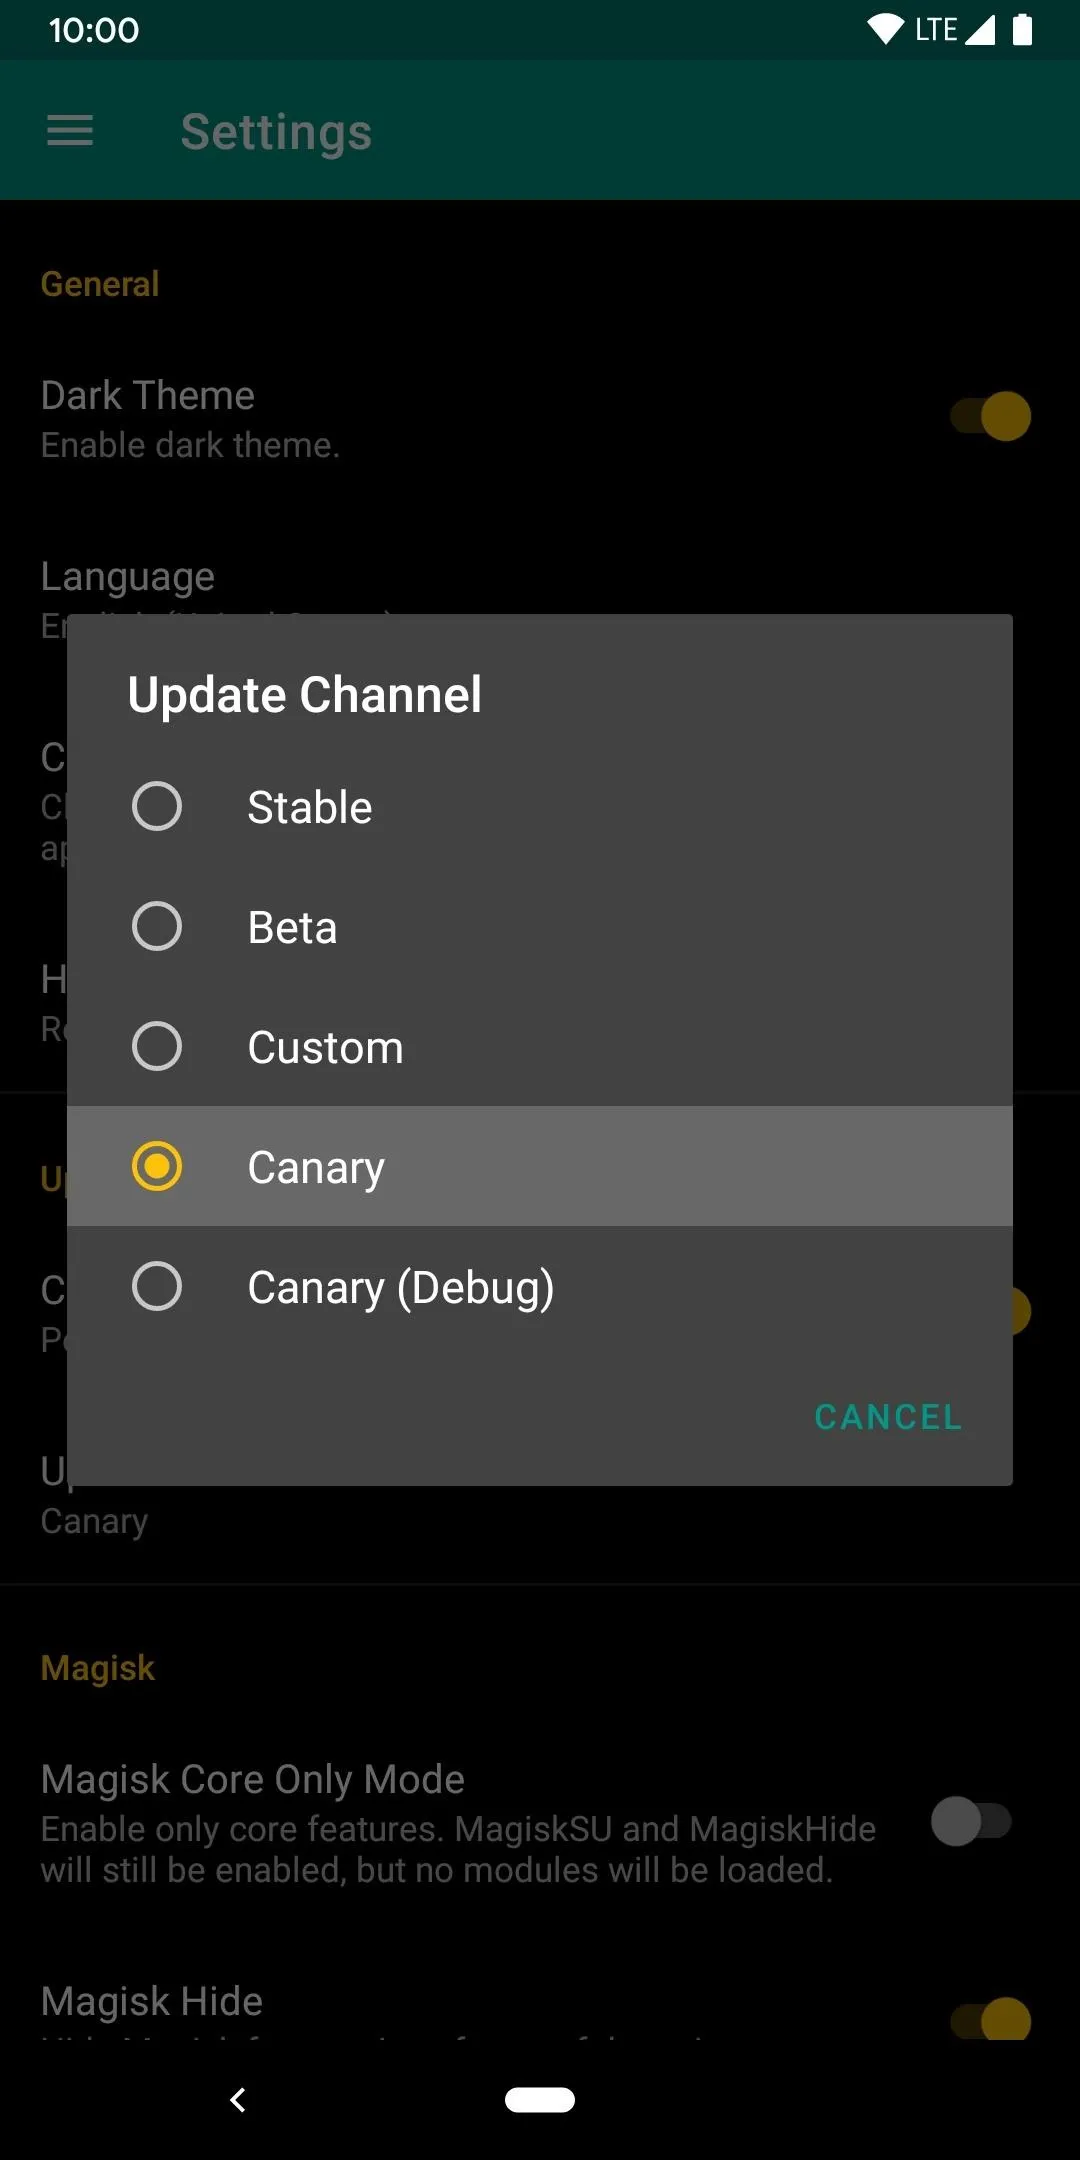
There are two different versions of the Canary builds, one is regular while the other is geared towards developers. Open the Magisk Manager app to the main screen, tap the menu icon on the left, then go to "Settings." Tap the "Update Channel" option, then change it to "Canary" if it's set to the debug version. This helps to ensure a more stable experience for future releases.
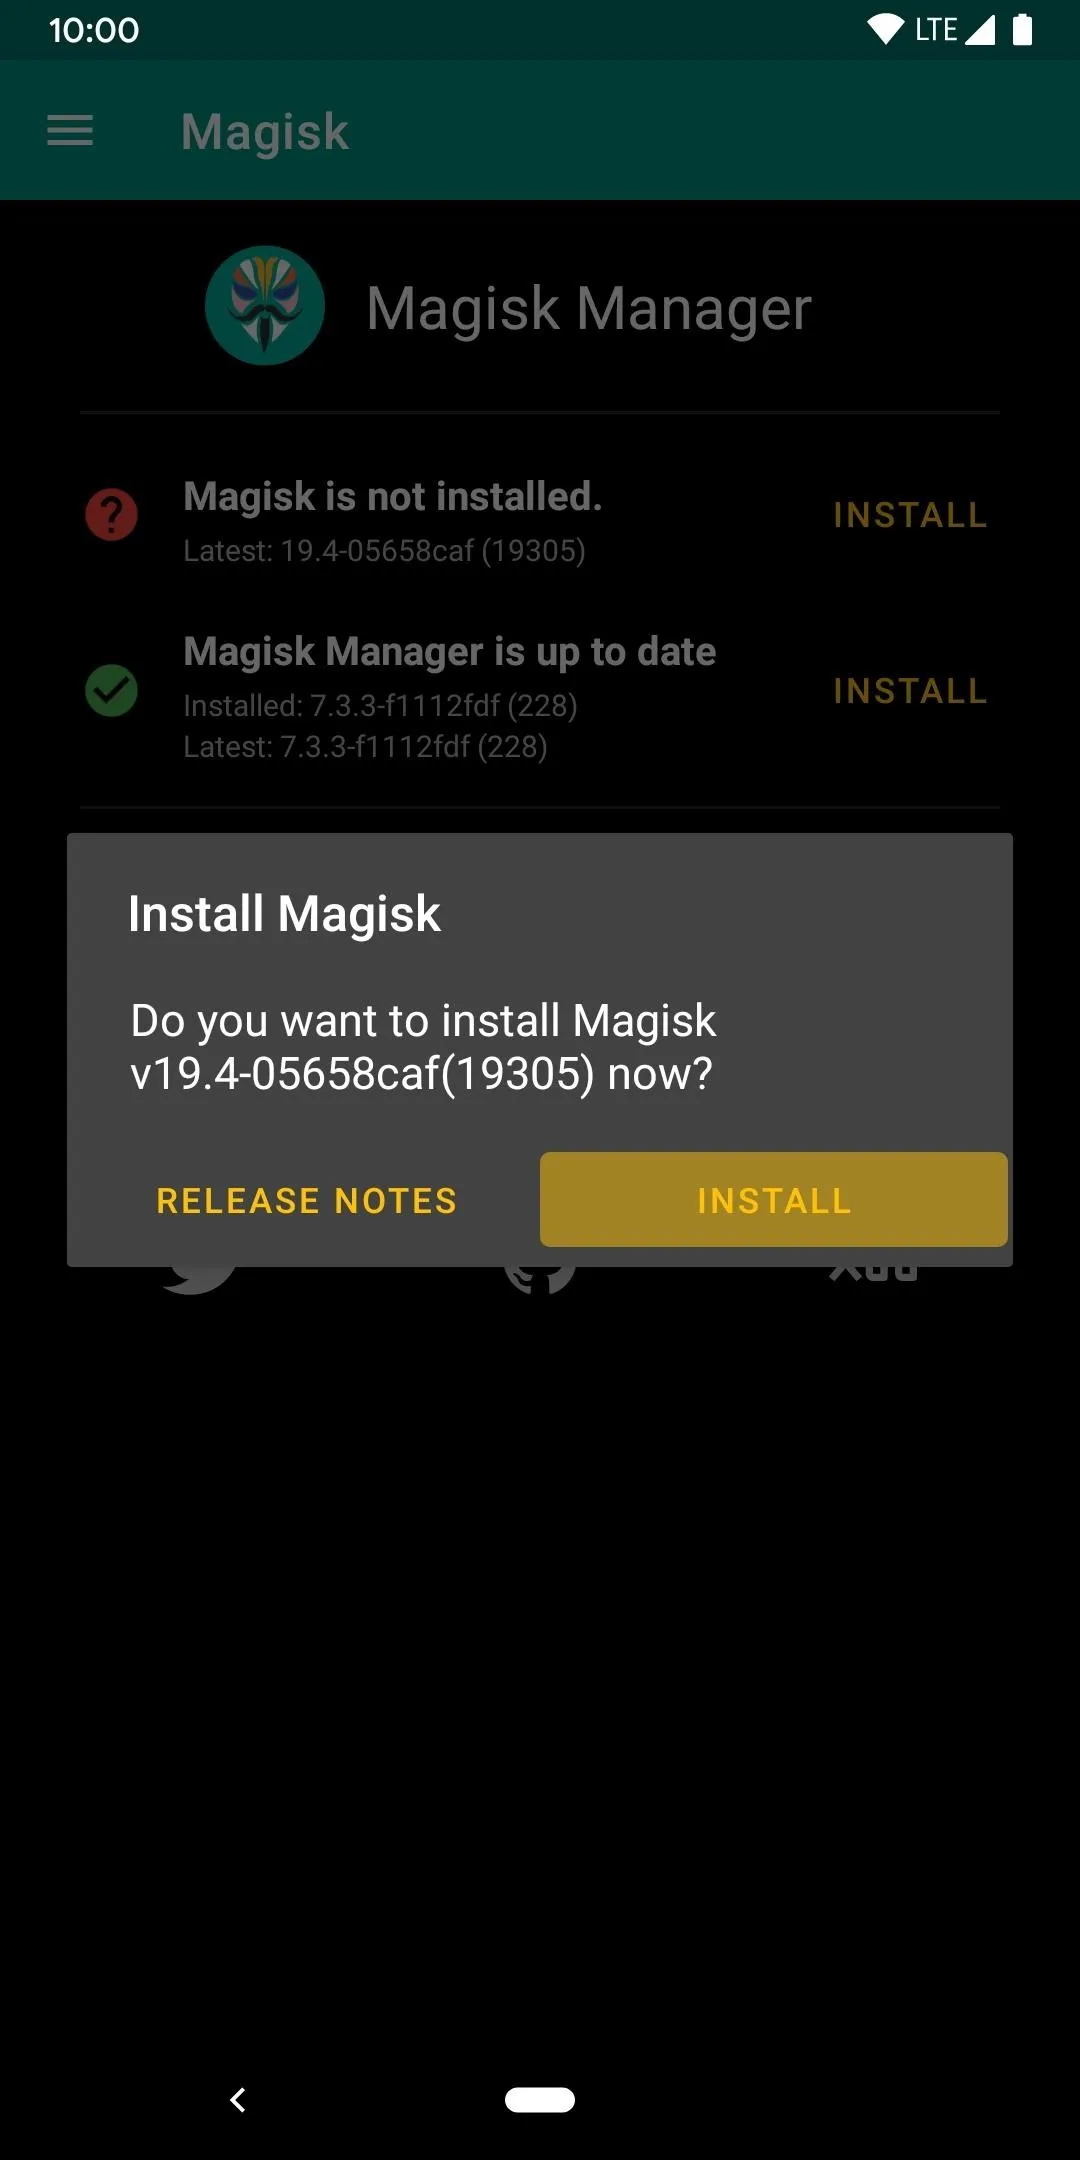
Patch the Boot Image
From the main screen of the Magisk manager app, tap "Install," then hit "Install" once more to bring up a new set of options. From the list, pick the "Select and Patch a File" option, then grant the proper media permissions if necessary by tapping "Allow."
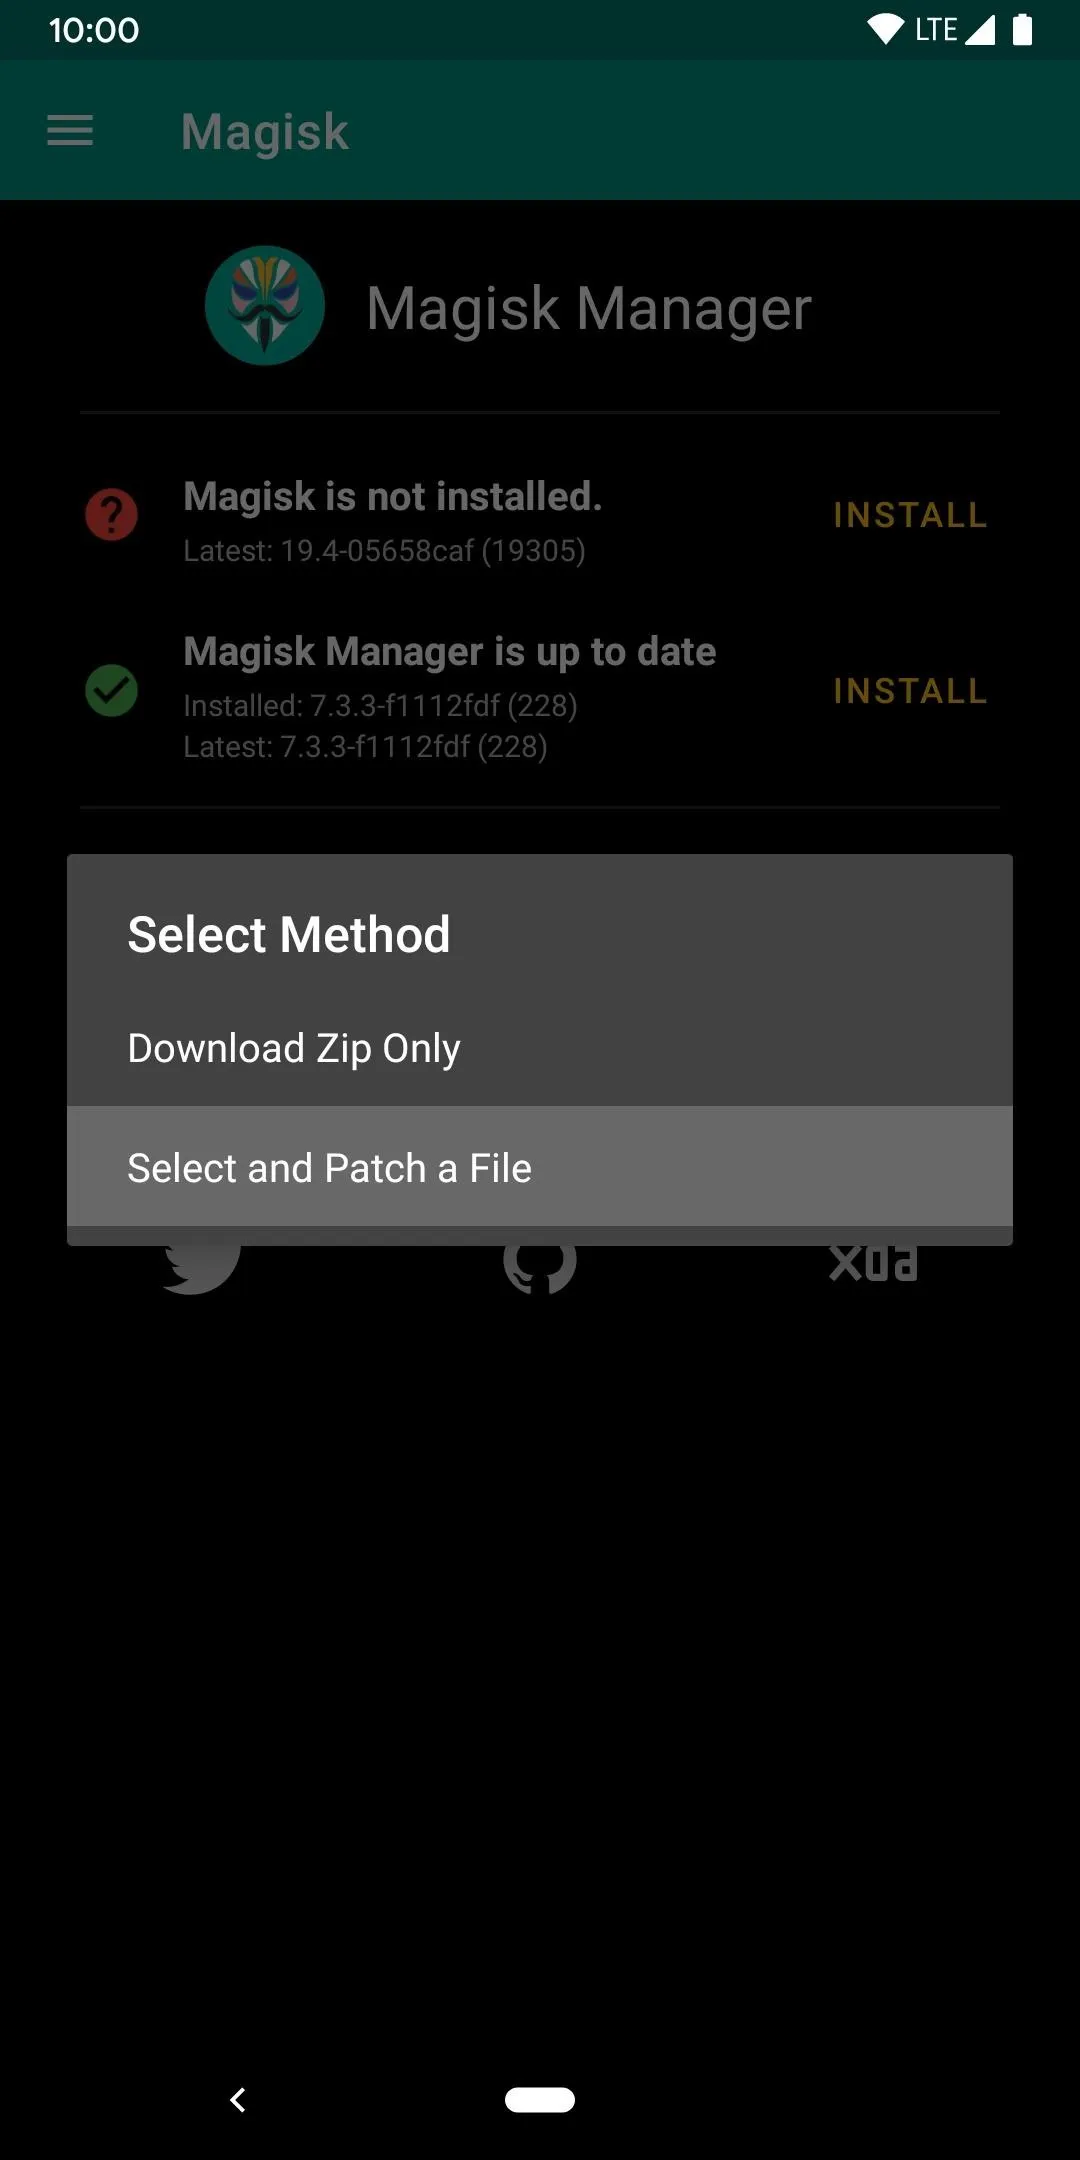
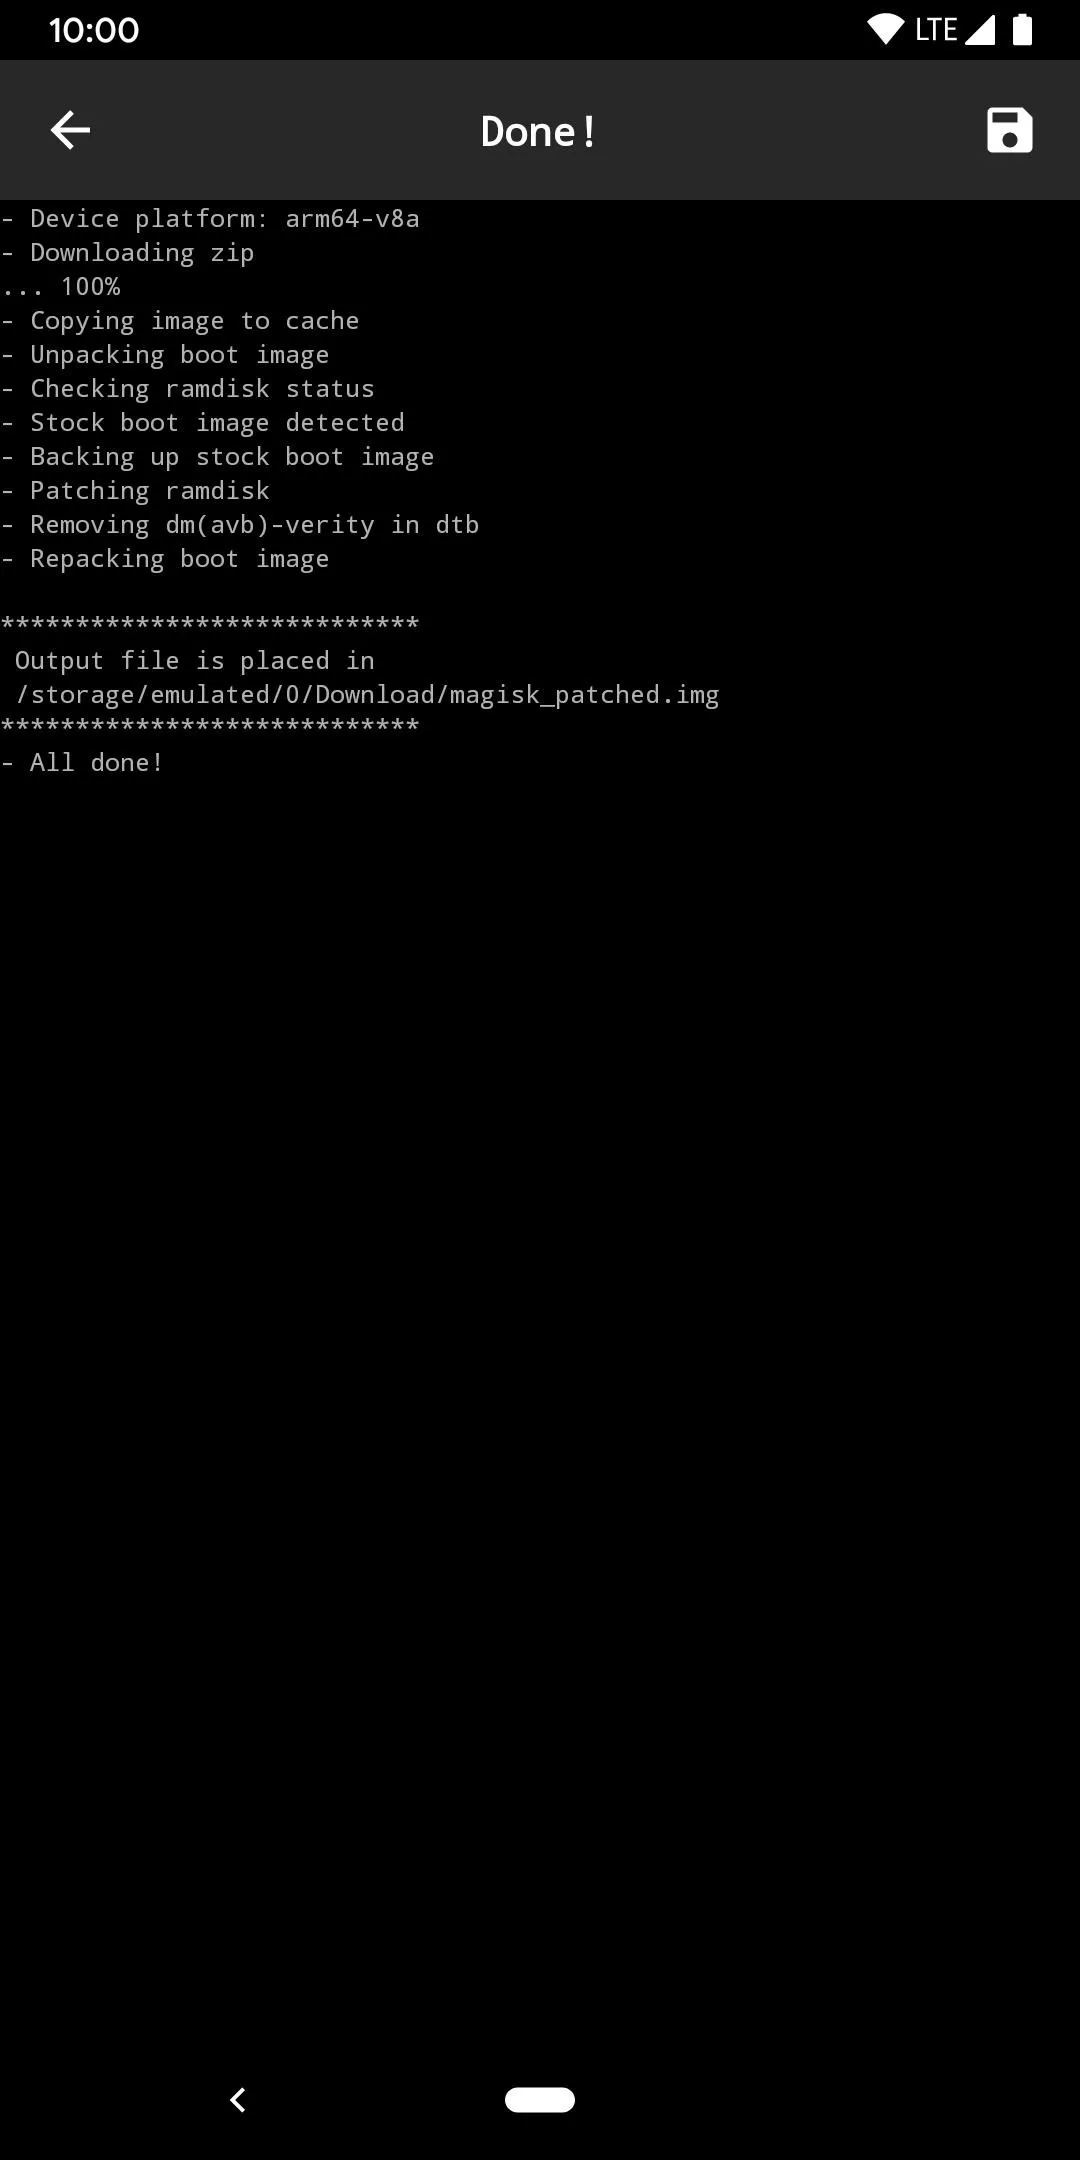
From within the file manager that pops up, you should already be sitting at the "Downloads" folder by default, and it should automatically detect the boot image file you transferred earlier. Tap the "boot.img" file once, then Magisk will go about patching it within a minute or so after that. Once it finishes, tap the back arrow to complete the process.

Install ADB & Fastboot on Your Computer
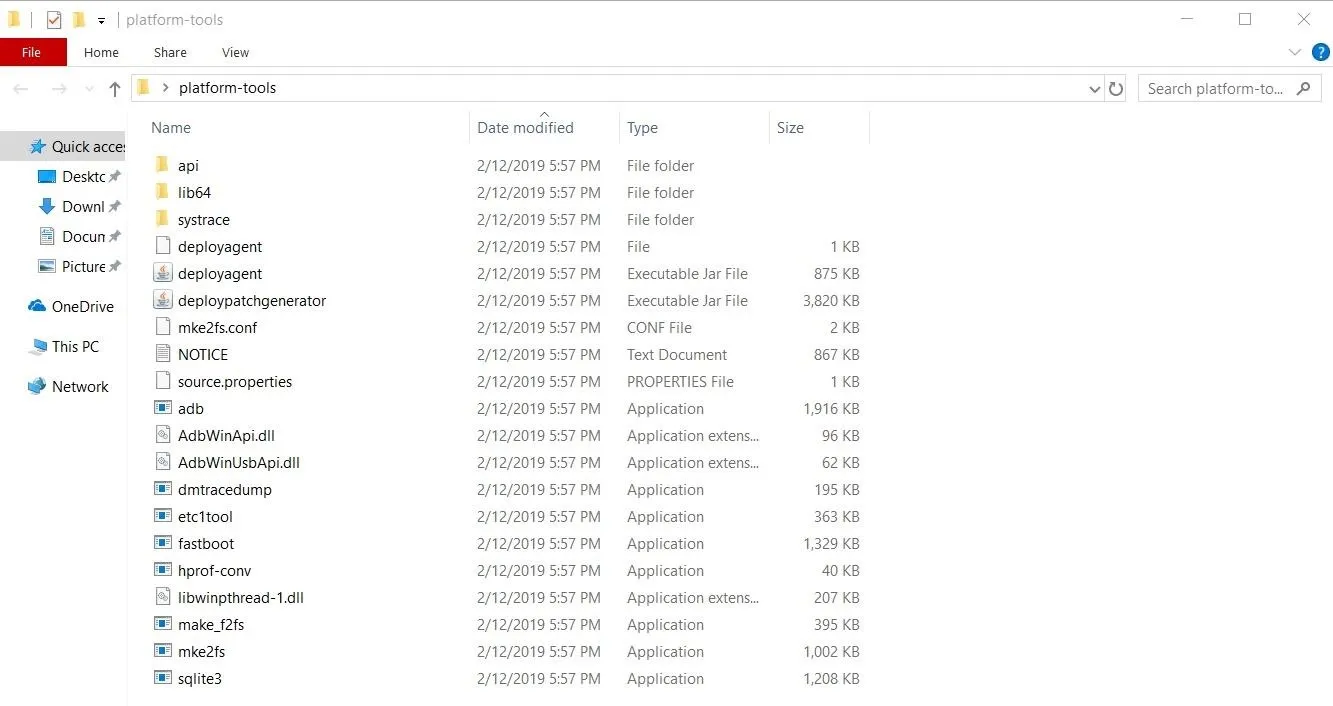
Now that you have the newly patched boot image file from Magisk, you'll need to use a quick command to send it over to your phone's system partition. Downloading Google's SDK Platform-Tools standalone package will give you everything you need to accomplish this without complicating things. If necessary, visit the link below to take care of that before moving on with the guide.
Move the Patched Boot Image to Your Computer
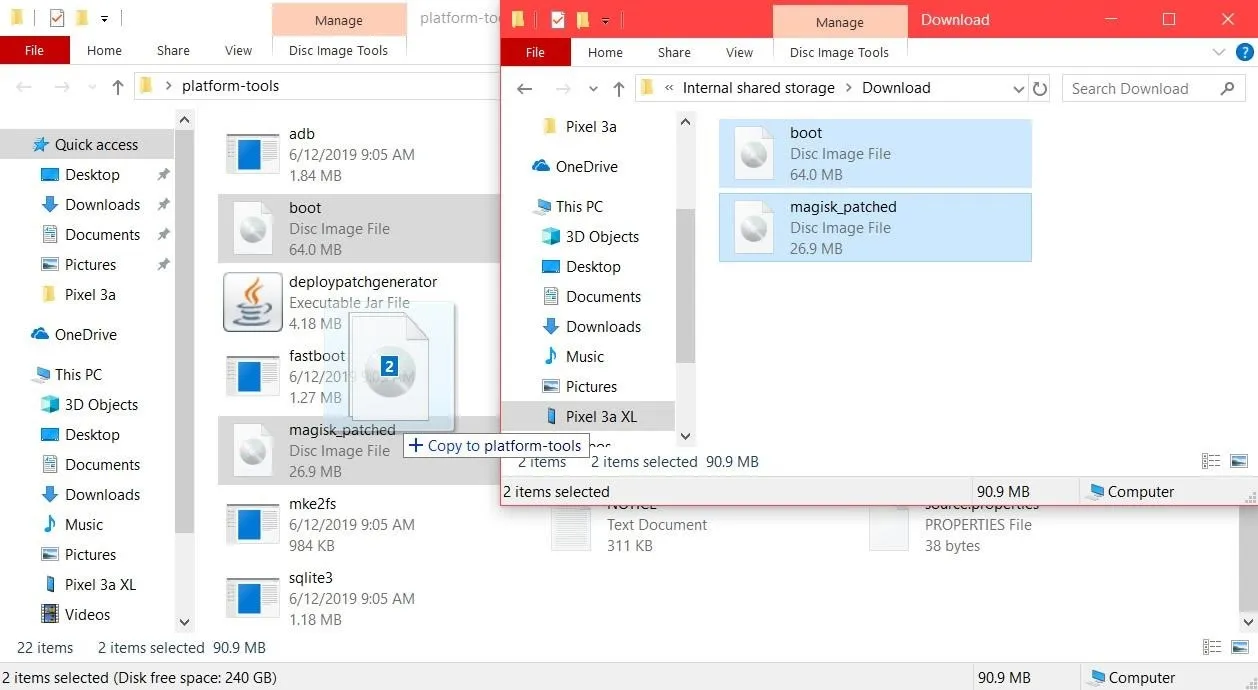
Now it's time to send that patched boot image file you got from Magisk to the platform-tools folder on your computer. The file should be located within the same "Download" folder as the original file, but it will be called "magisk_patched.img." You can go ahead and transfer both the patched and original "boot.img" files to your platform-tools folder for safekeeping.
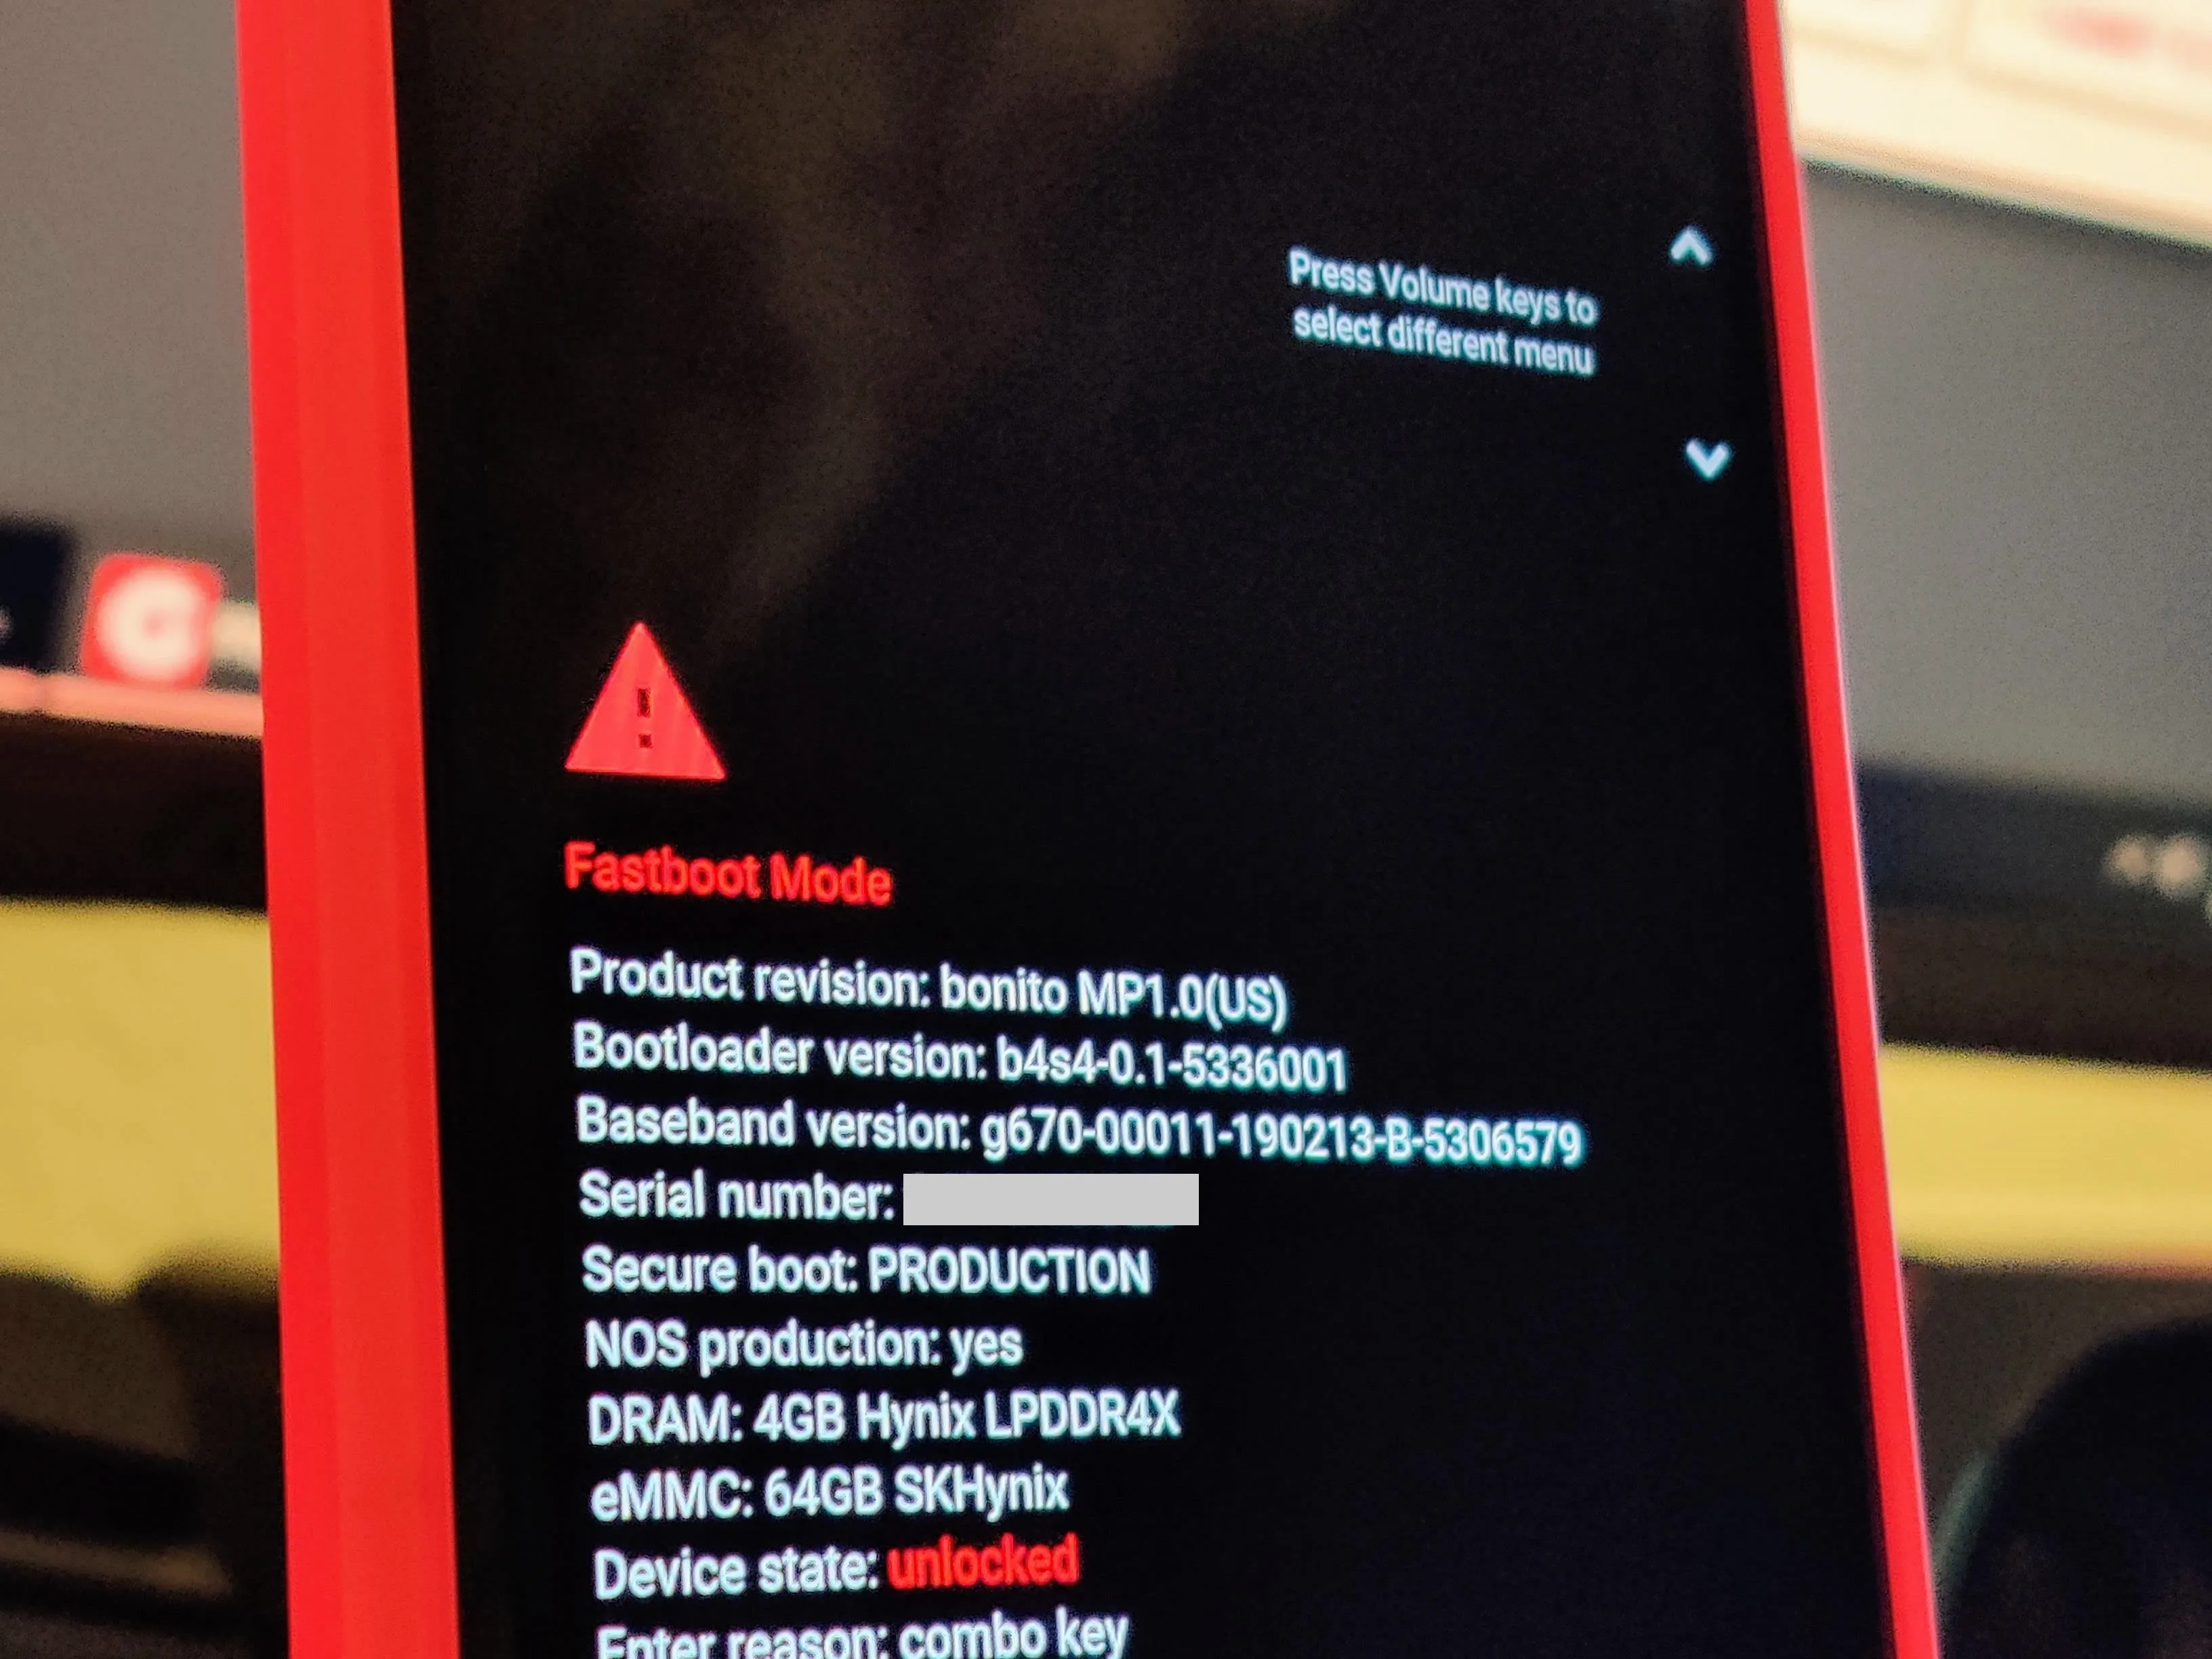
Boot into Fastboot Mode
You now need to put your phone into a state that allows it to receive the boot image file required to achieve root access. This state is called Fastboot Mode, which is how your phone and computer communicate with one another when using the command line environment.
To get into Fastboot Mode, long-press the power button then tap "Power off" to shut your phone completely off. Once you're positive the phone is powered down, hold the power button and volume down button at the same time until the Fastboot Mode main menu appears. Once you've made it that far, connect your phone to your computer with a USB cable, then leave the phone just like this for the next part.
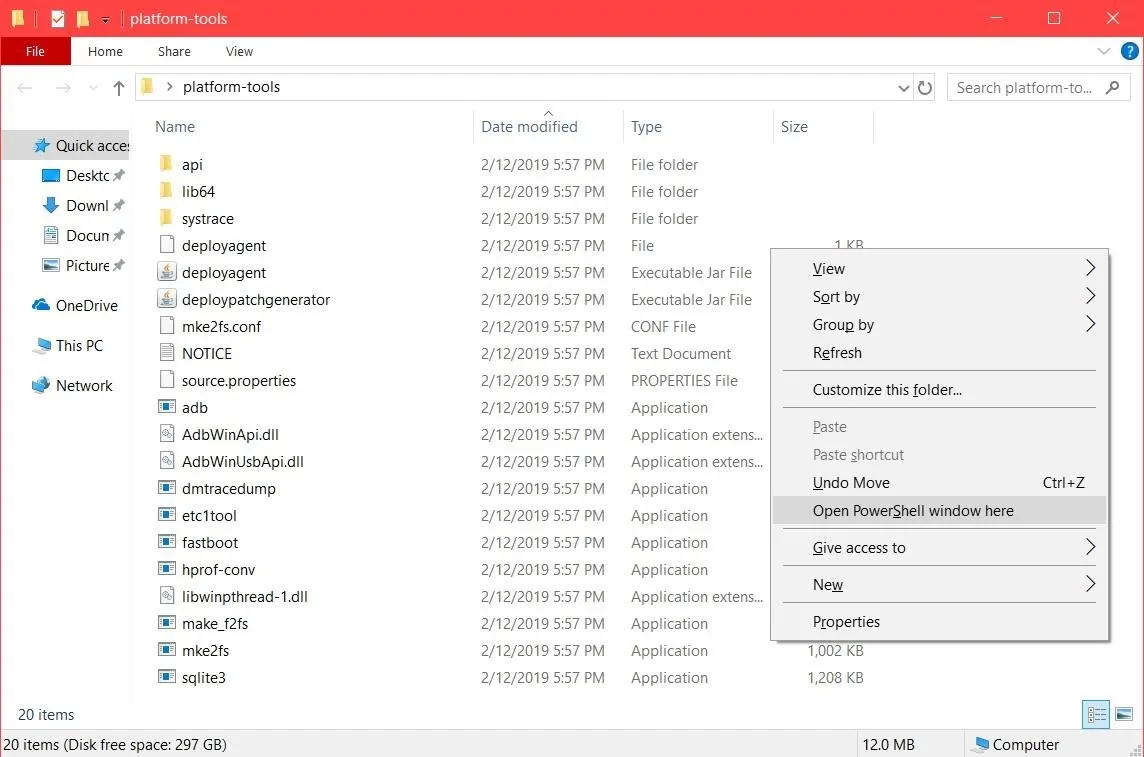
Open a Command Window in Platform-Tools
At this point, your phone is ready to receive the required Fastboot commands, but your computer still has one thing it needs before you can move on. You need to open a command window in the platform-tools folder so that it can communicate with your phone. This is typically done with a command like "cd C:\Downloads\platform-tools\" (replace "Downloads" with your platform-tools folder's actual location), but if you're not sure how to do this, just use the guide linked out below.
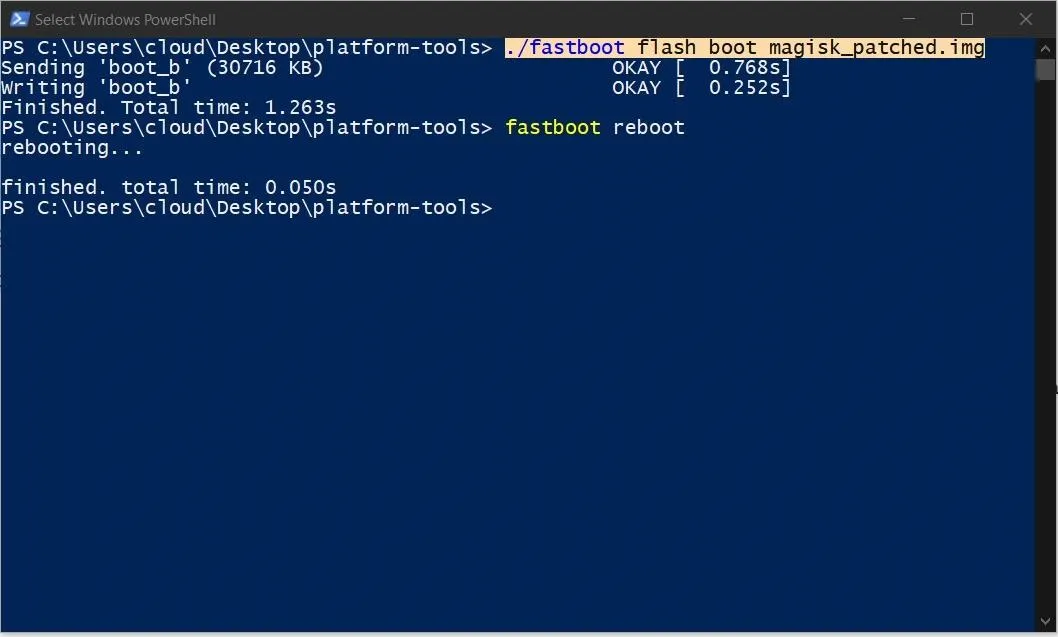
Flash the Patched Boot Image
Now, it's finally time to push that modified boot image file you got from Magisk over to your phone. Let's get right to it — type the following command, then press enter.
fastboot flash boot magisk_patched.imgNote: Mac, Linux, and Windows PowerShell users will likely have to add a period and a slash before entering any ADB or Fastboot commands (e.g., ./fastboot flash boot magisk_patched.img).
Once the patched boot image is finished installing, type in the next command followed by enter.
fastboot rebootThis command will tell your phone to reboot for you automatically without having to touch it. Doing this means you won't have to use the volume keys on your phone to manually reboot your device from Fastboot Mode — unless you'd prefer to do it that way, of course.
Verify Root & SafetyNet Status
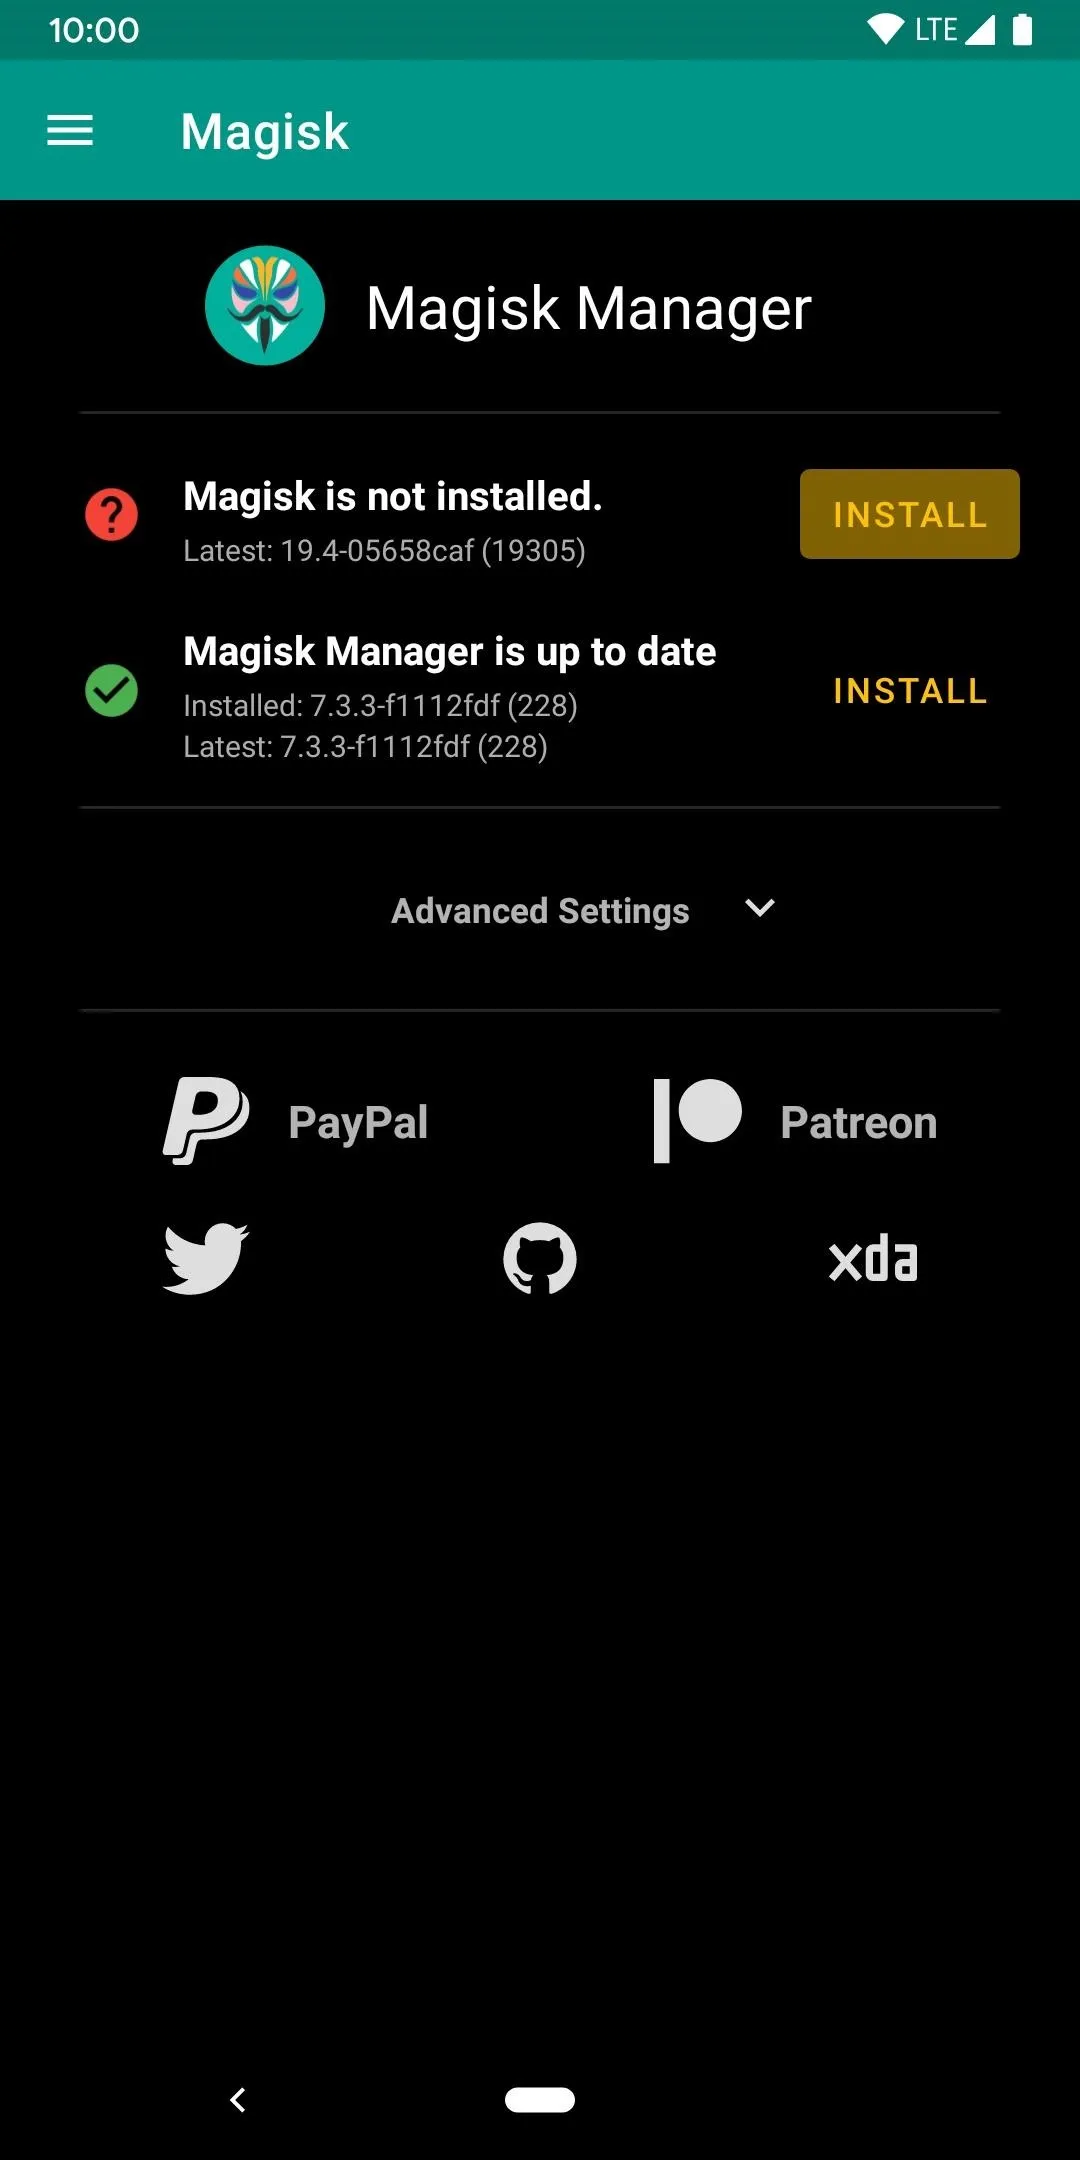
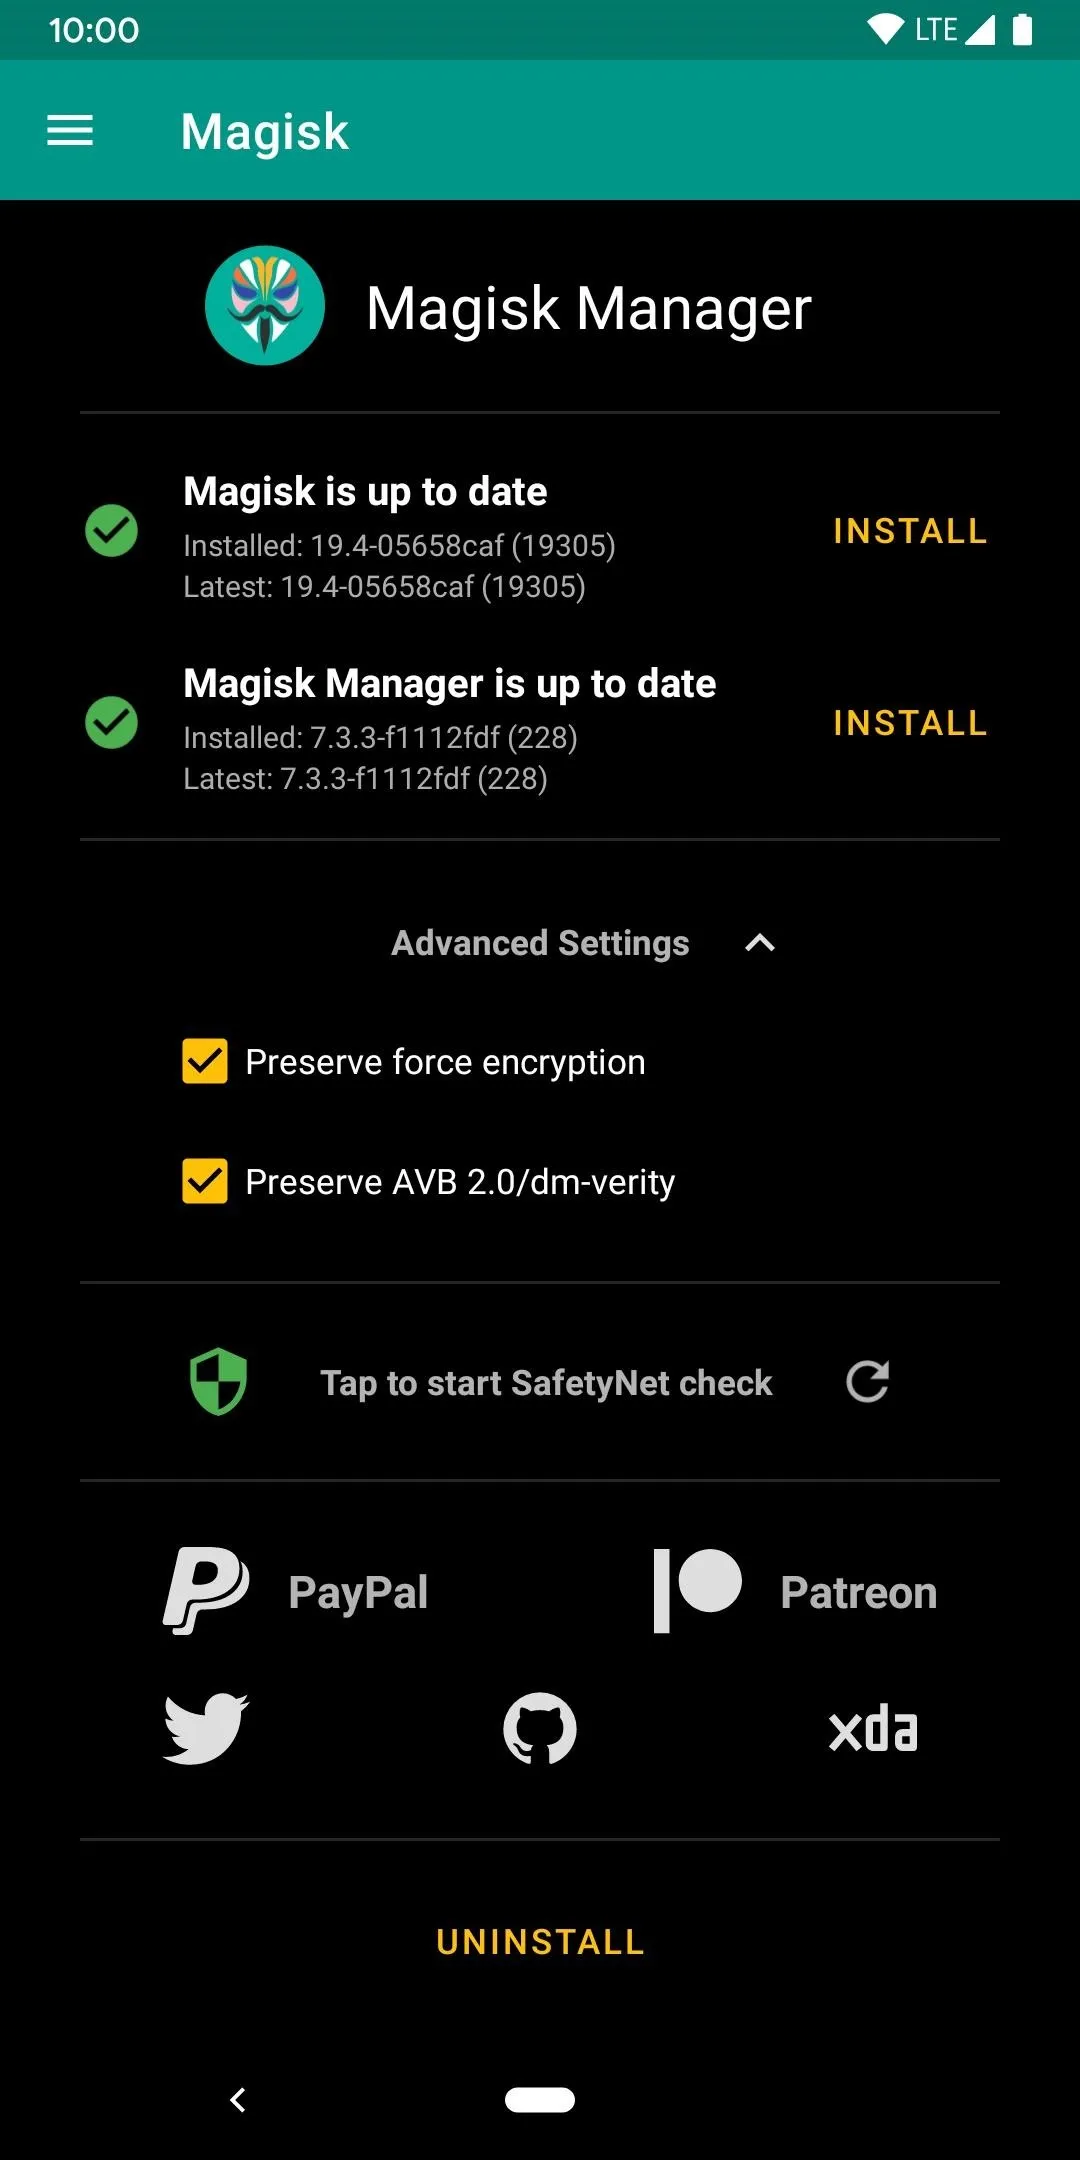
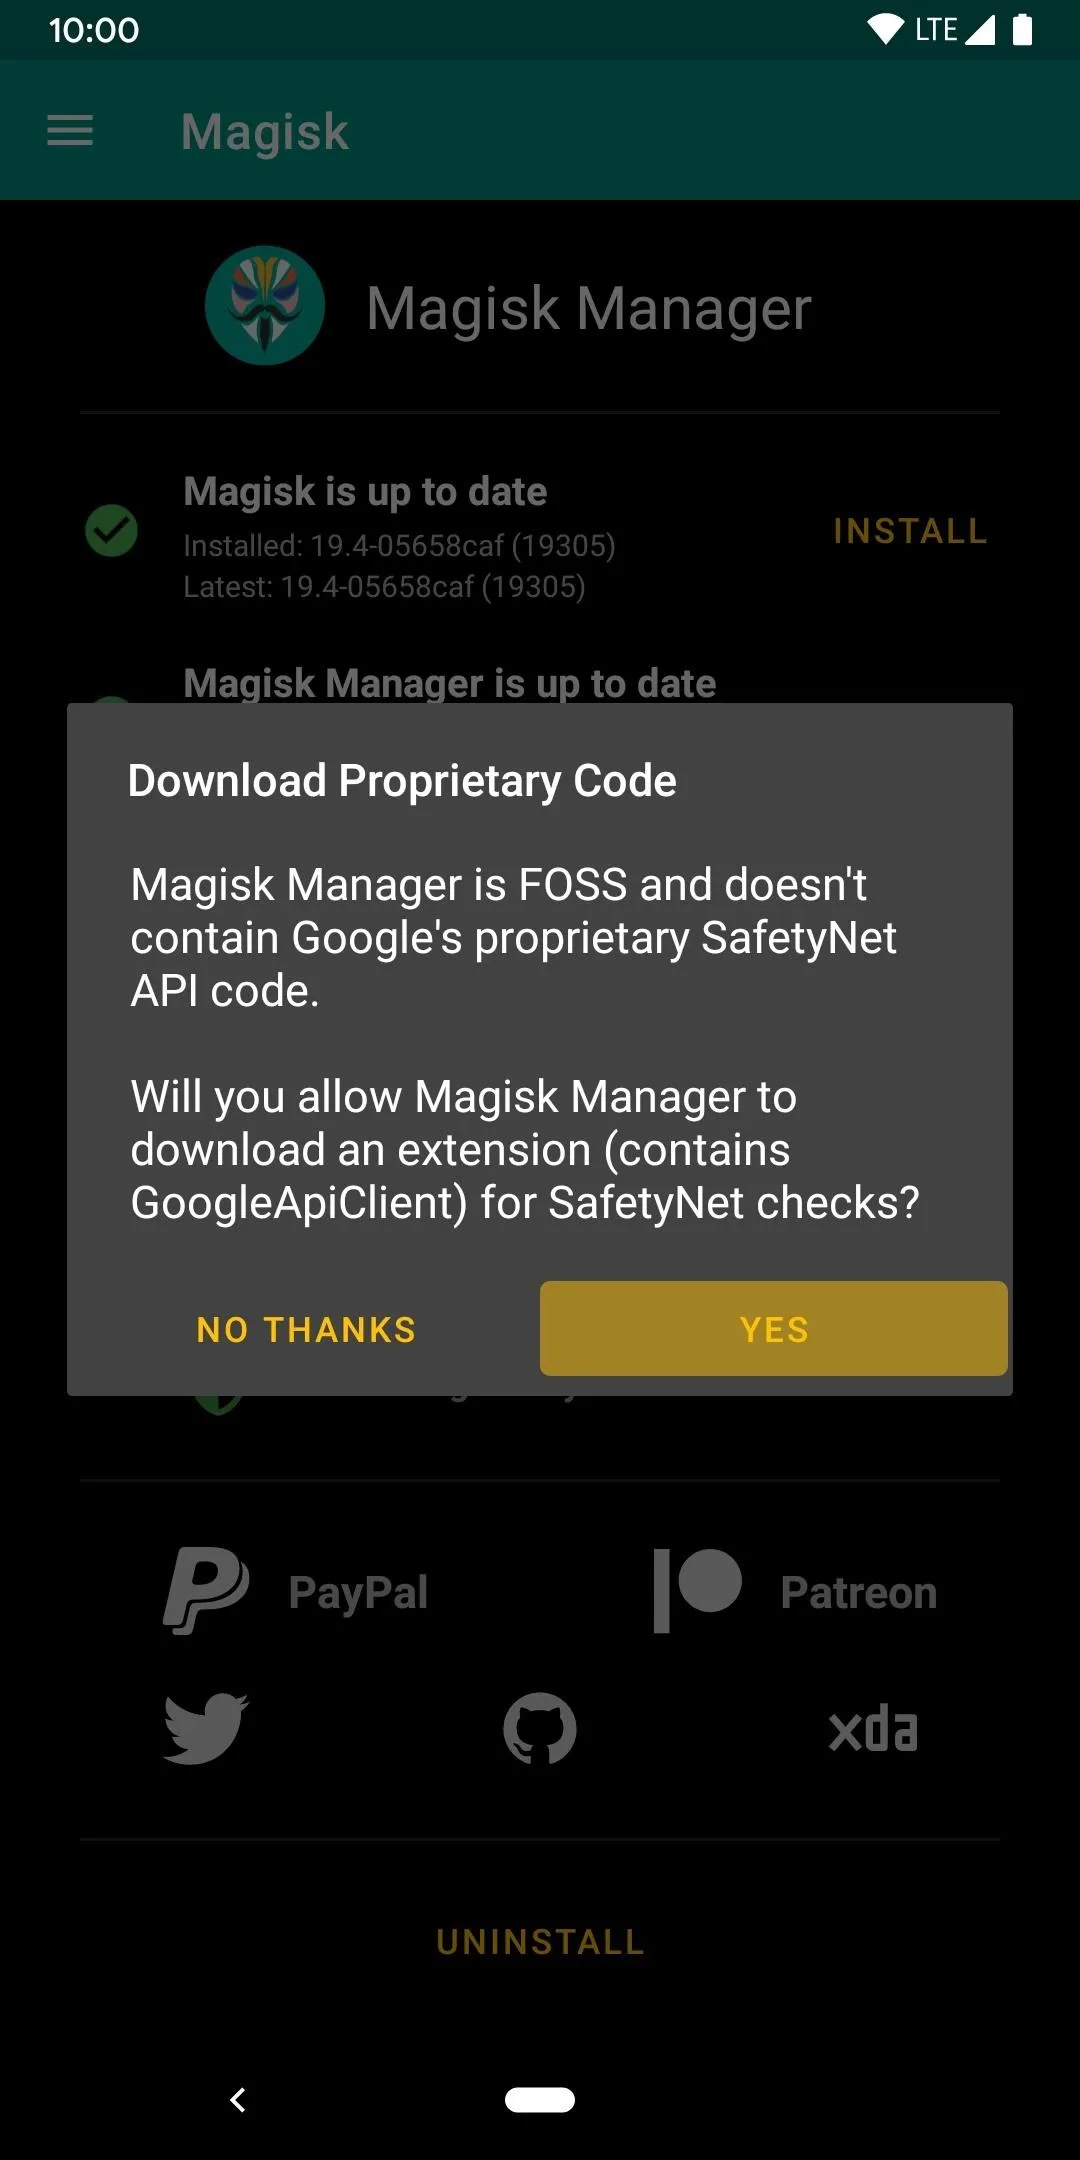
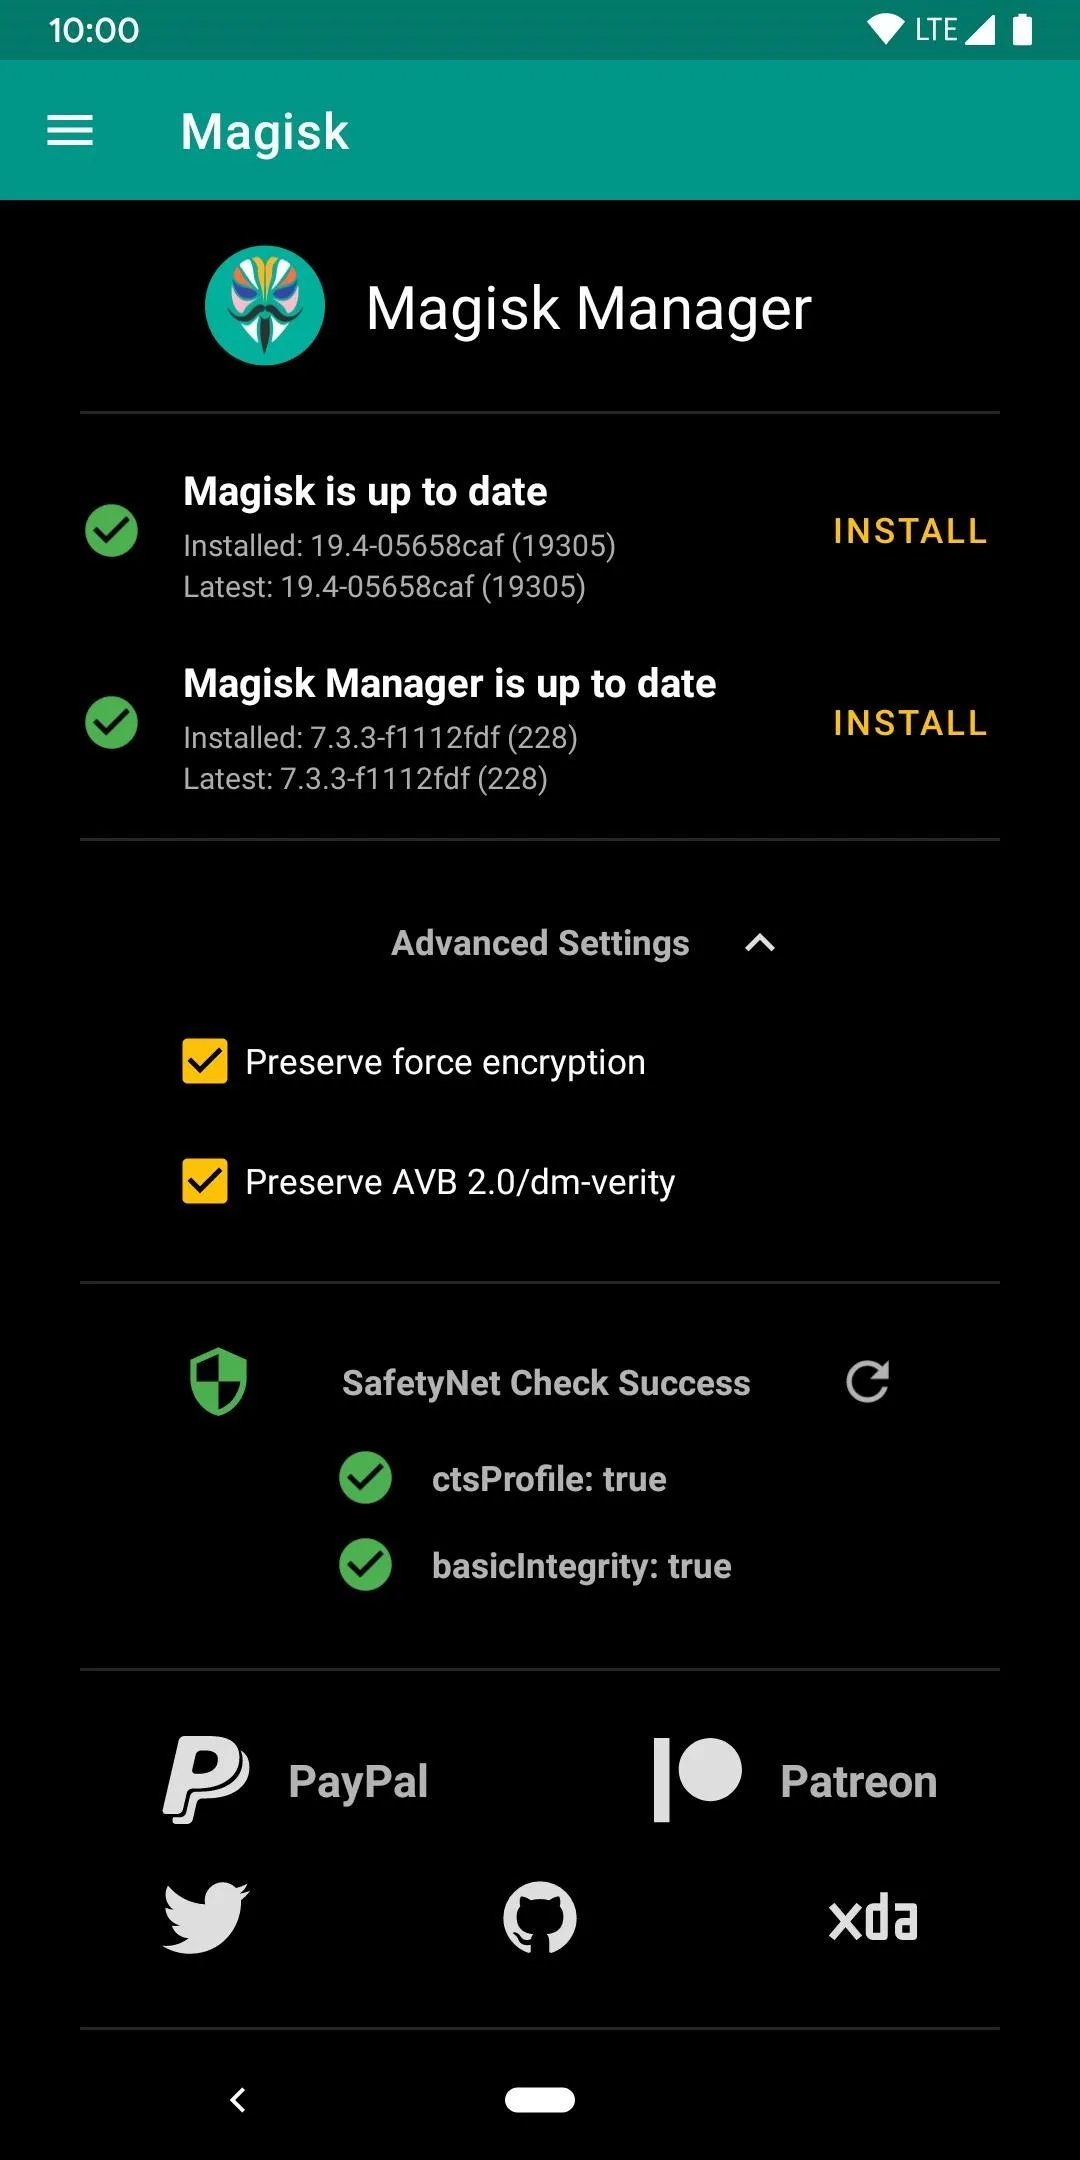
After the reboot, head into the Magisk Manager app, then verify both green check marks are active for the Magisk platform itself and the app. If they're not checked, update them both as necessary. Just for good measure, hit the arrow for "Tap to start SafetyNet check" to ensure you pass Google's SafetyNet check. All set! Your Pixel 3 is now fully rooted on the latest version of Android!
Final Notes
An important leap forward
The new Magisk Canary builds now have something called system-as-root support, which will help mask root detection even further than ever before. The combination of this with the new logical partitions might also allow for seamless OTA system updates as a root user, which would be something unheard of. This can easily be the most important Magisk update in a long time! Let's see where it leads.
Manual is the only way right now
Manually patching the boot image file is the long way around when you can't use TWRP to install Magisk via the recovery environment. With Android Q being so different on the Pixel 3, doing it the old-fashioned way is the only way to go about achieving root access right now. Until TWRP gets an official release for Android Q, this is what you'll be required to do.
TWRP support for Android 10 "Q"
There are always challenges with updated versions of Android or when things change with the new phones, such as the Pixel 3's logical partitions. When it comes to root access and TWRP — it's a particular process, but it'll happen without a doubt. The final release for Android 10 is not going live until sometime in September. When TWRP is available for Android 10, I'll update the guide accordingly.
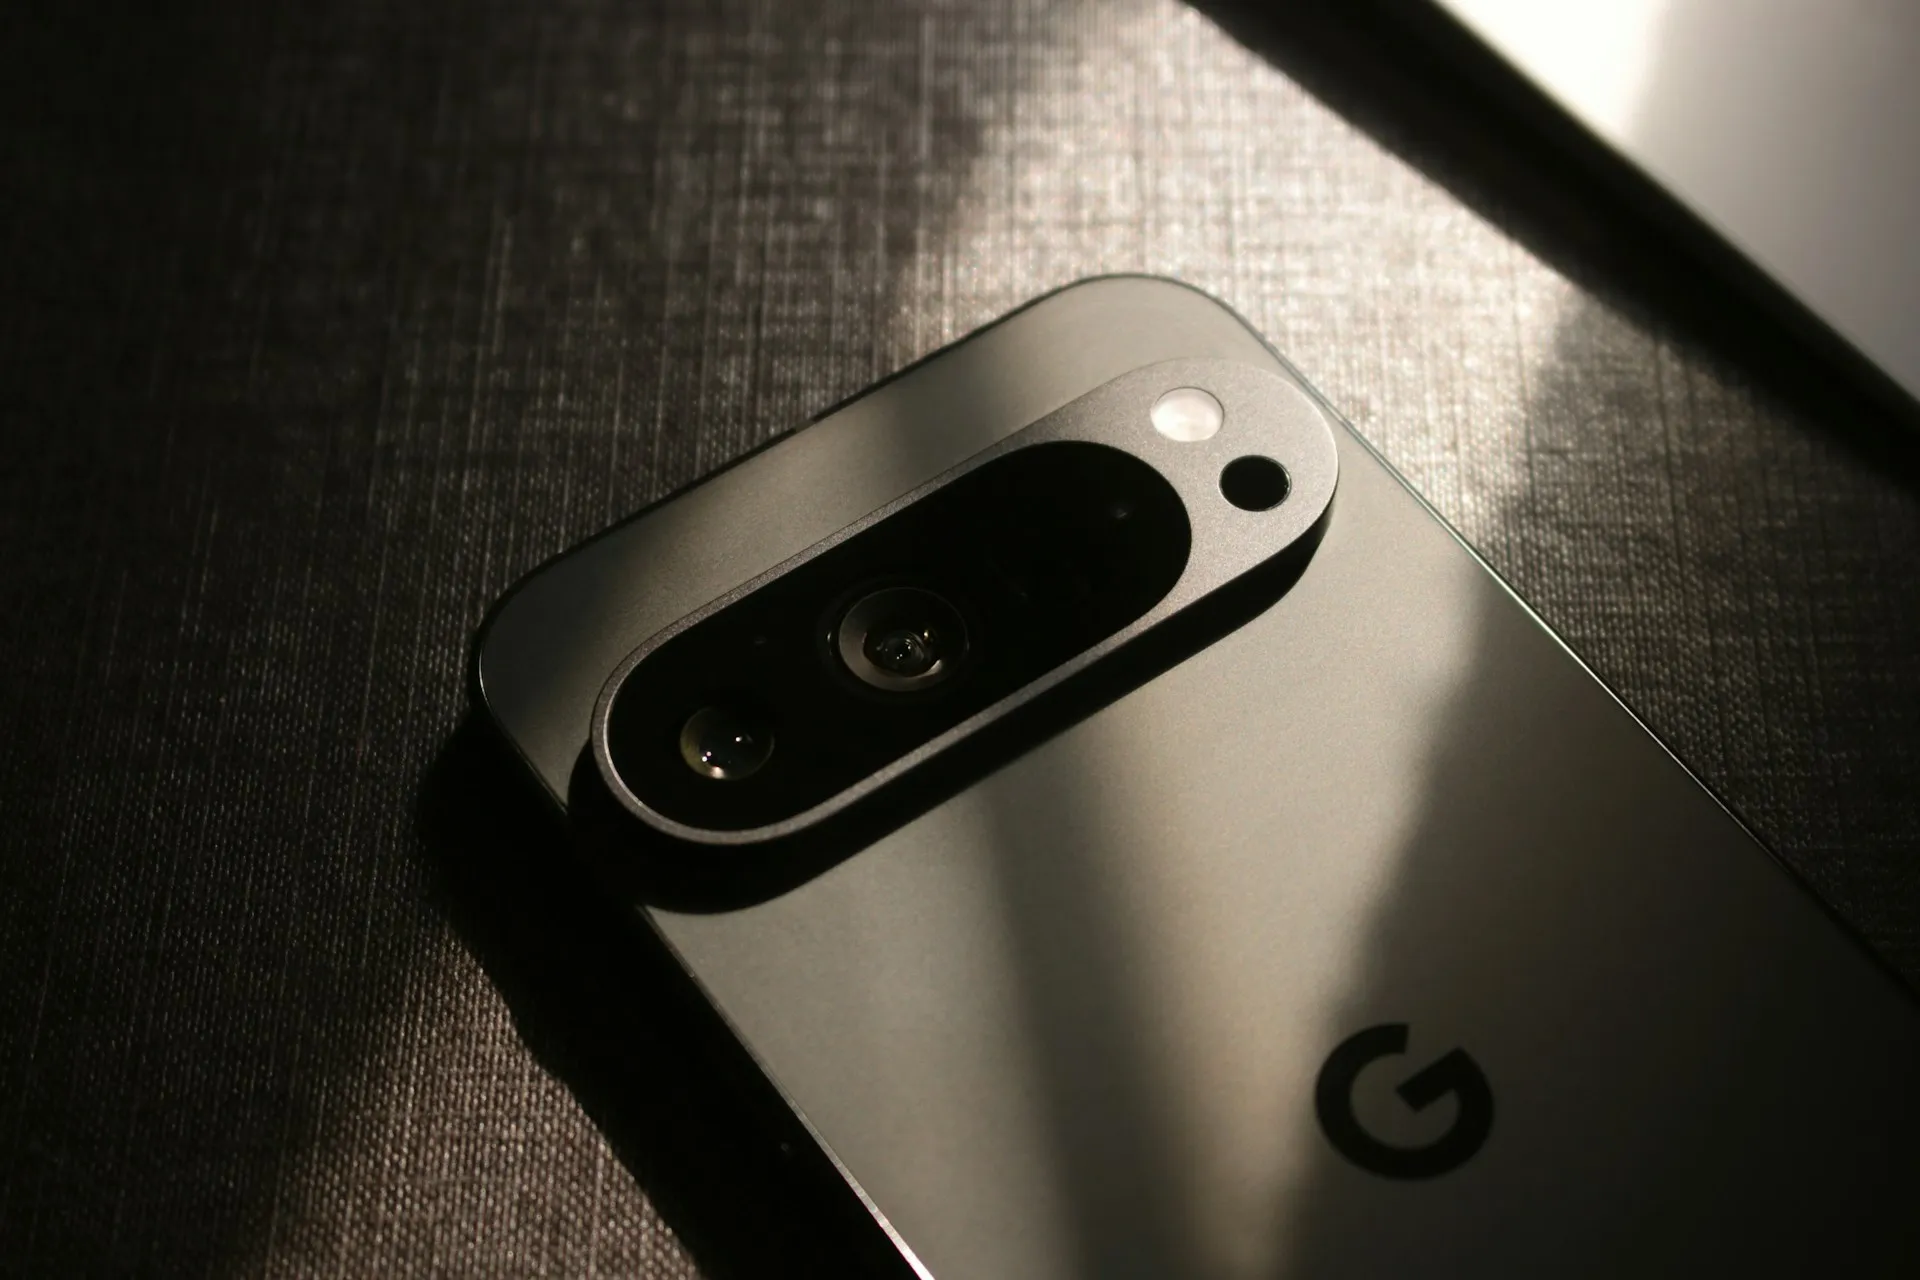
Cover photo and screenshots by Stephen Perkins/Gadget Hacks


Comments
Be the first, drop a comment!