


The Pixel 3a runs smoothly out of the box already, but installing a custom kernel can supercharge your experience even more. From fine-tuned CPU tweaks for boosting performance or battery life to adjusting the display colors for your screen how you want, ElementalX kernel can provide you with a ton of new features you didn't know you were missing.
Most of the time, you'll probably be using the TWRP recovery environment to install a custom kernel, but it's not currently available for the Pixel 3a. The developers are working on it as we speak and will be releasing it when the time is right to ensure all features are working and stable. Until then, I'll share with you two alternative methods you can use for installing the ElementalX kernel.
Requirements
For Method 1 (Manual):
- Unlocked bootloader
- Rooted with Magisk
- ADB & Fastboot installed on your computer
- Command window opened in the platform-tools folder
For Method 2 (Automatic):
Please make sure you meet the above requirements for the method you plan on using to install the ElementalX kernel on your Pixel 3a. Click on the links and follow along with any guides needed to complete the prerequisites for your method of choice. Once you're all set there, carry on with the rest of the guide below.
Manually Flash the Boot Image
This method takes a little more effort on your part but allows you to be in control of the process the entire time. It's perfect for anyone who prefers the "do it yourself" mentality over the automated way via the second method listed below. It can also provide a great learning experience to those that have never manually flashed a kernel before.
Download ElementalX Image File
Before you can get started with installing the kernel, you'll need to download the main image file itself from the link below using a computer.
The newest version of ElementalX for the Pixel 3a at the time of this guide is 1.02.
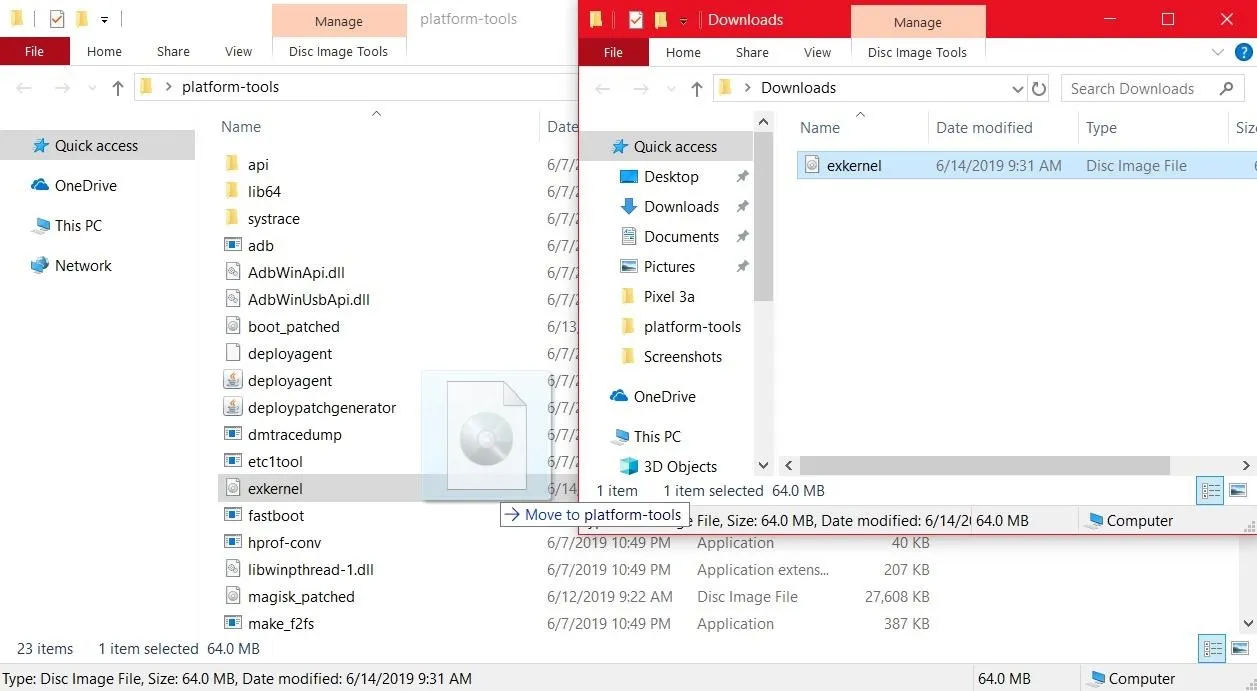
Move the File to Your Platform-Tools Folder
Now you need to move the "exkernel" image file you downloaded from the previous step to the platform-tools folder on your computer, which is used to send ADB and Fastboot commands to your phone. You'll find the platform-tools folder inside of your ADB installation directory, but if you need more help, check our guide.
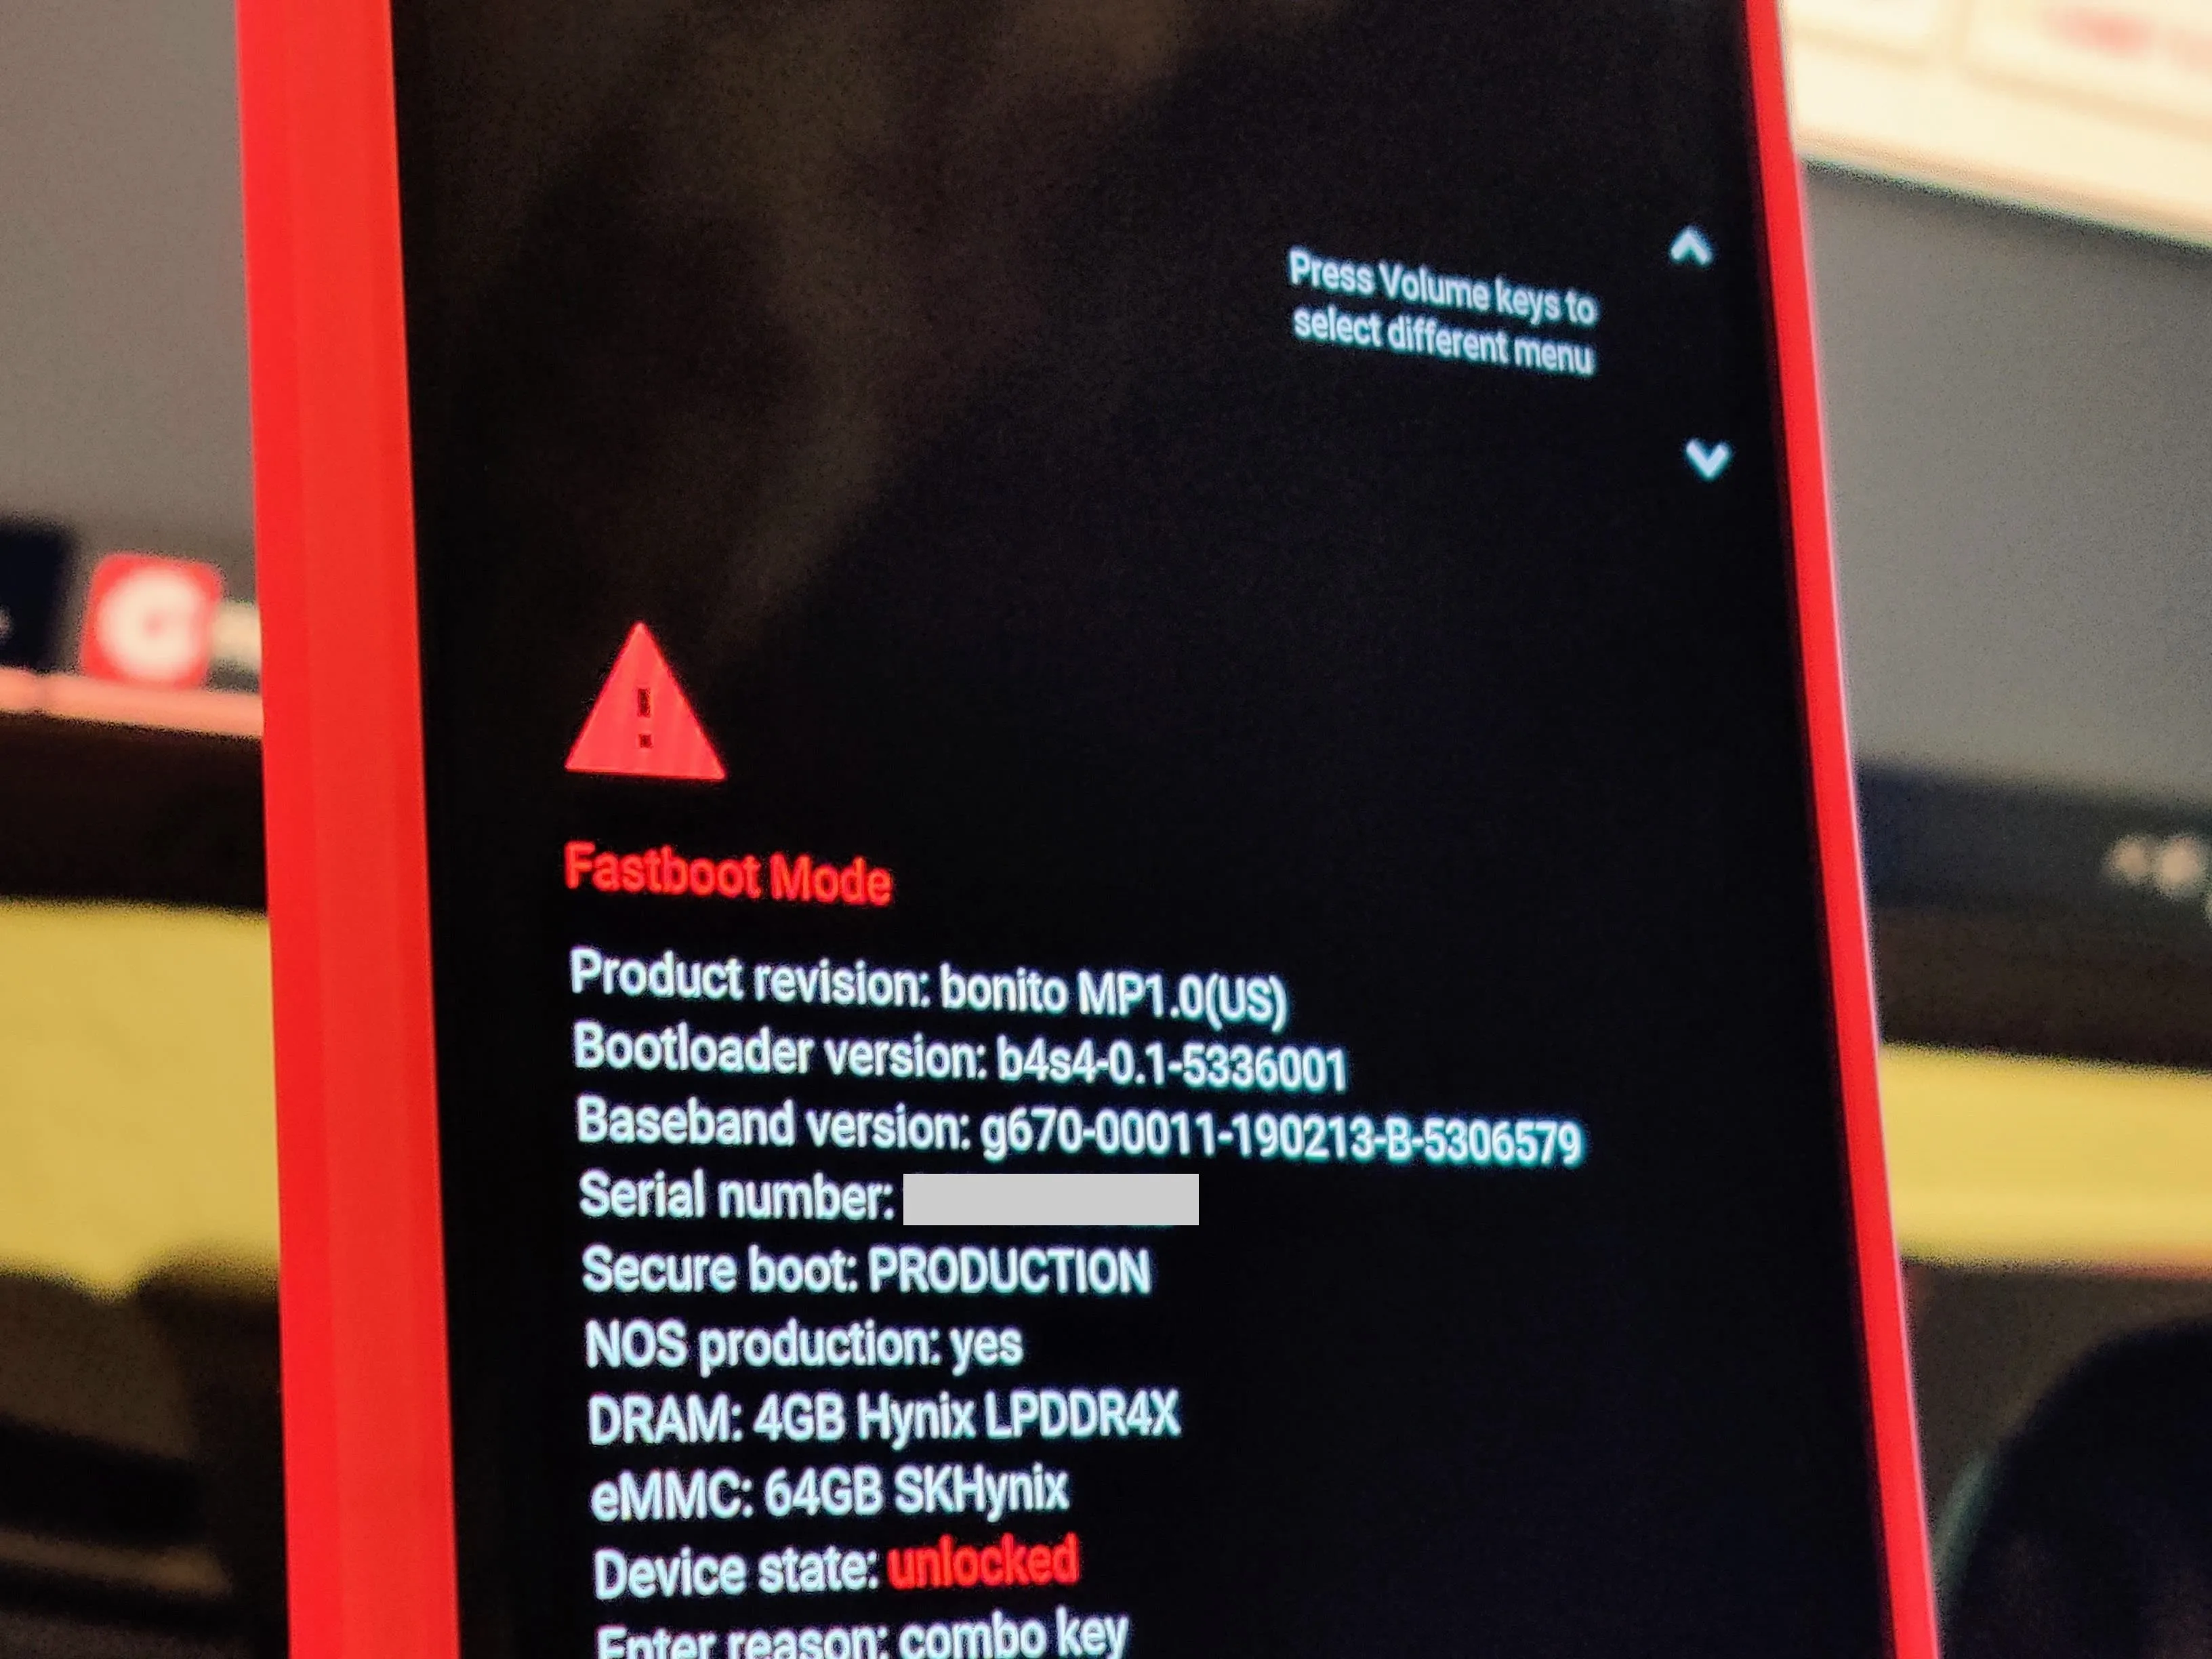
Boot into Fastboot Mode
On your phone, long-press the power button and select the "Power off" option to shut your phone down completely. Once it's shut down, hold both the power and volume down buttons at the same time until the Fastboot Mode menu pops up. Connect your phone to your computer via a USB cable and then leave your phone just as it is for the next step.
Open a Command Window in Platform-Tools
You should still be sitting in Fastboot Mode on your phone and are ready to get your command window environment set up for Fastboot. Opening the command window in the platform-tools folder allows your computer to execute the command needed to install the kernel file onto your phone. If you need to, visit the link below to get that all set up before moving onto the next step.

Install ElementalX Kernel
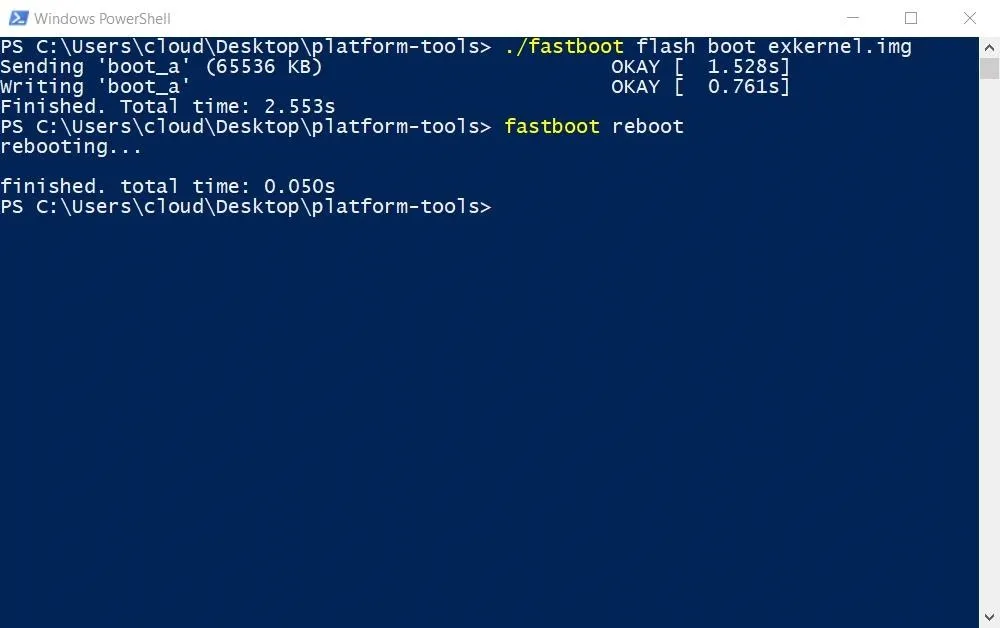
With a command window opened in the platform-tools folder, it's time to finally send the kernel file over to your phone to be installed onto the system partition. Type the following command, then press enter.
fastboot flash boot exkernel.imgNote: Mac, Linux, and Windows PowerShell users will likely have to add a period and a slash before entering any ADB or Fastboot commands (e.g., ./fastboot flash boot exkernel.img).
Once the file finishes installing, you can go ahead and reboot your phone using the following command below, then press enter.
fastboot rebootFrom this point, your phone should begin rebooting like normal, which is precisely what you'd want to happen.
Verify the Kernel Installation
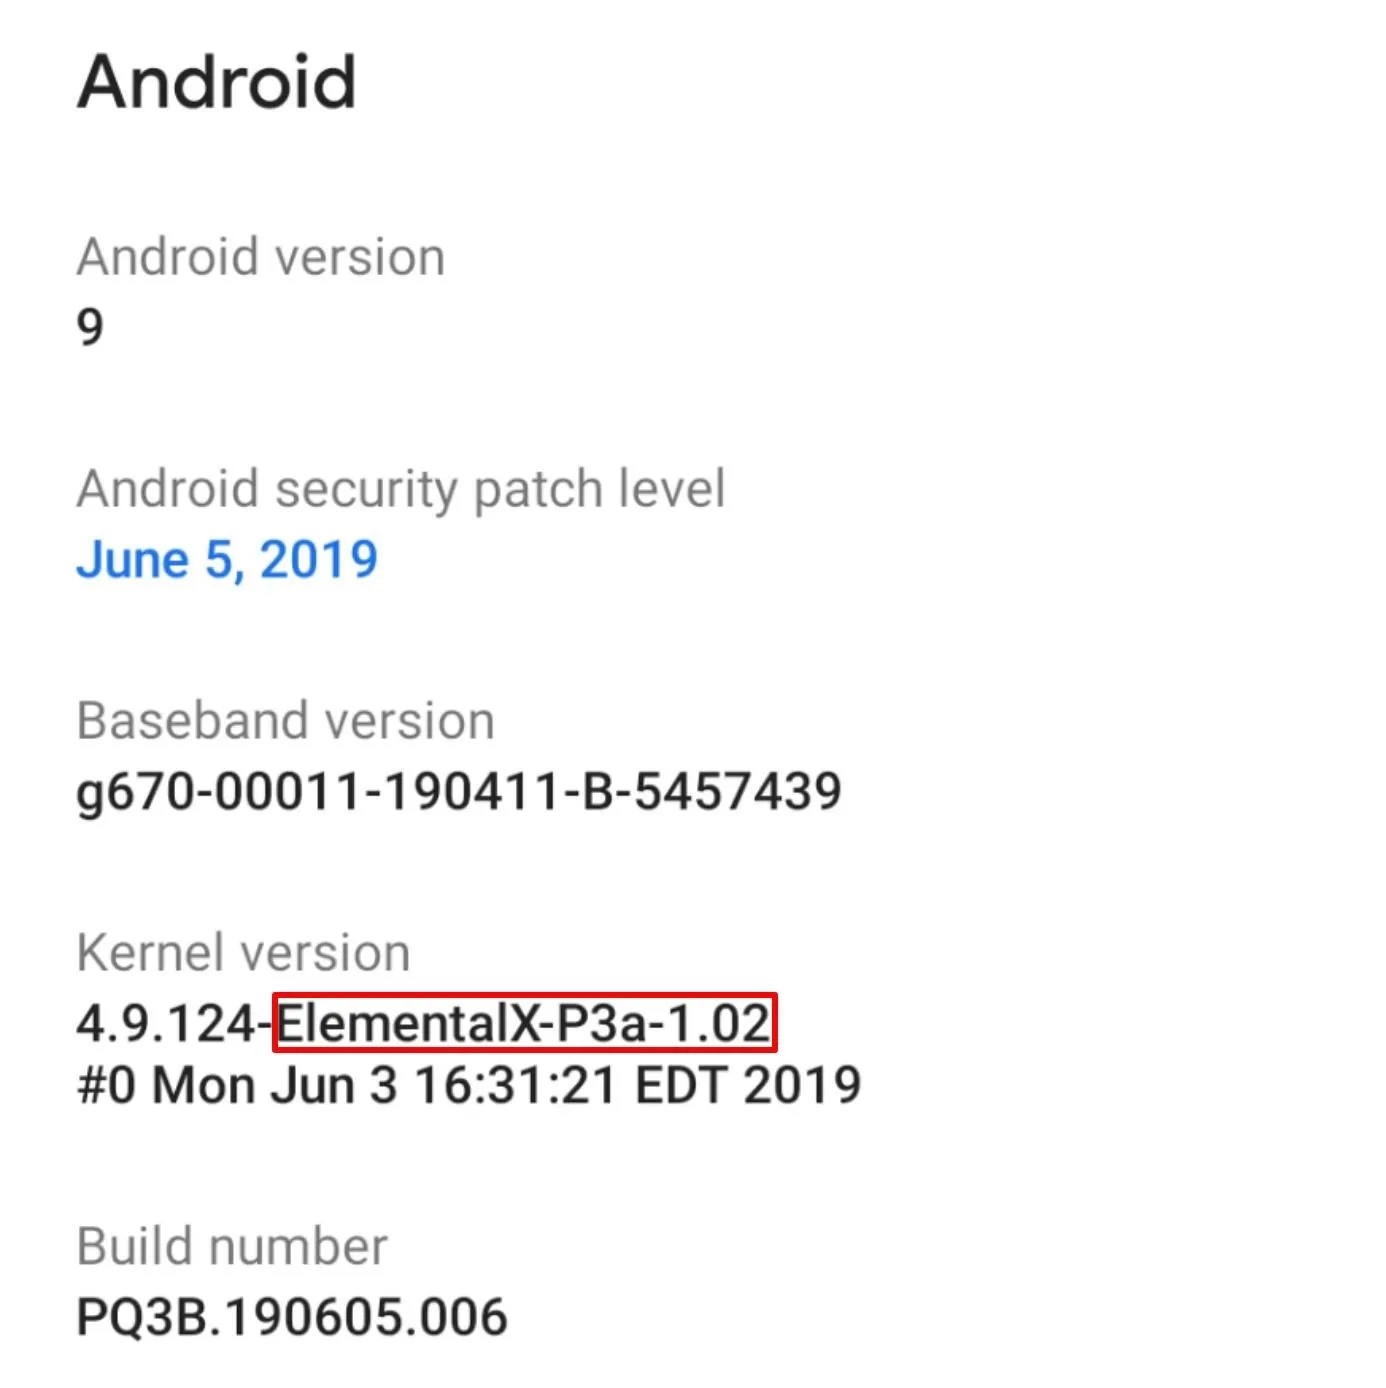
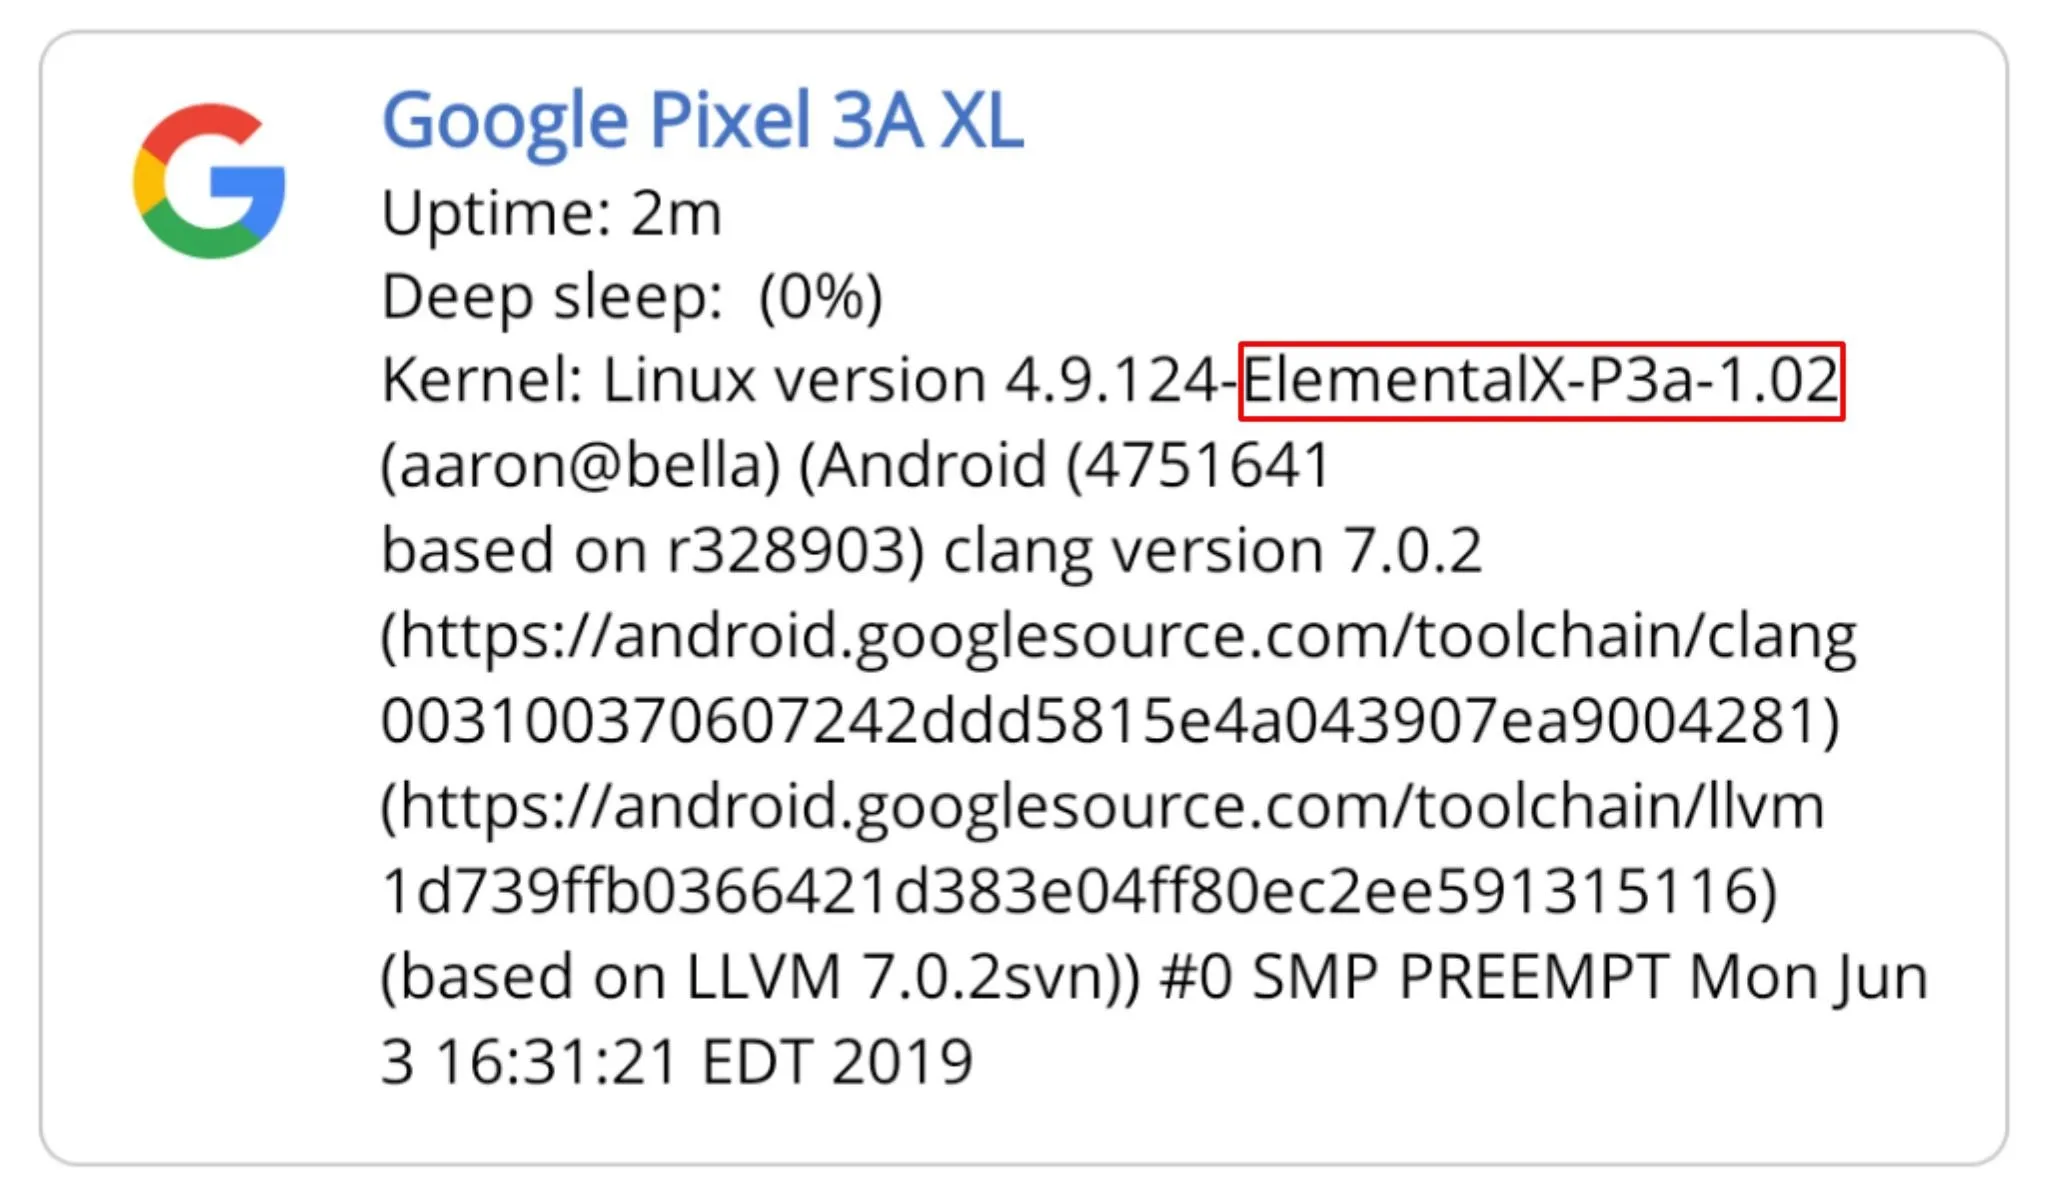
The final thing you need to do is to check your kernel version to ensure you really do have ElementalX kernel installed on your system. Once your phone is back up from the reboot, head into your system settings, and follow the location path below to double check your installed kernel version.
Settings -> About phone -> Android version -> Kernel versionYou should see something like "ElementalX-P3a-1.02" in the kernel section if everything went well during the install process. All set!
Automatically Install from EX Kernel Manager
This method is obviously going to be the easiest choice since all it takes is a few simple taps to complete. However, it does require you to purchase flar2's EX Kernel Manager app from the Play Store to take advantage of the auto-update/install feature for the ElementalX kernel. If you plan on tweaking and modding your device well into the future, this is easily worth the purchase, though.
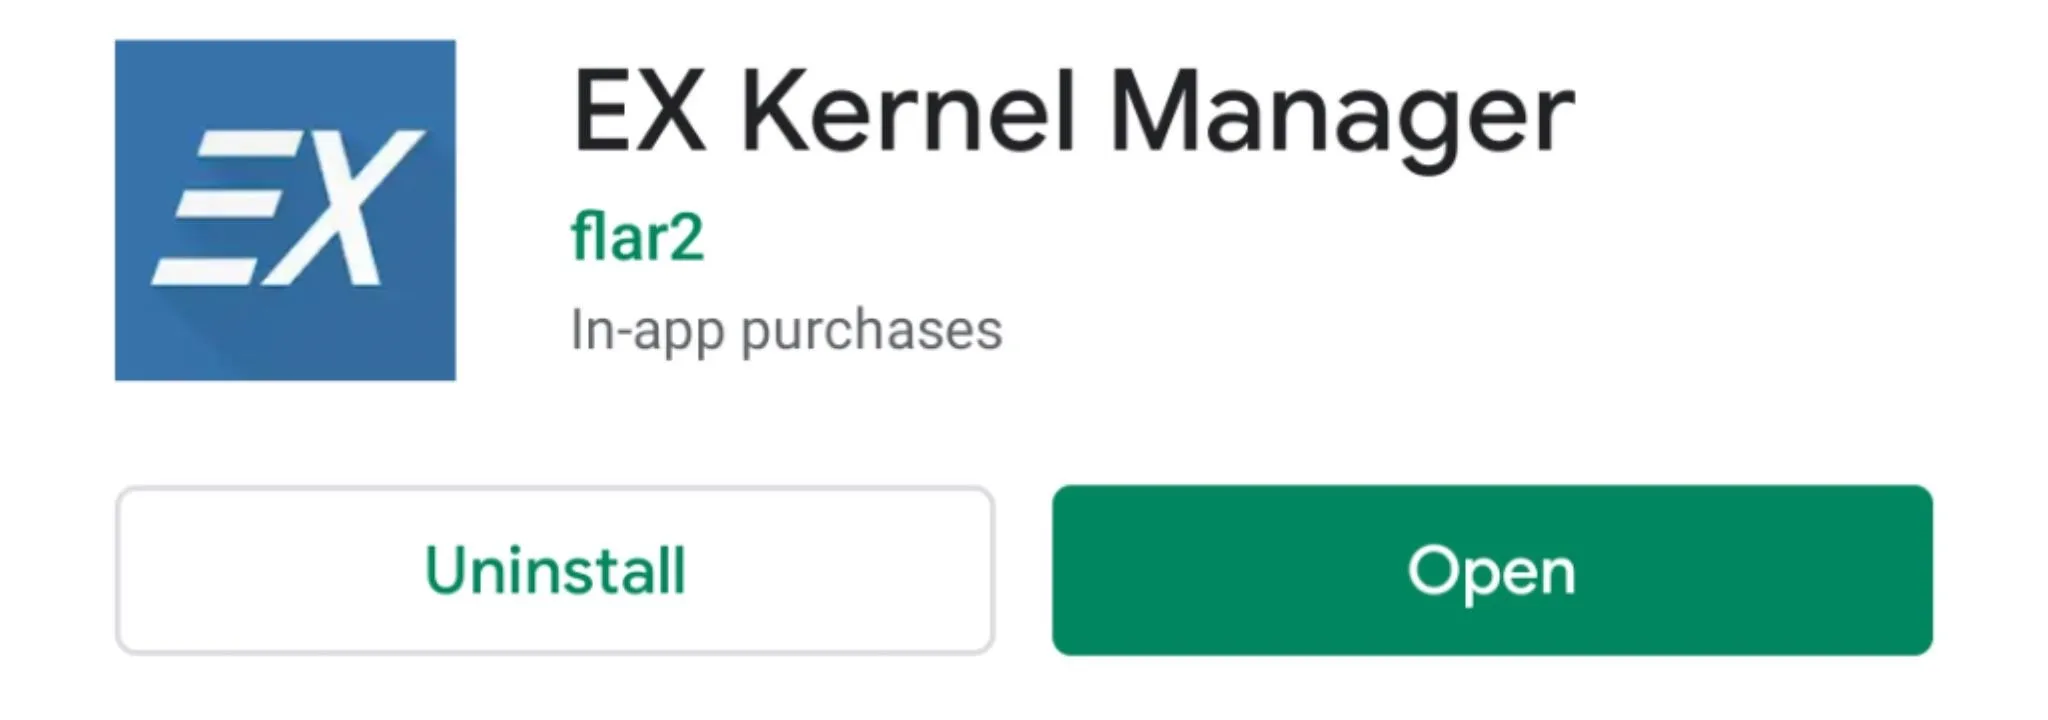
Download EX Kernel Manager
Before you can get started with automatically installing the ElementalX kernel onto your device, you'll need to grab the official EX Kernel Manager app from flar2 via the Play Store. Visit the link below to install or purchase the app as required then you're already halfway there.
- Play Store Link: EX Kernel Manager ($3.99)
Install ElementalX Kernel
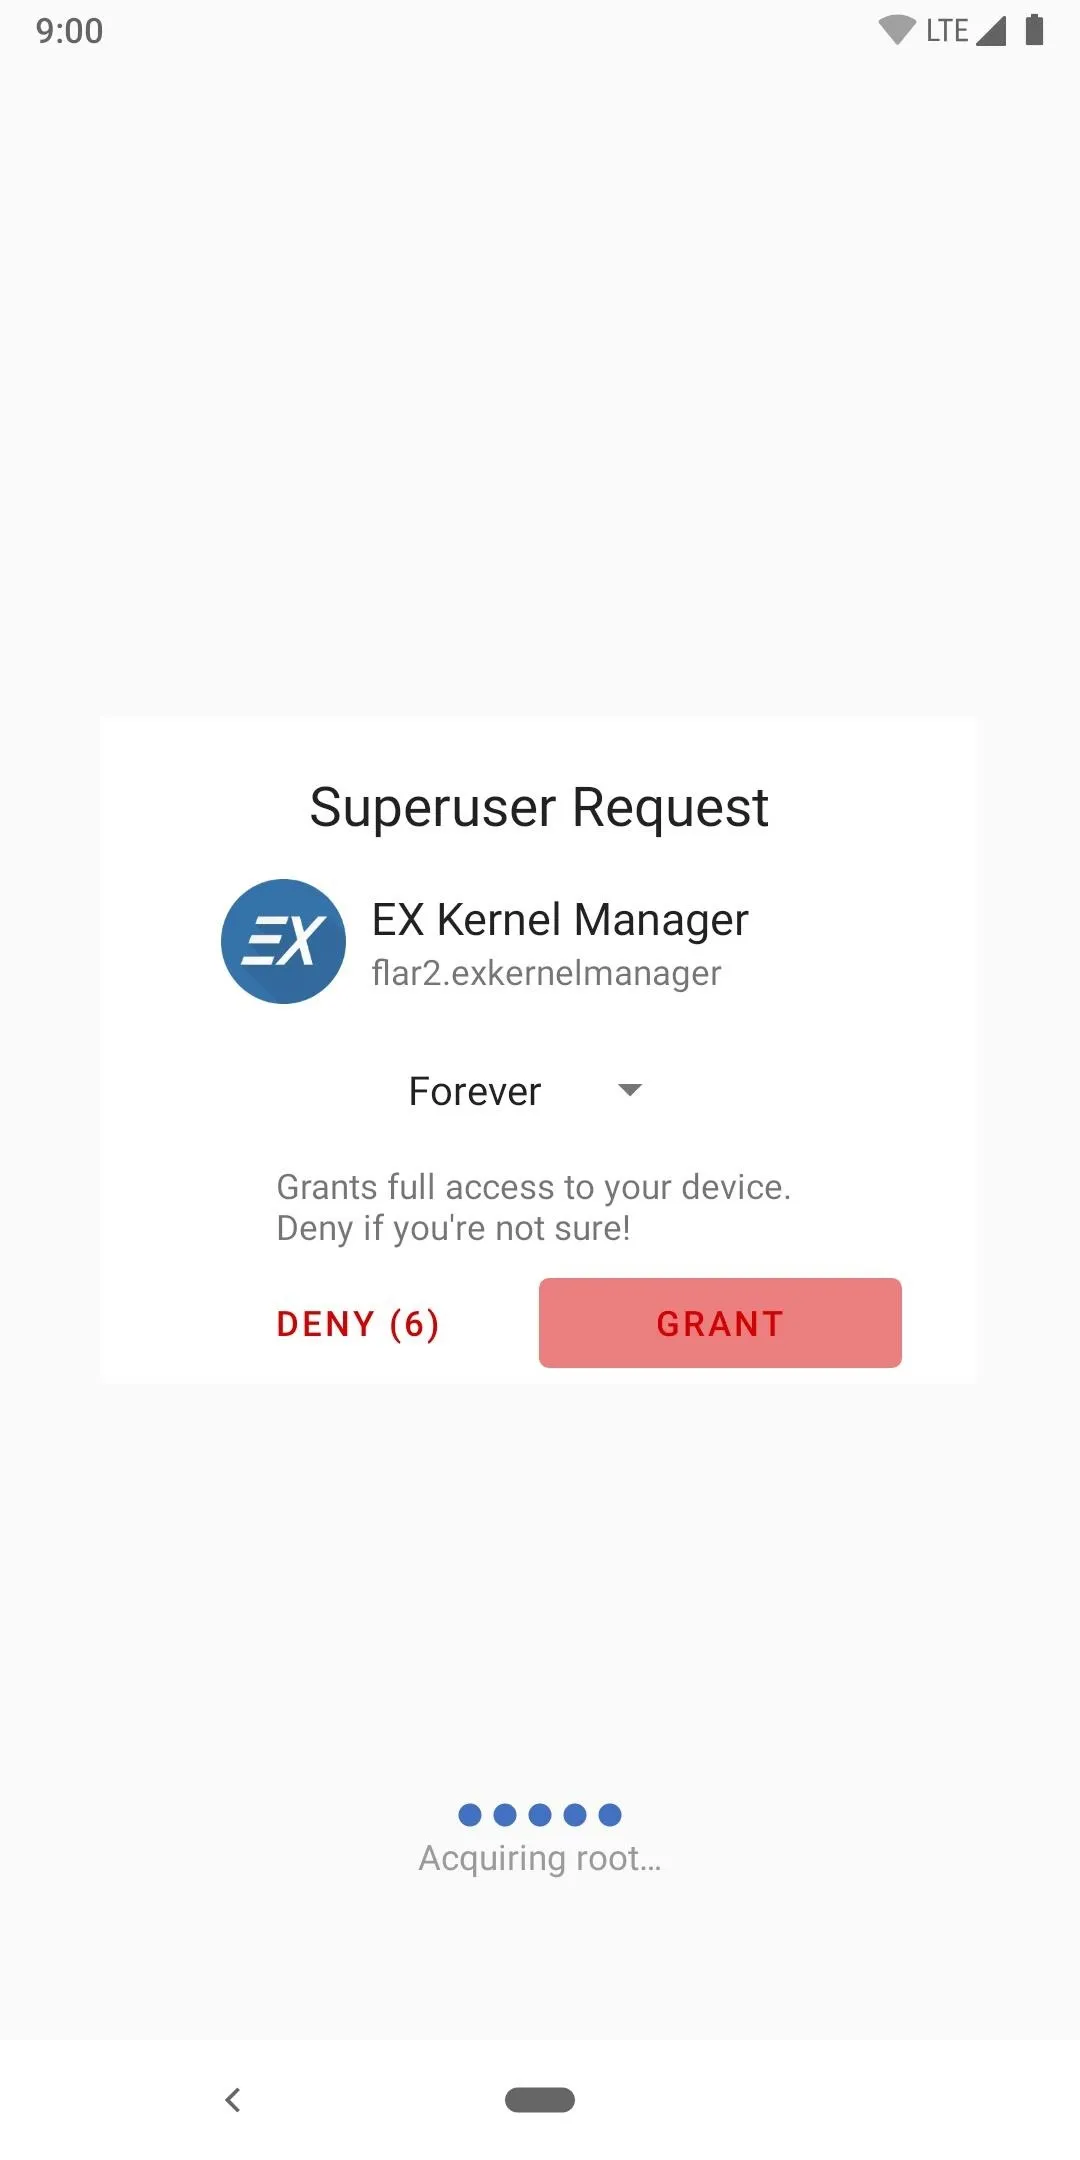
Once you open the EX Kernel Manager app for the first time, you'll probably have to grant it superuser access before you can get started. Tap "Grant" in the Superuser Request prompt that pops up, and it'll be given the appropriate root permissions immediately.
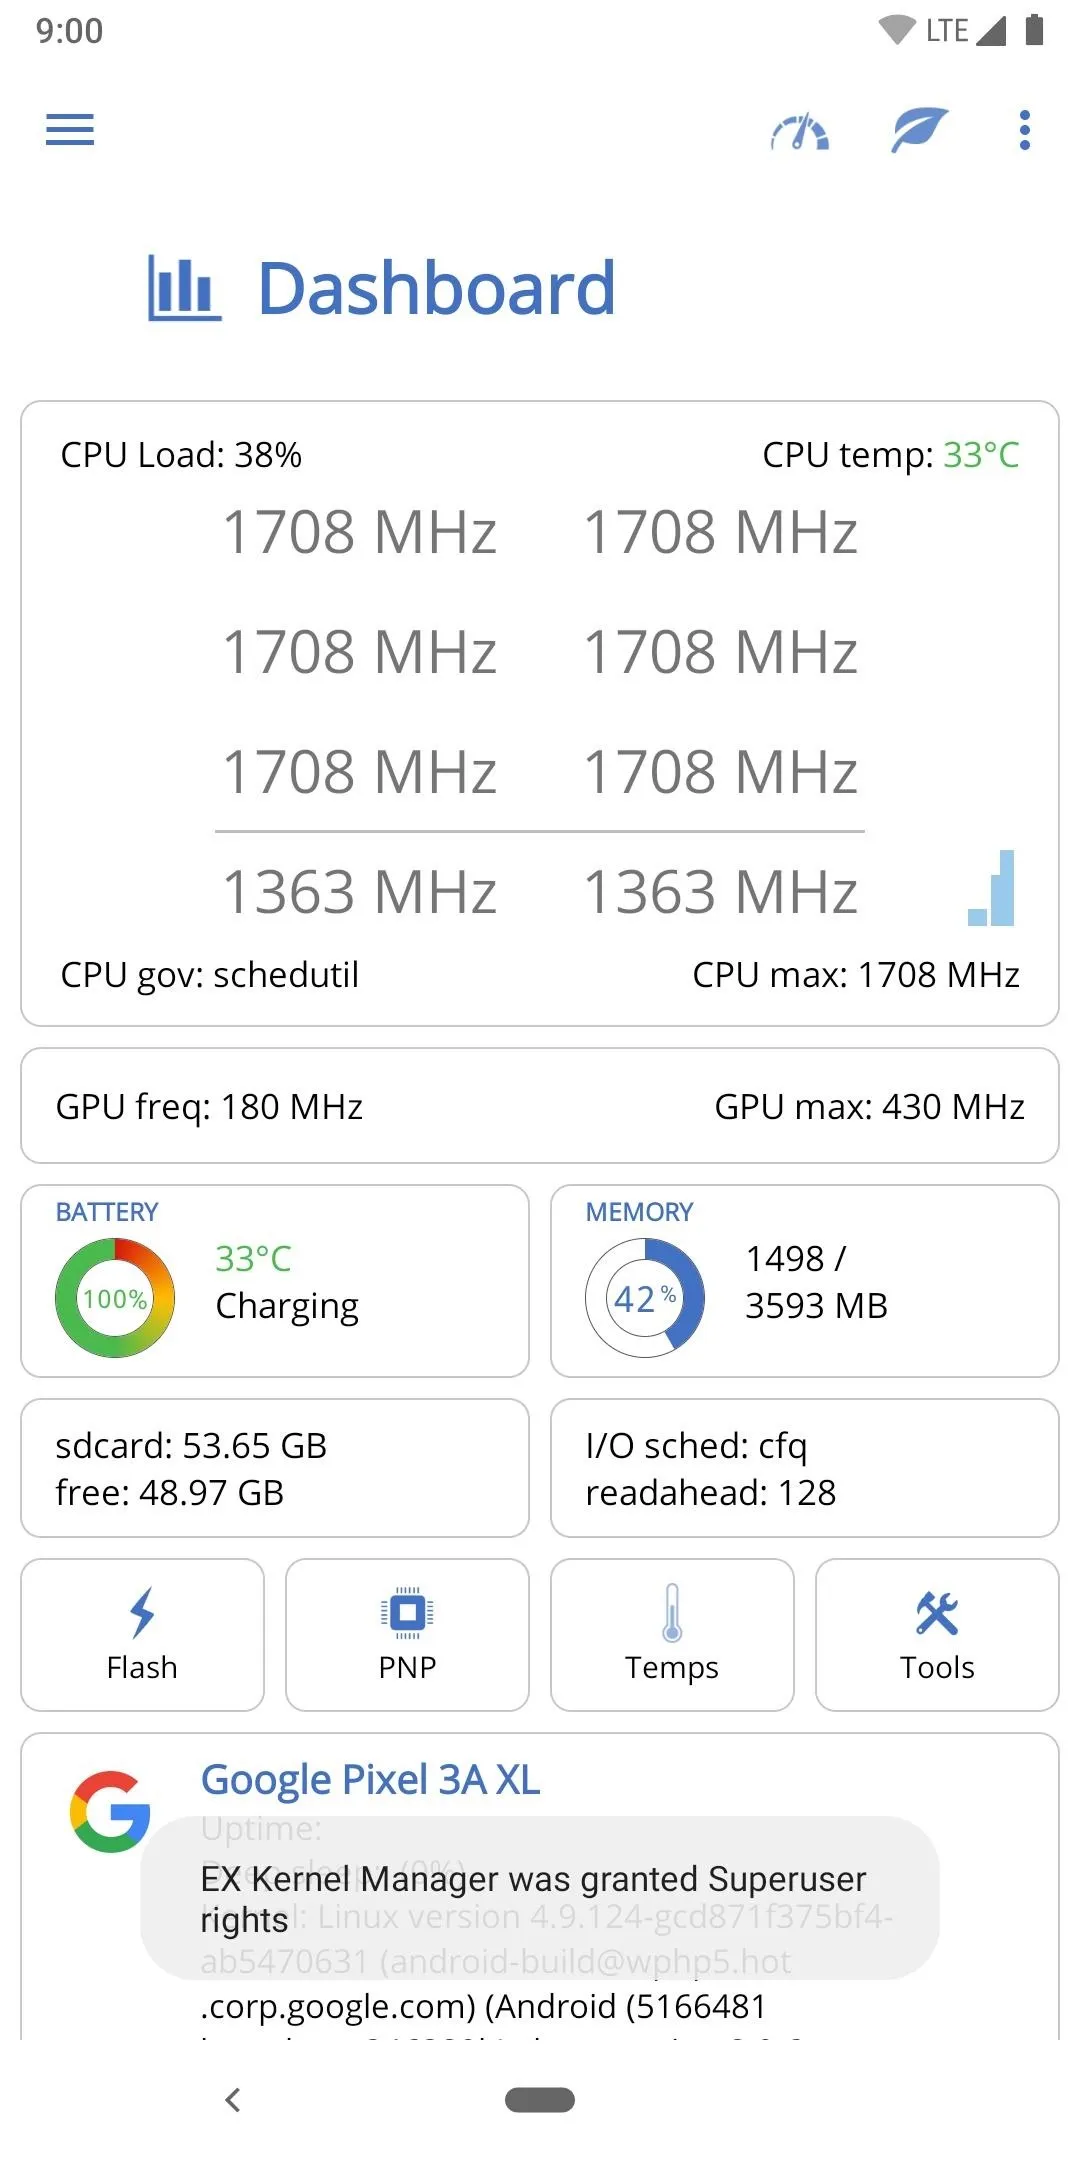
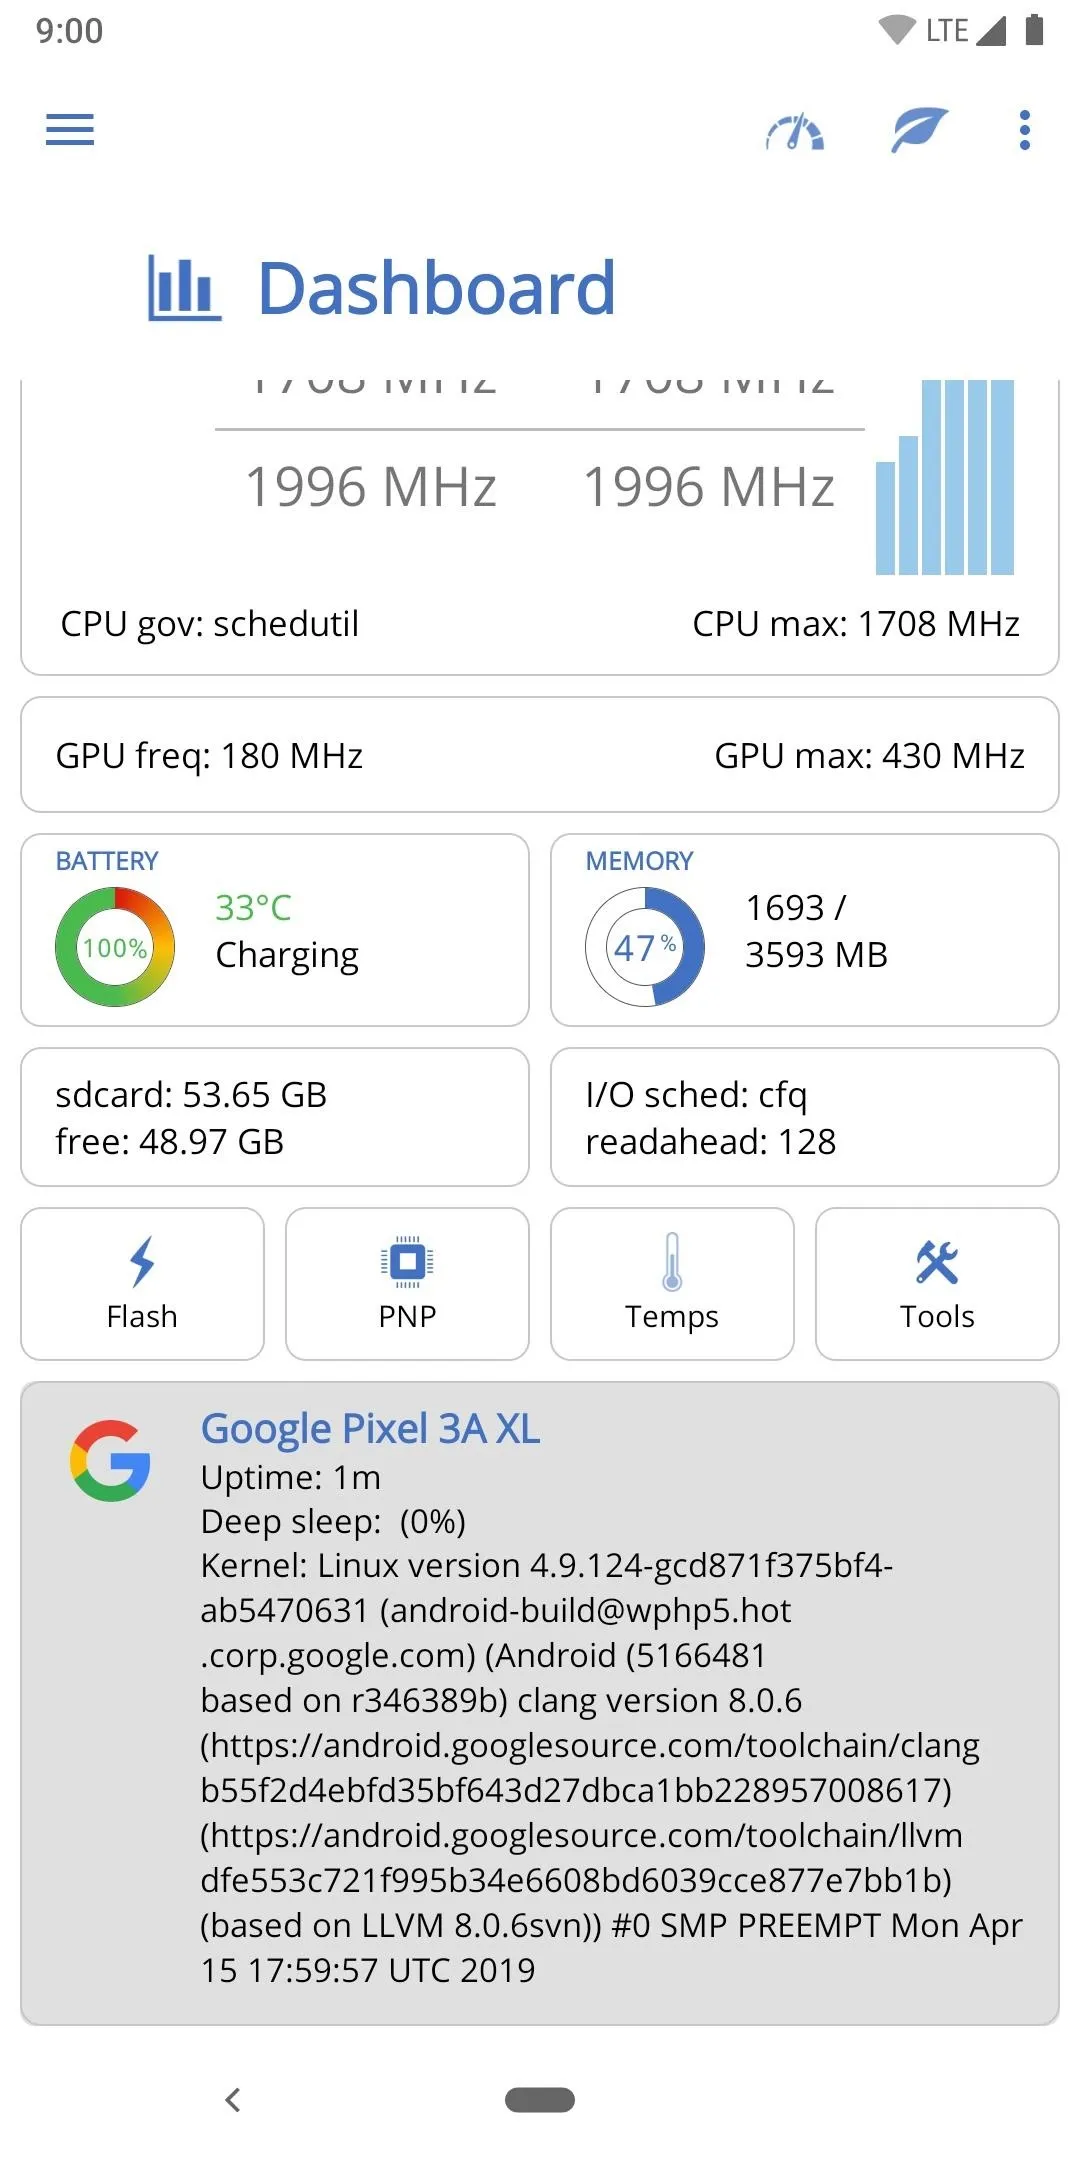
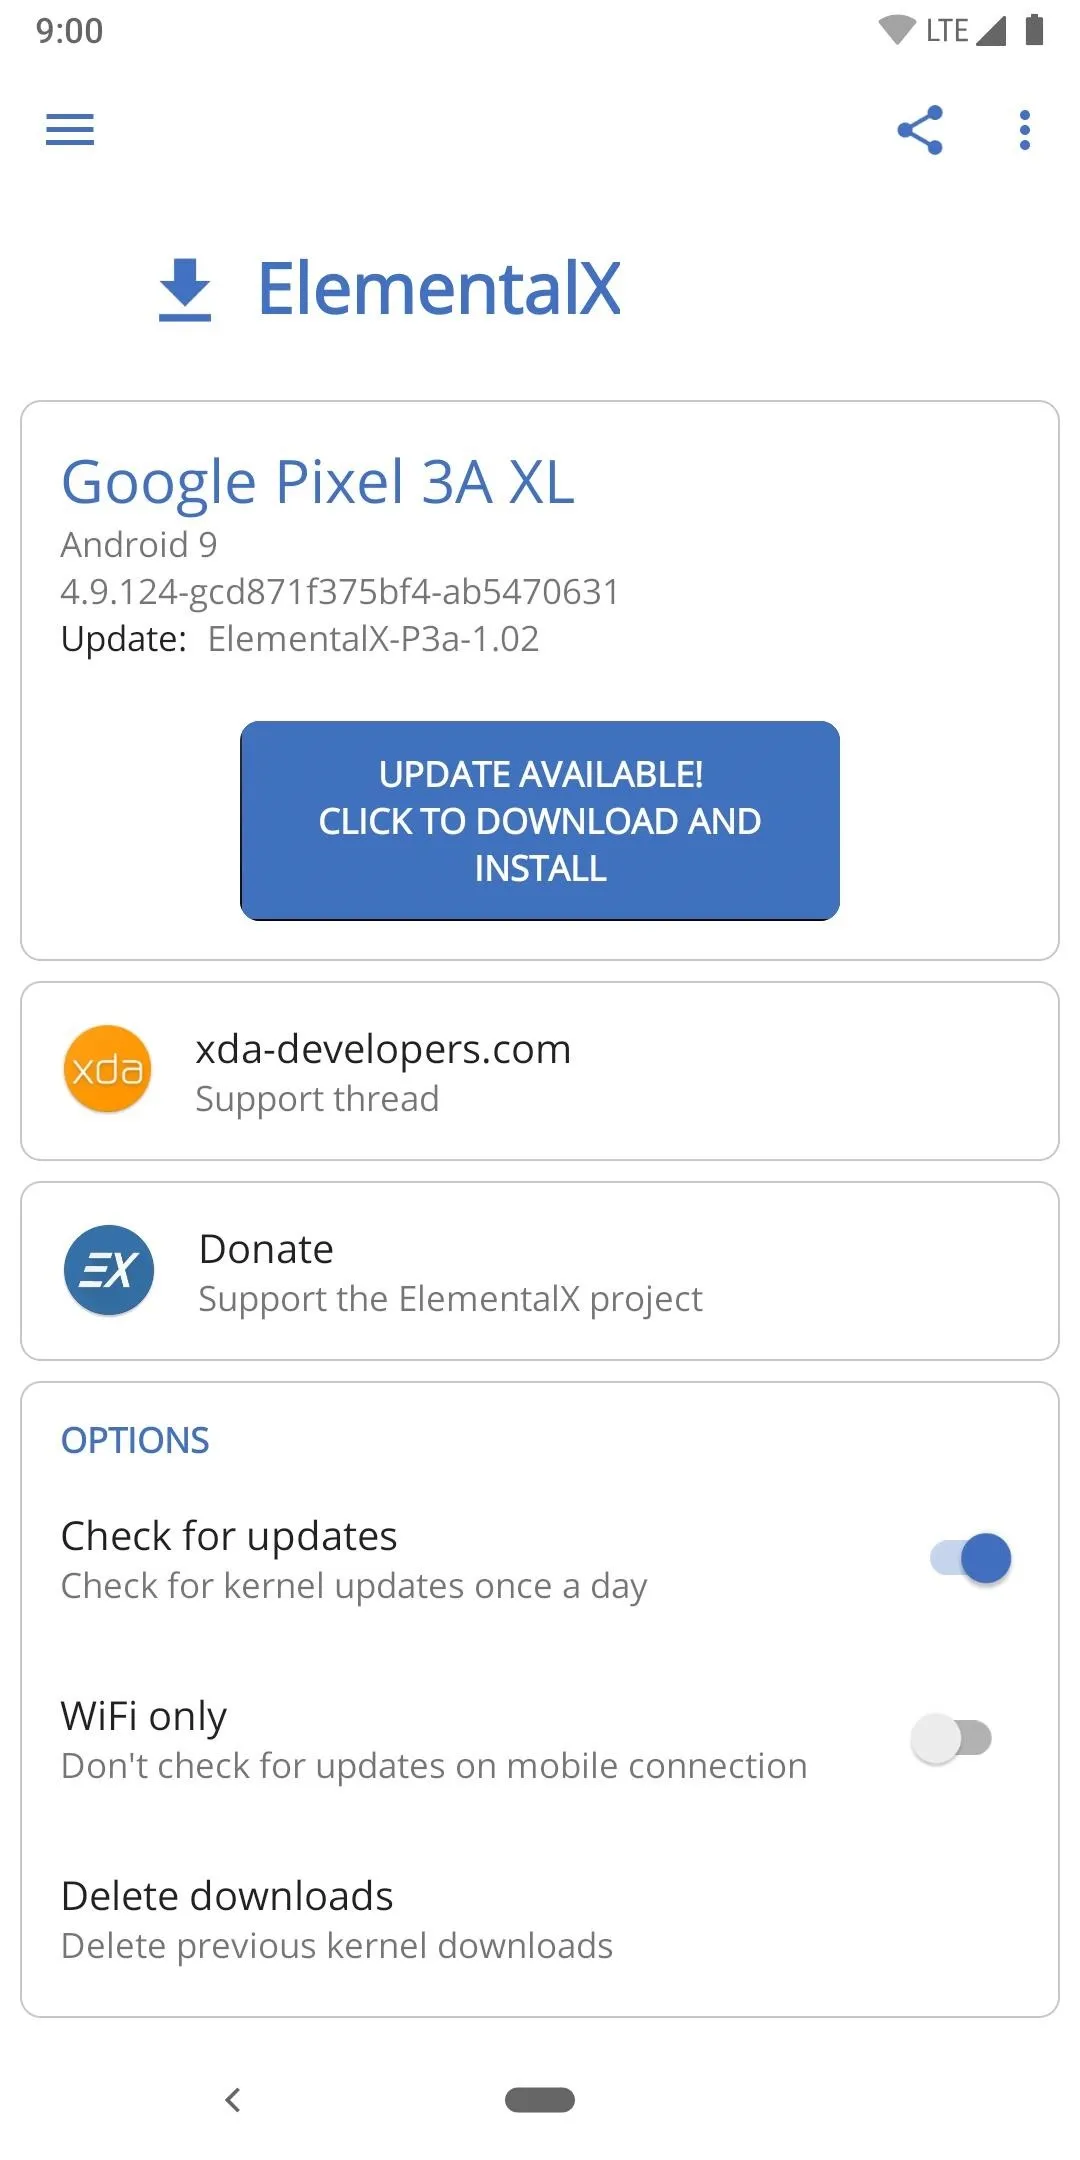
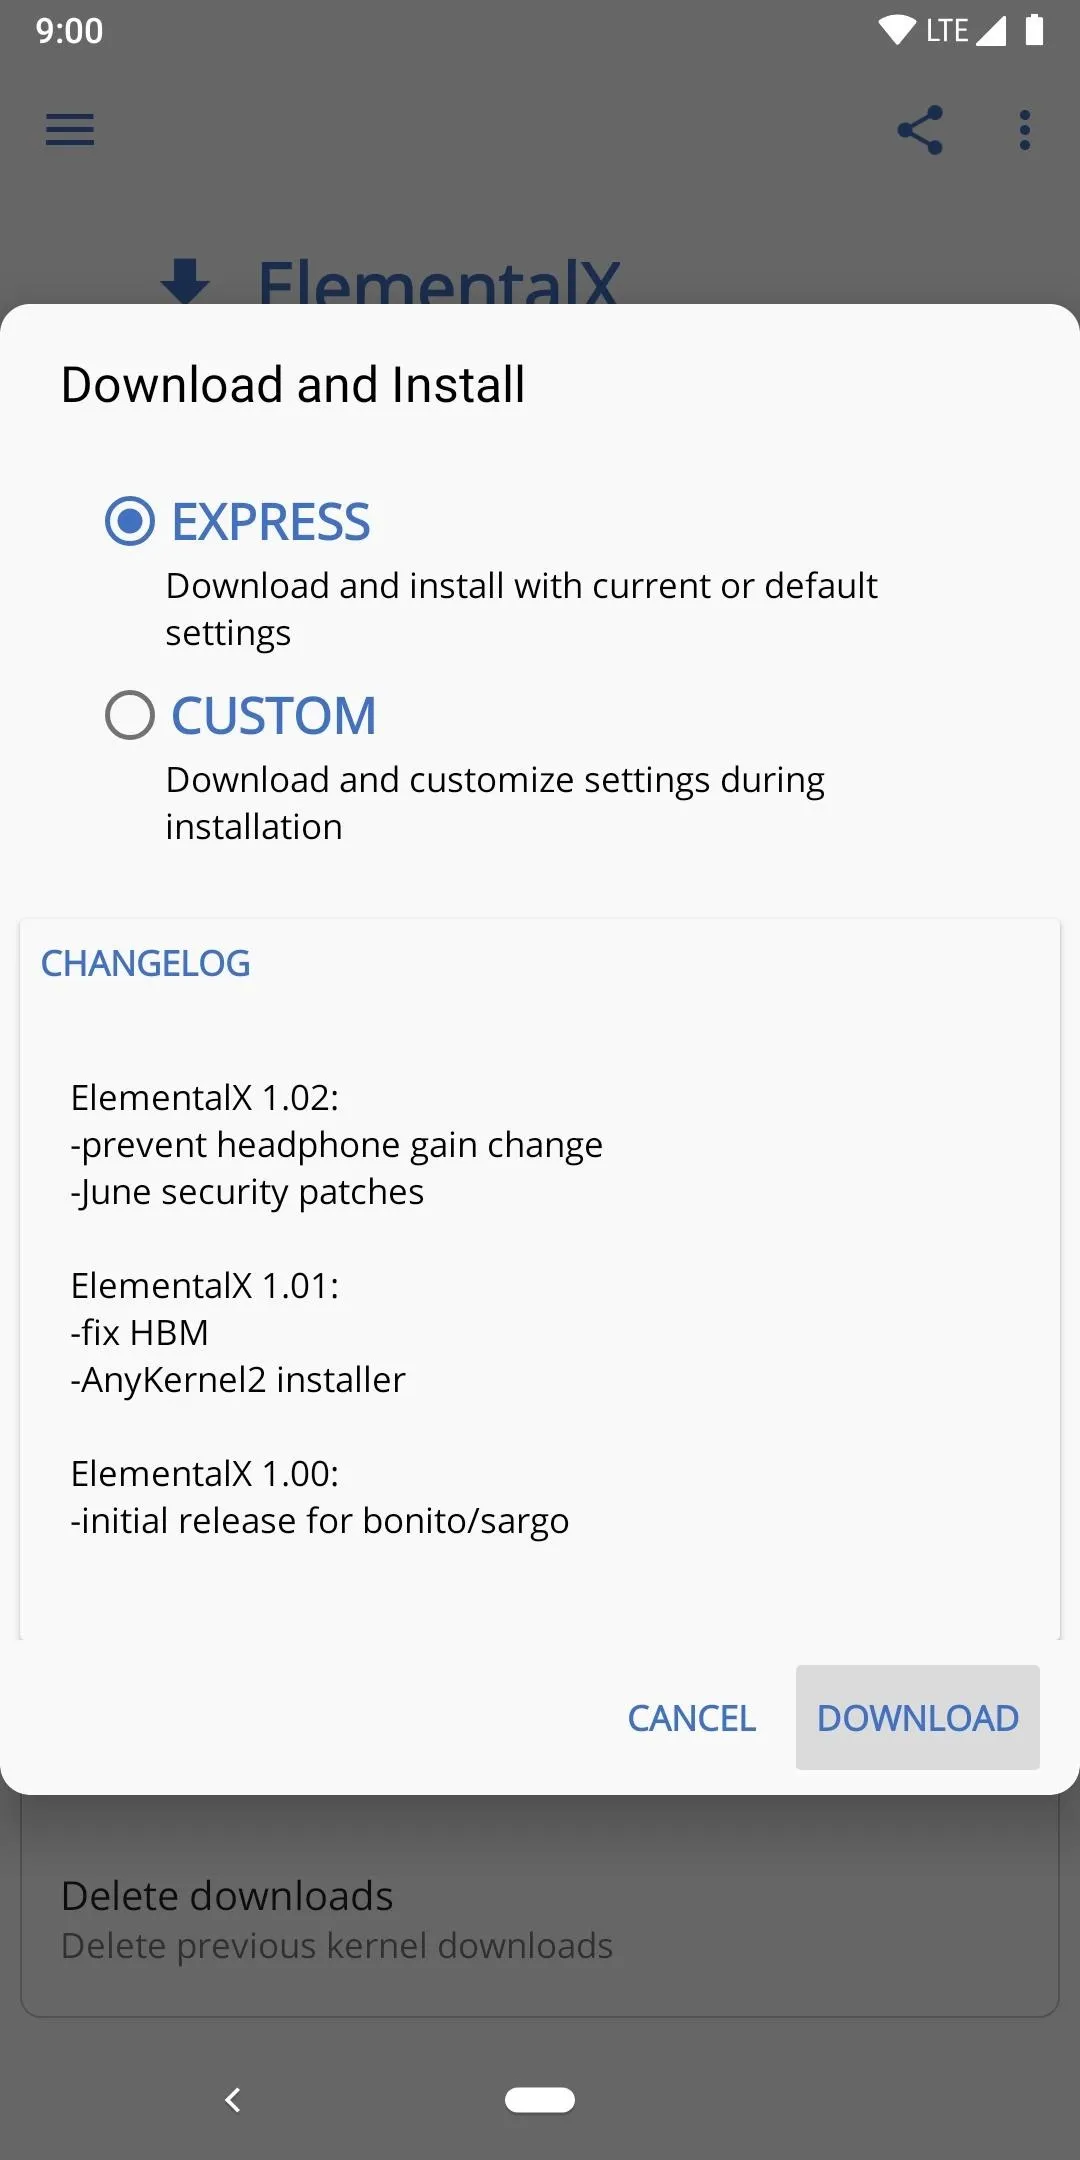
Now that the permissions have been granted, you should be sitting on the main menu screen of the app. All you have to do now is tap the device section at the bottom that shows your current kernel information, then tap the large button that says "Update Available." When the download and install screen shows up, leave it set at "Express" mode, then tap the "Download" button.
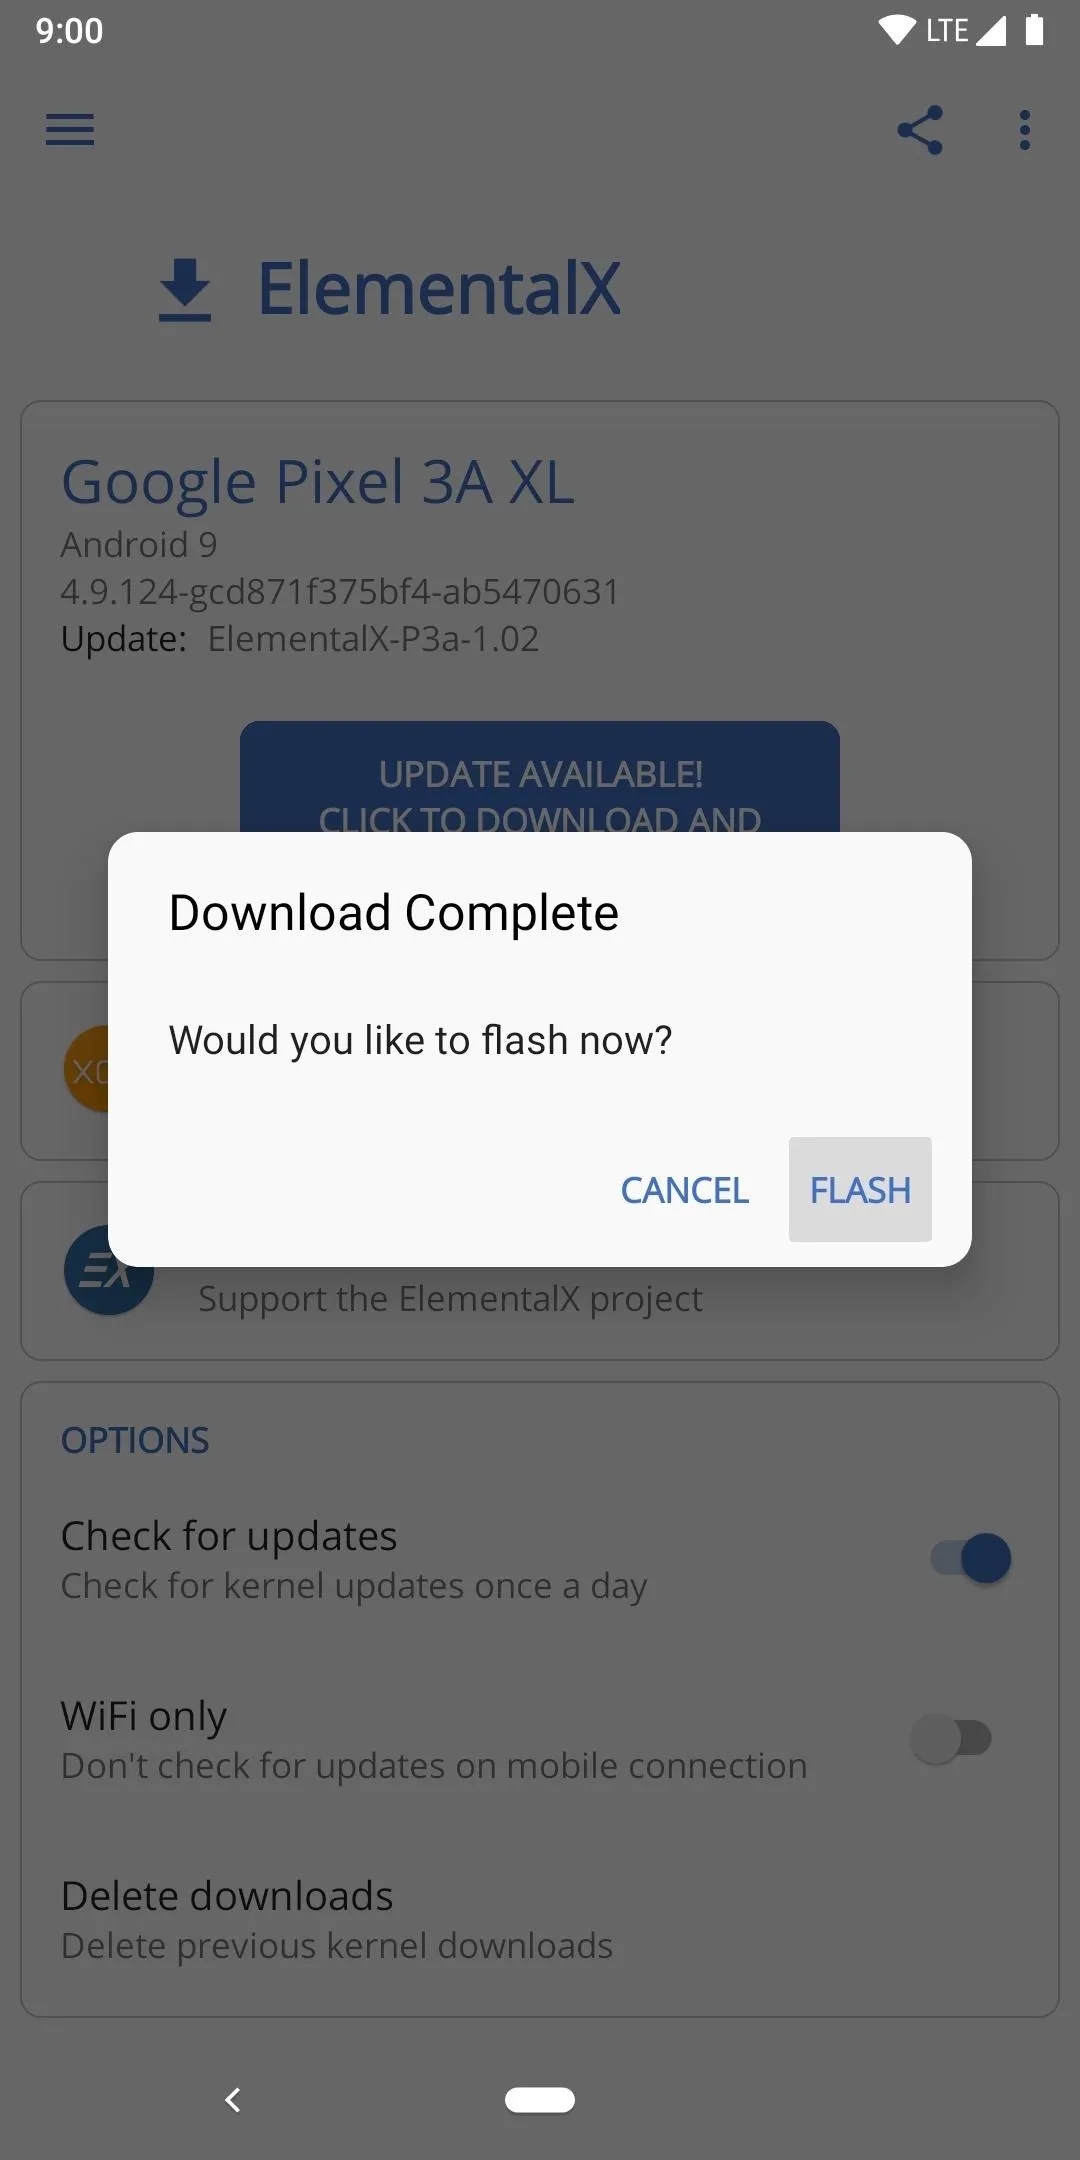
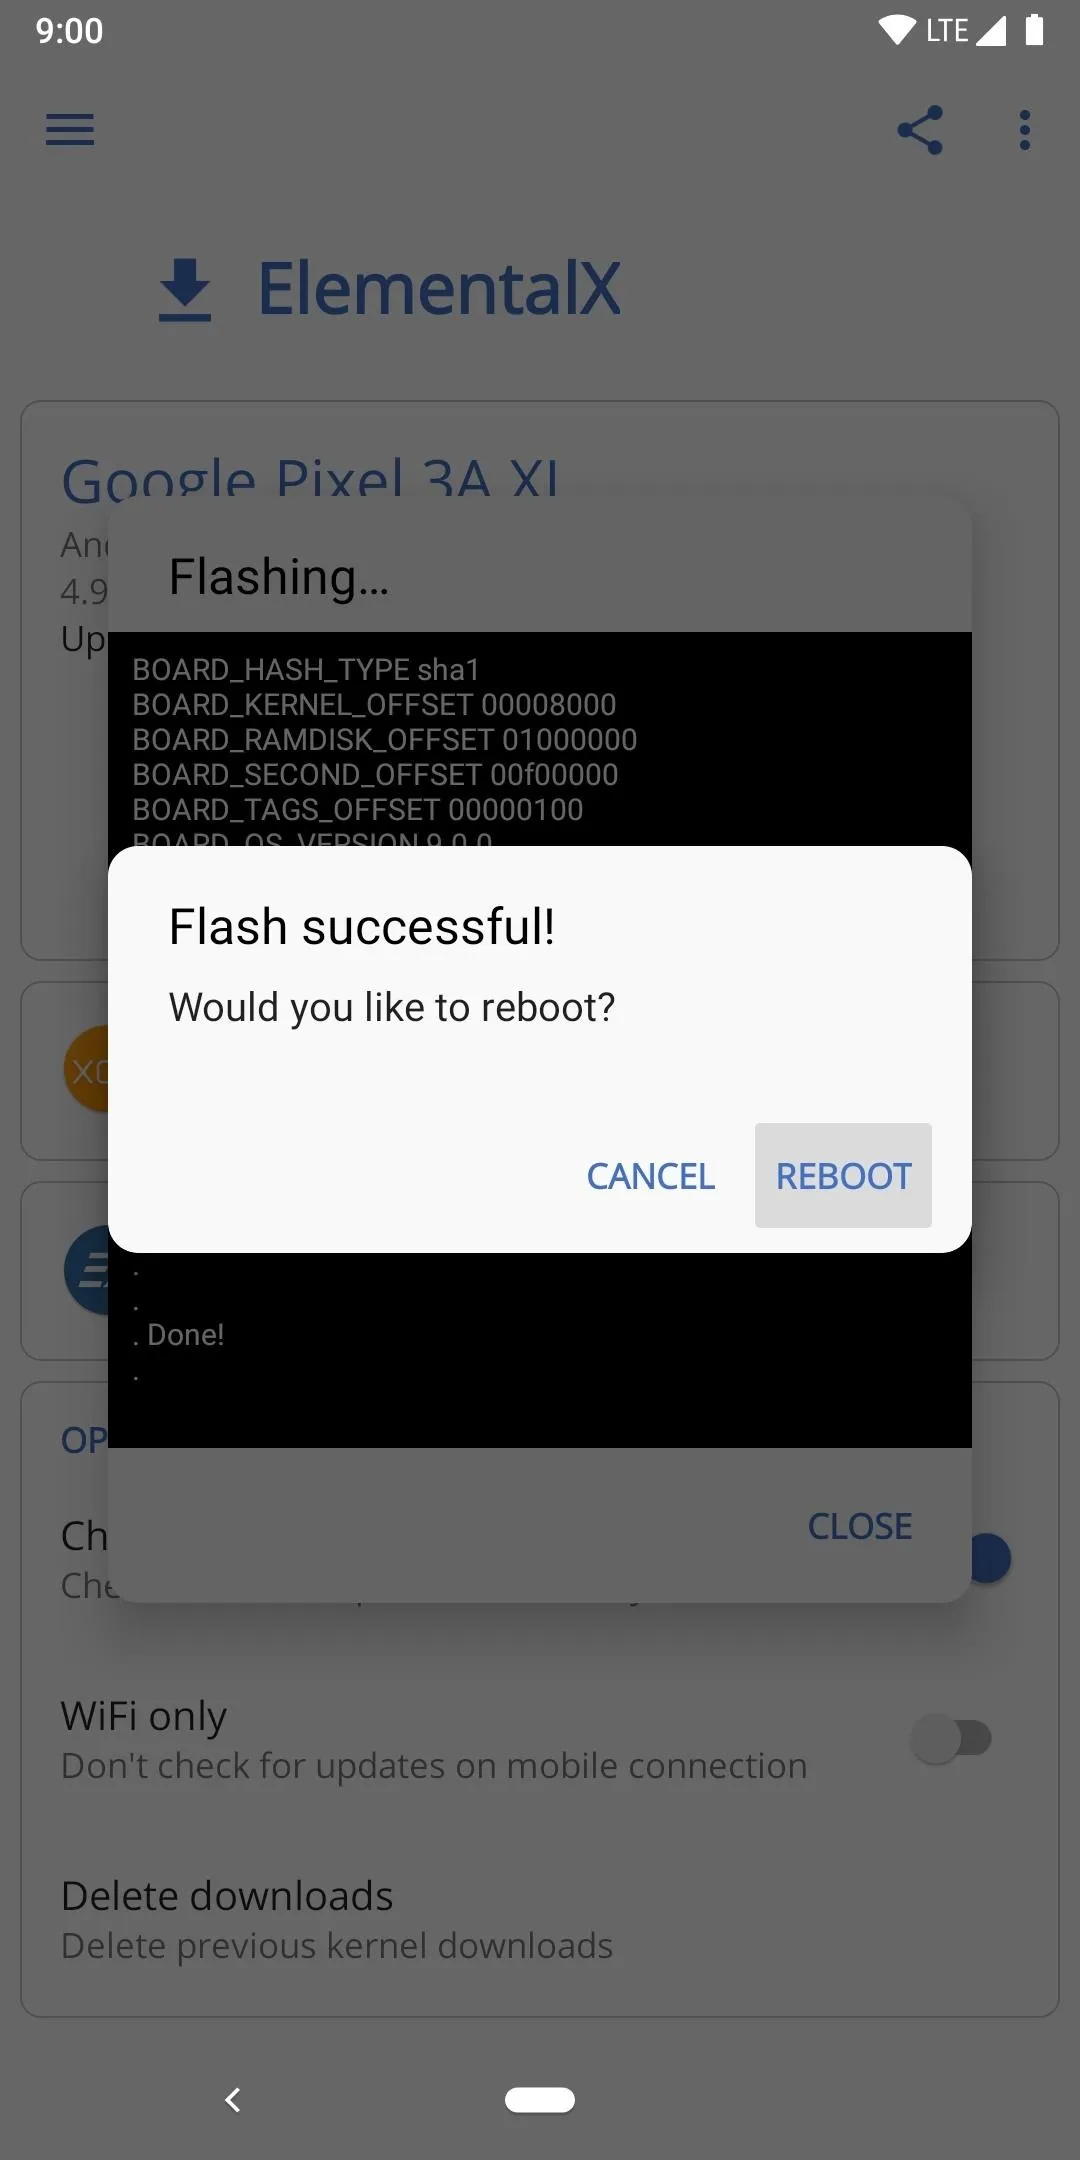
Once it finishes downloading the kernel, tap "Flash" on the screen that pops up to start the automated install process. After a few seconds, it'll finish installing the kernel onto your system, then you can tap "Reboot" to complete the process once and for all.
Verify the Kernel Installation
Once your phone is back up from the reboot, head into the EX Kernel Manager app again to make sure it shows you have the ElementalX kernel installed. You should see something like "ElementalX-P3a-1.02" in the kernel section on the main screen if everything went well during the install process. All set!
Cover image and screenshots by Stephen Perkins/Gadget Hacks


Comments
Be the first, drop a comment!