


During the Google I/O 2019 keynote, the latest Android Q Beta was released to the public for Pixel smartphones along with 15 other non-Pixel devices. It's the third Developer Preview for Android 10, but it's the first official public beta outside of Google's Pixel smartphones. A new public beta means good things are on the way as the future of Android continues to evolve.
Since the Pixel smartphones are official first-party devices directly from Google itself, installing the latest Android Q Beta will be quite simple and require minimal effort on your part. There are two methods involved depending on what works best for your situation. If you want to take the easy route or perhaps try the manual one instead, you'll get the same result no matter what.
Once you complete the few simple steps required for installing the beta, you'll be back up and running like normal in no time. If you run into issues or have any questions about the process, especially the manual one, let me know in the comments section. Without any more delay, let's dive right in and get that Android Q Beta onto your Pixel so you can test out the new features.
Over-the-Air (OTA)
When it comes to taking the OTA update and opting in for the Android Q Beta, it doesn't get much easier than this. This method is the one that most will probably end up taking since it requires minimal effort and is the fastest way of installing the beta. All you need to do is visit the link below to opt into the Android Q Beta, which allows your Pixel to receive Google's official OTA update automatically.

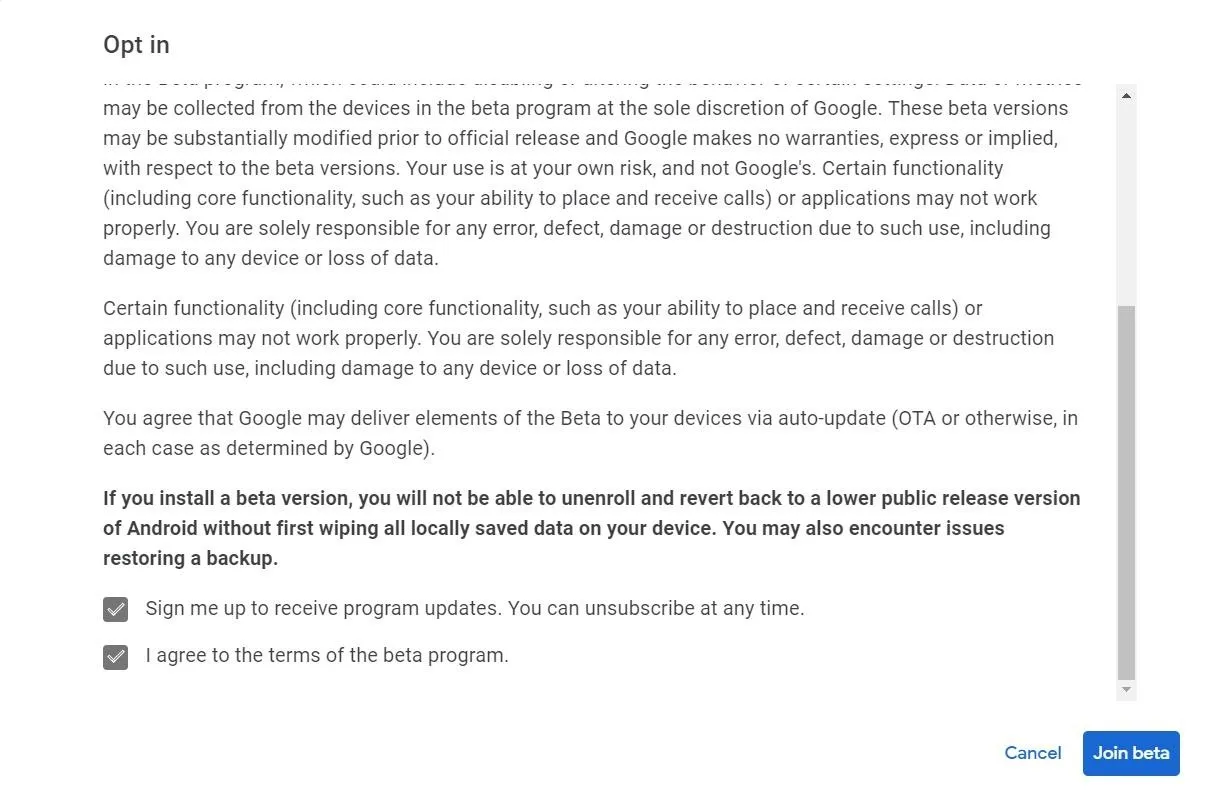
Click "View your eligible devices," hit the "Opt in" button for your Pixel device, check the two boxes to agree with the terms and conditions, then hit the "Join beta" button. Once you're signed up, it might take a few minutes for the Android Q beta to hit your phone, but it should be pretty quick though in general.
If you instead see a notification that says "There are no eligible devices associated with this Google account," make sure the same account you're on right now is also signed in on your Pixel as well.

Once the update comes through and finishes installing, you can then reboot your phone into the new Android Q Beta!
Use ADB & Fastboot Commands
If you prefer to do things the old-fashioned way rather than opting into the automatic OTA update, it'll take a few extra steps to get your device up and running. Although nothing overly complicated, this method is usually preferable for people who want more control over the install process, especially for all the power users out there with unlocked bootloaders.
Install ADB & Fastboot on Your Computer
Since you'll be installing the Android Q Beta on your own, you'll need to get the ADB and Fastboot tools on your computer to execute the proper commands. Once upon a time, it was a bit more in-depth of an install process, but Google has since made things simple with their official SDK Platform Tools package. Follow the link below to get that set up then you can move onto the next step of this guide.
- Instructions: How to Install ADB & Fastboot on Mac, Linux & Windows
Download the OTA File
Now you need to visit Google's official OTA images website from your computer to download the file required to install the Android Q Beta. From the brand new Pixel 3a that just came out to the original Pixel 1 from years past — every single Pixel phone is on the list for manually installing the latest beta. Visit the link below to get started on that.

From the main system images page, select the corresponding download link for your specific Pixel model, then you have to agree to the terms and conditions before proceeding. Once you check the box to confirm the terms, click the "Download Android Q Factory System Image" button to begin downloading the update to your computer.
Unlock the Bootloader (If Needed)
If you're using this method to install the beta on your Pixel, the chances are high that you've already unlocked your bootloader in the past and won't need to bother with this step. You're probably already quite savvy to this method, which is very similar to installing the monthly OTA security patches as well.
However, if your bootloader is currently locked or you don't know what that means, you're going to have to unlock it before moving onto the next step in the guide. Unlocking the bootloader allows you to modify your system in ways that a standard Pixel would never be able to do. You can follow the link below on how to do that. The guide says Pixel 3 or 3 XL, but it'll work universally across all Pixel models with an unlockable bootloader — the method stays the same.
- Instructions: How to Unlock the Bootloader on Your Pixel 3 or 3 XL

As a reminder, unlocking your Pixel's bootloader will also factory reset your device. Make sure to back up all critical data to a computer before moving on with this guide. You don't want to risk losing your data before you even get started with installing the beta.
Boot into Fastboot Mode
Before moving on, you'll need to make sure your phone is in Fastboot mode. The easiest way to get into Fastboot mode is by running the following command while your phone is on and connected to your computer:
adb reboot fastbootNote: Mac, Linux, and Windows PowerShell users will likely have to add a period and a slash before entering any ADB or Fastboot commands (e.g., ./adb reboot fastboot).
Your phone should now automatically reboot into the Fastboot main menu, and that's all you need to do with it right now.
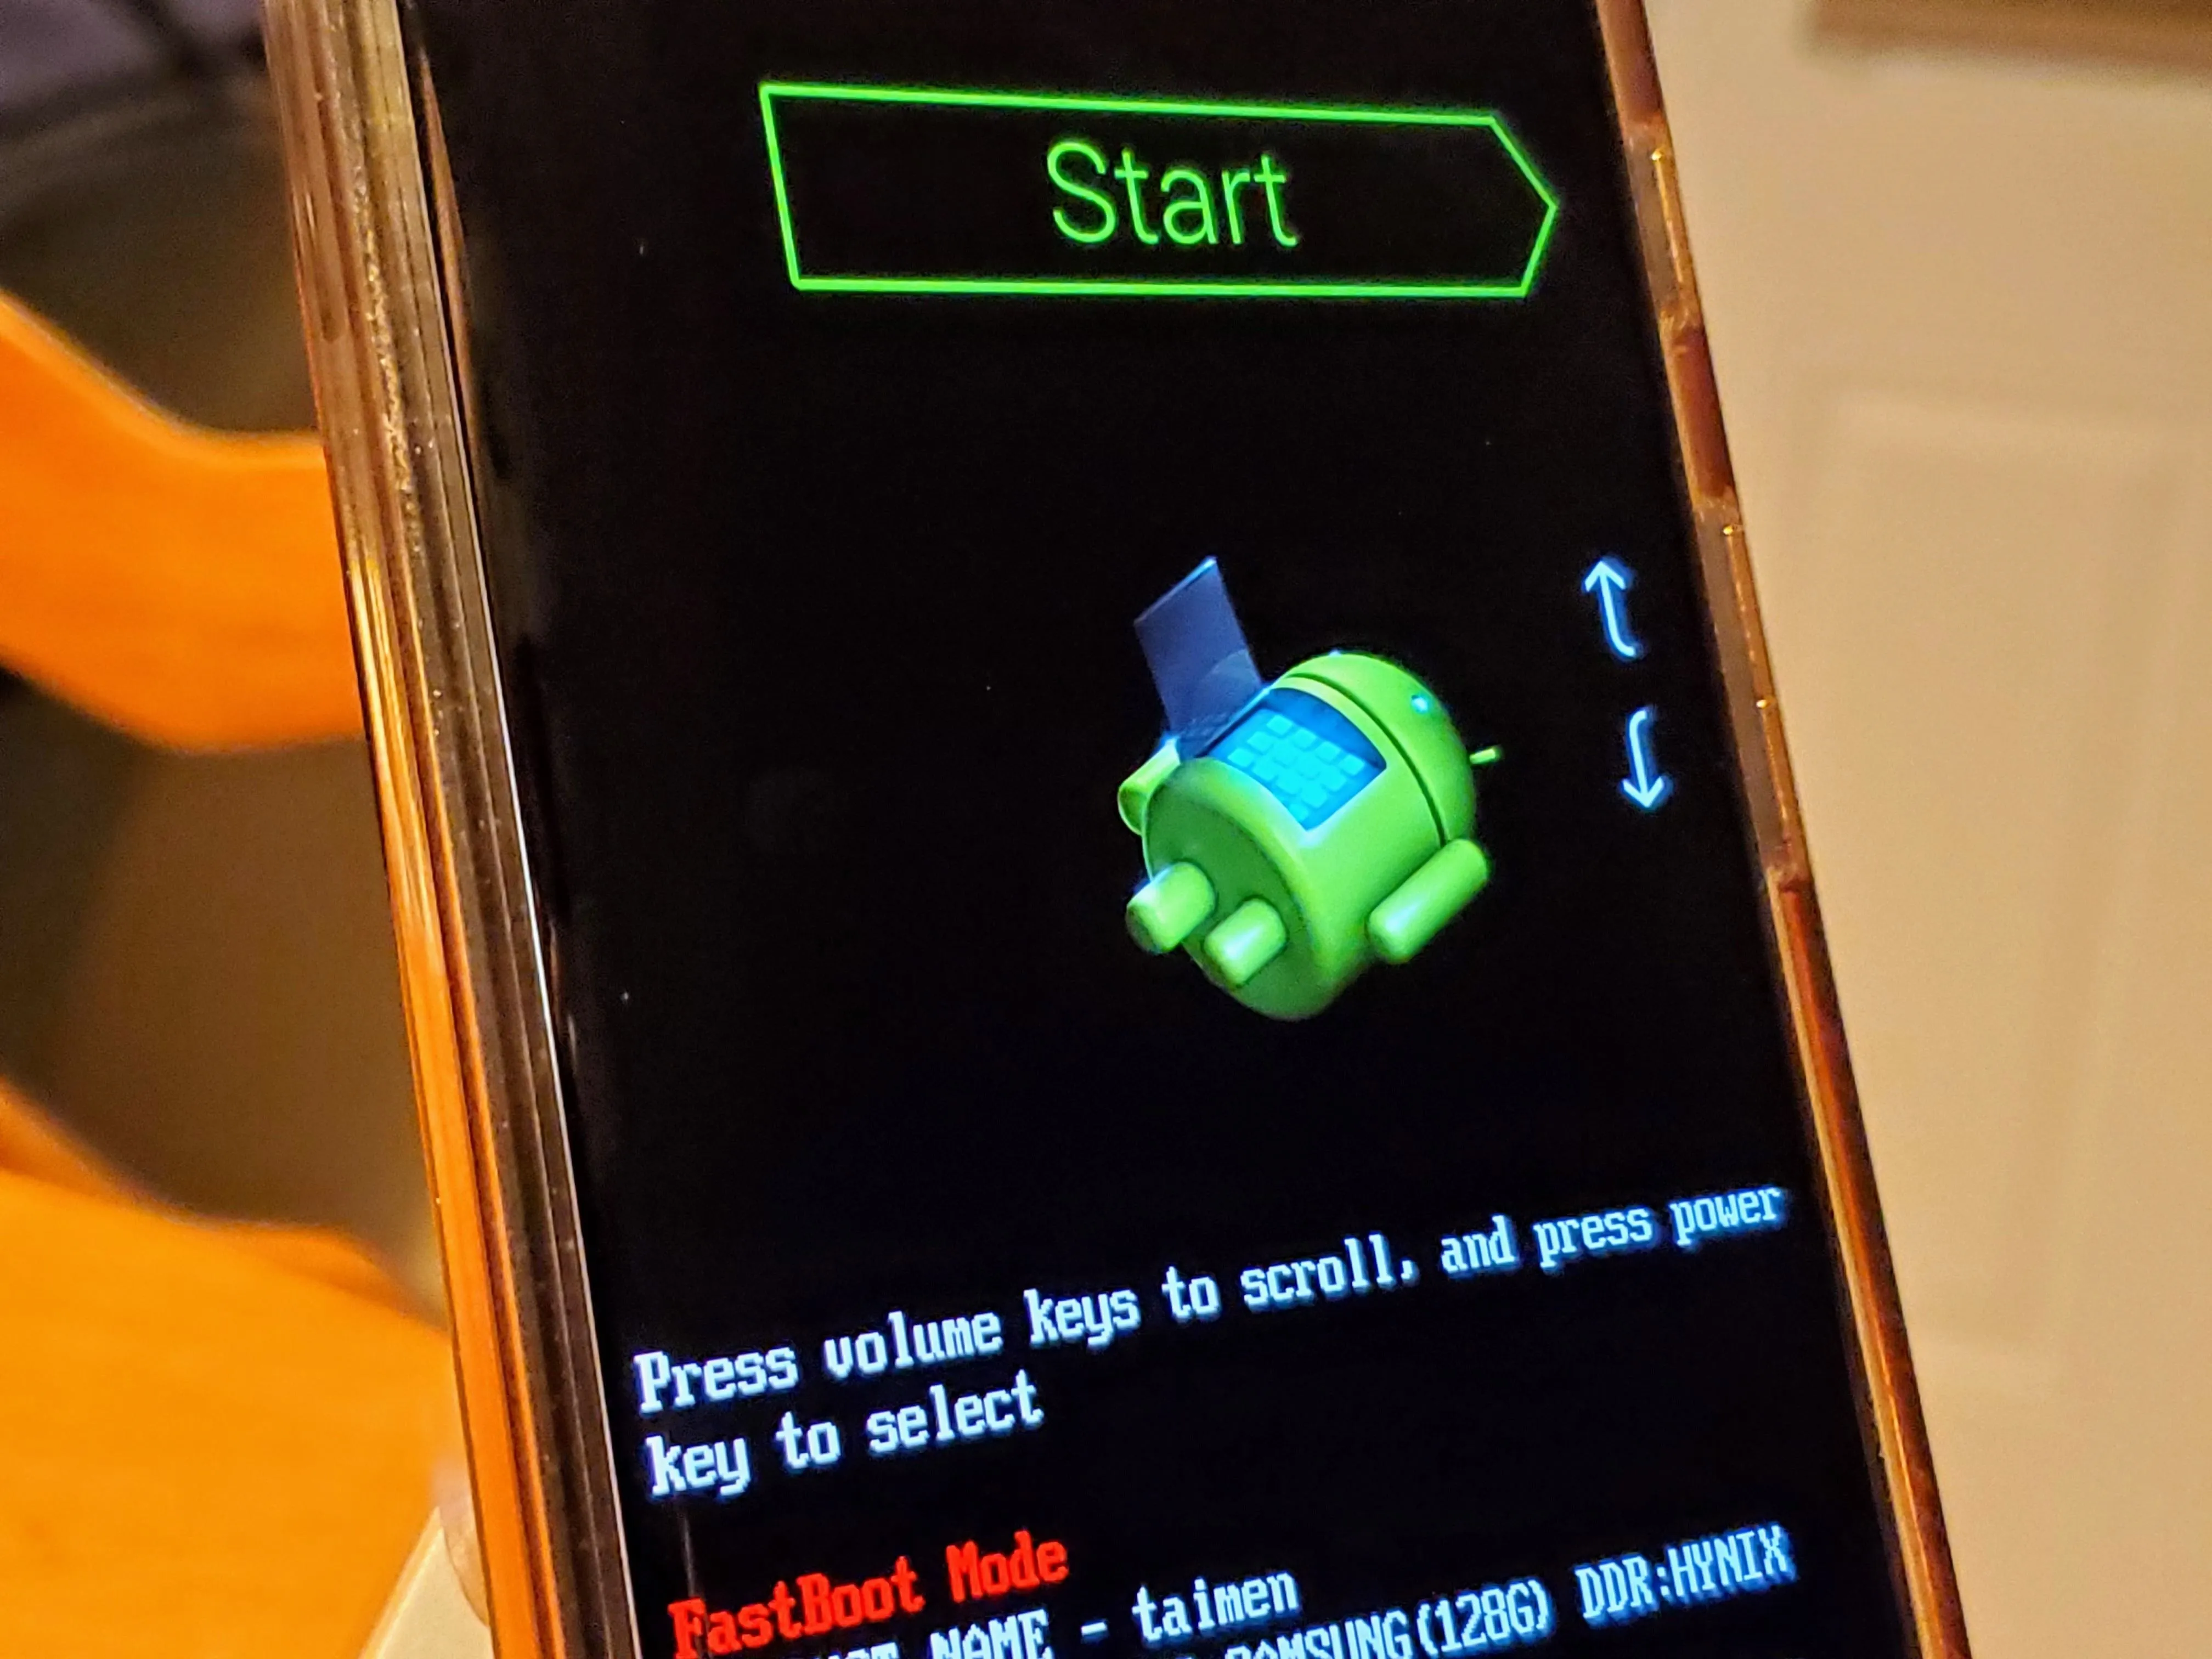
Stephen Perkins/Gadget Hacks
Install the Android Q Beta
For the sake of simplicity, I'll show you the most straightforward way of installing the beta using Google's tools. After all, you're probably ready to install the Android Q Beta by this point anyway — no need to complicate things further, especially if you're new to the whole process. You'll find that there's always going to be multiple ways to achieve the same solution in the end.
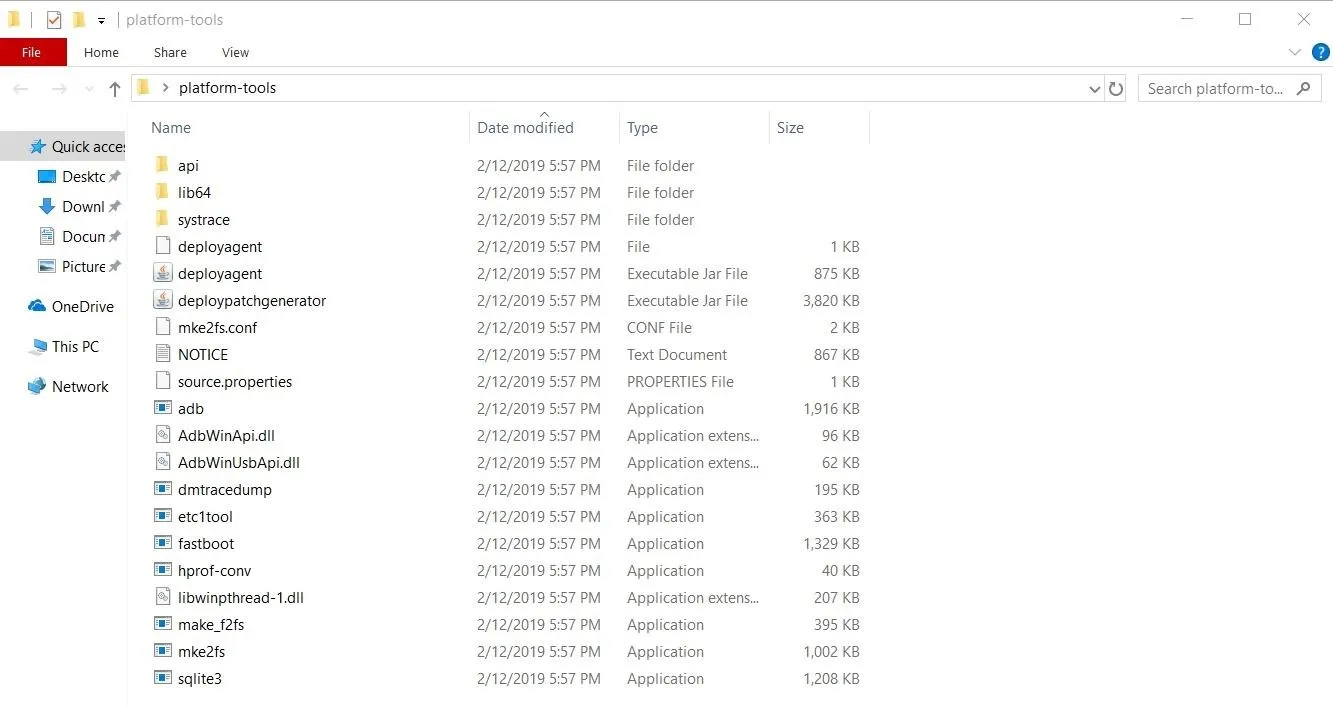
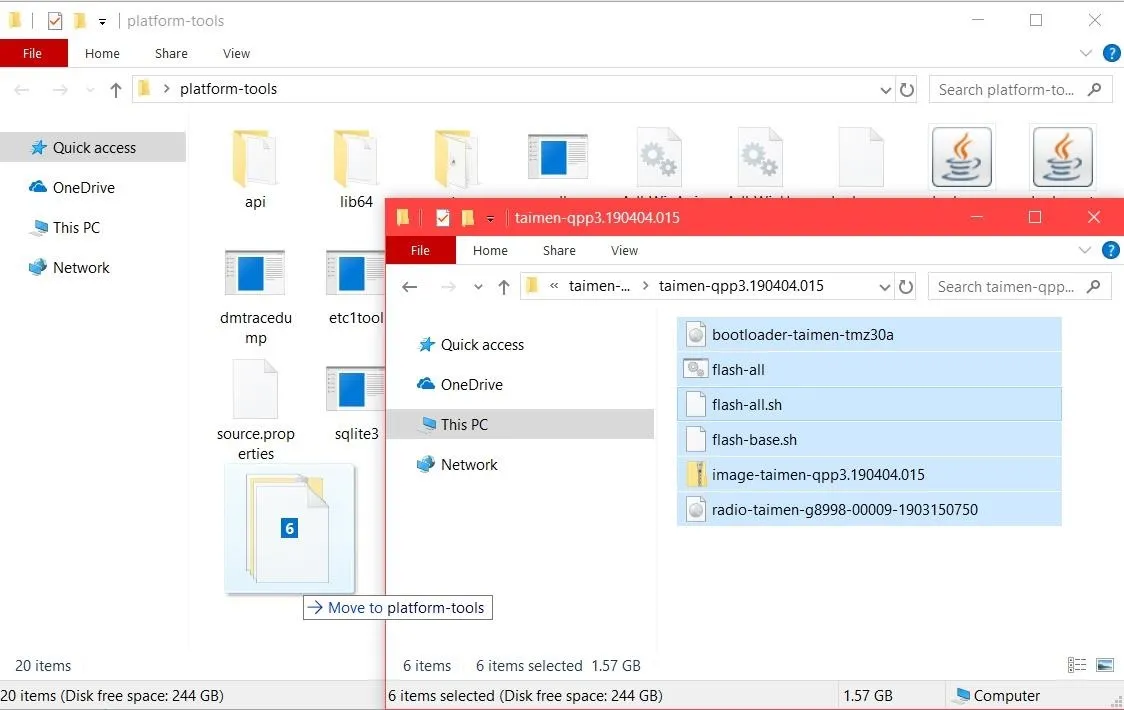
Go into your platform-tools folder from Step 1, copy the OTA file you downloaded from Step 2, then extract the contents to the root of your platform-tools folder. The next thing after this will wipe your data by default, but if you unlocked your bootloader from Step 3, you don't need to worry about any data loss since you went through the backup process earlier.
Windows
The easiest of the bunch, all you have to do is to double-click the "flash-all" batch file in the platform-tools folder to get started with the install process. As stated before — this will wipe your data. However, if you wanted to update your system without losing data for future use, there's a quick file edit you can do to help with that.
Right-click or open the "flash-all" batch file with a text editor, then locate the last line labeled "fastboot -w update." All you have to do is delete the "-w" from the line then save the text file before exiting. The "-w" is what tells Fastboot to wipe your phone's internal storage, so by removing it, it won't carry out the typical factory reset process.
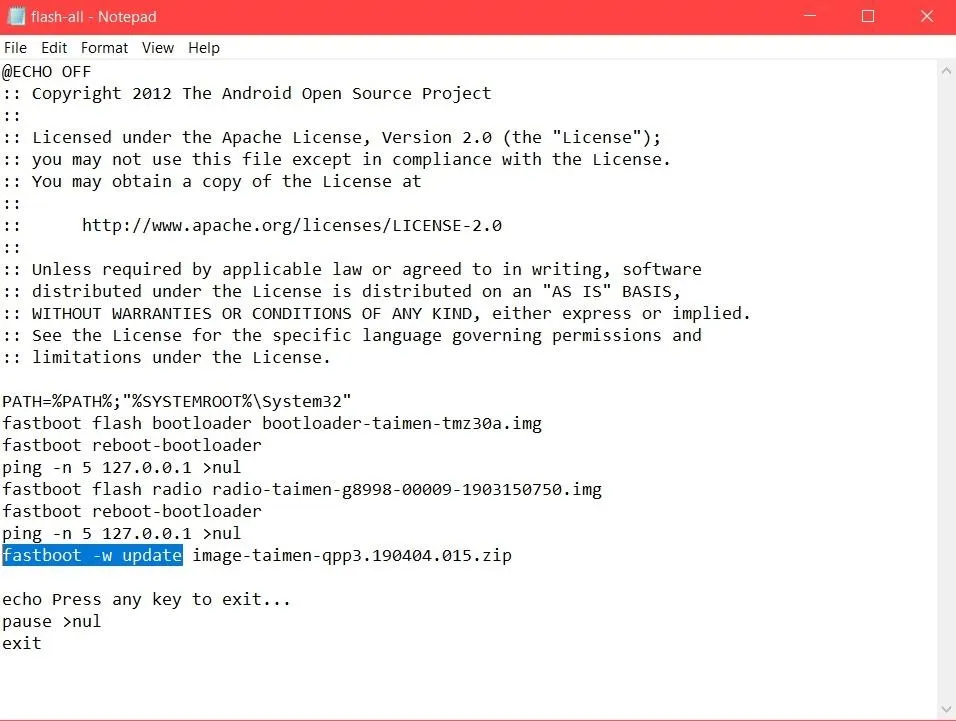
Once the "flash-all" command finishes installing the OTA file, your phone will automatically reboot to the new Android Q Beta!
Mac & Linux
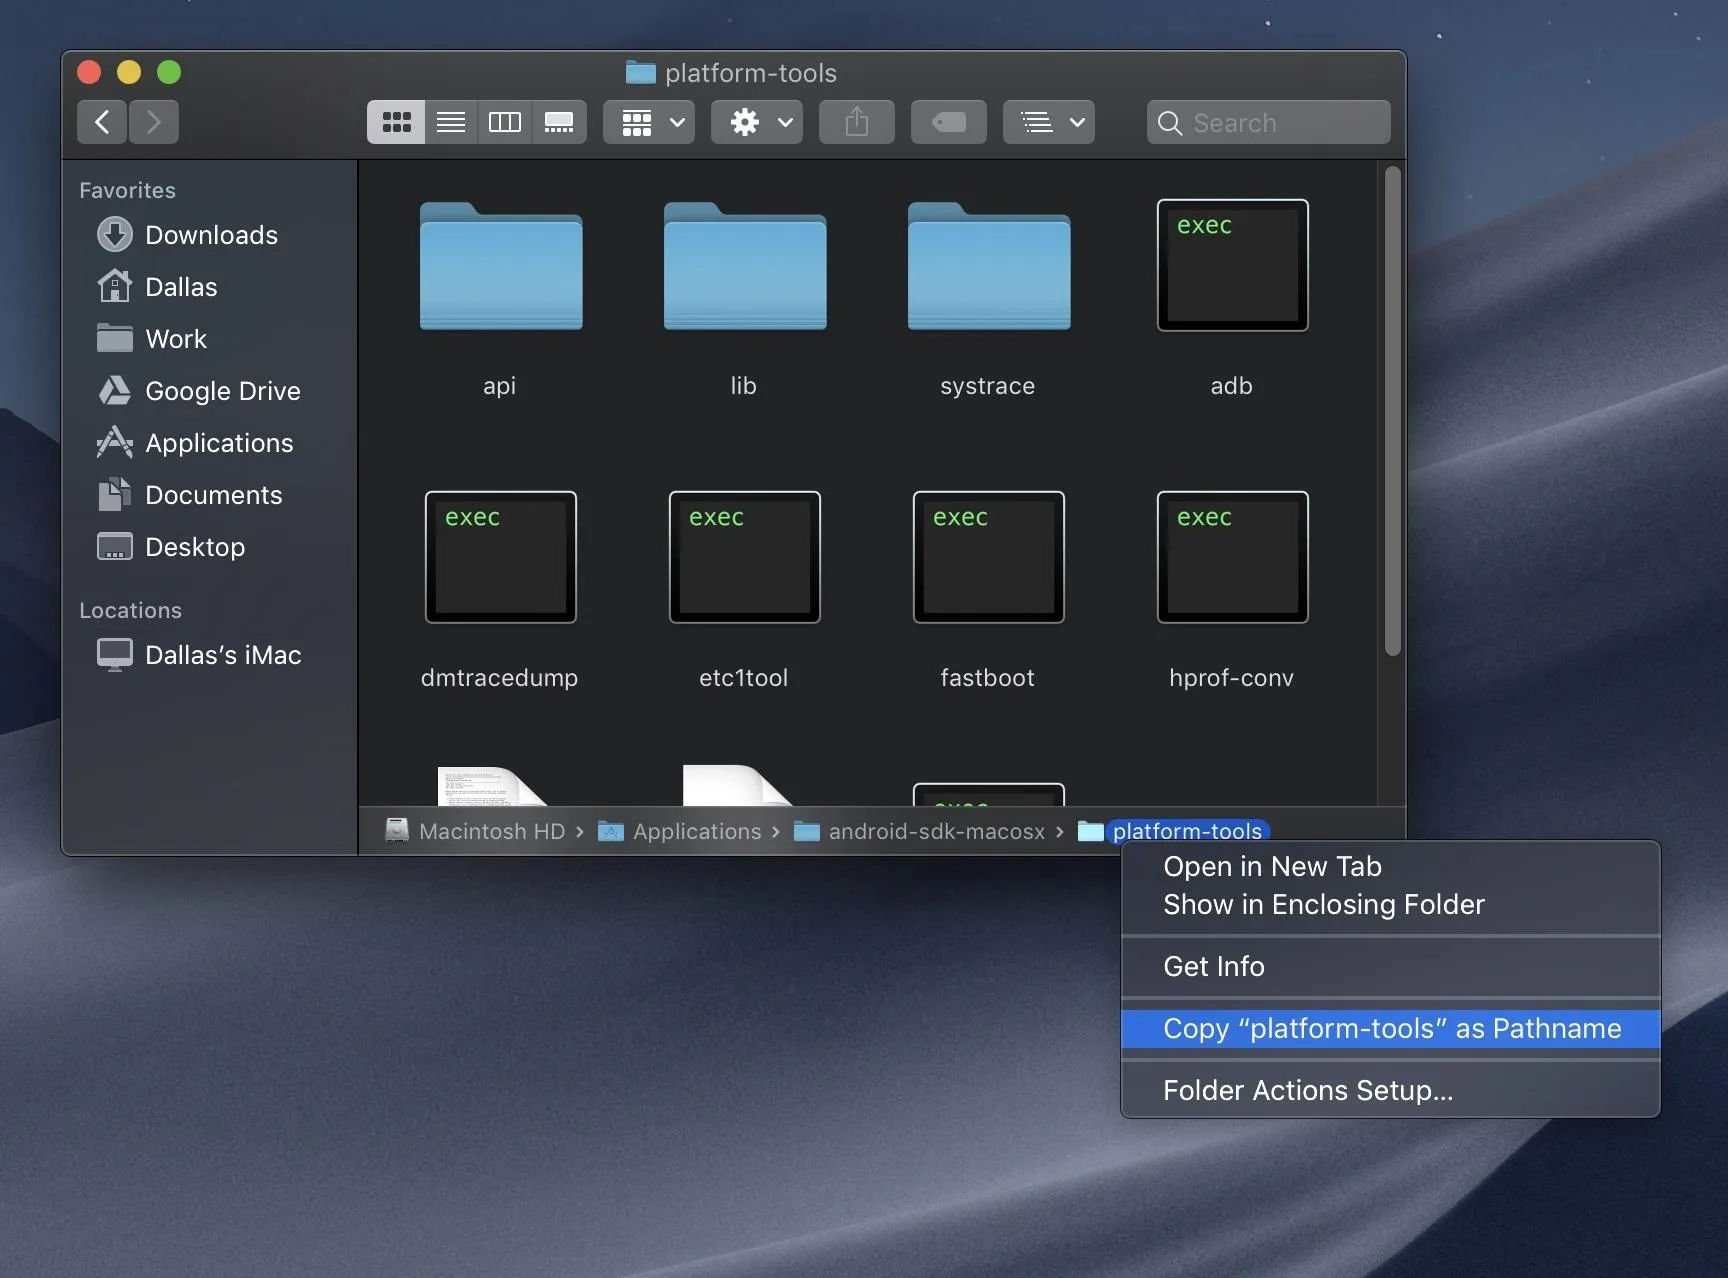
If you're using a Mac or Linux computer, there are a few extra steps you'll have to take to install the beta. You need to make sure your platform-tools folder is active and linked to the Terminal application before using the commands in the next part. Visit the link below to get that taken care of, then you can run the commands below to finish up with the process.
- Instructions: Open ADB or Fastboot Commands in the Right Directory
Run the following command to install the beta with a factory reset.
./flash-all.shRun the following command to install the beta without a factory reset.
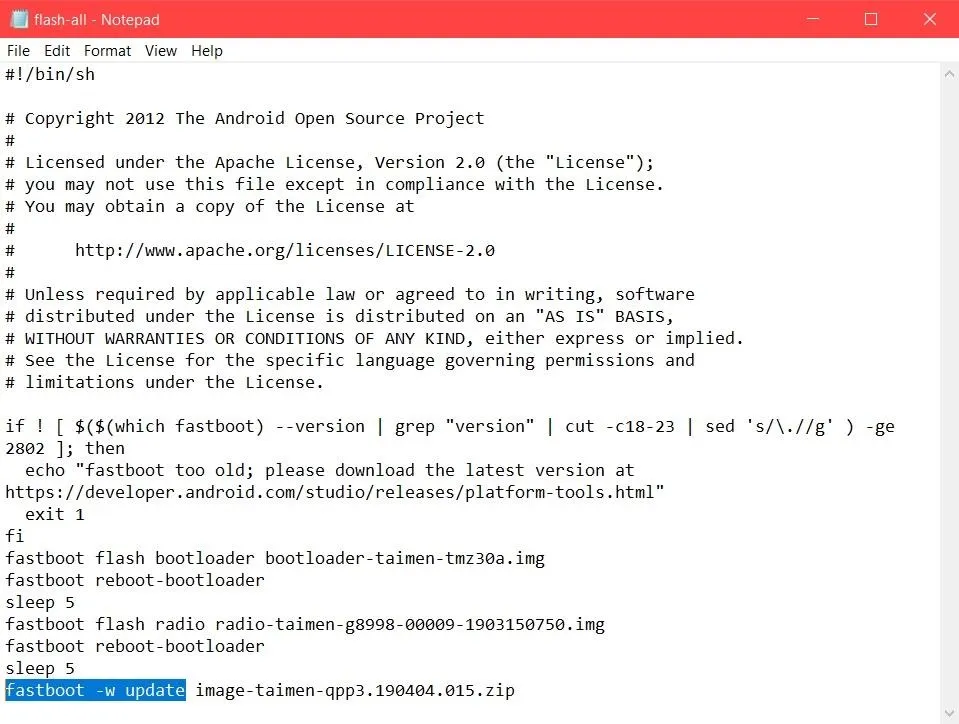
./flash_all_except_data_storage.shIf this command doesn't work for you for some reason, open the "flash-all.sh" script with a text editor, locate the last line that shows "fastboot -w update," then remove the "-w" from it. Save and exit the file then run the first command above — it will no longer wipe your data since removing the "-w" command from the script.
Once the "flash-all" command finishes installing the OTA file, your phone will automatically reboot to the new Android Q Beta!
Return to Android Pie When Finished (If You Want)
Since this is still an early preview of Android Q, this is not meant as a daily driver — you might have to deal bugs, glitches, or other weird errors during your testing period. However, at the same time, you might also find it to be stable enough to rock for a while until the next beta version comes along.
If You Used the OTA Method
The process is the same as you did when you joined the Android Q Beta through the official website, but choose to opt your device out instead. When coming from a beta version back to the stable public release, your phone will go through a factory reset. Make sure anything you want to keep gets backed up to a computer before moving on with the downgrade process.
If You Used the Manual Method
The process is also the same as you did here when manually installing the Android Q Beta. The only difference — you have to swap out the OTA file from Step 2 with the latest Android Pie factory image instead. When downgrading Android through a factory image, always make sure to let the "flash-all" command do a factory reset on your device. You can find all the newest Pixel factory images from the link below.
No matter which method you used to test the Android Q Beta, you shouldn't have much trouble reverting to the stable public versions. Since you know how to install and restore from the latest beta builds, you can look forward to trying out the other Android Q Beta versions that will come out over the next few months. Have fun!

There are three more scheduled Android Q Beta builds until the final public release in Q3.
- Follow Gadget Hacks on Pinterest, Reddit, Twitter, YouTube, and Flipboard
- Sign up for Gadget Hacks' daily newsletter or weekly Android and iOS updates
- Follow WonderHowTo on Facebook, Twitter, Pinterest, and Flipboard
Cover image and screenshots by Stephen Perkins/Gadget Hacks


Comments
Be the first, drop a comment!